
I took some quick pictures on how to start a paper bag book for splitcoast and thought I share it here as well. I haven’t finished it . This will only show a quick way to get your blank album started. (I am currently working on some design work I can’t share quite yet. I don’t like secret stamping….it’s hard for me not to share.)
Step one:
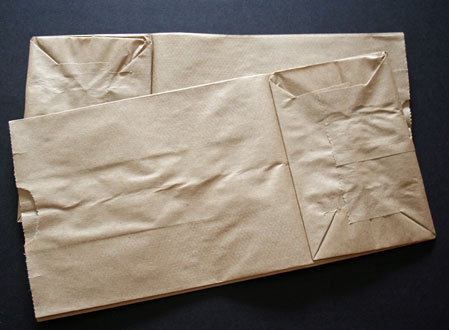
Position your lunch bags on top of each other. Alternate the open side one on the left, one on the right. If you have more then two lunch bags, just keep alternating. I used regular size in the pictures.
Step two:
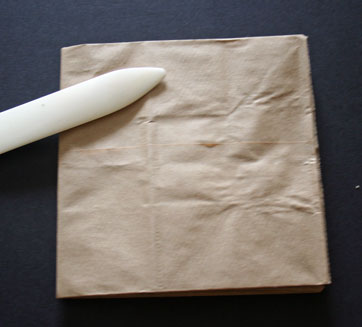
Line your lunch bags up perfectly and fold them all in half.
Step three:
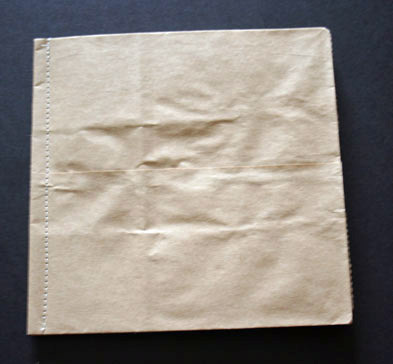
Sew the pages together close to the fold to keep pages together. You now have a blank book waiting to be decorated.
Step four:
Start decorating your front and pages. Add hidden pages or journaling in the open sides of the lunch bags.
Variations:
– Try different size or color lunch bags.
– Bind your pages together by punching holes on the spine and tie them together with ribbon.
– Bind them together with a binding tool like Bind-it-all or Rubicoil.
– Use eyelets, brads, paperclips to keep your pages together.
Beate
13 Responses to “Paper bag book”
Sorry, the comment form is closed at this time.


What a great tutorial. Thank you so much for sharing. It makes so much more sense now.
I love these things and haven’t made one in a while! You’ve inspired me to make one.
Quick question: how many can you sew them together?
Wow, I always thought these were tricky to make…LOL!!! You Rule!
Oh!! I wanna see… I wanna see!! Hehe..
I absolutely LOVE these little books. I demo’ed these at a stamp camp recently and my cousin has just ran with this idea. Now I will have to post one of my finished books on my blog.
Thanks for your wonderful tutorials.
Charmaine G
hi beate,
are these the kind of bags i can use to make the genie bags?
i always wanted to make one i just dont know what bag to use.
thank you
claudia
oh, I wanna see, I wanna see! lol 🙂
Thanks for sharing this tutorial Beate, it’s fab, it’s just over here in the UK we don’t have those type of bags, can you believe we actually have to buy them from craft shops, lol.
Somewhere once I read a tutorial about a faux paper bag book made from cardstock.
Can you show us what you do to it if you decorate it, I would love to see it!
Hi Beate,
I’ve seen these on SCS. I was wondering about the keeping this archival safe. Would your photos be archival safe if you adhere to cs first then to the bag? Also, I absolutley love all your work, thanks so much for sharing and being an inspiration.
Thank You
This is the greatest post I have come across so far.I am really pleased to post my comment on this blog .I love your blog by the way, I am gonna have to add you to my list of watched blogs .Thank you for this very useful information. stored it.Thanks again and keep up the good work.
[…] this blog tutorial I wrote back in 2007 for them. I hope it answers your questions. __________________ Beate my […]