
If you are interested in a tutorial for the Explosion box card, click on More. I don’t want to post a big long thread on the front page, so I don’t clog up the email of my subscribers.
Explosion Box tutorial

Supplies:
- one 7 1/2″ square of cardstock or patterned paper for box bottom
- one 4 1/4″ square of cardstock or patterned paper for box top
- Paper cutter with scoring tool
- Hand held scoring tool, ruler and mat (optional)
- Sticky Tape
- Stamps and ink
- Embellishments

Step one:
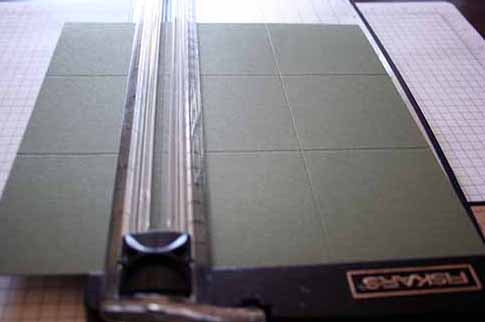
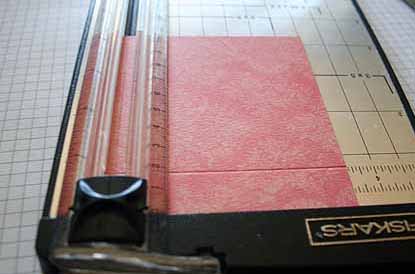
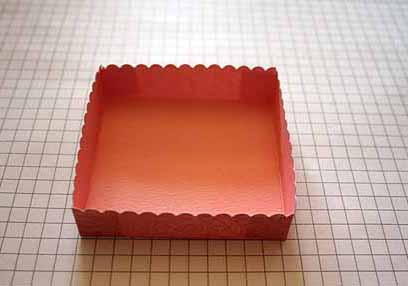
Take your 7 1/2″ square piece of cardstock and score it at 2 1/2″ and 5″
Step two:
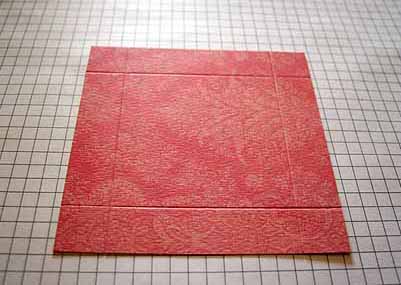
Turn your cardstock 90 degrees and repeat step score agan at 2 1/2″ and 5″. You now have a grid with 9 even squares.

Step three (optional):
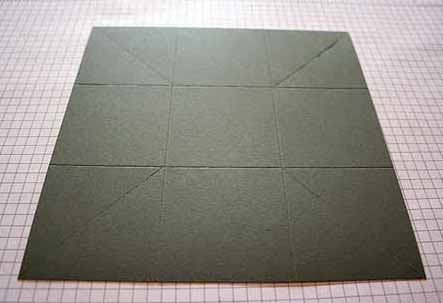
Take your hand held scoring tool and score from one corner of one of the four scored outside squares to the opposite corner of that scored square.
Step four (0ptional):
Repeat step three on the other three outside squares.
Step five:
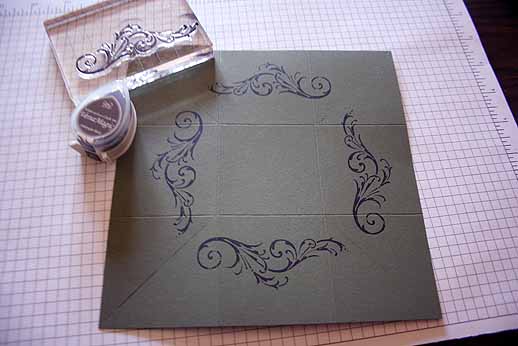
If you want to stamp your box bottom do it now.
Step six:
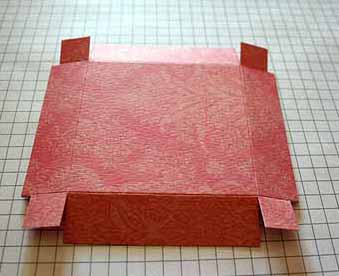
Prefold all your scores.
If you skipped step three and four, push the middle of the outer squares towards the center of what will be your box.
If you did step three and four, fold your diagonal folds towards the inside of the box.
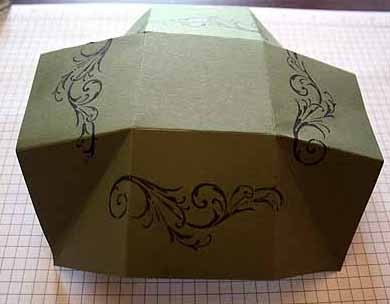
Set box bottom aside. It’s done, unless you want to decorate the inside as well.
Step seven:
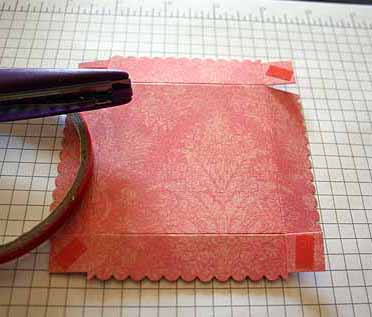
Take your 4 1/4″ square and score at 7/8″ on one side.
Step eight:
Score the rest of the three sides each at 7/8″ .
Step nine:
Cut four of the short scored lines as shown. It will create small flaps. Those will be your glue taps. I cut mine a bit smaller, so they won’t show when I tape them to the sides.
Step ten:
Add sticky tape to your glue tabs. I cut the side flaps with a decorated scissor.
Step eleven:
Fold your glue tabs in and tape them to the inside of one of the sides of the box lid.
Step twelve:
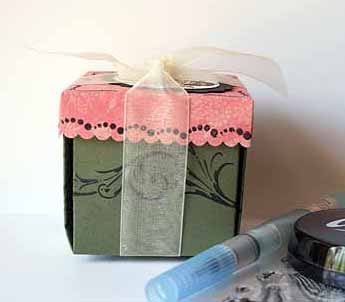
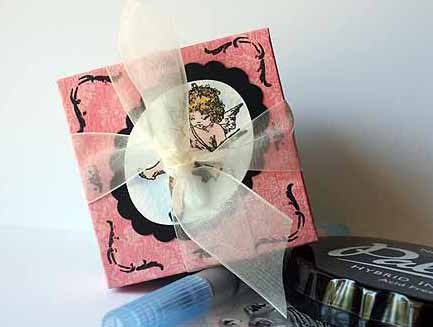
Fold box bottom back in, add the lid, some ribbon and maybe a tag and your box is done!
Beate
10 Responses to “Explosion Box Tutorial”
Sorry, the comment form is closed at this time.


Wow, great tutorial, Beate, simple, straightforward, stunning!!!!
Thanks for the tutorial – your tutorials are always so easy to follow. When looking for instructions on somthing I always go straight to yours!
Thank you soooooo much for putting the tutorial together… I love this project!
You are just wonderful! So many things I have to do! There aren’t enough hours in the day!
Thanks for the wonderfully demonstrated tutorial.
Great tutorial and us newbies need all the help we can get. I finally got in the rak club and I have been doing the weekly challenge there. I also do the wednesday sketch cahllenge so I am learning and your tutorials help me so much. Thanks for doing them
Terrific work!
NEAT!! I’m off to try this out!! Wish me luck.
Wow! I have to go try this again. Your directions are great!
Great, excellent tutorial, but what about those 7/8″,can you use regular measurements(laughs) like4, 4 1/2, or 3/4″ I really have trouble with those numbers. Sometimes my husband helps me, but I’m not goo with fractions. Thanks for your pacience Beate. You sure make amazing creations. Keep it up.