
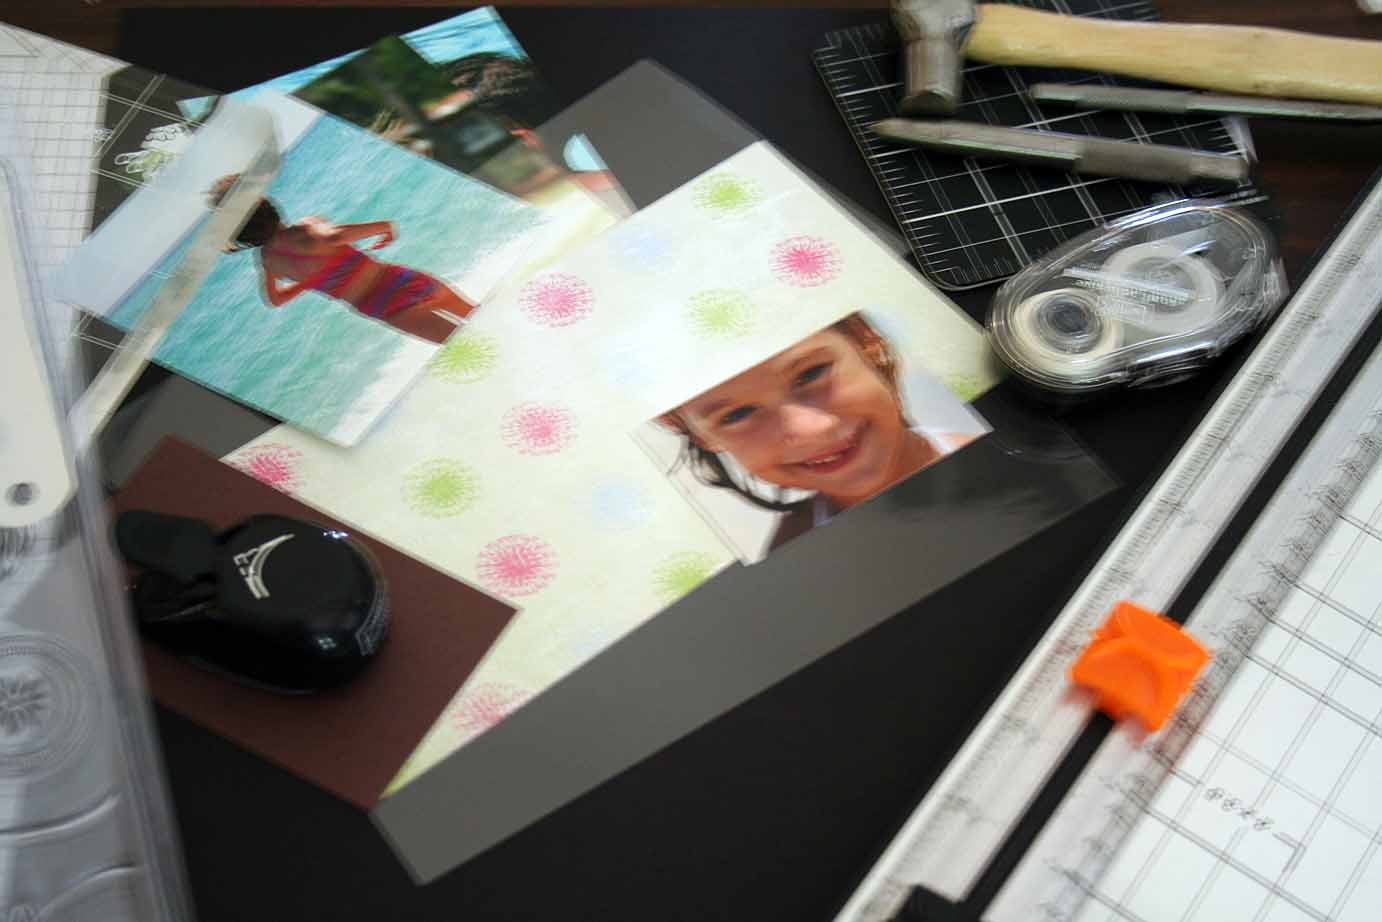
Some of you had a few questions about my little book yesterday. The book comes together fast and is easy. So I made another one and wrote a tutorial for it.

This time I used Fancy Pants stamps and paper. If you are interested viewing the tutorial, click on more. Some of the images are blurry. I have to apologize for that. My new stamp room is dark even during the day. I need to run out and buy some daylight bulbs.
Supplies:
- Two 4″ x 8″ transparency sheets
- Some of you had some questions about yesterday’s little book. It’s fairly easy, so I made another and wrote a quick tutorial for it.
- One double sided 4″ x 8″ patterned paper or two 4″ x 8″ patterned paper glued together back to back
- One 2 1/2″ x 4″ piece of coordinating cardstock or patterned paper for spine
- Corner Rounder, Eyelet setting tools eyelets (if you want the border shown)
- Paper cutter with scoring blade
- Stamps
- Ink that will work on transparencies (I used VersaMagic in Jumbo Java, Pixie Dust and Sea Breeze)
- Photos
- Adhesive
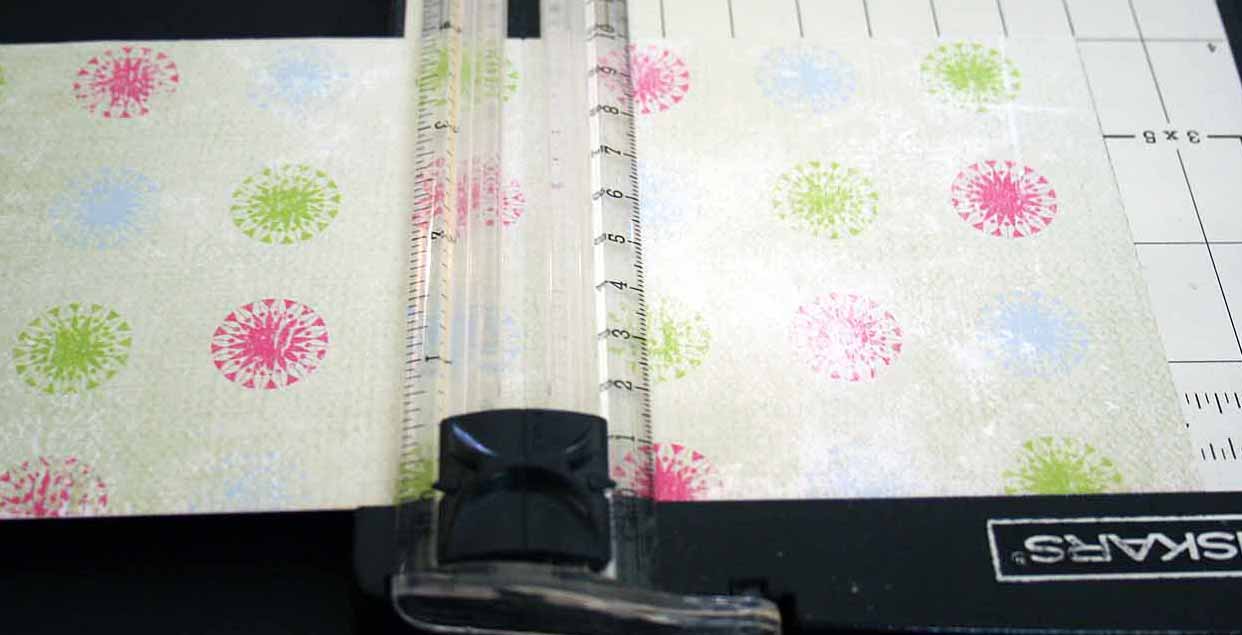
Step one:
Score your patterned paper at 4″.
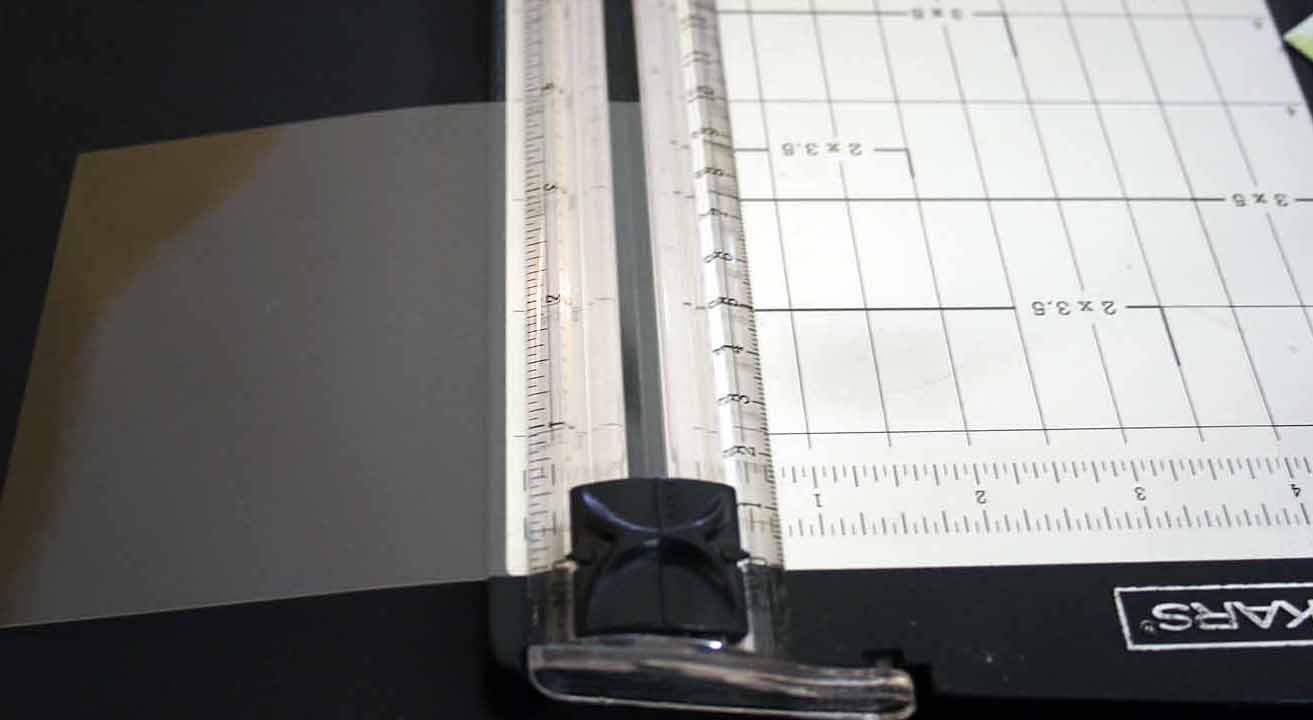
Step two:
Score both of your transparencies at 4″.
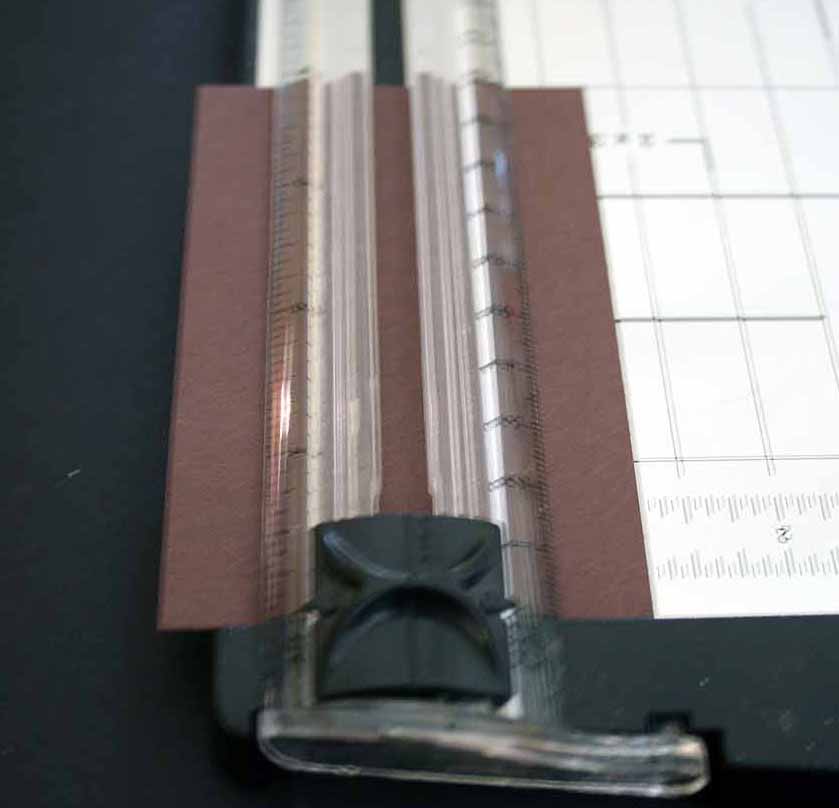
Step three:
Score your 2 1/2″ x 4″ piece of cardstock at 1 1/4″.

Step four:
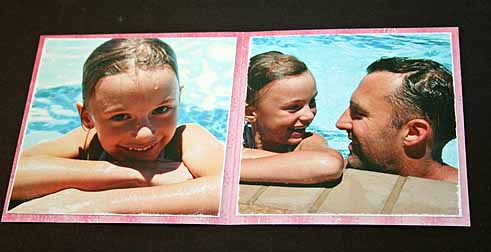
Add a photo to your front page. Slide one of the transparencies over the patterned paper.
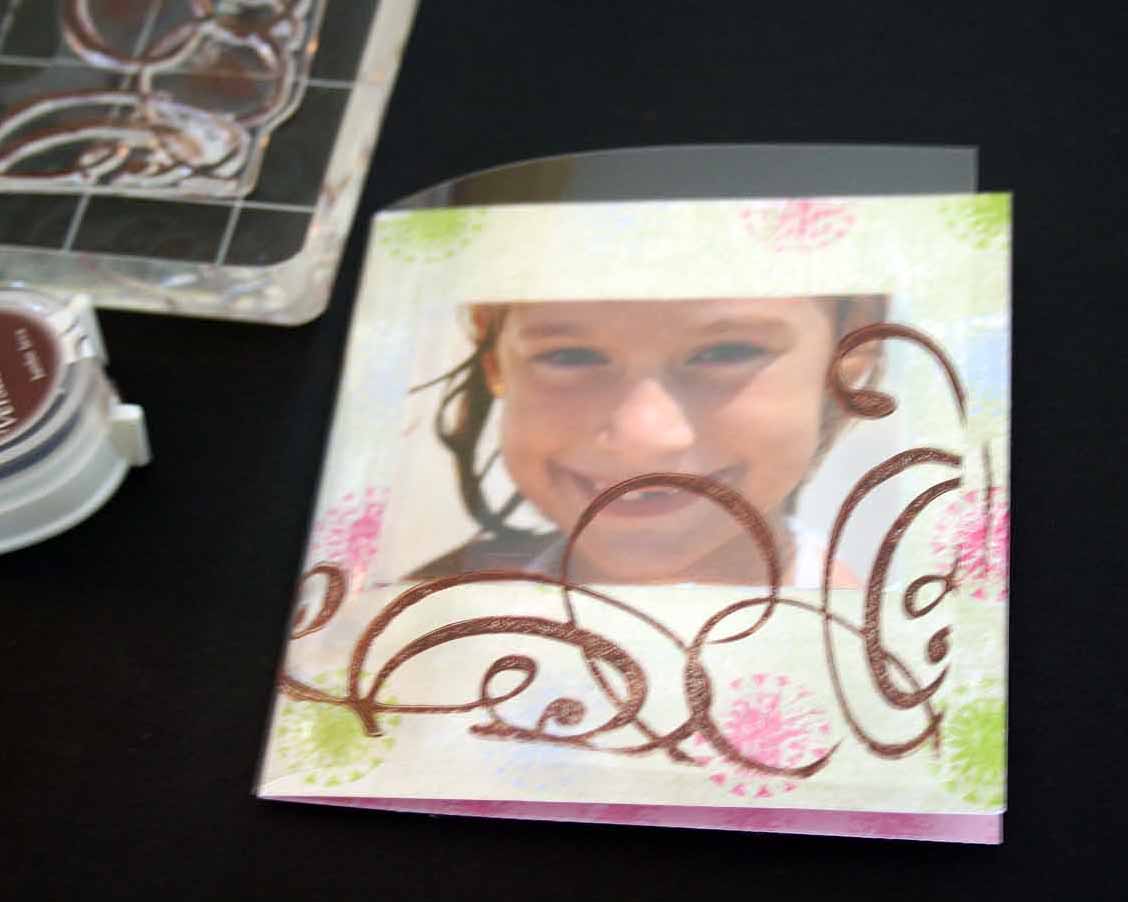
Step five:
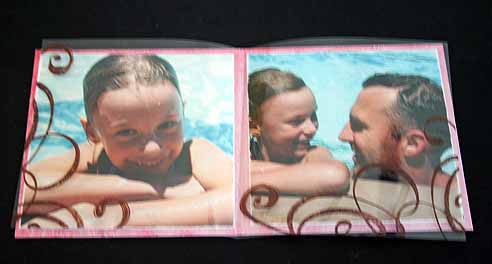
Stamp on your transparency.
Repeat Step four and five for your last page.
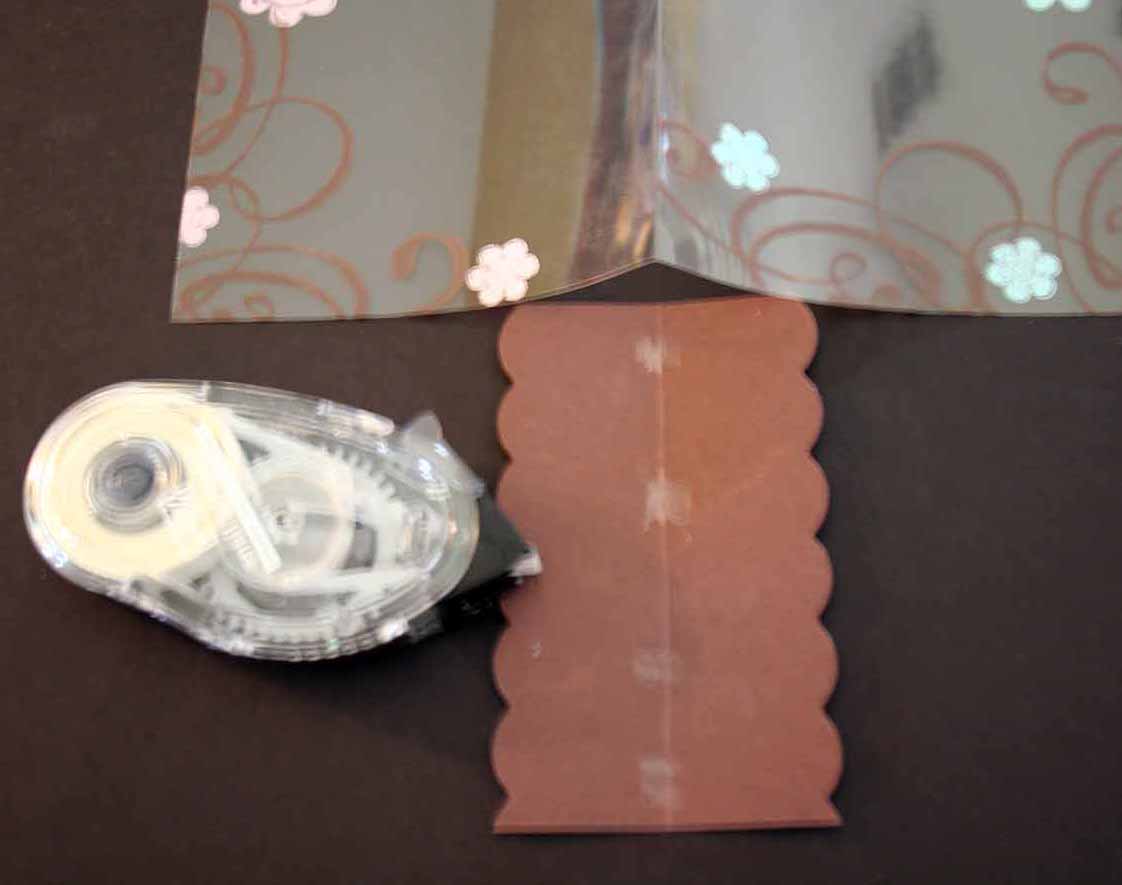
Step six:
After punching your scallops on both sides with your corner rounder, add just a bit of adhesive in the center on the score.
If you don’t know how to use your corner rounder to make scallops, you can find my tutorial on that here.
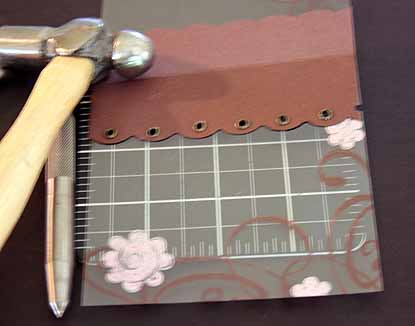
Step seven:
Lay your stamped transparency flat. I used my bone folder to flatten it back down. Line up the score line of the transparency with the score line of your scalloped spine and tape spine down. Make eyelet holes in the center of each scallop.
Step eight:
Set eyelets in each hole.
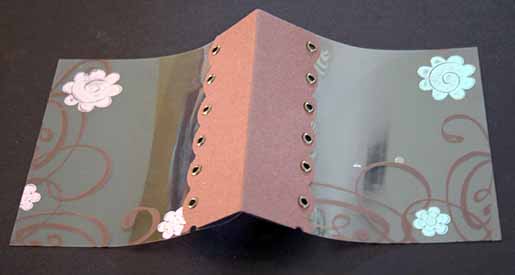
Step nine:
Adhere photos to your inside pages. I sanded all my photos with a sanding block to make them look aged before taping them down.
Step ten:
Lay your second transparency sheet over the inside pages and stamp it.
Step eleven:
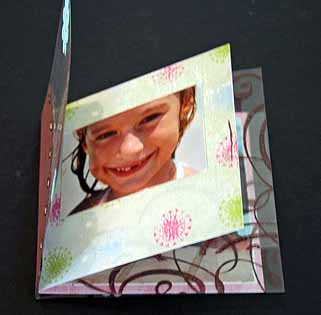
Stack your pages together. First the transparency with attached spine, then patterned paper with photos and then second transparency.


Step twelve:
Tie pages together with ribbon.
- I bought my transparencies at Walmart. Those were the only ones they had. I think they were inkjet transparency. One side is smoother then the other. I stamped on the not so smooth side and hit the stamped image with my heat gun for a few seconds. The ink dried pretty fast.
- You don’t have to put your transparencies over the photos before stamping. I did it because I wanted to see where the stamped image would be in relation to the picture underneath.
- You could use printed transparencies you can buy at stores.
Ribbon is May Arts ribbon from Starlitstudio.
Stamps and paper can be found at Eclectic Paperie.
Beate
23 Responses to “Transparency book tutorial”
Sorry, the comment form is closed at this time.


Beate, this is so gorgeous, thank you so much for the instructions. This would be the perfect gift for my mom and my MIL.
Beautiful book Beate!! Thanks for the tutorial, it’s much easier to visualize now!
Huggs,
Jana
This book is so pretty! What a great way to spotlight a favorite photo and what a nice gift it would be! The tutorial is wonderful. TFS!
Thank you for the tutorial. This one is beautiful too!
I love this tutorial Beate! Thanks so much for sharing it.
This is beautiful. Thanks for the tutorial.
Jamila
What a gorgeous book. I would love to try this and now I can thanks to your great tutorial…thanks much!
wow! another project I just have to try. I love this. So quick and easy. So basically, the transperancy is just a protective layer over the pictures (and another place to add stamped images), right?
I love your blog! it is one I visit almost everyday. Thanks for all your step by step instructions.
Thanks so much for the tutorial (although you were so prompt in answering my questions yesterday I didn’t need the visuals after reading your responses).
Another gorgeous little book!
Linda
Beautiful Beate! Thanks for sharing with us (once again!) Hugs,
Beate, thanks for this wonderful tutorial! (I hope I have a chance to try one of these sometime soon.) Your new book is just as lovely as the last one!
love your finished project! good tut. can’t wait to try.
Another fabulous project, Beate! Thanks for the stellar tutorial too! 😉
You are the QUEEN of tutorials, TFS.
Can’t wait to give this a try! Woo hoo! THanks so much for the tutorial!
This is wonderful!! Your talent never ceases to amaze me!!! Can’t wait to try this out!
Beate, I have to try one of these next week! You did a superb job–both on your book and your tutorial. Thanks for sharing!
I love the scallops with the eyelets. You are so talented, your tutorials & blog are wonderful.
I LOVE this! It reminds me of the photo altering you did awhile back. I plan on doing this as soon as I can get my hands on some transperancies. I see a child’s birthday album using Doodle Numbers from the spring mini!
Wow..what an awesome project.
[…] paper. We made these for Stamp Club last year. It’s so easy and you can make one, too! Here’s the tutorial. There is room on the inside for 2 more […]
Hi Beate
very nice tutorial, thanks for sharing 🙂
Beautiful book
MJ
Beate,
You are absolutely AMAZING!!! And I have learned so much from you! 🙂 Thank you for taking the time to make your tutorials…really, I can’t thank you enough!
I’m sorry! As usual, I have (what I hope will be) a quick question: now that you have your Scor-Pal, do you still sometimes use your paper cutter with a scoring blade (or were these done before you got your Scor-Pal)?
Thanks so much,
Jennifer