
I had a comment on my card yesterday asking how to round only one edge of the sentiment strip or how to make it a longer strip. I know most of you already know this little trick, but it’s easier shown then explained.
Step one:
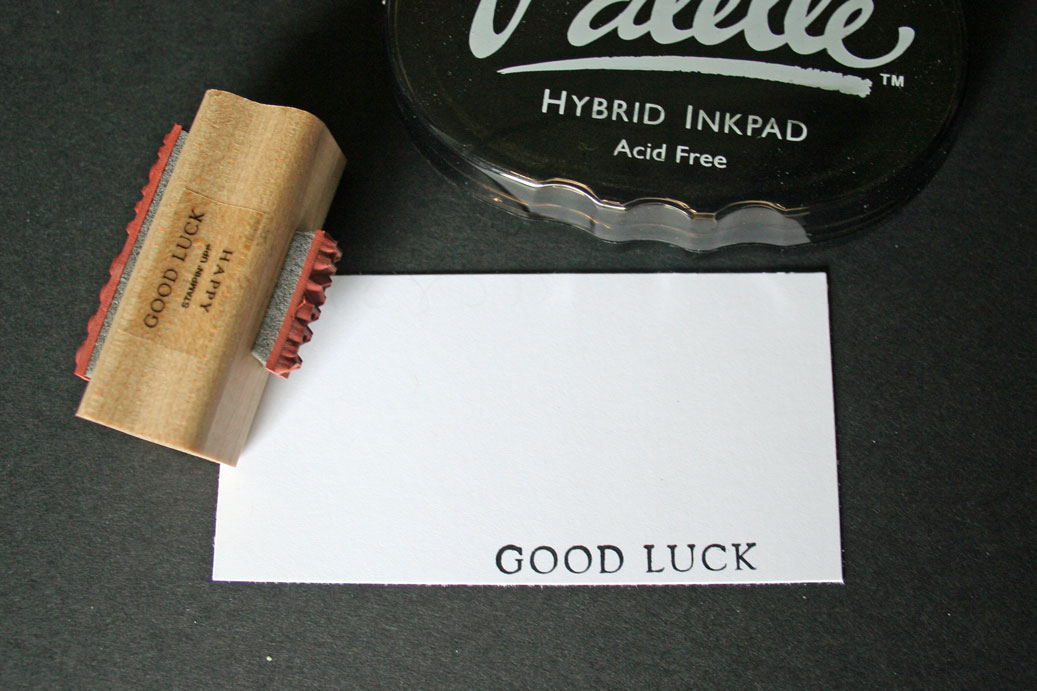
Stamp your sentiment on the bottom edge of your cardstock piece.
Step Two:
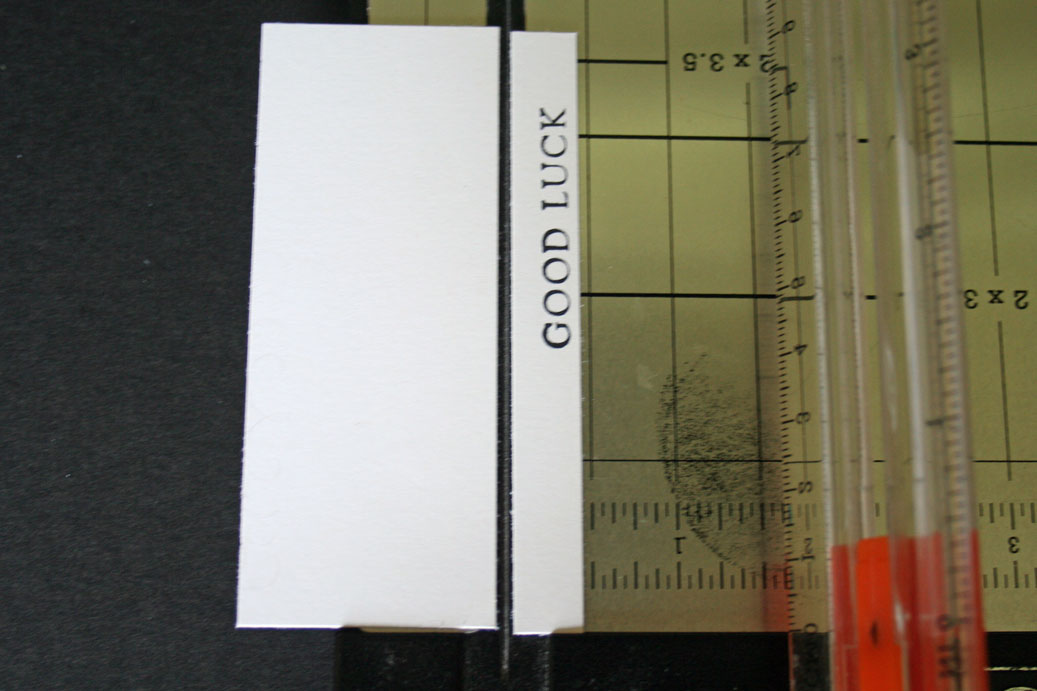
Cut your cardstock into a 3/8″ strip.
Hint: You can cut the strip first and then stamp. I just find it easier to stamp first and then cut. This way your sentiment will always be in the center of the strip.
Step Three:
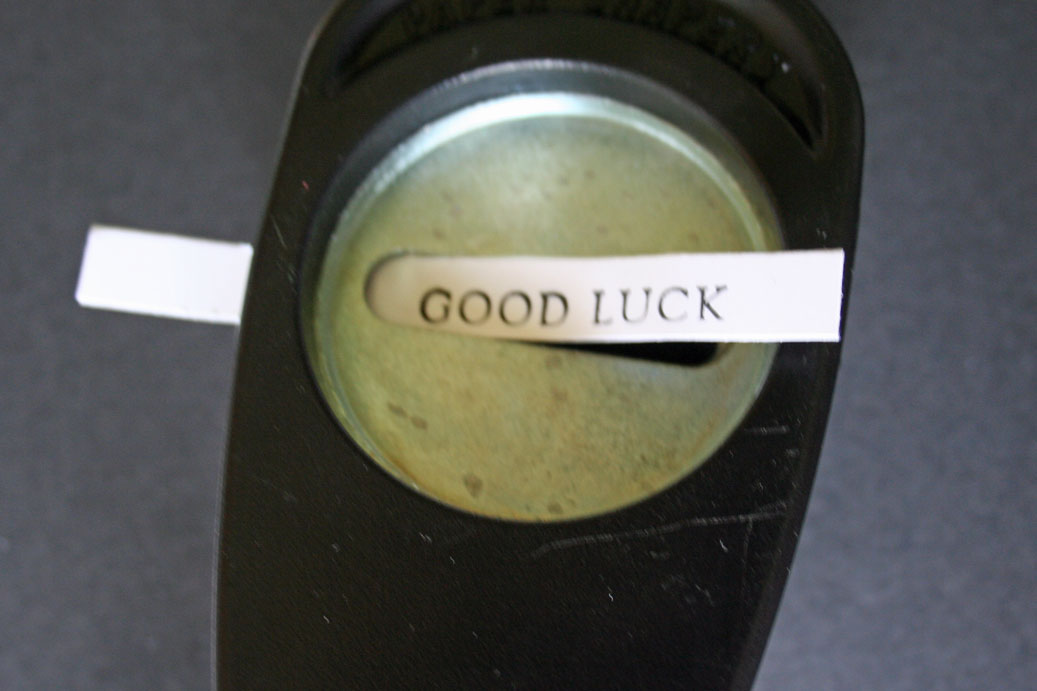
Slide your cardstock strip through your window word punch like shown.
Step four:
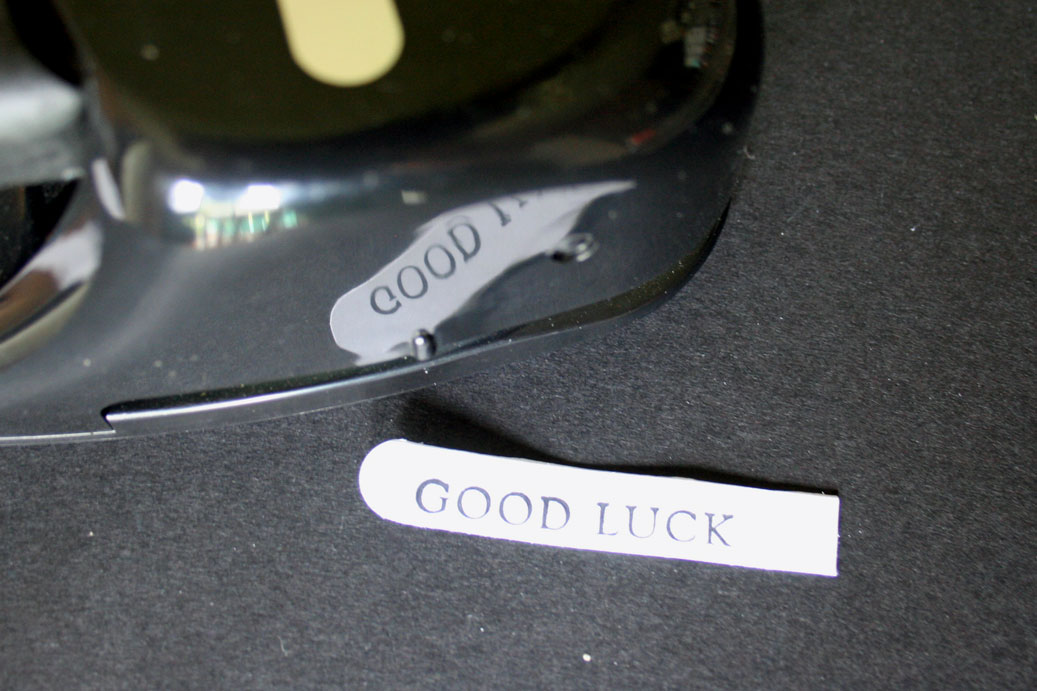
Punch your strip. It will only round the one edge that was inserted into the punch.
Alternate Punches:
Try it with any circle or oval punch. The key tag punch and even the round tab punch will work as well. Or course there are always corner rounder punches that do the same.
Beate
18 Responses to “Window Word Punch Tutorial -Rounding only one side of your strip”
Sorry, the comment form is closed at this time.


Danke für diese Beschreibung… Beate, du wirst es nicht glauben…aber ich habe mich das wirklich gestern gefragt! Prima Idee…, ich werde das umsetzen…:-) Schönen Tag für euch…:-) Liebe Grüße…, Silke
Thanks for the tutorial…I forget about this all the time!
Thanks for sharing this!
Brillant!!
Thanks for sharing! Didn’t know this trick until now!
Hi there, I see you use Palette ink…is that just for Black? I know my SU black can sometimes seem a little purply, so I’ll use the craft or staz on. your thoughts on black ink? THANKS!!!
Thank you. Now why didn’t I think of that? I played with my punch for quite awhile.
Can’t wait to give this a try! Thanks so much for sharing.
Very cool tip Beate!
Thank you. I knew there was a way to do this but I couldn’t figure it out. Now if I can just remember til the next time I need it !!
Thanks for sharing this for those of us that didn’t already know 🙂 I was wondering this myself.
Jodene
Yah! I just did this yesterday for my Chicky card but I used the Key Tag Punch. First time doing it…but will try it with the word window too! Thanks for sharing!
oh lord!!!! never even thought of that!!!! TFS!
This is a great little tute, Beate!! I love using this technique!
Sew that’s how you do that?!!!! TFS!! 😉
What an awesome idea! Thanks for this great tutorial! Take care 🙂
Great idea!
Wonderful.
I knew just where to come looking for this. Now I’ve done it once I am sure I’ll remember – but thanks for making it so easy to find.