
Todays tutorial on Splitcoast is about adding Texture to your Copic coloring.
You all know I went to the Copic Class in Pensacola a month ago. Marianne Walker is amazing and shared some great tips with us. I passed some of them on in this tutorial.
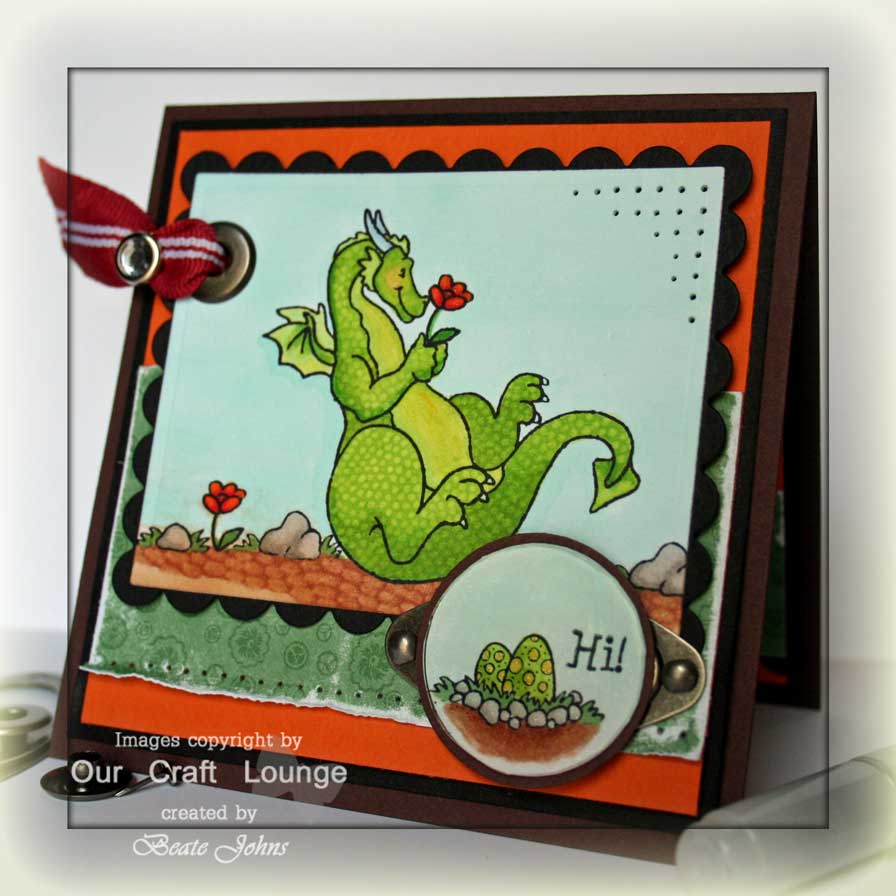
I started by stamping this adorable dragon from Our Craft Lounge in Tuxedo Black Memento ink on Neenah White cardstockand coloring him with Copic Markers.
(Dragon: YG00, YG23 and YG25; Rocks: W1 and W4; Flowers: Y35, YR04 and R27; Grass: G24, Ground: E34 and E37, Sky: BG10)
The texture was added with the Blending Pen.
The image was layered on a Black Scallop rectangle cut with Nestabilities. On the upper left I added a Jumbo Pewter Eyelet with Riding Hood Red Ribbon and a Clear Rhinestone brad. The upper right hand corner was paper pierced.
The card base is a 4 1/4″ x 8 1/2″ piece of Chocolate Chip cardstock folded in half. Next come a 4″ square in Basic Black and a 3 3/4″ square in Pumpkin Pie. The 2″ x 3 3/4″ strip of designer paper is from the Flock Together paper pack. It was sanded and the bottom paper pierced.
I stamped the sentiment and eggs on Neenah paper in Tuxedo Black, colored the eggs in the same colors as the dragon and punched it out with the 1 1/4″ circle punch. The sentiment was first layered on a 1 3/8″ Chocolate Chip circle, then on a retired Pewter Hodgepodge Hardware piece.

I kept the inside very simple and the layers similar to the outside.
I am sorry for another late post. My Internet was down this morning. Something is wrong with the splitter. I didn’t even know we had one sitting where it is. I felt like McGuyver (and hopefully not like McGroover) messing with it so at least we can have Internet, if not TV. I need to buy a new one of those things.
Have a wonderful day! Hugs and smiles
Beate
14 Responses to “Tutorial on SCS – Texture with Copics”
Sorry, the comment form is closed at this time.


Beate, this is an amazing card! I just love all that texture, thanks for doing this tutorial…now if only I could “master” this technique!!!
I have a award for you on my blog ! (excuse my english, I speak only french…)
http://bricole-anne.blogspot.com/2009/03/color-queen.html
This is so cute, love the colors and the stamp set.
This is amazing – love the bright, vivid colors!!! Great card and that stamps are darling!! I think I need some copics…..*STAMPIN HUGS* Alex
Oh I just LOVE this, Beate! The texture is just amazing! Can’t wait to try this out! 🙂
This is fantastic!! I’m going to have to try this technique out!!
Oh how cute is that dragon??!! So wonderfully coloured too!! I saw the tutorial yesterday and hope to sit down and follow along and learn how to do this!! Thanks for sharing Beate!
Wow, this is amazing! Look at the dragon skin!
I am so intrigued by those markersr, but they are expensive and I think you need some guidance to learn how to use them, so this is not something I would buy sight unseen.
That’s okay, though – I do not really need something else to add to my wish list… ;D
TFS!
Cindy
Simply adorable!!!!!!
What a wonderful card!
I really have to practice kids cards.
Thanks for the inspiration!
Smiles & Cheers,
Dorothy
This is so very cool Beate!! Just loved your tutorial!! TFS the great ways to use my Copics!! 🙂
This absolutely ROCKS! Awesome tutorial, too! Inky Hugs!
Wow – your coloring rocks!! Awesome card, Beate. Thanks for the inspiration!
Love this card and this dragon – so cute! And thanks for the wonderful tutorial on SCS – I need to get me some JUICE!
The texture you’ve created is amazing, Beate!! I love those adorable images too, and your card ROCKS!! Thanks for sharing these techniques!!