
I loved Tuesday’s Color Challenge Combo. It had brown in it. 🙂
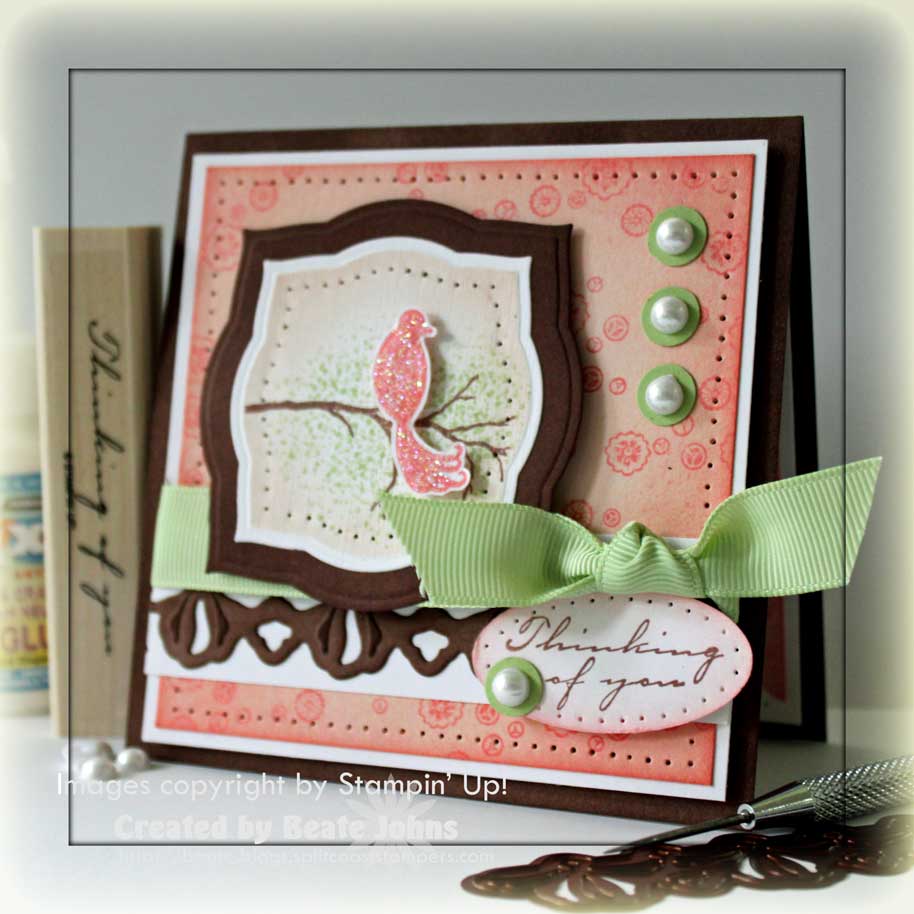
My card base is a 4 1/4″ x 8 1/2″ piece of Close to Cocoa cardstock piece. It was folded and the card front edge was sponged.
The next layer is a 3 15/16″ square of Whisper White cardstock followed by a 3 3/4″ square of Blush Blossom. The Blush Blossom cardstock was stamped with an image from Bird on a Branch Stamp Set in Cameo Coral. The cardstock edge was sponged first with Blush Blossom, then with Cameo Coral and a paper pierced border was added.
I added a slim strip of Whisper White cardstock on the lower half of the card front and placed a strip of Close to Cocoa Cardstock over that. The Close to Cocoa strip had been cut, embossed and stenciled with the Kaleidoscope Borderabilities. Celery 5/8″ wide grosgrain ribbon was tied above the die cut strip.
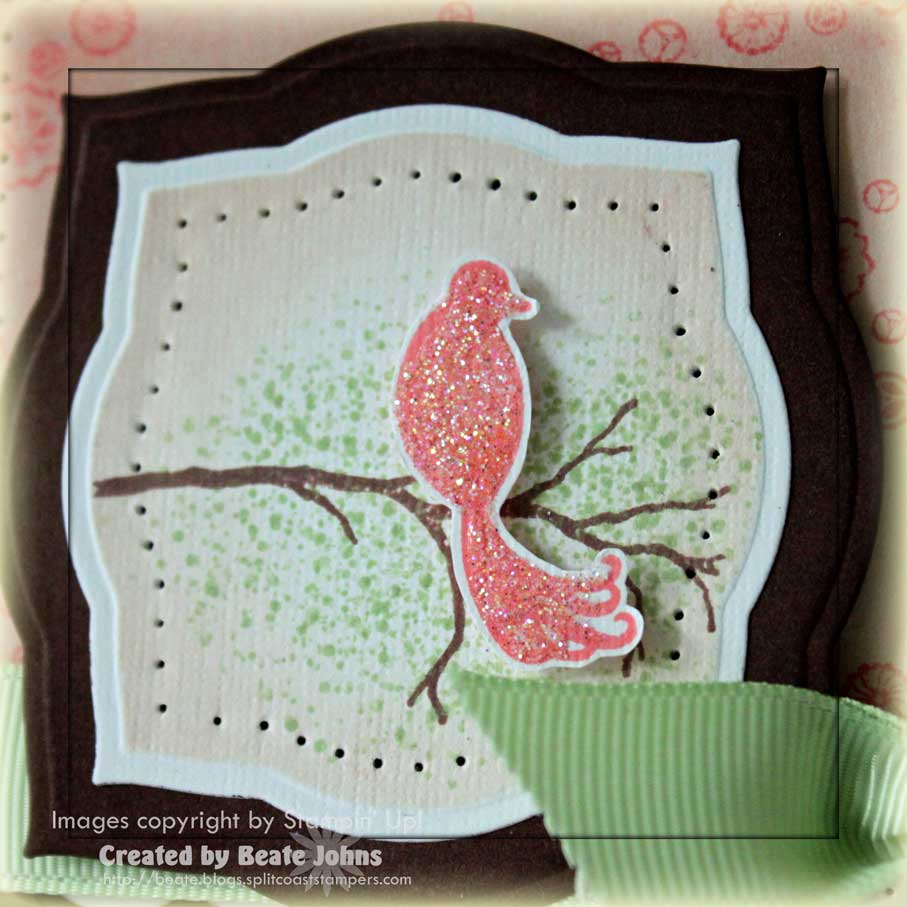
The main image panels were cut with Nestabilities Label 3. All images are from the Bird of the Branch stamp set. The branch was stamped in Close to Cocoa, the leaves in Certainly Celery, the bird in Cameo Coral. I left the Nestabilities die over the textured white cardstock while stamping, and also left it over the cardstock while sponging Blush Blossom over it. Then I layered it on the next size up Label Three cut out of sponged Close to Cocoa cardstock. A paper pierced border was added on the edge of the white cardstock.
I stamped the bird again in Cameo Coral on Textured white cardstock, cut it out and adhered it over the main panel with dimensionals. I covered the bird in Crystal Effect and sprinkled Dazzling Diamond Glitter over it.
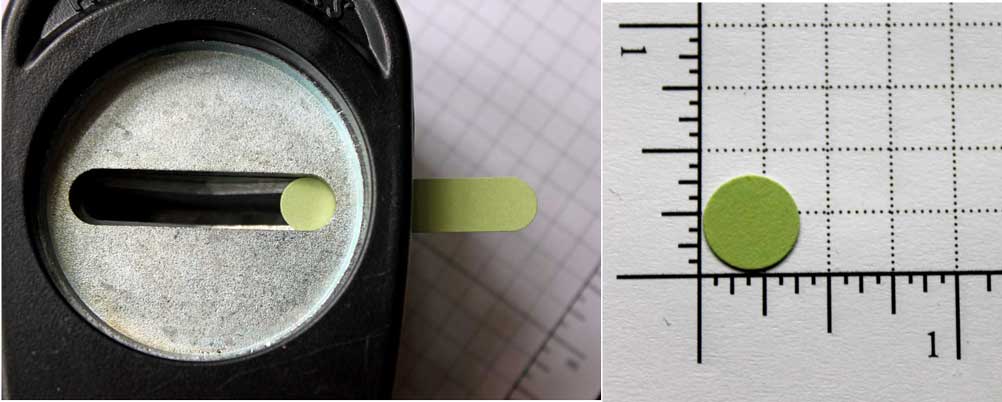
To add more green I decided to add a Certainly Celery circle underneath my Pretties Kit half pearls. Unfortunately the 1/4″ circles were just as big as the pearls and the 1/2″ circle looked too big. So I decided to try the Window Word punch. I first punched a tag out like normal, then slit it back into the punch, lined it up until it looks like a circle and punched. That circle was perfect for my pearls and measured about 3/8″.

For the inside I created a similar layers then the front. Except for the Blush Blossom layer was cut this time with the second Borderabilities template. The one that only cuts one side, not both. Again the background image was stamped in Cameo Coral and the edges were sponged first with Blush Blossom, then with Cameo Coral ink.
For the visual learner out there, I shot a video tutorial on sponging. You can find it here:
[youtube]https://www.youtube.com/watch?v=3-HhazuOMjQ[/youtube]
Have a wonderful day! Hugs and smiles
Beate
18 Responses to “Coral Bird”
Sorry, the comment form is closed at this time.


Very nice and ellegant card! Love the glitterbird! Your tip with the circle is excellent – thanks a lot…
What a beautiful card! and a fabulous tutorial. I love sponging. I use this technique alot. I have never sponged with my nestabilities though.. I can hardly wait to give it a try!
Thanks for another great tutorial. I really enjoyed this.
Keep the videos coming 🙂
Thanks again for sharing your talent…
Beautiful colors, images, and I love the sparkle you’ve added to your bird!! Love your die cuts, piercing and pearls too!!
Your sponged card is so much richer-looking!! Wonderful tutorial!!
Oooooh, SO pretty, Beate! I love the colors, and the pearls and sparkly bird really caught my eye!
Wow, this is absolutely beautiful, love the brown also, i like brown with just about any color. 🙂
smallcity
Beate your card is absolutely gorgeous!!!
Thanks so much for the great video I gave the sponging with the Nesties a try and really liked it!
Okay I have a whole new appreciation for spounging. After seeing the side by side how can anyone argue. I need to go upstairs and find those spounges LOL! Oh, Izzy is now requesting your videos by name, you are a huge hit.
It’s a good life!
Terri E.
WOW. This is soooo gorgeous.
How clever to think to make a circle from the Word Window Punch!
What an absolutely gorgeous card! Love the idea about making a circle by using the Word Window punch. Just one more reason I have to get that! Been eyeing it for a very long time!
Wow, you do a fabulous job on your videos. Love the card.
smallcity
Wonderful card! I love the circle frame
around the pearls. I am going to have
to give that a try. It adds so much
dimension and balance. I also loved the
video. Thank you so much!!
what a wonderful tutorial. loved it and I soooo enjoyed hearing your voice. ONly a month till we meet for real! Can’t wait 🙂
Wow these colors totally POP!! So pretty, I am sponging challenged so I am going to go watch your video 🙂 Thanks!
Your tutorials are always very complete. Thanks for taking the time to share.
This was another great tutorial, Beate!
I love learning all the nuances of the techniques! I thought I knew sponging, but your video was great & the tip about making that little circle was awesome. Thanks for sharing!
Eine wundervolle Karte Beate und vielen lieben Dank für Deine Erklärungen.
Liebe Grüße
von Anke
[…] stitching to the long strip with my paper piercing tools and Soft Suede Marker and taped three circles cut with the Window word punch on the top right. Three clear Rhinestone Brads were added in the center. Red Polka Dotted Ribbon was […]