
Today’s inspiration challenge let us pick an image from the Curiosity shoppe as inspiration piece. I picked the Sunprint Kit.
After I picked the image I noticed that I don’t have any silver embossing powder. I wonder what happened to that? It’s already on my order list for next month. 🙂 Good thing I had ordered the Shimmery Paint from the Holiday Mini catalog. I applied that to the stamp from Autumn Days with a foam brush and stamped it on 3 1/2″ square of Ballet Blue cardstock.

The square was layered on a slightly bigger piece of Scallop Square that had been cut with Square Nestabilities out of Brushed Silver Cardstock. The edges were paper pierced. That seemed a little flat so I added tiny Crystal Twinkles over some of the image.
The card base was cut with the Scallop Square Big Shot Die out of Brushed Silver cardstock. It was layered first with a 3 3/4″ square of Ballet Blue, then a with a 1/4″ smaller piece of Whisper White. The edges were again paper pierced. I added a ribbon slit on the lower left hand side of the main image and tied Organza Ribbon through it.
The sentiment is from Teeny Tiny Wishes. It was stamped in Basic Gray on Whisper White. It was punched out with the small oval punch, taped on Brushed Silver cardstock and hand-cut (I don’t like to layer a small oval punch-out over a big oval punch-out. The big one is too big for layering for my taste.). The layers were adhered to the focal point layers and a row of Crystal Twinkles were added under the sentiment.

For the inside of the card I layered another 3 3/4″ Ballet Blue square with a 1/4″ smaller Whisper White square. I added a few more branches in second and third generation Basic Gray and paper pierced a border around it.
If you want to see step by step pictures on how I stamped with the paint, click on more.
Step one:

Add a small mount of Shimmery Paint on a disposable piece of plastic ( I used clear envelope).
Step two:

Dab your foam brush in your paint and brush on to your stamp.
Step Three:
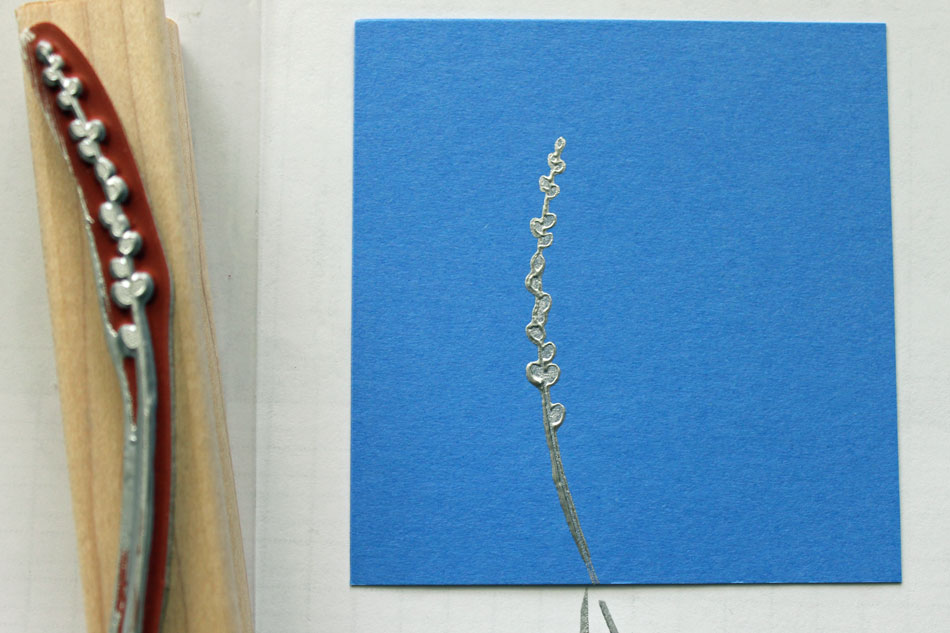
Stamp your image on to your cardstock.
Step Four:
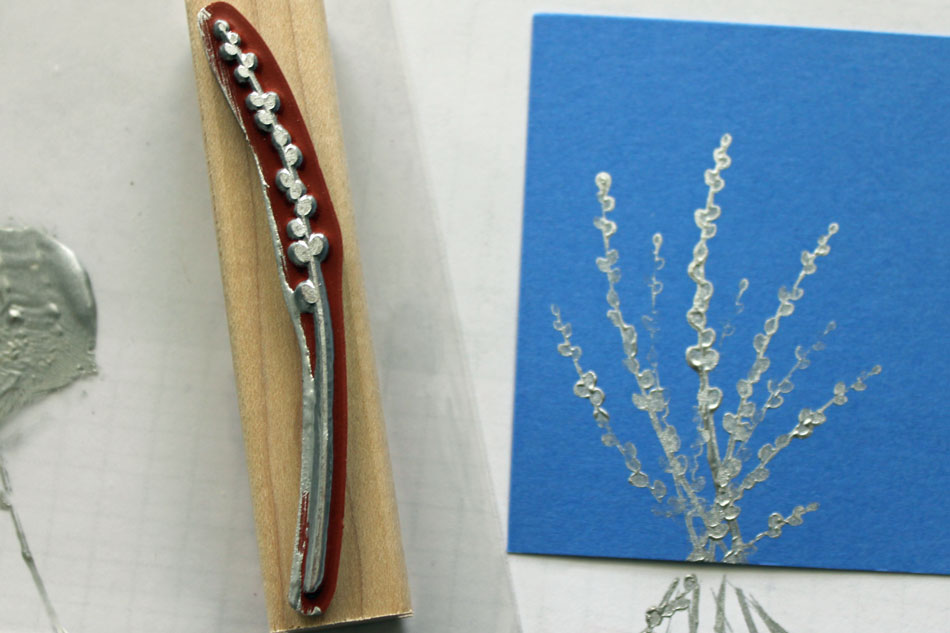
Continue with steps 1-3 if necessary.
Step Five:
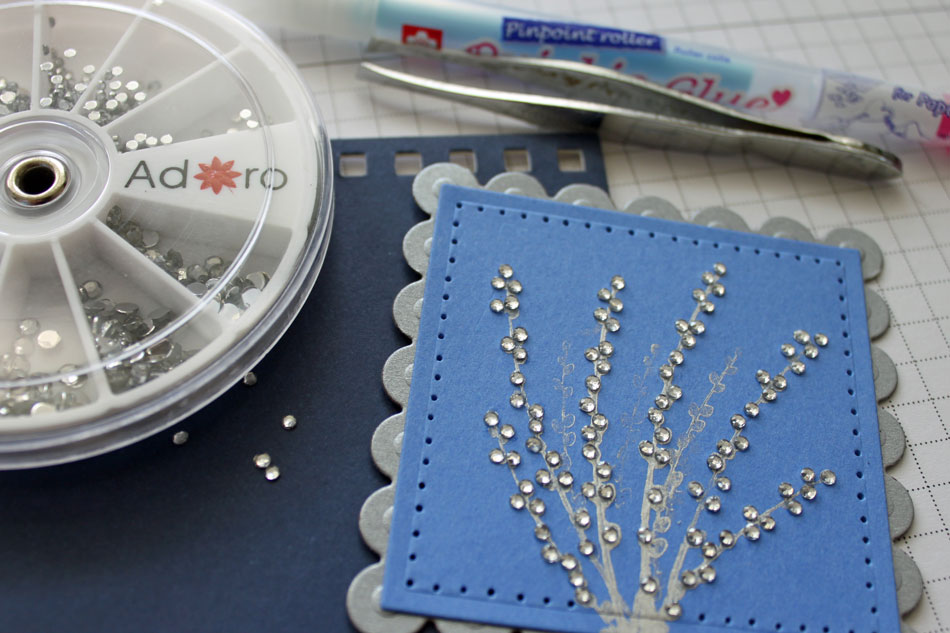
Not really part of this techique, but I wanted to show off how cute those Crystal Twinkles are. I added Glue with the Quickie Glue pen and dropped the Twinkles on top of the glue.
Beate
16 Responses to “Inspiration Challenge on SCS – Curiosity Shoppe/ Stamping with Shimmery Paint”
Sorry, the comment form is closed at this time.


This card is so beautiful! Thank you for the demonstration. I am curious how much you think this card cost to make?
Hi Katemeri,
If you have a die cut machine, you would need the following:
-Scallop Square Nestabilities: $24.99
(You could use the biggest one of those instead of the Big shot die, to cut the card base. That would save money. The Big shot Square Die costs $21.99)
– Stamp Set (Autumn Days by Stampin’ Up!) $23.95
– Shimmery Paint (Holiday Mini catalog Stampin’ Up!)$5.95
– Basic Gray and Ballet Blue Ink Pad
(Stampin’ Up!) each $5.95
– Organza Ribbon (Stampin’ Up!) $5.95
– Ballet Blue cardstock (Stampin’ Up!, pack of 24 sheets) $5.50
– Whisper White Cardstock (Stampin’ Up!, pack of 40) $7.50
– Brushed Silver Cardstock (Stampin’ Up!, pack of 10) $7.95
– Dimensionals (Stampin’ Up!, pack of 300) $3.95
– Small Oval Punch (Stampin’ Up!) $15.95
– Mat Pack (Stampin’ Up!) $9.95
– Paper Piercing Tool (Stampin’ Up!) $3.50
-Crystal Twinkles $3.99
I hope I didn’t forget anything.
Hugs and smiles
This is so beautiful, Beate!! I love the colors, images, piercing….and especially all of the bling!! Wow!!
OH MY GOODNESS!!! This card is absolutely GORGEOUS!! I love it!! My favorite color is blue, and this card is definitely blue 😉 I think it is beautiful, Beate. Hugs!!
Wow, so very beautiful!
Beautiful card!
… and THANK YOU for your comment about SU!’s large oval being too large for the small oval to your tastes! I feel the same way, and I thought it was just me. I was so very glad when they came out with the scalloped oval, which provides a much better balance with the large oval.
Although it is summer, this card makes you feeling like winter…awesome!
AHHHHH!! Blue and Silver…my favorite colors (and just so happens, the colors of my formal Christmas tree!) This is just STUNNING!
This is beautiful. The shimmery paint if also on my next order. Thanks for the info. on how to apply it.
Oh, how pretty! Love the colors and shimmery paint.
Gorgeous card – Beate!!! Love all the added bling :)!!!
Hey how do you like Ohio??? If you ever want to come south please let me know – I’d love for you to come and visit!!! I’ll even bake you a German cake :)!!! Hugs ~S~
You never stop with the ideas. Can’t wait to create too.
WOW, this is a BEAUTFUL card, on my way to ur tutorial..awsome,awsome. thanks for this card,,,, 🙂
Holy Moly, Beate! This card is so far beyond words! I just keep staring at it! Wow!
Zauberhaft Beate, dieses Blau ist einmalig schön.
Liebe Grüße
von Anke
I have read you articles in the SCS newsletter forever, it seems. I don’t know how I ever missed your blog link, but I am glad I found you! You have so much talent that it is amazing. I would love to have just a little bit of it. I have just started buying copics (a few at a time due to cost). I bought the set of Spectrum Noir markers and am not happy with them. I love your videos and this card is just gorgeous. Thanks so very much for sharing!!