
I created a tutorial for another way of playing with Shimmery Paint: Shimmery Resist. I uploaded it today on Splitcoast.
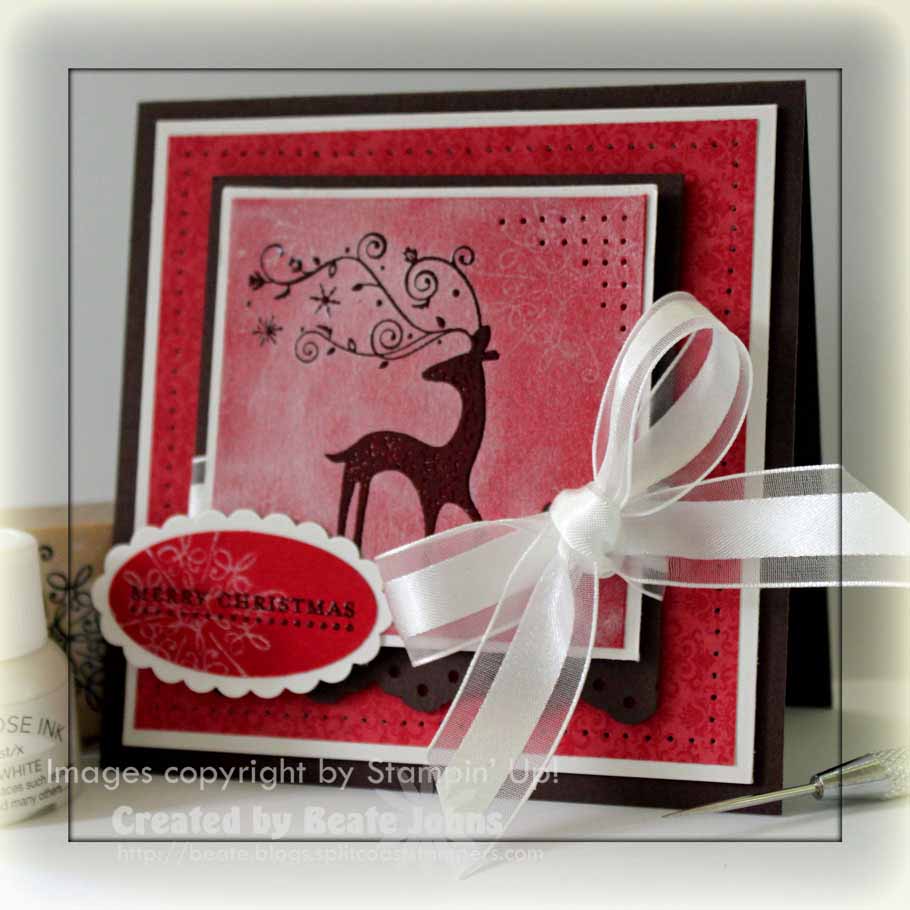
My card base is a 4 1/4″ x 8 1/2″ piece of Chocolate chip cardstock folded in half. Next is a 3 15/16″ square of Whisper White followed by a 3 3/4″ square of Christmas Cocoa Specialty Paper. The edges of the paper were paper pierced.
For the main image I stamped Dasher in Chocolate Chip Craft ink on a 2 1/2″ square of Real Red cardstock and embossed it with clear embossing powder. Next I brushed Shimmery Paint all over with a the cardstock and stamped Snowflakes from the Serene Snowflake set over it with Shimmery Paint.

I buffed the image with a paper towel. It was layered on a 1/4″ bigger piece of Whisper White cardstock. The top right corner was paper pierced and a ribbon slot was added on the lower right. I threaded Organza ribbon through the slot, adhered the image with dimensionals to a 3 1/4″ Chocolate Chip square and tied my ribbon into a bow. The bottom edge had been punched with the Eyelet Border punch.

The sentiment is from Teeny Tiny Wishesand is stamped in Chocolate chip craft ink on Real Red cardstock. It was embossed with clear embossing powder and punched out with the large oval punch. I stamped a snowflake from Serene Snowflakes over it with Shimmery Paint and layered it on a Whisper White Scallop Oval Punch-out. The sentiment was adhered to the card with dimensionals.
Here is a video for the visual learner:
[youtube]https://www.youtube.com/watch?v=jEQZeNElqMg[/youtube]
I will post the other card shown in the video tomorrow.
Have a wonderful day! Hugs and smiles
Beate
19 Responses to “Tutorial on SCS – Shimmery Resist”
Sorry, the comment form is closed at this time.


hey, girlie! we missed you on Saturday, BUT I saw this card on the display board and loved it. what a great surpise to find it here today!!! great tutorial, now to get my hands on some of that paint. hugs to you!
We should have known it was yours! Lisa and I both took pictures of it on the boards! Fabulous card- missed you at regionals!
Beate,
Great techniques, thanks for the fresh ideas with the shimmer paint.
Thanks for your lovely introduction to the shimmer paint. I have mine but haven’t gotten to it yet. You have inspired me. Hugs, Mary
Love both cards – they are very pretty! That deer is so elegant 🙂
Cindy
xXx
Both of your cards are awesome and I am loving that technique!
JUST got this stamp & shimmering paint fresh off the Brown truck 15 mins. ago!! GUESS what I will be doing tonight! OH LOVE THIS!! 🙂
just gorgeous, Beate!!
barb
gorgeous Beate … as always =0)
Awesome tutorial, Beate! I love your cards! I really like how you wrapped and tied your bow! TFS!
Oh wow fabulous card Beate. I adore that ribbon.
Beautiful Beate!! I just taught a class tonight using the new shimmer paint – so much fun!! *STAMPIN HUGS* Alex
Beautiful Beate, as usual!! I love my shimmer paints! Thanks for all you do! {hugs}
[…] Good Friends, family, summer at the beach, creating with rubber stamps « Tutorial on SCS – Shimmery Resist […]
Thank you so much for the lovely video, it’s a beautiful card and so great to see what can be done with the shimmer ink! TFS!
Vicky
Thank you so much for the lovely video, it’s a beautiful card and so great to see what can be done with the shimmer paint! TFS!
Vicky
hallo beate
deine karten sind ein traum
ich sende ir liebe gruesse
xoxo BA
Beautiful cards! I think I like the chocolate Dasher better. But, will try both techniques. I have the shimmer paint and wasn’t sure how to make the best use of it. You’ve shown me! Thank so much.
Oh…this one is gorgeous as well!! I will have to check out your video!! It looks wonderful! Thanks!!