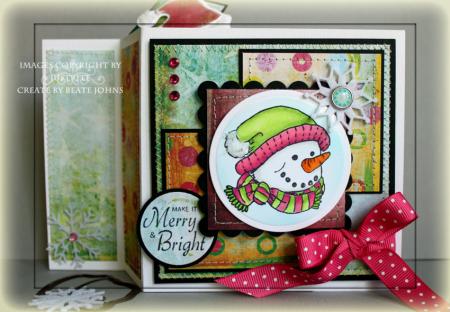
I worked ahead this week and already made this card on Monday as my entry for the Technique Challenge, which was to create a Wiper card.
I haven’t made a square one before, so it was perfect to use the sketch with the challenge. As my main image I chose this cute stamp from JustRite’s Old Fashioned Christmas set. Frosty was stamped in Tuxedo Black Memento Ink on Gina K’s Pure Luxury White cardstock, cut out with Circle Nestabilities and colored with Copic Markers (RV13, RV14, RV17, YG01, YG03, YG05, W1, YR04, YR07) and airbrushed with Copic Marker B000. White Flower Soft was added the to the pompom on the hat.
My card base consists of two 4 1/2″ x 7 1/2″ pieces of Textured Whisper White cardstock scored at 1 1/2″ and 3″. A 3 3/4″ square of Fancy Pants Happy Holidays Patterned paper was sewn to a 4″ Black square. The three smaller patterned paper squares measure 2 5/16″ and are from the same paper pack. They two outer ones were layered on a 2 7/16″ black cardstock square, the one in the middle on a scalloped black square that had been cut with Square Nestabilities.
Melon Mambo dotted ribbon was tied around the big square layers before the smaller square were adhered. A retired felt snowflake from Stampin’ Up! with a My Mind’s Eye Brad in it’s center was added to the top right corner of the main image. Three little pink rhinestones filled the left top corner.
For the sentiment I chose another JustRite stamp from the Merry Little Christmas set. It was stamped in Tuxedo Black Memento ink directly on Fancy Pants patterned paper, punched out with a 1 1/4″ circle punch. It was layered on a 1 3/8″ black circle and adhered to the bottom left of the main image.
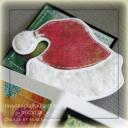
My wiper pop up image was a little Santa hat cut out with Spellbinders Holiday Cheer die. It was cut out twice, once out if White cardstock, once out of red/pinkish patterned paper from the Happy Holidays Paper pack. I cut the red center out, sanded it a bit and taped it to the white layer. White Flower Soft was added to the rim and pompom of that hat.
You can find the step by step tutorial for wiper cards on Splitcoast. Here is the video for the visual learner:
[youtube]https://www.youtube.com/watch?v=SDrn0UG2Bto[/youtube]
14 Responses to “Sweet Frosty”
Sorry, the comment form is closed at this time.


OMGosh, Beate, totally sweet snowman there. The papers you’ve used are absolutely gorgeous and your coloring, well, stunning as always :D. Hugs and blessings, Sabrina
Absolutely darling!! Love the little hat on the “wiper” – that is so clever!!
LOVE that sweet snowman, Beate — beautiful card!
You do the most wonderful things, thanks for the inspiration and for your comment on my blog about my watering can :o) I question: I´m about to get my hands om JustRite Stampers products here in Sweden. But there is so many sets, do you have some tips on a beginner set that includes the stamp, images and fonts? Hugs
The snowman is so cute and I like your video on how to make that kind of card! Thanks 🙂
Have a wonderful day.
eine schöne Idee, die Mütze für den Wiper zu nutzen!
Your “Frosty” is just darling, and I love how you’ve made this a Wiper Card!! Your coloring is incredible as well!! Love it!!
Oh I love that his little hat pops up Beate! Precious!
ACK! This is soooooo cute, Beate! You know I love snowmen 😉 Adorable!
THis is adorable,Beate! Love those wiper cards…I have to try one!
You are great! Thank you so much for all your video tutorials. I always look forward to learning something new. Jane
Wow Beate! I LOVE your video tuts! AWESOME babe! Have a super weekend!!
Super cute card! I love the fun, bright colors!
Oh he is just too cute, love the little hat that pops up, thanks for the tutorial!