
In yesterday’s newsletter the “Tutorial you might have missed” was the Free Standing Pop-Up card. I used the colors from this weeks color challenge to create this sample for the video tutorial. I had been waiting for a chance to use Flourishes Waterlily stamp set. I the color combo (Hunter, Celery, Bermuda Bay and optional pink) were perfect for the image.
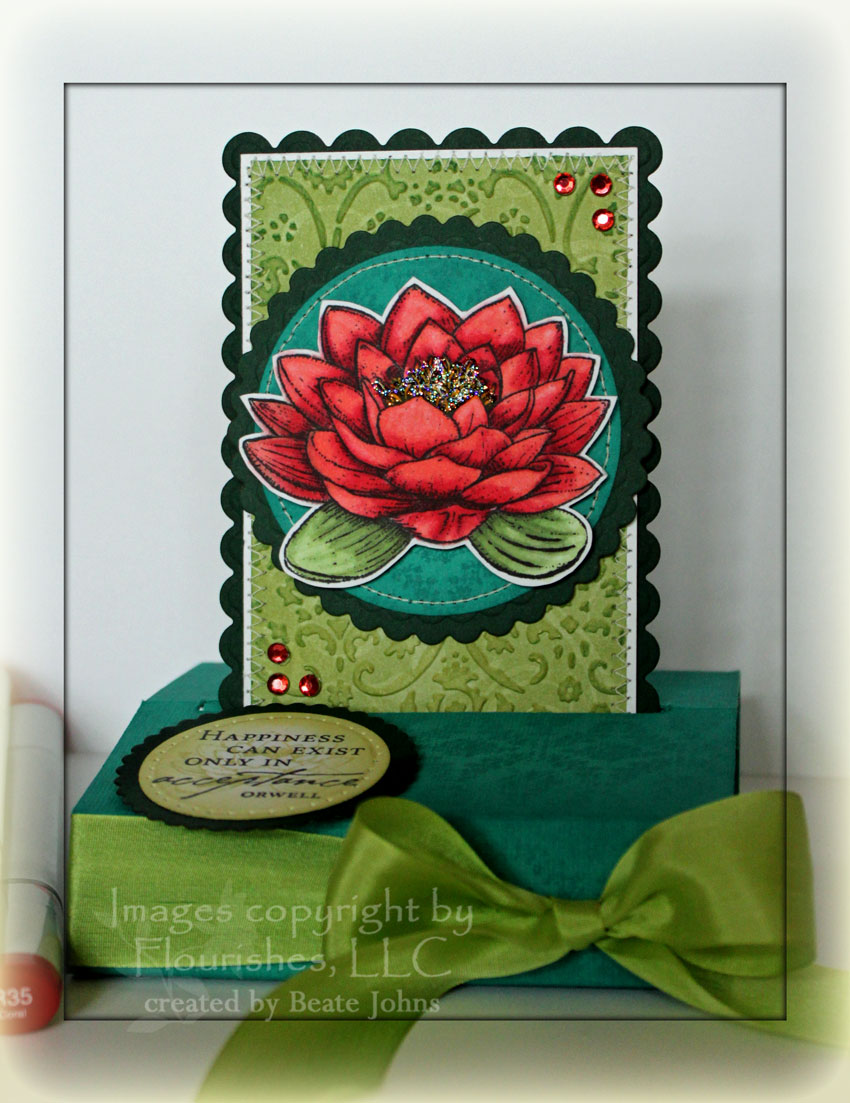
The card base was created out of a 4 1/4″ x 11″ piece of textured Bermuda Bay cardstock. The strip had been stamped with the Vintage Wallpaper background stamp in Broken China distress ink. Each edge was sponged with the same ink.
The tag base was cut with long rectangle Nestabilities out of Hunter cardstock. It was sponged with Pine Needles Distress ink. A 2 11/16″ X 5″ piece of Certainly Celery Patterns Designer Paper was embossed with the Textile Texture Cuttlebug embossing folder and first sponged with Shabby Shutters, then with a hint of Pine Needles Distress ink. It was sewn to a slightly bigger piece of Whisper White cardstock. Lippy Red Kaiser Rhinestones on the top right and bottom left corner finish off that layer.
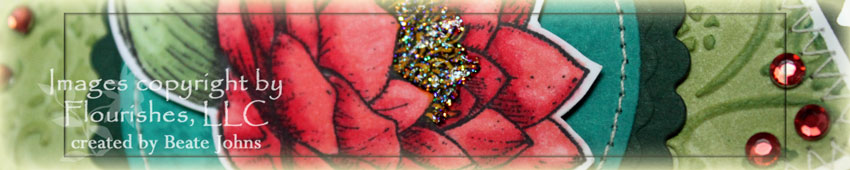
The main image was stamped in Tuxedo Black on Neenah White cardstock and colored with Copic Markers (R32, R35, R39, G40, G82, G85, Y15, Y18) and cut out. Star Dust Stickles were added to the flower center. The flower was adhered to a Bermuda Bay circle with dimensionals. The circle had been stamped with Vintage Wallpaper in Broken China, the edges were sponged and it was sewn to a slightly bigger scallop circle out of Handsome Hunter cardstock. Both circles were cut with Petite Circle Nestabilities.
The sentiment was stamped in Tuxedo Black Memento ink on Neenah White cardstock. It was cut with Circle Nestabilities and layered on a slightly bigger scallop circle that had been cut with Petite scallop circle Nestabilities. The edges of the white circle had been sponged with Shabby Shutter ink and a smaller waterlily had been stamped over the sentiment in the same color. Celery Silk ribbon was tied around the card base.
Here is a video for the visual learner:
[youtube]https://www.youtube.com/watch?v=wzeqvwyxyss[/youtube]
Beate
32 Responses to “Video tutorial – Free Standing Pop-Up Card”
Sorry, the comment form is closed at this time.


OH! I love these pop-up cards! and your color combo here is AMAZING!!! great work, Beate! are you ready for some snow????!
Great tutorial Beate! I’ve always looked at these and steered clear. Now I know I can make one! Love YOUR card! Someone will be so so lucky to be on the receiving end! Thanks for sharing!
This is so neat! I’ll definitely have to try it out! Thanks for the video!
Gorgeous color combo…this card is fantastic!
Your tutorial has totally inspired me. Gorgeous card, thanks for sharing 🙂
thanks for the EASY step by step tutorial. it has always looked hard to me but now i feel i can do it. i do miss hearing about your days and your kids! please post of them. thanks, enjoy your Thursday.
bg
OOOOOH! This is GORGEOUS Beate!!! Your coloring is AMAZING and I LOVE this technique! You SO totally ROCK girlie!!!
I love the card!!! It makes me want to go out and buy every single item you mentioned… 🙂
Thanks for all the tutorials! I love being able to see how things get done.
I love your blog, and look forward to every post.
Thanks for showing video tutorial. Keep up good work.
great tutorial … i’m inspired to make one! thanks!
Beautiful flower, such great coloring, neat style!
Again Beate…thank you for the tutorial..it was perfect!
This is so beautiful! The colors are lovely!
What an amazing creation! This is a show stopper!!
You’ve colored that lily so beautifully, and your Pop-Up card ROCKS!! Lovin’ the colors!!
Oh my word, Beate–this is a rock solid stunner! Gorgeous colors and what a color combo–wowzers!
Sooo beautiful, Beate!! LOVE the colors, and your coloring of the flower!! Oh my!!
Hugs to you!!
Absolutely breathtaking! Your waterlily really stands out and your colouring si gorgeous! Love it!!!
This is gorgeous Beate, I love the colors!! I hope you are staying warm in Ohio!!! *STAMPIN HUGS* Alex
I love reading your blog each posting- another wonderful project- and I have never tried one of these too fun!
This card is absolutely striking! The colours are so gorgeous. Great job with the coloring, and TFS!
Cindy 🙂
I hope you are okay. I can’t remember when you have gone this long without posting. Take care of yourself in the cold country.
Thinking about you – and all you have gone through this year – alot of adjustments and changes. May you know that you are cared for by many you have never met.
Bless you.
I have checked in with you every day. Sure hope things are going well. You are in my thoughts. I miss you.
Beate, I am praying everything is okay with you and your family. I miss seeing your daily posts and wonderful creations.
Take care, we all hope to see you back soon.
Hugs,
Sue
This card is so beautiful! Fab job – the colours are striking!
really pretty colors i love the combo ^-^
Love the video. I found some other videos that people might find useful for scrapbooking.
Cuttlebug Embossing Videos
Thanks for the help!!!!
it is a amagzing, so nice card.
thanks for your share
very beautiful card
thanks for your share