
Last week I created a video for the Stipple Basic Tutorial. I received my January KOM from Unity right before I left for the CHA and hadn’t had a chance to play with it until then. I LOVE these cute mushrooms that came in it. They are just darling.
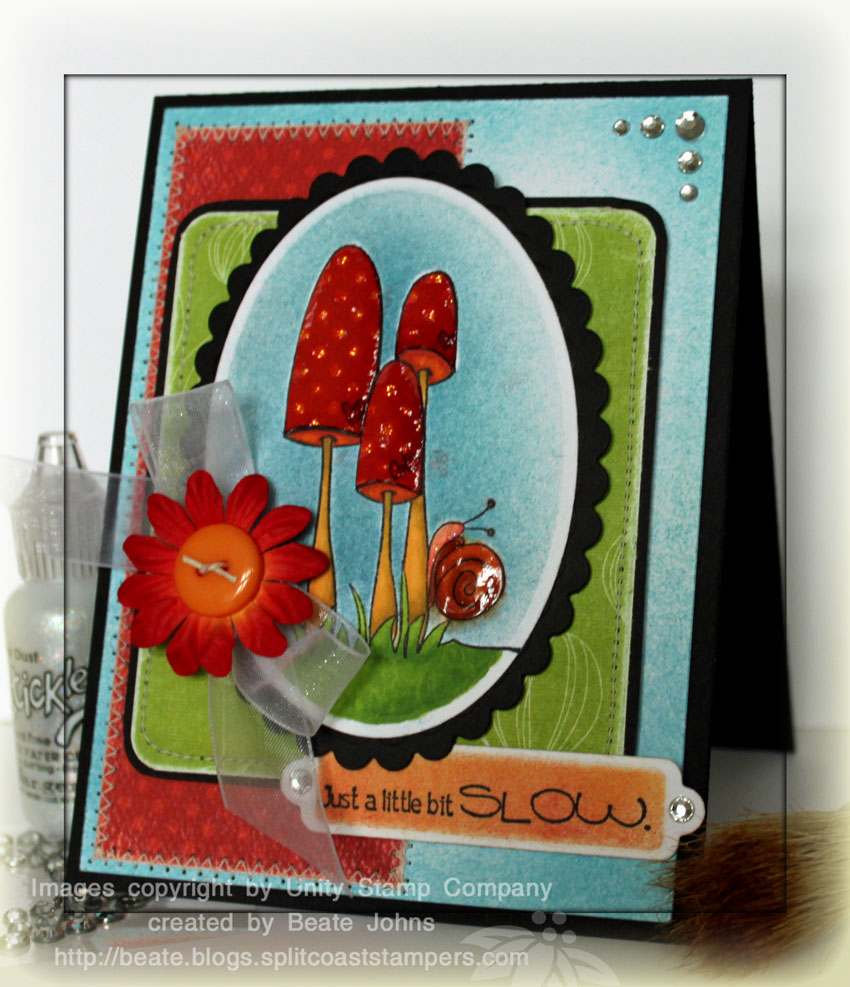
I stamped the image in Tuxedo Black Memento Ink on Neenah White cardstock and cut it out with Petite Oval Nestabilities. The image was colored with Copic Markers (stems: Y23, Y26, Y28 mushroom under top: YR04, YR07, YR18 Grass: YG07, YG17 Snail: R01, R02, R05). The top of the mushrooms were stamped on Bo Bunny paper and cut out. The edges were sponged with Aged Mahogany Distress ink and the mushroom tops were adhered to the over the main image. Fruit Punch Stickles was added over the orange dots on the mushroom dots, Christmas Red Stickles over the hearts. The snail body was covered in Stickles Stardust. The rest of the mushroom top and snail were covered in Glossy Accents.
The image was stamped again on Eclipse Tape, cut out and placed over the main image as a mask. Broken China and Faded Jeans Distress ink were stippled over the image while the Oval Nestabilities die was still placed over the cardstock. The image was then adhered to a slightly bigger black scallop oval.
The card base is a 4 1/4″ x 11″ piece of Basic Black cardstock folded in half. The next layer is a 4″ x 5 1/4″ piece of Whisper White cardstock. The edges were stippled with Broken China Distress ink. The strip on the left hand side measures 2 1/8″ x 5″ and is the same paper that the mushroom tops were cut from. It was sanded and stitched to the stippled layer.
The 3 1/8″ x 3 3/4″ piece of paper in the center is from the Bo Bunny Love Bandit collection. The corners were punched with a corner rounder, the edges were sanded before it was stitched to a slightly larger piece of Black cardstock.
A Basic Grey button was tied to a Prima Daisy Doodle with waxed linen with a organdy bow behind it. It was adhered to the main image with a glue dot. Five Bo Bunny Rhinestones finish off the top right of the card.
The sentiment is also from Unity’s January KOM. It was stamped on Neenah Cardstock with Tuxedo Black ink and cut out with Spellbinders Double Ended Tags. While the die template was still on the paper, I stippled the cardstock first with Scattered Straw, then with Dried Marigold Distress ink.
Here is a video for the visual learner:
[youtube]https://www.youtube.com/watch?v=URpBo-uqc8Q[/youtube]
Beate
15 Responses to “Video Tutorial – Stipple Basics”
Sorry, the comment form is closed at this time.


OMGosh, how fabulous is this!! Just adorable!
Psst ~ I’ve got a giveaway on my blog…a new release ippity set!!
Great to learn a new way to put sky in the background…I cannot wait to try it…BTW…I love that mushroom stamp!!
Your stippling really makes that adorable image POP! I love the addition of your Glossy Accents and Stickles as well!! Such a darling card, Beate!!
Tolle Karte Beate, mir gefaellt, wie die Pilze funkeln… das hat sowas von Zauberpilzen… und magic… TOLL!
Your video’s are wonderful…I have tried so many things that you have done…Your cards are beautiful..Thanks for sharing…
WOW! Beautiful card Beate – LOVE all the bright colors you used!!
Nice video/tutorial Beate. Lovely card & so colorful! Thank you.
Beate,
I can’t tell you how much I enjoy your site! I check it every day, and I think that you do a terrific job of explaining how to do your amazing projects. You are soooooooooooo gifted! Thanks for sharing your talents.
Helen Werntz
I love the look of stippling. I am so glad you reminding me of this awesome technique that really packs a wonderful punch! Your card is gorgeous,,, TSMFS you video.
How do you clean the stipple brush when you are finished?
I love stippling! Your card is just wonderful – love it! And again, what a wonderful tutorial! You are just amazing, Beate!
I love this………..you are so inspirational to us all…thank you so much….love all your work
Beautiful, Beate! Time for me to dig out my stipple brush!!
I love my stipple brushes. I actually need some more. I am quite at the point of one for every general color shade. Your video is great thanks!
Hey Beate! I am now getting your blog feed in my reader, so I hope to be commenting more often.
This card rocks! How vibrant and beautifully colored! You rock, too, Missy!