
I created this card for Our Craft Lounge’s Sketch challenge that was posted last Friday. The background was created with a technique Tim calls Nostalgic Blended Batik. It is a bit like the Emerging color background, but instead of stamping images underneath, you sponge different colors and you iron off the embossing powder at the end.
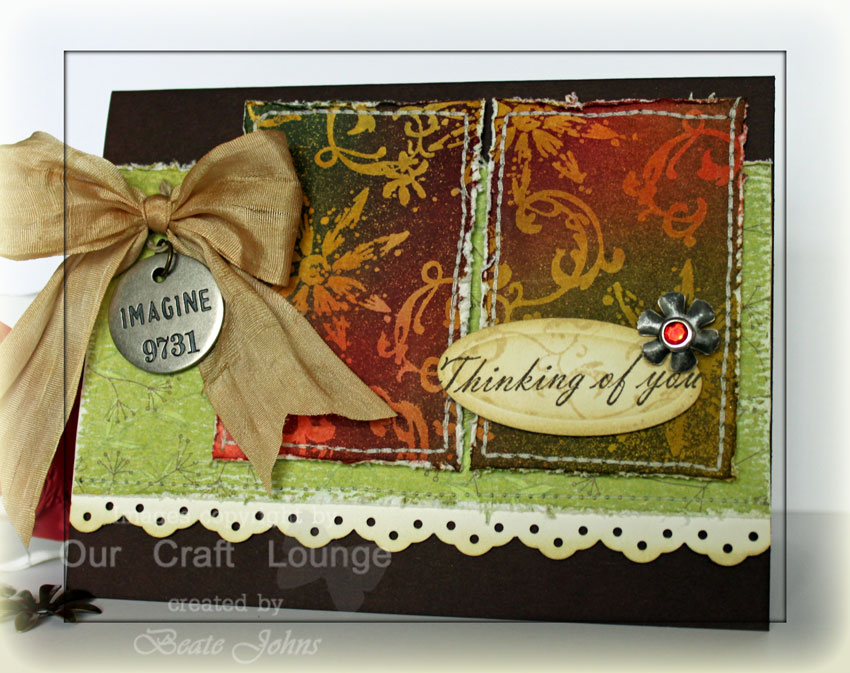
My card base is a 5 1/2″ x 8 1/2″ piece of Chocolate chip cardstock folded in half. The edges of the card front were sponged with Walnut Stain Distress ink. As you probably already noticed, I like sponging my cardstock. I think it creates a richer look and I LOVE that.
The horizontal strip measures 2 5/8″ x 5 1/2″ and is from My Mind’s Eye Penny Lane collection. The long edges were sanded and distressed and sponged with Antique Linen Distress ink. A white strip of cardstock was added under the lower edge. It had been punched with Stampin’ Up!’s Eyelet Border Punch.
My panels started out as one 3″ x 4″ piece of Neenah Solar White cardstock. It was sponged with Wild Honey, Shabby Shutter and Worn Lipstick Distress ink and then heat set. Once it was dry I stamped the Flower from Nature’s Notes and the Flourish from Vintage Swirls in Embossing ink all over the panel. They were embossed with Clear Embossing powder. Once the embossing powder cooled, I swiped Chipped Sapphire, Forest Moss and Aged Mahogany over my panel. The cardstock was placed between Newsprint paper and ironed over to take off the embossing.
The sentiment is from Nature’s Notes. It was stamped in Walnut Stain on White cardstock. It was cut out with Petite Oval Nestabilities. A swirl from Vintage swirls was stamped over the sentiment in Antique Linen and the edges were sponged with the same color. A Foilage flower centered with a red rhinestone brad finish of the sentiment.
The ribbon started out as Ivory May Arts Silk Ribbon. I filled a mini mister with water and a bit of Vintage Photo Distress re-inker and sprayed the ribbon with it to dirty it up a bit. The ribbon was dried, tied and adhered with a glue dot over a Philosophy Tag.

P.S.: Sorry about yesterday. I hope the blog as well as Splitcoast will stay up and running today. Also crossing my fingers that most glitches are already caught and that the sites will run smoothly.
Make sure you check out the big JustRite Blog hop that’s going on right now. Prizes will be giving away on each of the three blog hop days. Make sure you stop by participating blogs and comment there. I will post my card…along with a video tutorial tomorrow.
Have a great day! Thanks for stopping by! Hugs and smiles
Beate
25 Responses to “Nostalgic Background Flowers”
Sorry, the comment form is closed at this time.


very pretty. love the distressing, Beate!
This is SO beautiful – I love the soft look of the colored panels and that ribbon is stunning. Perfect, as usual!!
THis is GORGEOUS, Beate! I HAVE to try this technique! I LOVE it!
Gorgeous!
I love this card! It is so perfect and vintage! 🙂
So gorgeous! Love everything about it!
REALLY awesome Beate! Totally knocks my socks off!! You are my dirty hero!! 🙂
This is just so very beautiful, I have done the similar technique only with alcohol inks…I really like the look the the distress inks…very soft!
Absolutely gorgeous!
Oh I love the look of this card! That technique sounds interesting!!! Very cool!
I LOVE this look!!! Will have to try it.
Very pretty. I love it!
That is very pretty and elegant!
Thanks for sharing your artwork with us today.
FYI(But something is still wrong here cuz when I went to type in my email the previous one before me was still in the box so other people will view our email address.)
Yep, something is still wrong….I cant see the pictures…
WOW! this one is a show stopper! Love the colors and technique.
What a great tutorial…..love your card and the technique is a great addition too…
smiles…Tammy
Very very artsy and totally beautiful.
*sigh* another lovely blog to follow 😉 love your card, can’t wait to check the rest of it out and your tutorial look awesome I am sure I will be back to give them a try
such great colors in the card and the panels are really neat!
wow! Love the colors on this card!
Ohhhhh Beate, this is gorgeous!! Love the technique!
Gorgeous card Beate!! I always admire your work!! I love all the distressing and sewing!
WOW Beate was für eine megageniale Karte.
Begeisterte Grüße
von Anke
Love this gorgeous distressed look, Beate!! Juat amazing!!