

Today’s tutorial on Splitcoast is written by new tutorial writer Kim Score. She shows us a different kind of slider card. I created my sample with My Favorite Things Sunshiny Day. The image was stamped with Tuxedo Black Memento Ink on Neenah Solar White cardstock. It was colored in with Copic Markers (E000, E01, E11, YG25, YG17, R24, R29, Y17, YR16, BG07, BG09). the image was cut with Label 13 Nestabilities. It was layered on a slightly bigger piece of Basic Black cardstock and hand cut around it. The background was airbrushed with Copic Marker B00.
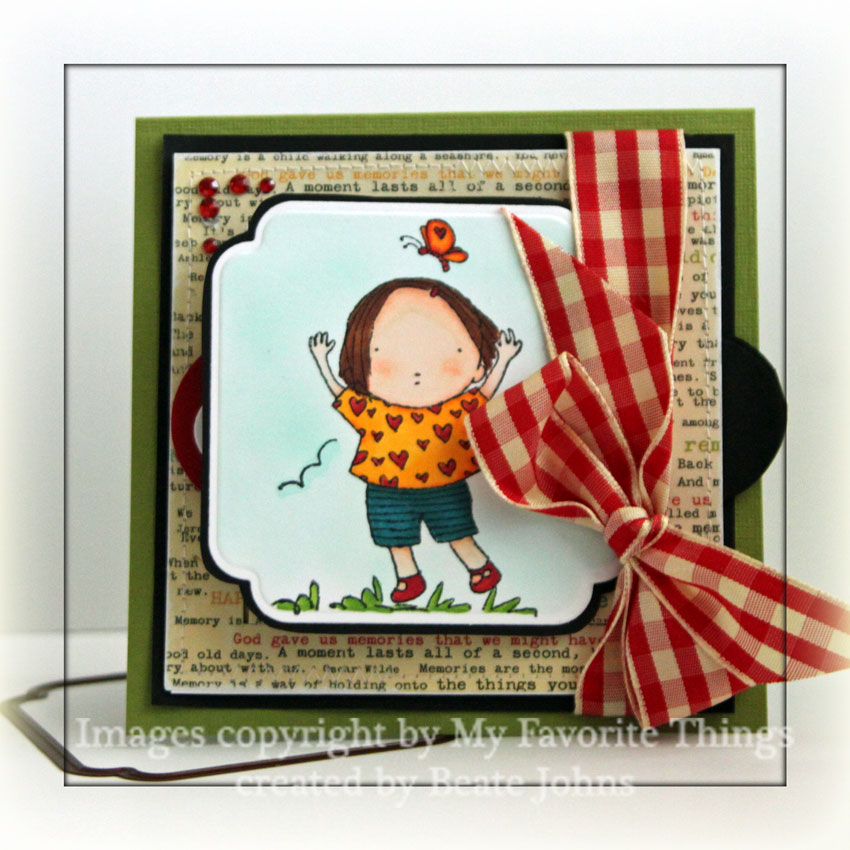
The card base is a 4 5/8″ x 9 1/4″ piece of Textured Old Olive cardstock folded in half. The edges of a 4″ square of Thrift Store October Afternoon Paper were sanded and stitched to a 4 1/4″ black cardstock square. Red Gingham Ribbon was tied around the right side of the layers. Red Rhinestones were added to the top left corner.
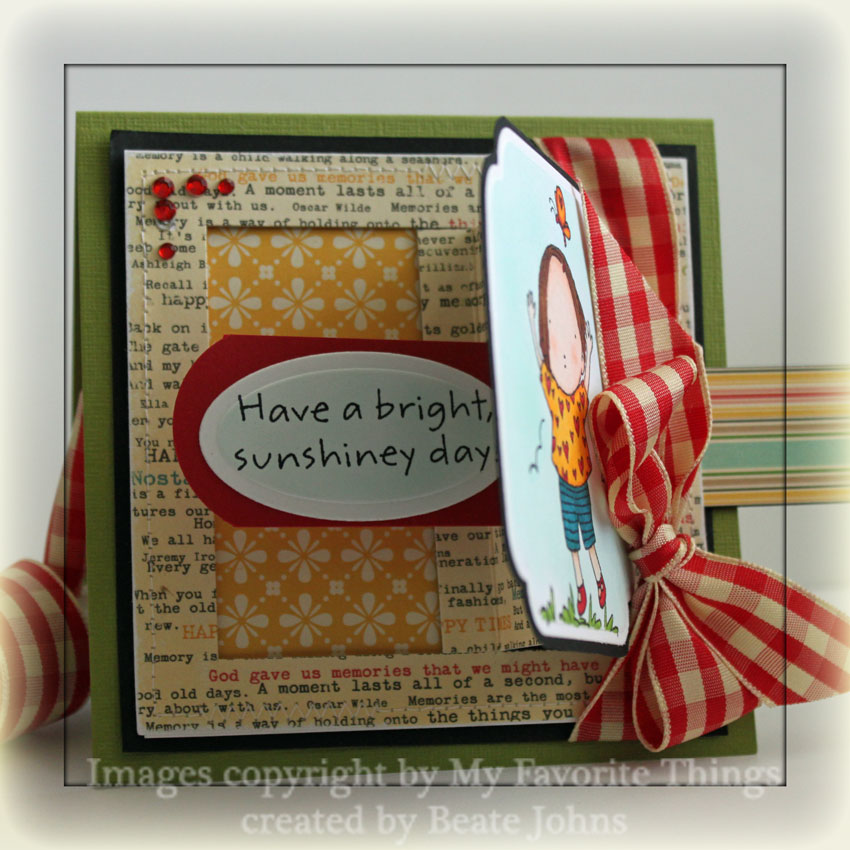
When pulling on a tab on the right, the image lifts up and a hidden message appears. The sentiment is from the same stamp set and stamped on Neenah Solar White cardstock in Tuxedo Black Memento Ink. It was cut with Petite Oval Nestabilities and the inside was colored with Copic B00.
Here is a video for the visual learner:
[youtube]https://www.youtube.com/watch?v=Jdqh_Z6rR8Q[/youtube]
Thanks so much for stopping by. Have a great day! Hugs and smiles
Beate
16 Responses to “Tutorial on SCS – T-slide Card”
Sorry, the comment form is closed at this time.


Very clever way to open a card!!!! Too cute. Thanks for the tutorial – they’re always so well done and easy to follow.
So cute! I love the papers you used.
Oh! How FUN is this! What a great fold! LOVE the PI girl you used and your colors ROCK!!!
This is so cute and a fun slider card.
SO cute and whimsical feeling Beate. What a fun style of card!
OH!! There’s October Afternoon again! *drool* lol! I have to tell you, I LOVE watching you work. The card is adorable. The colors are gorgeous together. You make it good, girl! love it!
Way too adorable and cute! What a fun slider card, I might have to attempt it soon!
YAY! I made one and it’s so cute! I posted it in my gallery on SCS. Yours is adorable, as per usual, Beate!Fun tute!
Hugs,
Brandi
Thank you for another great tutorial Beate!! I wish I were going with you to CHA…what I would give…I will live vicariously through you though…Have a great time when you do go 🙂
This is very clever! I love it and I’m going to have to give it a try! 🙂
The first time I see your card. I was stunned. Because the design is one of a kind. I thought it is so hard to make. I was wrong. I watched your video and I can say that it is so easy to create.
Beate, your video makes this one seem so E-Z! Darling little image & colors you’ve chosen for this!
~Bev
Can I stow away in your suitcase? lol… Great tutorial, Beate! I love your card, and will be looking forward to trying one 🙂 Have a great day!
HERRLICH und MEGAGENIAL diese Technik.
Liebe Beate, jetzt liege ich echt am Boden !!!
Einen schönen Freitag
wünscht Dir
Anke
You do the most creative kinds of cards! thanks so much for posting the tutorials!!!!!!
Totally cute Beate!!!