
As we get closer to the season of giving, let’s take the wraps off your creativity to come up with beautiful ways to gift give. Do you have a fun template for a beautiful box? Or, do you have a beautiful presentation for gift cards? Show us what you’ve got! Link up your Bringing Back Beautiful Challenge card here to enter. If you upload to SCS, please use the keyword BBB03. You have until October 30th to enter! As we unveil our challenge for next month, we’ll share our True Beauties – those card makers who wowed us with this challenge! Winners will be featured on the Flourishes Blog and will receive a True Beauty blog button to display proudly on their blog!
Make sure to check out the blogs of fellow challenge team members:
Becca Feeken
Cindy Coutts
Kathy Jones
Julie Koerber
Michelle Woerner
Yvonne Hagane
For my sample I used the A2 Card Box tutorial on Splitcoast to create part of Rebecca’s teacher gift for Christmas. I love working ahead. I created 6 simple thank you cards with matching envelopes. I hope the teacher will be able to use them to give to other parents as thank you for their Christmas presents.
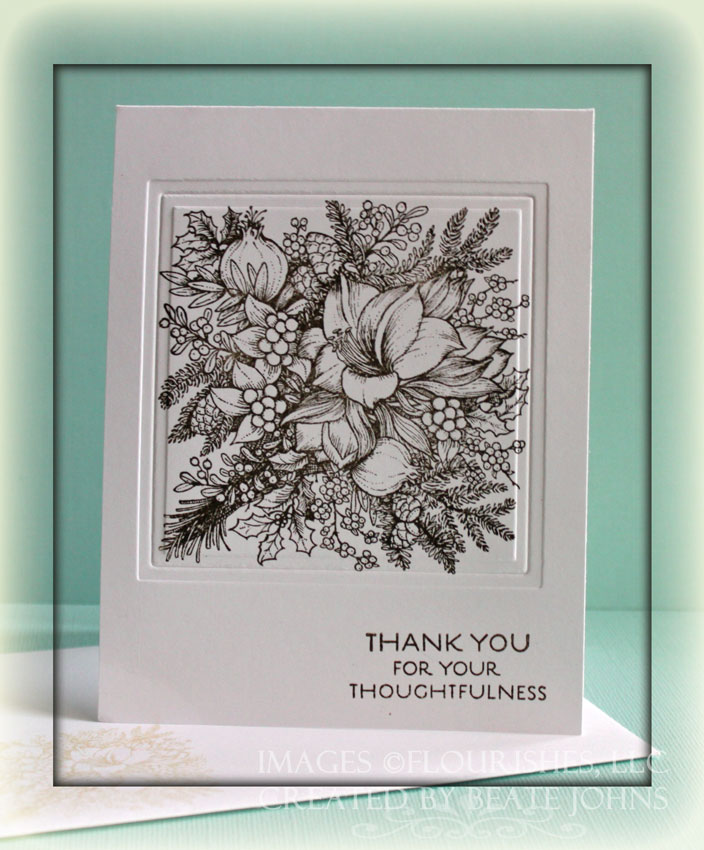
The card base for each is a piece of 4 1/4″ x 11″ piece of Flourishes Classic White cardstock folded in half. The big Winter Bouquet Image was stamped in Walnut Stain Distress Ink. The sentiment is from the same stamp set and was stamped with Walnut Stain into the lower right corner. A frame was embossed around the image with Classic Square Nestabilities. The envelopes were stamped with the smaller Winter Bouquet image in Antique Linen Distress ink.

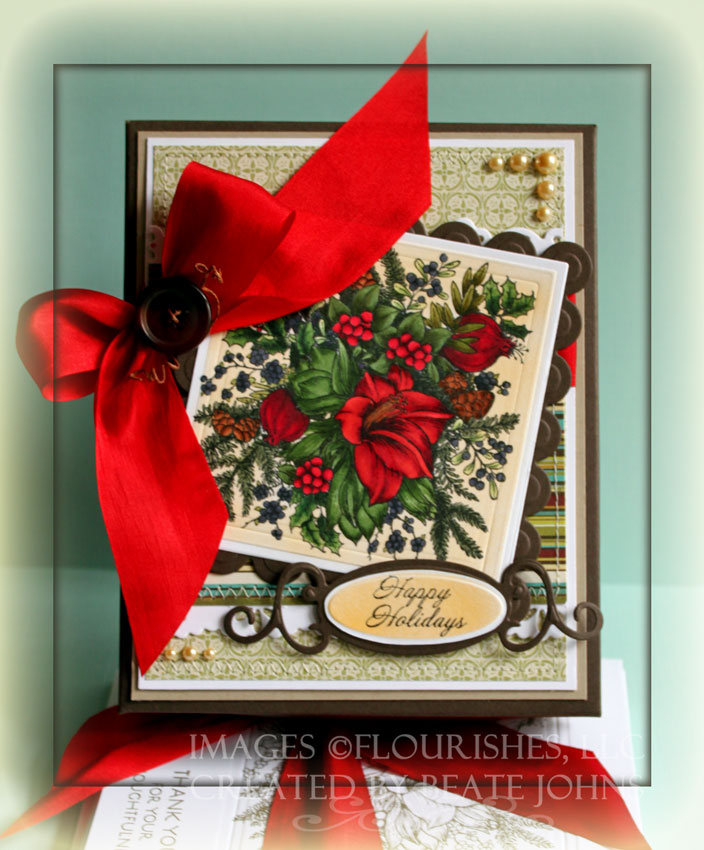
For the box front I stamped the Winter Bouquet again, this time in Tuxedo Black Memento Ink on Neenah Solar White cardstock and colored it with Copic Markers (Lily: R24, R27, R29, R39, YG63, YG67, Holly: R35, R37, R39, G21, G24, G28 Pine Cones: E33, E35, E37 Pine Branches: BG93, BG96 Berries: BV25, BV29, G20, G21, G24, bigger berry leaves: G94, G97 more greens: YG93, YG97, G94, G99). The image was cut and embossed with the Classic Square Nestabilities and then airbrushed with YR21. It was then layered on an Early Espresso cardstock piece that had been cut and embossed with Classic Scallop Square Nestabilities.
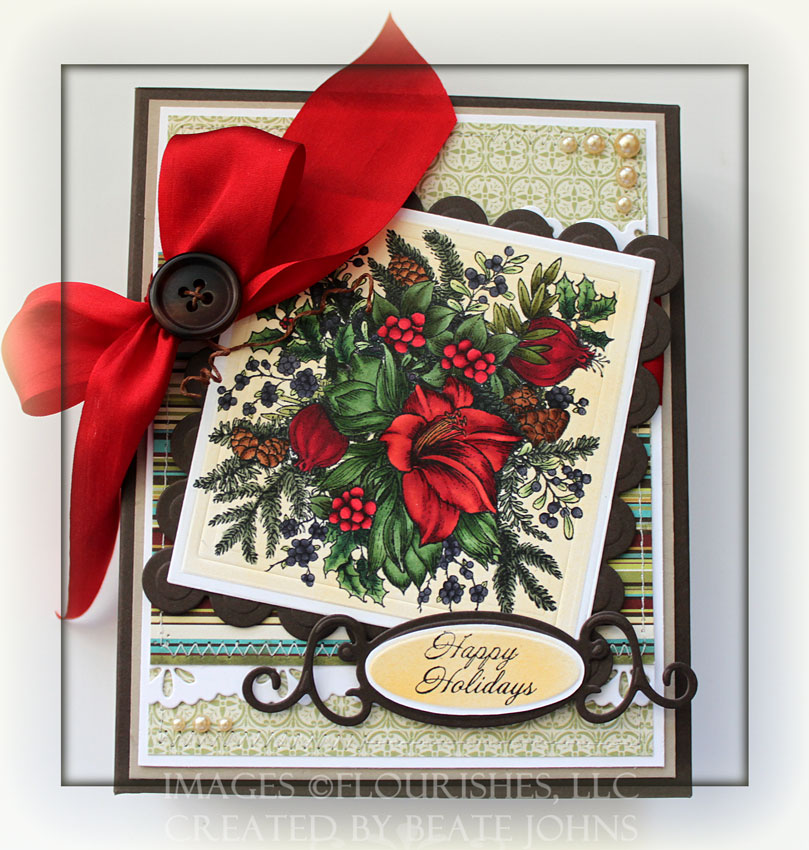
The bottom of the box was created with Kraft cardstock, the top with Early Espresso cardstock.
Two 4 1/4″ long strips of Flourishes Classic White cardstock was cut and embossed with Eyelet Borderabilities. They were stitched to a 3 1/2″ x 4 1/4″ piece of Holiday Webster’s Pages paper. A 4 1/4″ x 5 1/2″ piece of a different pattern of Holiday Webster’s Pages was stitched to a 3 /16″ piece of White cardstock. The smaller piece was adhered to the bigger one and Red Silk May Arts Ribbon was tied around the horizontal strip and topped with a brown button. The layers were then adhered to a 4 5/8″ x 5 7/8″ piece of Kraft cardstock which topped the box top.
The sentiment is from Dove and Holly. It was stamped in Tuxedo Black Memento ink on Neenah Solar White cardstock. It was cut and embossed with Petite Oval Nestabilities and sprayed with YR21. It was cut down just a bit and layered on a Early Espresso cardstock cut and embossed with Spellbinders Fancy Tag dies. To finish off the box front, I added Latte Kaisercraft Pearls to the top right and bottom left corner.
Here is a video on how to create this box for the visual learner:
[youtube]https://www.youtube.com/watch?v=LKZiQhSYO5Q[/youtube]
Beate
42 Responses to “Bring Back Beautiful #3: Beauty of a Gift”
Sorry, the comment form is closed at this time.


SO SO Pretty!
WOW!!!! Beate this is STUNNING!!! I would be thrilled to pieces to receive something this gorgeous!!!
Oh WOW, Beate this set is GORGEOUS! I`m sure she`ll LOVE your gift. The box looks amazing and the cards are just so elegant. Love the clean and simple look!
What a wonderful idea! I love the box and can’t wait to try it! Anyone would love to receive this!
Very pretty card set and box. A great gift idea. Thanks for sharing your box video tutorial. It is very helpful!
Oh my gosh girl! This is absolutely stunning! Your colouring of those flowers is AMAZING!
Beyond breathtaking!! What a fabulous gift!! The box ix absolutely dazzling and the cards inside are wonderfully classic!! Beautiful work!!
This is gorgeous and thanks for the awesome tutorial.
Now that I’ve picked my jaw up off the floor… wow! What beautiful color and such a beautiful design! You nailed this one Miss Beate! 🙂
So beautiful Beate! I love the cards, stunning! And, oh my, that gift box is gorgeous! What a truly wonderful gift, the recipient will be thrilled to pieces!
I knew whatever you were going to make for this challenge was going to be fabulous but this is WOW! Thank you for the tutorial too!
Beate – this is magnificent. I love the box and the whole idea…thanks for the tutorial.
xo
tina
You have coloured that image incredibly!!! Gorgeous! Great box tutorial too.
I really love your tutorials great job. as I sit here shaking my head 🙂
Both cards are just beautiful, Beate!
[…] that's an awesome challenge. I combined it with the currentBring Back Beautiful challenge project. I uploaded the card box here, but the CAS card version is only on my blog. […]
tried to make the box but the dimesions are not right! 6 3/4 x 1 1/8 for the top- shouldn’t the top be bigger since it is going over the bottom? i tried to figure this out on my own but just couldn’t get it right. help – check your tutorial. thanks for all your great ideas and help jeanine
Beate this is gorgeous! I love both of them, the white with the framing is awesome. Then when you color it just brings it to life. Gorgeous job.
you always make me gasp! love this! it is GORGEOUS!
Oh completely gorgeous Beate. What a beautiful gift…your coloring on the box is just stunning!
Jaw dropping fabulous Beate!!! When I grow up I want to be able to color just like you do :)!!! Fabulous gift giving idea!!! Hugs ~S~
Beate, I love the gorgeous simplicity of your card which shows off the detail of this image so well. And your box! Well! So rich and elegant and beautifully detailed, with stunning coloring. Wow!
Oh Beate! This is simply amazing!
This is so gorgeous, Beate! What a wonderful gift this will be- I think they will appreciate the box long after the cards are gone! Thanks for sharing the tutorial~
Beautiful gift idea, such lovely coloring! and like your framing in the card!
What gorgeous work! The white one stopped me in my tracks. Hugs, M
Oh this is beautiful Beate! Thanks for your tutorials…It really makes me more of a visual learner when watching your tutorials…that didn’t make sense, but your card and box sure put a smile on my face! TFS!!
I always enjoy your blog-you do such a nice job explaining to all of us.
This is really a beautiful project Beate.. I love the way you colored your image.. It takes some time to color all that.. Great job..
Easy Peasy…thanks Beate! What a very useful box and it can be expanded too! I like how you left the cards uncolored…striking! The cover for the box was a gift in itself!!!
Fantastic and gorgoeus! The set is wonderful- the coloring is outstanding!!! TFS
Wow, your coloring is just amazing! Very beautiful card, Beate!
such a jaw dropping beauty, girl! awesome project idea and your coloring is amazing as always! i am really drooping over those beautiful stamps!! =)
Amazingly beautiful, Beate! The top card is fabulous, but I am sure it was hard for you to leave all the white space. It does look beautiful, though. The second is totally more your style and just gorgeous! Your coloring, detailing, and design are fabulous! beautifully done!
Oh this is sooo pretty – love that the cards are uncolored — so striking and the box is absolutely amazing! Absolutely lovely! Thanks for the video on the box as well!
Stunning!! Both the beautiful simplicity of the card design and the gorgeous rich coloring on the box image are a.. WOW!!
What a fabulous gift.
You really make it seem so easy with your presentation but I find this topic to be really something which I think I would never understand. It seems too complicated and very broad for me. I am looking forward for your next post, I will try to get the hang of it!
STUNNING cards Beate!!!! Love them both – with & without color they are gorgeous!
Lovely box but the measurements are not stated correctly.
Beate, beautiful box, but the measurements on your tutorial says the top is 6 7/8 x 1 1/8 . This just doesn’t work. Can you send the box top measurements or post to SCS? Thanks,
Gail
Myefox send the box top measurements or post to SCS? Thanks,
From the tons of comments in your articles, I guess i am not the only real only one possessing all the enjoyment here! Thank you!