
As we enter into the busiest time of the card making season, we want to see how you use beauty and artistry and wrap it up with a bow… with ribbon! You don’t have to create a bow, just show us your favorite way to add elegance to your cards or creations with ribbon. Link up your card for the Bringing Back Beauty challenge here to enter.
If you upload to SCS, please use the keyword BBB04. You have until November 29th to enter! As we unveil our challenge for next month, we’ll share our True Beauties – those card makers who wowed us with this challenge! Winners will be featured on the Flourishes Blog and will receive a True Beauty blog button to display proudly on their blog!
Make sure to check out the blogs of fellow challenge team members:
Cindy Coutts
Kathy Jones
Julie Koerber
Michelle Woerner
Yvonne Hagane
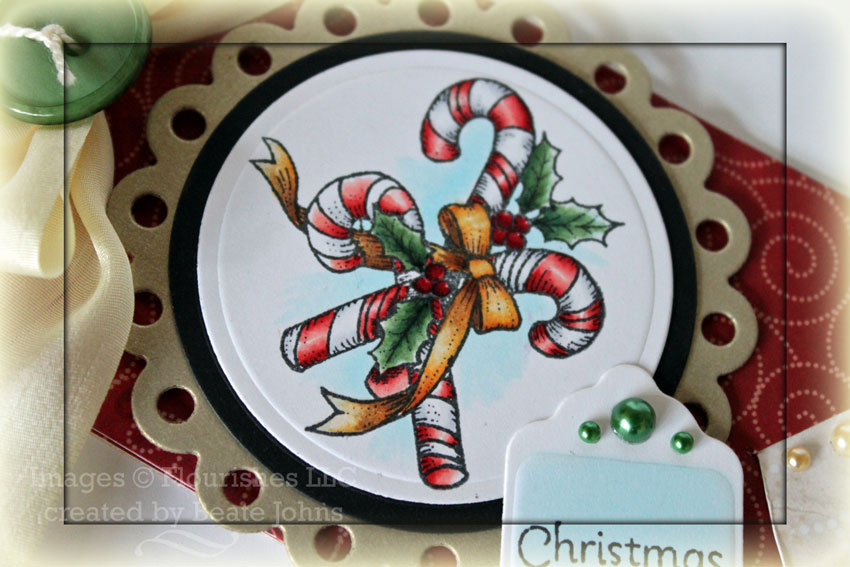
For my sample I used Sweets of the Season. The image was stamped in Tuxedo Black Memento Ink on X-Press It Blending Card. It was colored with Copic Markers (Candy Cane: R20, R24, R29, C01, C00, Berries: R27, R29, R39, Leaves: G24, G28, Bow: Y35, Y38, E97 and darker colors (used by Marianne to add more shading)and cut and embossed with Classic Circle Nestabilities. It was then layered first on a black card stock circle, then a piece of brushed gold card stock, cut and embossed with Eyelet Circle Nestabilities.
A tag was cut out of Neenah Solar White card stock with a Spellbinders Tag die and airbrushed with Copic Marker B01. Green Kaisercraft Pearls were added to the top of the tag.
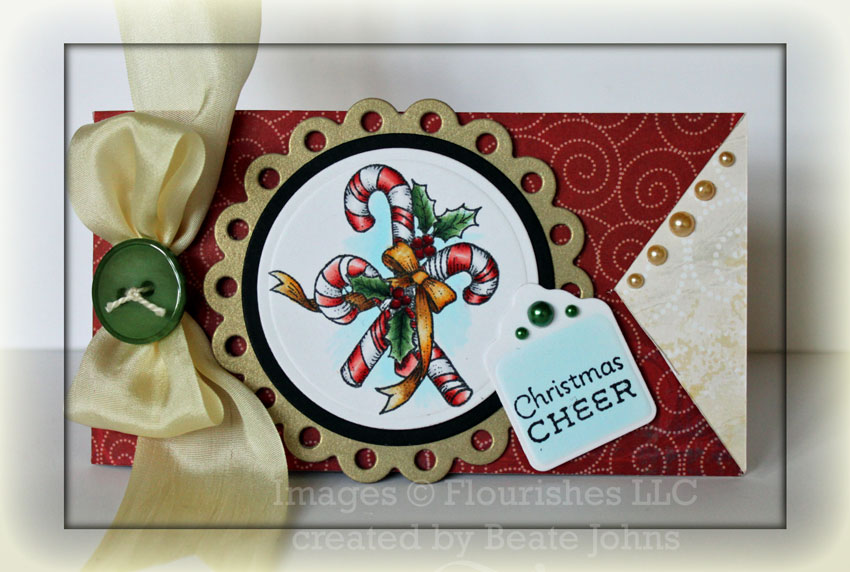
I used Bo Bunny paper to create a Slit Latch Gift Card Holder. It’s today’s Holiday Blitz tutorial on Splitcoaststampers. It was created by Jane Matsumoto. I tied the bow with Cream Silk Ribbon and the help of my Bow-Easy. It was topped with one of the new Stampin’ Up! Buttons. Latte Kaisercraft Pearls on the upper edge of the slit gift card holder finish off my gift card holder.
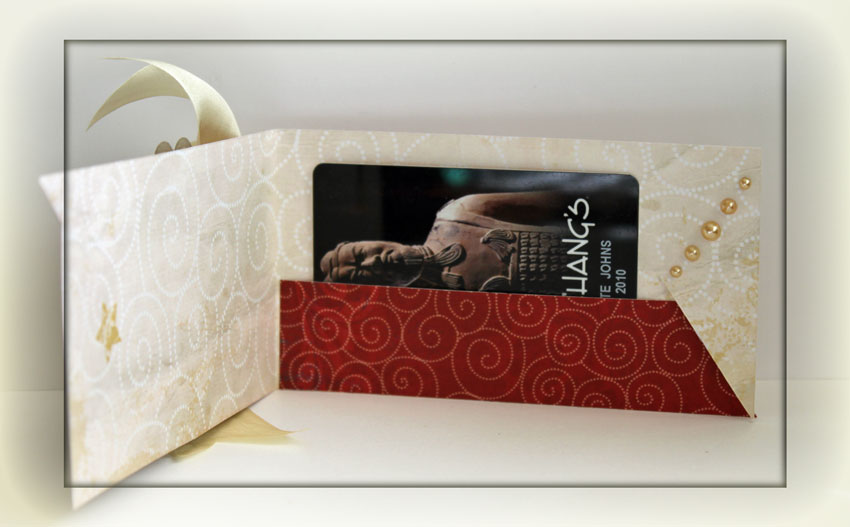
I changed the inside from the tutorial by adding a 1 1/8″ x 5″ strip to the bottom of the inside of the card holder instead of punching slits for the gift card. Just adhere the strip by adding adhesive to the left and bottom edge of the strip before you cut your slit. Once the slit is cut, add adhesive to the diagonal edge of the right side. The strip will hold your gift card and help make your holder a bit sturdier.
Thanks so much for stopping by! I hope you have time to try out this fast and easy gift card holder and participate in the challenge. Using ribbon is definitely not a challenge for me. I LOVE ribbon.
Have a wonderful day! Hugs and smiles
Beate
22 Responses to “Bring Back Beautiful Challenge #4 – Beauty of a Bow”
Sorry, the comment form is closed at this time.


WOW!!!!! Beate this is just GORGEOUS!!! Your colouring is just DIVINE girl and love the layout, not to mention that luscious bow!!!!! 🙂
I always look forward to visiting your blog; there is always something to catch my eye. This morning as I sit here with my first cup of coffee, the thing that i zeroed in on is the way you hi-lited the candy canes. I struggle with the way the light hits an image but you seem to have nailed this! Just lovely and lucious …..it looks like you can just pick one up and eat it!
Looks like they need a good lick!! Great work Beate
My gosh this is gorgeous, Beate!! Your coloring is MAGICAL, and I sure love that beautiful bow:)
Oh Beate, your coloring on this little candy cane is just perfect! It really brings that little sweet treat to life! Of course, your ribbon is perfect too! 😉
Beate, this is simply beautiful. I love your overall design, perfect ribbon treatment, and how you colored the candy cane. Your embellishments are perfect.
Beautiful tag, Beate!
Absolutely gorgeous, Beate!! Such a beautiful job done with the coloring of the image and the colors that you used are fabulous! LOVE the yummy ribbon treatment! Thank you so much for letting me put the tutorial together for the Holiday Blitz. I can’t wait to see the rest of the tutorials! hugs!!
Oh my Beate! LOVE these candy canes. They look good enough to EAT! everything is perfectly done! Hugs,
Beate, Beate, Beate… what can one say?!? I have wanted to be on your SU team for years, and even more so now. What can one do when I’m in Virginia and you are in ??? (forgot where you moved to)? I dropped in June, as I had no customers. You are such an inspiration to me, and I know I would be able to learn from you (even remotely) to WOW others.
Thank you for this fantastic post on your gorgeous bow.
DonnaWB
So beautiful Beate…how you’ve colored those candy canes is just dreamy!
You have some of the most wonderful little gift ideas. This Flourishes set is so pretty and I love how you featured the cute Candy Canes. 🙂
Beate, your gift card holder looks gorgeous!!! Your coloring rocks!!! Hugs ~S~
Was für eine schöne Idee liebe Beate, ein zauberhaftes Werk.
Herzliche Grüße
von Anke
Beautiful gift card holder Beate! Love that rich, elegant bow!
Beate, as usual a wonderful idea. I’ve seen the tutorial yesterday, but I like your idea for the inside a bit better. As you said, it makes it sturdier. By the way, your candy cane stamp is too cute!
Have a lovely day and take care,
Heike
Nobody ties a bow as beautifully as you do, Beate! And the gift card holder is ingenious. Thank you!
Beautiful, Beate! Your colouring of those candy canes is awesome!!
Beate this is wonderful! I love the colors with the red and creams. Beautiful ribbon bow.
Gorgeous and if that is a P.F. Chang’s restaurant gift card, delicious, too! Your candy canes are colored so perfectly! Wonderful bow and gift card design! Totally rockin’ the BBBs!
fabulous project, Beate! wonderful gift card holder idea. so so so pretty! LOVE IT!
Beate, your coloring is exquisite and I love this design for a gift card holder. Beautiful, for certain!