
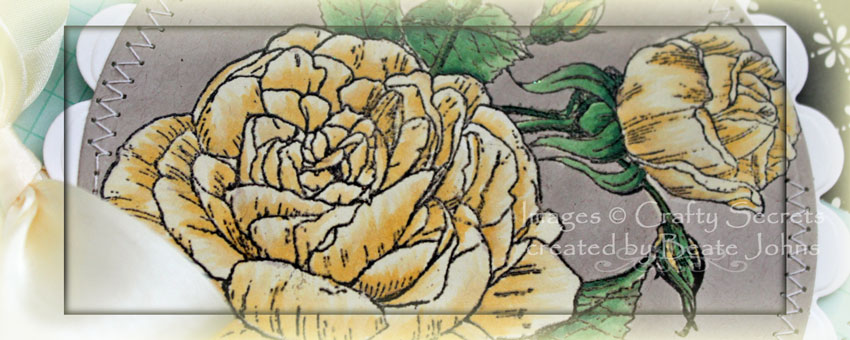
For last Wednesday’s Newsletter I updated the Bleached out Image Tutorial on Splitcoaststampers. For the new sample I used one of my favorite Crafty Secrets stamps, the Roses.
I stamped the image in Black Soot Distress ink on Kraft cardstock and embossed with clear embossing powder. Next I used a brush to apply bleach over the image. The bleached cardstock turned a light yellow.
Once the bleach dried, the image was colored with Copic Markers (Y21, Y32, G21, G24, G28). The cardstock was cut with a Grand Circle Nestabilities die and stitched on a piece of Vanilla cardstock, cut and embossed with a Grand Scallop Circle Nestabilities die.
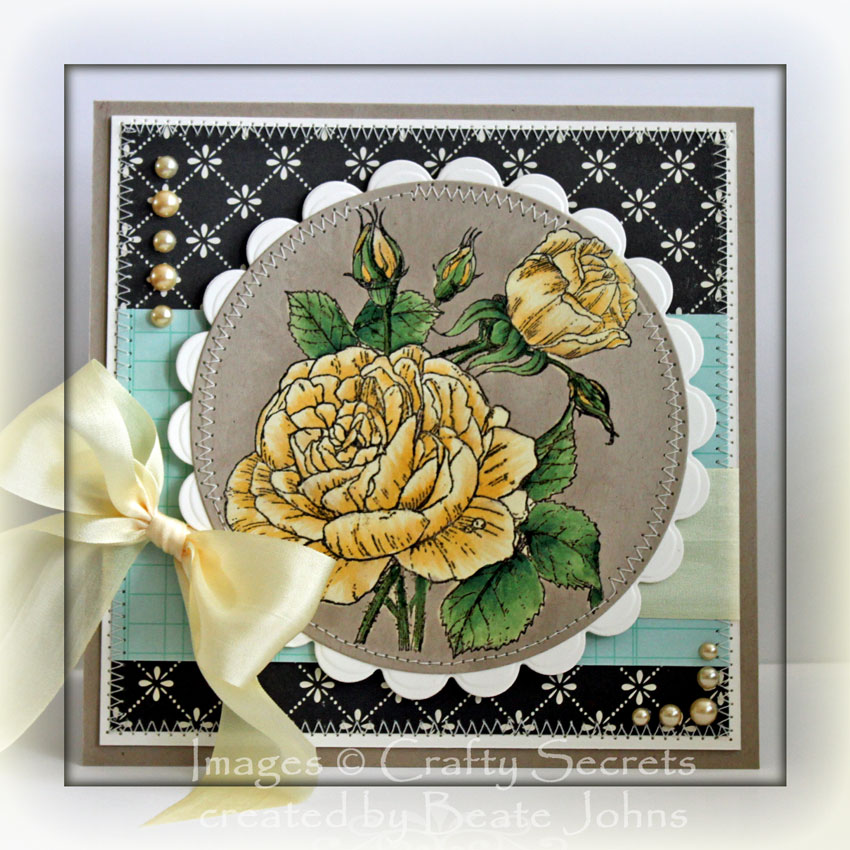
A 3″ x 5 1/4″ piece of Hometown October Afternoon Paper was adhered to a 5 1/4″ square of the same patterned paper (other side). The layer were stitched to a 3/16″ bigger piece of Vanilla cardstock. May Arts Ivory Silk Ribbon was tied around the horizontal paper strip.
The layers were adhered to the card base, a 5 3/4″ x 11 1/2″ piece of Kraft cardstock, folded in half. The image layers were adhered to the card base with dimensionals. Latte Kaisercraft Pearls finish off the card front.
Here is a video for the visual learner:
[youtube]https://www.youtube.com/watch?v=JMViatZt_DA[/youtube]
Thanks so much for stopping by! Have a wonderful day!
Hugs and smiles
P.S.: I am not sure if I get a post ready for tomorrow. The last few days I have been prepping like crazy for my next class at Simply Scrapbooks this Saturday. I am also trying to work ahead for next week! We are going back to Florida for a week during the kids spring break! We can’t wait! To be warm without a space heater or lots of layers of clothing…..To feel the sun warming your skin while lounging on the beach…..HEAVEN!
Beate
33 Responses to “Video tutorial – Bleached out Images”
Sorry, the comment form is closed at this time.


This is GORGEOUS! Can’t wait to try this!!!!
Another very beautiful card, Beate. I love the colours! It’s so kind of you to give your time and make a video tutorial, too. Thank You! xx
LOVE this Beate….It has been so long since I have done any bleaching…i need to try it again!! This is just Gorgeous…..
Hugs!!
I really enjoy your tutorials; I’ve tried this tech., but like your way much better….thanks for the inspiration!
OMG Beate – this is stunning I love the little touch of blue…it makes the card and image POP…thanks for the tutorial.
xo
tina
Holy smokes! This is gorgeous!
wow.. this is stunning Beate. I’m going to have to try this.
thanks for sharing ~ Pam
This is great! I have tried the bleach method but have not added any type of medium afterward. I will definetly try this!! Thanks
This is beautiful, Beate. I love how this looks. I will give it a try for sure. Will the bleach not ruine the Copics?
For some reason when I have been stopping by, your blog posts have not been updating for me. All of a sudden I stop by and here they are. This happened one other time here too. Crazy! 🙂
Hugs~
Absolutely gorgeous! That rose is stunning and so is the whole card. I’m going to have to try this technique. The results are stunning!
wow! this is breathtaking! gorgeous card, girl! love it!
Wow Beate, This is stunning and those roses look so real. Love the shading you achieve. I may just have to try this technique. Thanks for sharing.
hugs
Marion
PS Have a wonderful time in Florida.
Love your video…wonderful technique and your card is stunning!
Hi, Beate,
first: thanks a lot for stopping at my blog!
And thank your for this fantastic tutorial! I learned a lot!! Now I know that I can use my distress inks for clear embossing- great!
But I have a question: Is it possibe to use distress inks too for coloration the image after bleaching? Because I have no copics…
Have a wonderful day!
Hugs
Katrin
Wow this is gorgeous! I hope that you and your family have a wonderful time in Florida.
You are the master for techniques and inspiration, Beate…and this video tutorial is no exception. Thanks for keeping my to-do list filled with ideas!
AMAZING. You are te best Beate. Thank you for sharing. ;0)
Traci Lord
C’est superbe !!!
Gorgeous coloring…and a very cool technique!
Oh my is that ever gorgeous, I would never have thought kraft cardstock would turn yellow, I will have to check out my kraft brands and see how it goes.
Hope you all have a wonderful break, sounds heavenly!
I really think this is a favorite video of yours for me…I am amazed with the Clorox and the awesome way it works…Thank you for sharing, yet another great video…Have a great weekend my friend 🙂
Thanks for always providing inspiration, beautiful artwork, and a pleasing place to spend some time.
I have tried this in the past, but it’s been years. Must go to it again! The card image is perfect.
Beate: This card is so beautiful. I love the bleaching on Kraft paper. The yellow is so lovely. Have a fun trip to FL. I am in Fort Myers, and it is going to be in the mid to high 80’s all next week. A couple days it will be in the 90’s. You will not need coats. LOL
Margie F.
WOW was für eine atemberaubend schöne Rosenkarte.
Und vielen lieben Dank für das geniale Tutorial.
Liebe Grüße
von Anke
beautiful card, gorgeous colours used!
Wow, what a great technique! Your rose looks fabulous on the kraft card stock. Great card, off to try this out!
Your roses look amazing with the bleaching technique, Beate!! Such gorgeous papers and bow too!!
What a gorgeous card!
Absolutely fabulous … I love your tutorials … thanks ever so much
wowww ! i love it
very very beautiful.
hugs
Wow, those yellow roses look really impressive! They are gorgeous 🙂
This is gorgeous!!! Thanks for including a video.