
Remember the card I made for the Inspiration Emporium challenge last month? I created a tutorial for the Diamond fold card for Splitcoast and it’s being published today. My sample is the same as the Fragment card, except for without the fragments. Instead of those, I paper pierced the edges of the square.
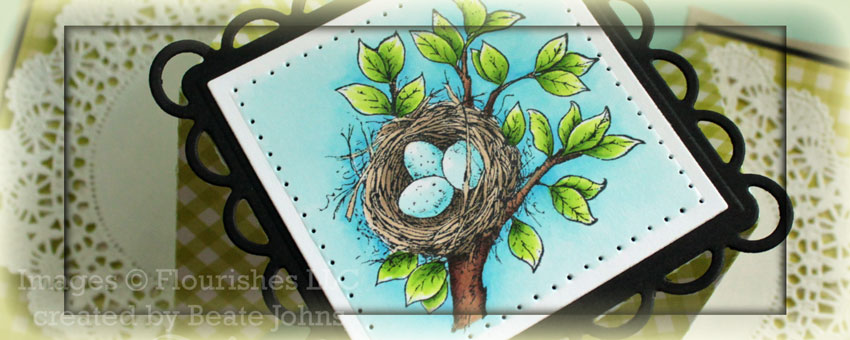
I chose another image from Flourishes Spring is Sprung set. I just LOVE that set. I stamped the bird nest in Tuxedo Black Memento Ink on Neenah Solar White cardstock and colored it with Copic Markers (Nest: E41, E42, E43, E44 Eggs: BG000, BG01, BG02 Leaves: YG01, YG03, YG17 Branch: E23, E25, E27, E29 Sky: B12, B000, B0000).

he image layers were adhered to a Diamond Fold card base created out of a 4″ x 12″ piece of October Afternoon Weathervane paper. I created a tutorial for it, but that won’t be published until the end of May. It’s pretty easy though. Score your strip at 2″ and 10″. Mark the center of the strip on each side and fold the paper down and back up.
The 2″ x 4″ panels were stitched to a 2 1/8″ x 4 1/4″ piece of black cardstock, then adhered to a piece of Kraft cardstock, cut and embossed with a Curved Rectangle Nestabilities dies. A doily was cut and half and a half was adhered on each panel.

A sentiment from the Spring is Sprung was stamped in Tuxedo Black Memento Ink on Solar White cardstock that had been cut and embossed with the retired Five in one Tag die from Spellbinders. The center of the tag was colored with Copic Marker BG000. The tag attached to the card with the White May Arts Organdy Ribbon that was used to tie the card shut.
Here is a video for the visual learner:
[youtube]https://www.youtube.com/watch?v=QzPyoUja4DI[/youtube]
Thanks so much for stopping by! Have a wonderful day.
Hugs and smiles
Beate
17 Responses to “Tutorial on SCS – Diamond Fold Card”
Sorry, the comment form is closed at this time.


Beate! This is GORGEOUS! LOVE this fold and your coloring is, of course, STUNNING!!
How gorgeous!
Awesome fold! Your coloring is phenomenal and your designs are da bomb!
Beate this is wonderful – first of all love the pop of black color and the image is stunning…thanks for the tutorial – going now to try it…
I love this design for a card! It looks complicated, yet it is really quite simple. Thanks for reminding me of this technique!
So pretty Beate! Your coloring always blows me away! sigh…
Was für eine zauberhafte Karte liebe Beate, die Technik ist genial.
Herzliche Grüße
von Anke
This is amazing! I love your coloring…that bird’s nest looks so real! I’m going to enjoy this technique as well…Thanks so much for being here!
I’ve seen this card and tried to make it on my own and failed. Thank you, Beate! Is there a message inside?
Beate: I love this card…everything about it! It’s all the little touches you add that make each card so special. Thanks for the link to the tutorial. I save them all in my favorites!
WOW – that’s a great card – thanks for the video!!!!! I’m always looking for cards that fold out differently.
Just beautiful Beate, the split doily really looks great…and I love how you’ve given color to the sky behind the nest! It’s the perfect vibrant blue to pair with it!
such a sweet image and I love how this card works. I don’t think I’ve ever made a diamond fold card! Thanks for the tutorial!
gorgeousness! beautiful coloring on the image as always and really like how you tucked the doily in it! fabulous work, Beate!
Oh so pretty, love the nest image, and the pretty doily underneath. thank goodness for your videos I don’t think I would have understood the folding without it
This is such a fun interactive card, Beate!! The image is so beautiful and perfectly colored!! I love the addition of the doily as well!! Gorgeous card!!
Absolutely love it, and I will definitely try this. Many thanks for the tutorial xx