
For this post I thought I share a card I created to update an older tutorial on Splitcoaststampers. The Foxy Oxi Technique. I created it back in 2004 when OxiClean was a pretty new product. I was wondering if it would act just like Bleach. Well, it does and it doesn’t. Depending on what ink and paper you use, the results vary.
For my sample I used a shipping tag and Distress inks. Distress inks don’t bleach out all the way, the get darker spots. When I created the tutorial, I used Stampin’ Up! Classic inks and Whisper White cardstock. That combination bleached out into white spots.
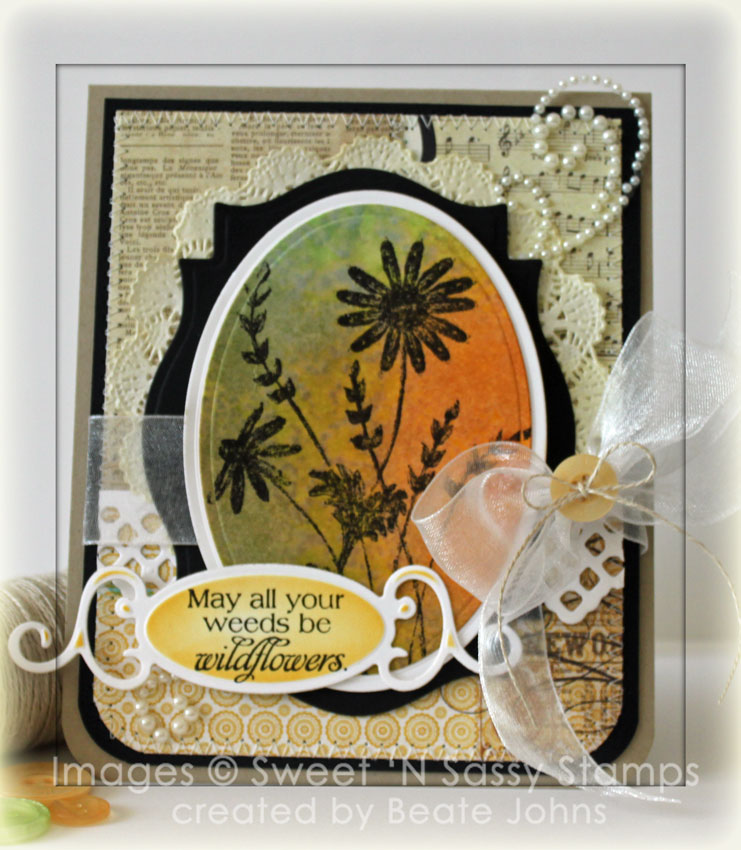
I sponged my shipping tag with Peeled Paint, Broken China and Wild Honey Distress inks before I sprinkled OxiClean over it and sprayed it with water. After the tag dried, I cut it with a Petite Oval Nestabilities die and stamped the main image from the Wildflowers set in Jet Black Archival ink over it.
The oval was first layered on a slightly bigger white oval, then on a piece of black cardstock that had been cut and embossed with a Label 18 Nestabilities die.
The pieces of My Mind’s Eye Lost & Found Sunshine paper were stitched to a 4″ x 5 1/4″ piece of black cardstock. The bottom corners were rounded. A 4″ strip of white cardstock was cut and embossed with a Lacy Doily Accent die. It was adhered over the horizontal patterned paper strip.
A doily was cut apart, sponged with Antique Linen and adhered under the Label 18 layer. White Organdy ribbon was run under the main image and tied around the layers. It was topped with a button that was tied on with Linen thread.
The sentiment is also from the Wildflowers set. It was stamped on a piece of white cardstock that had been cut and embossed with one of the Fancy Tag labels and sponged with Wild Honey Distress ink.
To finish the card off a Pearl swirl was cut apart. The bigger part was adhered to the top right, the smaller one to the lower left of the card front. The layers were adhered to a 4 1/4″ x 11″ piece of Kraft cardstock, folded in half.
Here is a video I created for this technique for the visual learner:
[youtube]https://www.youtube.com/watch?v=H4gFNafQ1hY [/youtube]
Thanks so much for stopping by! Have a wonderful day!
Hugs and smiles
Beate
14 Responses to “Distressed Wildflowers”
Sorry, the comment form is closed at this time.


Beautiful card Beate. Thanks for sharing the tutorial.
Oh my! This is just beautiful, Beate!! Hope you’re doing well!!
very feminine! Pretty!
I love it. I’m gonna try this out this weekend. Better bookmark your tutorial.
Interesting technique, I’ll have to try this one for sure.
Great card and interesting technique! I will have to try this one!
Beate, this card is stunning! The focal, of course is amazing…but all the other little details: The stitching, the bow, the pearls, layered paper doily…such a wonderful combination of beautiful elements that all work together. Absolutely artful! I love your work!!!!
Such a beautiful card! It has a stately feel to it with the pop of color in the middle with the layers of neutrals! Love it!
Cool Technique, love the layering of the dies and doily, great sentiment!
What a neat technique. I love the end result. The papers, doily, and bling blend together perfectly. 🙂
Hugs~
Beautiful! I love revisiting older techniques. I love the Nestability sandwich and the doily in the back. Such a pretty card- beautiful colors!
very neat technique and such a beautiful card! love the warm autumn colors you used. fabulous work as always, Beate! love it!
I love the colors and embellishments on this one. SO gorgeous!
OMG liebe Beate diese Karte ist ein TRAUM, unglaublich schön *seufz*
Herzliche Grüße
von Anke