During the Mini VSN a few of weeks ago, the first challenge was to create a card with an image of a warm clothing along with some felt on your card. I had just shot the video tutorial for the Pocket Card ,and had a finished pocket, that just needed an image to be finished off.
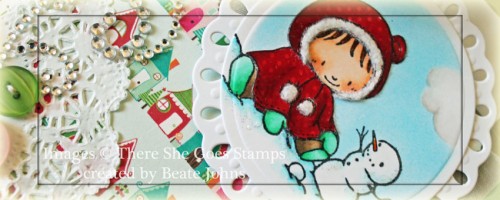
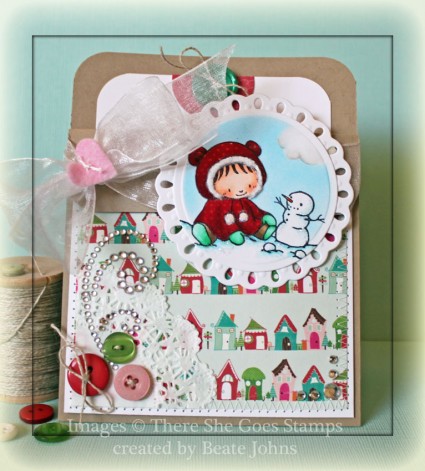
I stamped an image from the super cute There She Goes Clear Stamps Wonderful Winter Wishes set in Tuxedo Black on Neenah Solar White cardstock as well as a patterned piece from Echo Parks Holly Jolly paper pack. The jacket was cut out of the patterned paper and shaded with Copic Markers ( R35, R37, R39). The image on the cardstock was cut and embossed with a Classic Circle Nestabilities die and also colored with Copic Markers (mitten and boots: G000, G00, G02 Skin: E0000, E00, E01, R20 Pants: E40, E41, E42 Snow: BG0000, BG000, B01 Hair: E97, E25 carrot: YR15, YR18). The jacket was adhered to the main image and the background was airbrushed with Copic Marker B02. The cloud that had been masked, was shaded with Copic Markers (W00, W0, W1).
The card base was created out of a 4 1/4″ x 11″ piece of cardstock, scored at 1 1/4″ and 5 1/2″. The four corners were rounded. A 3 3/4″ square of Holly Jolly paper was stitched to a 1/4″ bigger piece of whtie cardstock. A quarter of a paper doily was adhered to the lower left of the the stitched layers and three buttons were tied to it with Linen Thread.
Part of a Finesse Swirl was adhered over the buttons and more Rhinestones were adhered to the lower right corner. The layers were adhered to the card base. Before the flap was taped down, May Arts Organdy Ribbon was tied around it. Pink felt was cut with a small Heart Nestabilities die and stitched to the top of the bow.
The image circle was adhered to a piece of Solar White cardstock, cut and embossed with a Tear Drop Circle Nestabilities die. The layers were adhered to the card base with dimensionals.
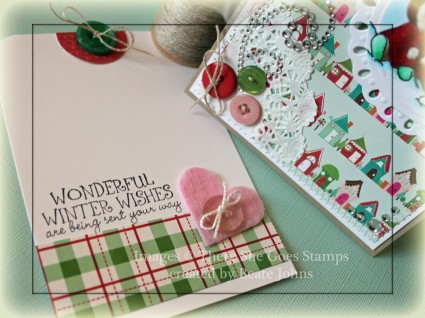
The inside tag is a 3 1/2″ x 5″ piece of Solar White cardstock. The top corners were rounded and a 1 1/8″ wide strip of Holly Jolly paper was adhered to the lower half. A sentiment from the Wonderful Winter Wishes set was stamped above the strip with Tuxedo Black ink. Another pink felt heart was topped with a clear button and stitched to the tag with embroidery thread.
The card works great for this weeks DYSU Challenge, so I will be entering it there. It’s an easy challenge that I could enter all my cards into. Use ribbon. It would be harder for me if the challenge was NOT to use ribbon. LOL
Here is a video for the visual learner:
[youtube]https://www.youtube.com/watch?v=PrH-I8Op-O0[/youtube]
Thanks so much for stopping by! Have a wonderful day!
Hugs and smiles
17 Responses to “Fun in the Snow”
Sorry, the comment form is closed at this time.


So Adorable Beate, I have so many little images , but didn’t know how to use them on a card. Thank you for sharing! ;0)
Hello!
I love your card – what a sweet image! You are always so clever with your layout and accessories! I have not made this style card in a long time but am inspired to make one today!
Wishing you a happy Sunday!
Hugs,
Barbara DIane
Beate, this is such a sweet card. I love the softness of the colors, and your coloring is always so beautiful. The Basic Grey CS is perfect, must find mine and use it! Your layouts are always so much fun! Thanks for sharing – hugs, Pj
This is so pretty. Beautiful image. Thanks for joining us at Do You Stack Up.
-Wenche
Beate…..that image is adorable and that paper 🙂 not to mention all the other cuteness you added the touch of bling and the doily and that sweet heart and the buttons. Soooooooo CUTE!!
I love this cutie patootie set from TSG. She’s just so cute, and she looks so cozy!
Love this one, Beate … the colours, layers, textures … looks like you had fun creating this one!
This is just plain CUTE CUTE CUTE!!!
Great tutorial, Beate. Love this! Such a cute way to give a gift card, or money. Beautiful work!:)
Beate, this is so adorable!
Another adorable card! I looove the felt hearts, they’re so cute & a special little touch. Lovely job!
Simply adorable Beate!!! Love the accents you added!!
absolutely darling, Beate!! i’ll have to check out those stamps NOW! =) off to watch the video.
that is the most darling image, love the little fur around the hat 🙂 I need to get my doily’s out where I can see them, love the touch of it being in the corner like that!
Aww bless – that’s so sweet
kitten – DYSU team
She is such a doll. I love that fun paper. I passed that up at Archiver’s when I was there last time. I might have to pick some up. I like the dots on her jacket. 🙂
Hugs~
I LOVE this…I actually just purchased this set during the Black Friday sales a couple of weeks ago…and I think I’ll give this card fold a try…very cool and looks SO easy….LOVE your tutorials, Beate, they’re the BEST…please keep them coming!
Hugs,
Naomi