
In today’s Weekly Inkling we had the Smackin’ Acetate technique as the technique from the Archive. It was a tutorial I wrote a long time ago and needed an update BAD.
For my sample I used my new Distress Markers (Wild Honey, Shabby Shutter and Tumbled Glass) on Whisper White cardstock. I tried it with Neenah and Glossy cardstock, but Neenah was too soft and Glossy to slick. Whisper White seems to work best.
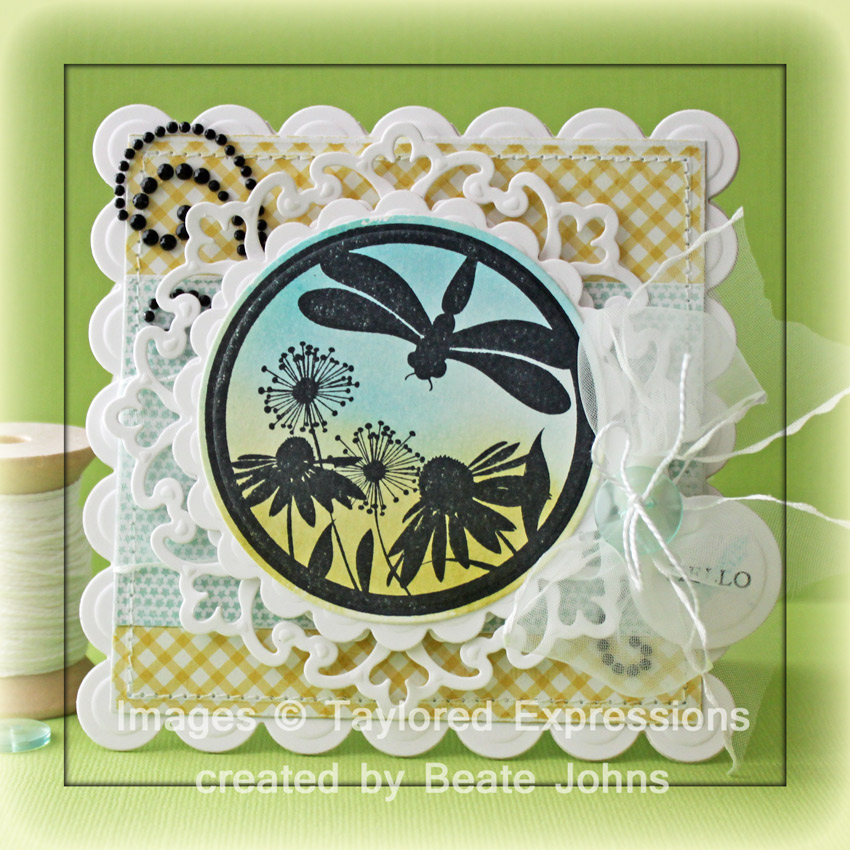
Once the background was dry, an image from Taylored Expressions Embrace Beauty was stamped over it withJet Black Archival ink. The image was cut out with a Standard Circle Nestabilities die. The image was layered first on a piece of Neenah Solar White cardstock cut and embossed with a Scalloped Circle Nestabilities die, then on more Solar White cardstock, cut and embossed with one of the Parisian Motifs die.
A strip of My Mind’s Eye Follow your Heart Be Amazing patterned paper was adhered to a bigger square of the same paper pack. The paper was cut and embossed with one of the Grand Square Nestabilities die. The edges were sanded and stitched.May Arts ribbon was threaded through the bigger layer before the layers were adhered to the patterned paper with dimensionals. The layers were then adhered to the card base, Solar White cardstock, cut and embossed with a Grand Scallop Square Nestabilities die.
A sentiment from Make it Amazing was stamped in Jet Black Archival Ink on a piece of Solar White cardsttock cut and embossed with a Home Sweet Home die pack. It was tied to the bow with embroidery thread and a button. Parts of a black Finesse Rhinestone swirl finish off the card.
Here is a video for the visual learner:
[youtube]https://www.youtube.com/watch?v=7CoGjuqa1nw[/youtube]
Thanks so much for stopping by! Have a wonderful day.
Hugs and smiles
|
|
|
|
|
|
|
|
|
|
|
|
|
|
|
|
Beate
21 Responses to “Video tutorial on SCS – Smackin’ Acetate”
Sorry, the comment form is closed at this time.


Excellent Idea Beate! i’ve not seen this before, but am certainly going to go have a play with this.
This is really pretty and that image really caught my eye. Gorgeous card, Beate! Thanks for sharing 🙂
Thank you for another inspirational tutorial, Beate. I love the stamp you used…just perfect for that silhouette effect. Beautiful embellishing, too x
I like this technique. Like you said it’s an oldie but a goodie.
stamping sue
http://stampingsueinconnecticut.blogspot.com/
Gorgeous card Beate! I just love the colors and the image! Hugs! Mojca
What a great card and an awesome tutorial! TFS
Hugs
So lovely! Your colored background is fantastic…I had to look twice…I thought it was designer paper! LOL
This is so gorgeous, Beate!! This is a coloring technique I might be able to do!! Thank you so much for the tutorial!! I have added Distress Markers to the top of my wish list 🙂
Lisa
A Mermaid’s Crafts
Great tutorial of an easy project. Distress markers are on te top of my list as well.
Great technique. Love the result. 🙂
Hugs~
Quick and easy and it is just beautiful! Thanks!
Gorgeous! I love that background you created! Colours I would pick too! Thanks for the update on that technique! I don’t know if I’ve ever done it before….but I will try!!
Another stunning make Beate!!
I don’t know if I have seen that technique before, love the sihoutte stamping on top of it, very pretty!
I always just shake my head at your amazing talents. Thank you sooo much for all the wonderful ideas you share with us. You have a real talent for teaching, really!
Unglaublich schön *seufz*
LG
Anke
such a cool way to make watercolor background! love love this, Beate! thanks so much for the video!
Beate, this is just GORGEOUS! Love the background colors and that gingham paper!
Yay, easy peasy technique – and beautiful card, as always!
Hi Beate! The card is so Gorgeous!! Love the background, it’s a simple technique, yet the result is so wonderful. Thanks for sharing, and I’ll definitely want to try this. Have a lovely weekend! {hugs}
That really WAS quick and easy! Thanks so much for taking the time to make the video : ) Your card is sooooooo pretty ♥