Today’s tutorial on Splitcoaststampers was written by Trudy Sjolander. She shows how to use dimensional adhesive as an embellishment. You can check it out HERE.
Since Trudy’s tutorial shows off Perfect Pearls, I thought I update our Poppin’ Pearls Tutorial and add it in the newsletter as Tutorials you might have missed. It’s been 6 years since I wrote it the first time around and it needed a makeover. I switched from Pearl-Ex (which need to be sealed) to Perfect Pearls.
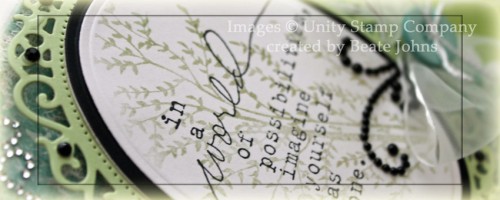
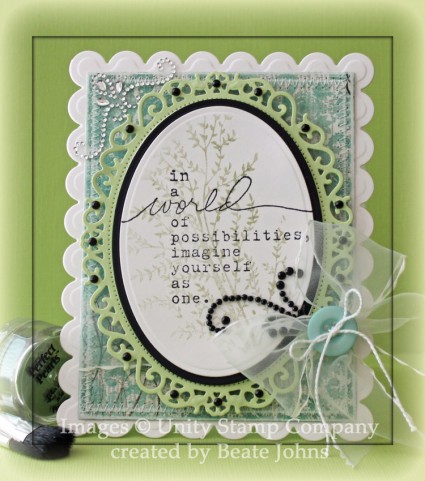
I stamped an image from Unity’s The Artist in You in Perfect Medium ink on Neenah Solar White cardstock, cut and embossed with a Petite Oval Nestabilities die (they are unfortunately retired now) and brushed over it with Forever Green Perfect Pearls.
The oval was layered first on a piece of black cardstock cut and embossed with the next size up Petite Oval Nestabilities die, then on a piece of Celery Neenah cardstock, cut and embossed with the largest Floral Oval Nestabilities die.
A piece of My Mind’s Eye Lost &Found 2 Breeze paper was cut and embossed with a Grand Rectangle Nestabilities die. The edges were sanded, stitched and May Arts ribbon was tied around the horizontal strip. The paper was adhered to the card base, white cardstock, cut and embossed with a Grand Scallop Rectangle die. The ribbon was topped with a button, tied on with embroidery thread. Part of a black Finesse Rhinestone swirl and some Black Baby Bling Rhinestones finish off the card.
Here is a video for the visual learner:
[youtube]https://www.youtube.com/watch?v=kAeMsNFh3q0[/youtube]
Thanks so much for stopping by! Have a wonderful day.
Hugs and smiles
25 Responses to “Video Tutorial – Poppin’ Pearls”
Sorry, the comment form is closed at this time.


Hi Bete!! Beautiful job.
God Bless 🙂
Wow, what a stunning card! The over-stamping looks so gorgeous. Thanks for the tutorial, too!
I do love using Perfect Pearls like this, it’s almost magical.
This is SO gorgeous!
I’ve never done this…..will definitely be trying this….thank you so much for the tutorial…..love it…
Waht a great tutorial and your card is gorgeous as always! What a great sentiment!!! Hugs! Mojca
Beautiful, I love the look of stamping sentiment over lighter images but keep forgetting to do it, love all the gems!
Beautiful card, Beate. That sentiment is very nice – thanks for sharing it. Thanks, too, for bringing back some of the older techniques. I tend to get so wrapped up in learning new ideas that I forget to keep using the old ones. Have a good day, and try to stay cool. It’s supposed to be 108 here today plus heat index. Yikes!
Hello!
Love your tutorial as always and your card is lovely! What is with the words at the bottom of the tutorial? Is this a translation of some kind? The words do not match the voice and it is very distracting! Wishing you a happy day today!
Hugs,
Barbara Diane
Too cool! We will be exploring different techniques in our Tues card making class and this is one I will share. Fun, fun, fun. Love what you do Beate! Please don’t ever stop.
Thank you Beate, for this lovely card. I have over looked my perfect pearls, now I have a good idea to use it again. …thanks again for sharing and lovely tutorial……hugs
Beautiful–the paper, bow, bling, die cuts.
Wow, this is elegant and gorgeous, Beate!! I can’t wait to try this technique…I haven’t used my Perfect Pearls in too long!! Thanks so much for the amazing inspiration 🙂
Lisa
A Mermaid’s Crafts
Gorgeous!….and I think I need to find myself some black rhinestones…how pretty!
Thanks for sharing another beautiful card with us Beate.
Z*A*U*B*E*R*H*A*F*T
Eine traumhaft schöne Karte in entzückenden Farben und mit einem wunderbaren Spruch. Und die Gestaltung ist wieder perfekt wie immer.
Herzliche Grüße
und ein wunderschönes Wochenende
wünscht Dir
Anke
i bet he looks amazing in person! love this technique and your gorgeous card!
I love how soft and faded the Perfect Pearls image is behind the stamped sentiment. Really beautiful! Thanks, Beate!
Very pretty and soothing Beate.
Yet another beautiful creation!! Just gorgeous!!!
Mishy
Absolutely beautiful Love the soft colours and the fabulous details!
This turned out so pretty! I have some Perfect Pearls sitting in a drawer somewhere. I should pull it out and give this a try. Great video too! 🙂
Hugs~
Stunning, I just love the colourway!
Beautiful card Beate! Love all the layered dies and the soft color palette!
A work of BEAUTY Beate!!~