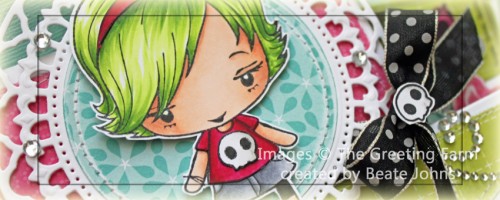
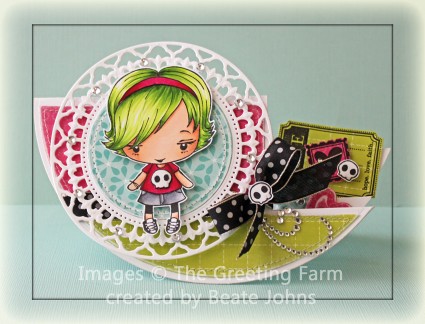
Today’s tutorial on Splitcoaststampers is for a Side Step card variation, the Circular Side Step card. For my sample I stamped the darling Ebony from The Greeting Farm in Tuxedo Black Memento Ink once on Neenah Solar White cardstock, once on pink paper from Echo Parks Summer Days collection. The shirt and head band were colored on the patterned paper, the rest on the white cardstock with Copic Markers (Hair: YG01, YG03, YG17 Skin: E000, E00, E01, E11 Shirt/Headband: RV25, RV29, RV69 Skirt: C3, C5, C7 Skull: W00, W1). The headband and shirt were cut out and adhered to the image stamped on cardstock, which was then cut out as well.
White cardstock was cut and embossed with the largest Splendid Circle die and blue patterned paper from Summer Days with the third largest Standard Circle Nestabilities die. The patterned paper was sanded, then stitched to the Splendid Circle center. Ebony was adhered over the circles with dimensional adhesive.
The card base was cut and embossed out of white cardstock with the second largest Grand Circle Nestabilities die. Patterned paper strips from the Summer Days paper pack were adhered together, cut and embossed with that same circle die. The edges were sanded and then the paper was cut on the embossed edge. For the cuts on the right hand side I placed the paper over the card base and used a stylus to trace the cut lines. Next I cut 1/8″ along that traced line. The edges were stitched before the paper was adhered to the card front. Ribbon was tied around the edge of the first step and tied into a bow. A skull from the shirt was stamped again on white cardstock, cut out and adhered over the bow. The image was adhered over the big part of the card base with dimesional adhesive and part of a Finesse Rhinestone Swirl was adhered under the bow.
The tag and postage image from Tea-rrific clear stamp image were stamped in black ink on Summer Days paper and cut out. They were adhered on top of each other with another skull image and taped the the back step of the card.
In the center two pieces of Summer Days paper were cut and embossed with the bigger heard from the new Folk Art die set. The edges were sanded. The hearts were adhered to the center step and topped with two of the bigger rhinestones from a Sleek Strips Silver Rhinestones pack.
Here is a video for the visual learner:
[youtube]https://www.youtube.com/watch?v=HlALbWF4MRc[/youtube]
Thanks so much for stopping by! Have a wonderful day!
Hugs and smiles
7 Responses to “Tutorial on SCS – Circular Side Step Card”
Sorry, the comment form is closed at this time.


Hello!
What a fun card! I love it! This is the first new shaped card in a long time! I am going to SCS now to print the tutorial to have it for my files! Loved your video – as always! Wishing you a sunshine day!
Hugs,
Barbara Diane
Beate, Wonderful card. I will have to try it. Thanks for sharing it with us.
Patricia
Oooo! Must give this a try, Beate. Just watched your video tutorial and it looks such fun. As always, your card is so pretty, beautifully coloured and embellished x
Beautiful job Beate!!
God Bless 🙂
I was so excited when I saw this on the SCS newsletter this morning…I’ve never seen a circular side step!! This is fabulous, Beate!! And I should be used to your amazing coloring by now but it still blows me away every single time!! Love, love her green hair…it has such depth and dimension!! Stunning as always my friend!! And so inspirational…I can’t wait to try it 🙂
Lisa
A Mermaid’s Crafts
What a fun card. I’ll have to try one like this! Thanks for the video!
such a fun card and love all the details. superb card, Beate! thanks for the video, too! =)