tcpwitchycc287wide.jpg

Today is the release day of The Cat’s Pyjama’s new stamp sets. They are super cute!!! To introduce all the news stamps, there is a blog hop going on! I love blog hops!!! If you came from Susan’s blog, you are right on track. Next in the line up is Ana.

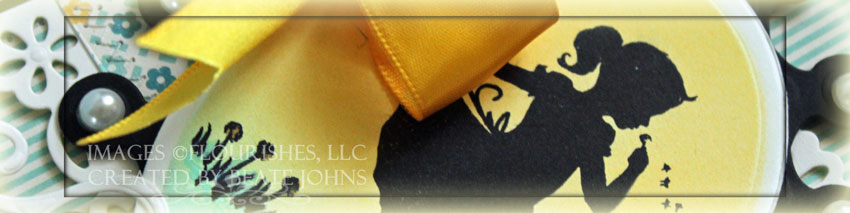
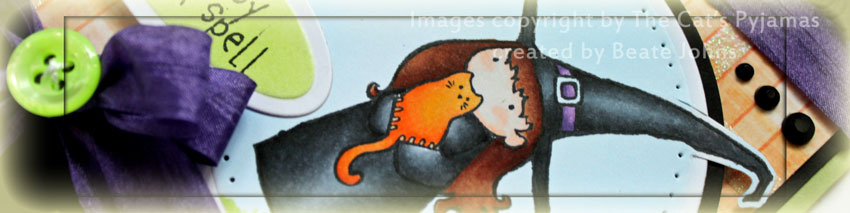
Check out this darling witch from the stamp set Witchy. I used her to create a card for today’s TCP Tuesday challenge as well as for last week’s color challenge. The TCP challenge is to use plaid on your project. I looked high and low in my paper stash. Thank goodness I had one sheet of plaid paper from the My Mind’s Eye Laundry Line. If you participate in the TCP Tuesday challenge you might win $25 in Cat’s Cash. That will come in handy because you might “need” some of these new stamps.

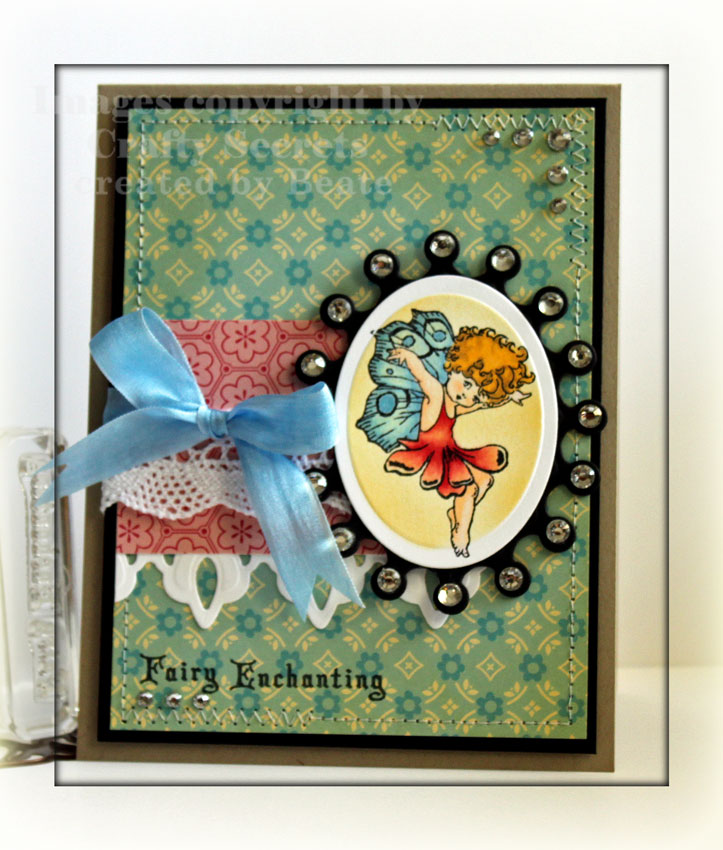
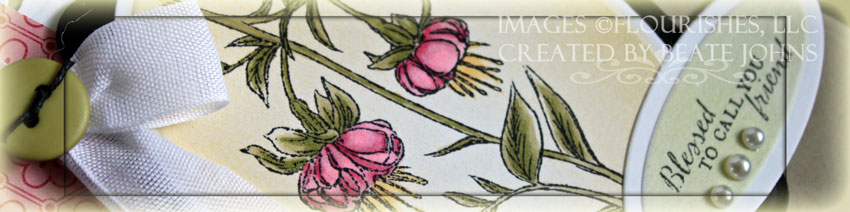
I stamped the witch in Tuxedo Black Memento ink on Xpress-it blending paper and colored her with Copic Markers (hat and cloak: C3, C5, C7, C9, cat: YR21, YR65, YR68, Skin: E0000, E01, Pants and hat trim: V12, V15, V17, hair: E13, E19, E26, grass: YG03, YG05). The image was cut with Classic Circle Nestabilities and layered on a slightly bigger black circles, also cut with Classic Circle Nestabilities. The sky was airbrushed on with Copic Marker B12.

tcpwitchycc287beate.jpg

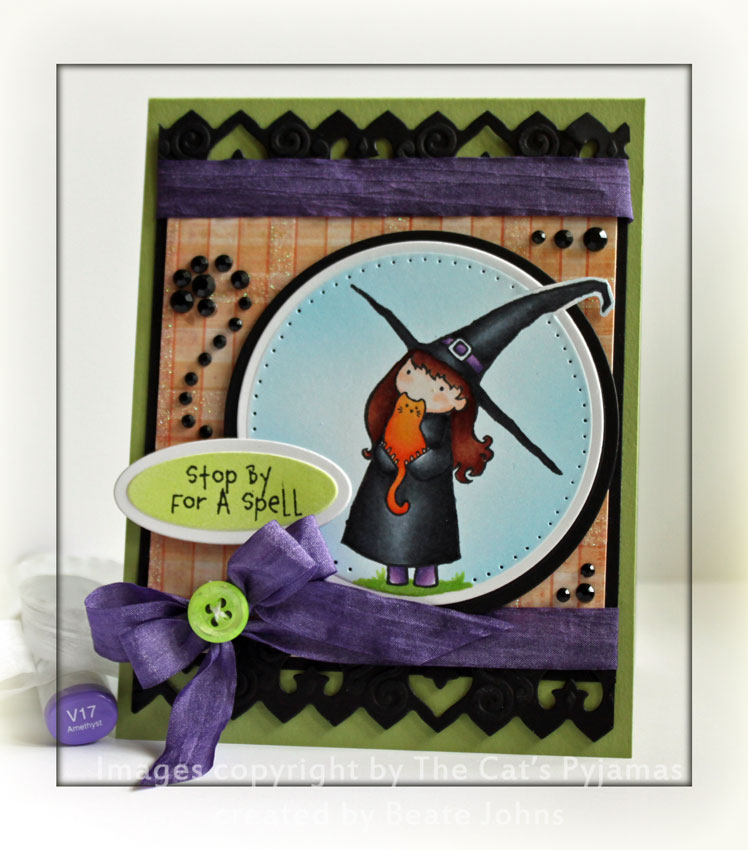
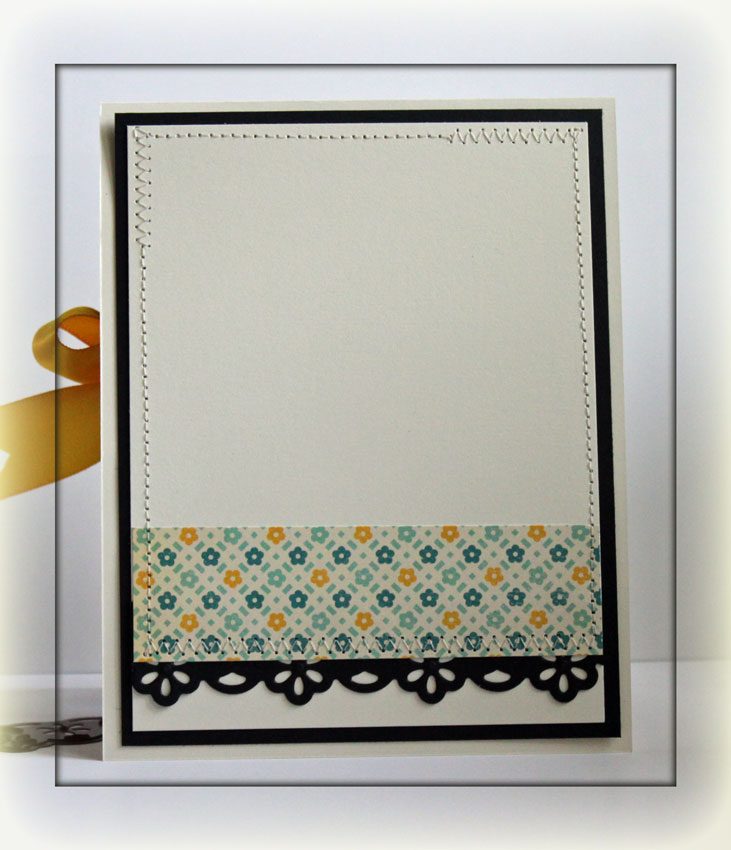
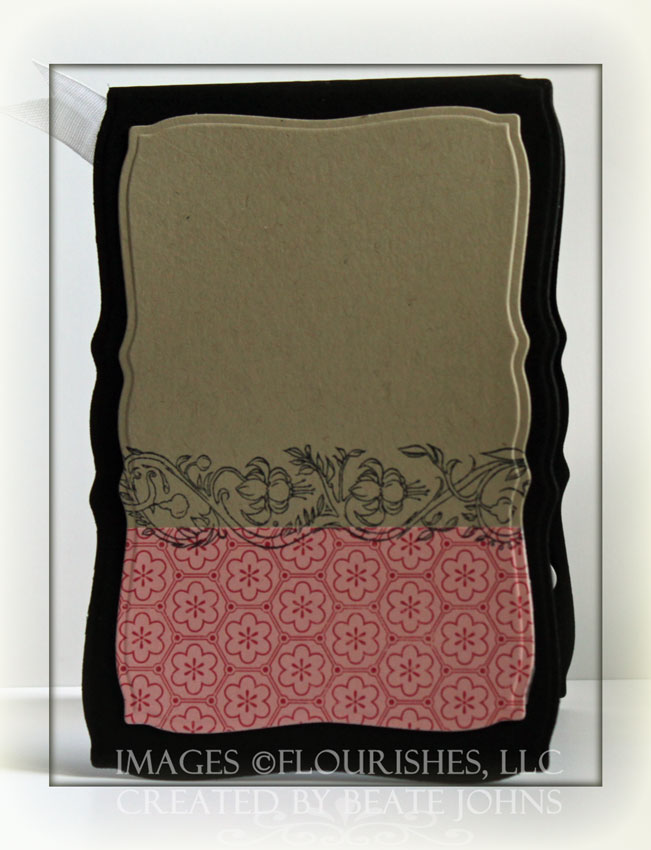
The card base is a 4 1/4″ x 11″ piece of Pear Pizzazz cardstock folded in half. A 3 3/4″ x 4″ piece of My Mind’s Eye Laundry Line patterned paper was adhered to a 1/4″ bigger piece of black cardstock. Two 4″ long strips of black cardstock were cut and embossed with Spades Borderabilities. They were adhered to the top and bottom of the patterned paper.  1/2″ wide may Arts Crinkled Ribbon was colored with V17 Copic Marker and taped over the end of the top of the patterend paper and tied on the lower edges into a double bow. The bow was topped with a green button. Black Kaisercraft Rhinestones finish off the card.

Thanks so much for stopping by! Have a wonderful day!
Hugs and smiles

fllchummingalongccwide.jpg

I created today’s card for the PPA Celebrity Color Challenge. Mary Fish was sweet enough to ask me to participate. Today’s color combination is:

getattachmentaspx.jpg

I decided to use the branch from Flourishes Humming Along stamp set. It was stamped in Tuxedo Black Memento Ink on Neenah Solar White cardstock, cut with the largest of the Classic Circle Nestabilities and colored with Copic Markers (Blossoms: Y21, YR12, Leaves: YG93, YG95, YG97, Background: BG01, BG0000). The image was layered on a piece of Basic Black cardstock cut and embossed with the largest of the Lacey Circle Nestabilities.

fllchummingalongccbeate.jpg

A 4 3/4″ square of Webster’s Pages patterned paper was sanded and stitched to a 1/4″ bigger piece of basic black cardstock. A 2″ x 4 3/4″ strip of basic black cardstock was cut and embossed with Fair Isle Borderabilities. A 1 1/2″ wide strip of Webster’s Pages paper was stitched to the black strip. The strips were adhered to the square and Turquoise Linen ribbon was tied around it and topped with a Basic Grey Button. The layers were attached to a 5 1/4″ x 10 1/2″ piece of Neenah Solar White cardstock folded in half.

The sentiment is also from the Humming Along set. A black label was cut with a Fancy Tag die, a Solar White one with Double Ended Tag die. The white tag was colored with BG01 and BG0000 stamped and layered on the black Fancy Tag. The ends were topped with Mango Kaisercraft Pearls. Pearl Kaisercraft Pearls were airbrushed with Copic Marker BG02 to match my ribbon and adhered to the top right corner to finish off the card front.

The inside of the card is kept so simple, that I didn’t take a picture. I just stamped the branch from the set in Peeled Paint Distress ink into the lower right corner.

Thanks so much for stopping by! I hope you have time to play with these colors! Have a wonderful day!

Hugs and smiles

justritebeautifulblossomswidebj.jpg

Today’s tutorial on  SCS is written by Lee Conroy. She shows us how to use the paper crimper (you know, the dusted over, unused tool you bought years ago) to create a diamond shaped background.

For my sample I stamped an image from JustRite Stampers Beautiful Blossoms set in Tuxedo Black Memento Ink on Classic Cream Neenah Cardstock. The image was cut and embossed with Classic Oval Nestabilities. The edges were sponged with Antique Linen Distress Ink. The images were colored with Copic Markers (Flower: R32, R35, R37, R39, bow: R30, R32, R35 Leaves and Frame: G21, G24, G85 ). The image was then layered on a piece of black cardstock, cut and embossed with the new Beaded Oval Nestabilities.

justritebeautifulblossomscrimpedbj.jpg

The card base is a 4 1/2″ x 11 1/2″ piece of red Core’dination cardstock folded in half. My crimped cardstock piece is a 4″ x 5 1/4″ piece of Kraft cardstock. It was stitched to a 1/4″ bigger piece of Black cardstock. A classic cream strip was cut and embossed with Fair Isle Borderabilities. The edges were sponged with Antique Linen and adhered to the lower half of the layers. May Arts Gingham Ribbon was tied over it and topped with a Basic Grey button.

The sentiment is from the stamp set Christmas Joy. It was stamped on Classic Cream Neenah cardstock. It was cut and embossed with Petite Oval Nestabilities and sponged with Antique Linen Distress ink. The sentiment was layered on a Fancy tag cut out of black cardstock.

Another black cardstock piece was cut with a Lace Pendant piece which was then adhered to the top right of the card. Latte Kaisercraft Pearls were added to that piece as well as on part of the Beaded Oval .

Here is a video for the visual learner:
[youtube]https://www.youtube.com/watch?v=TrgSpTZhIkM[/youtube]

Thanks for stopping by! Have a wonderful day!
Hugs and smiles

fllckidsatplaycrownedovalwi.jpg

Here is another card I made for yesterday’s review. Again I used the Kids at Play set from Flourishes. This time I stamped the girl in Jet Black Archival Ink on Vanilla cardstock. It was cut with Classic Oval Nestabilities and airbrushed with BG32 and Y17 Copic Markers. Besides the Lacey Circles I showed off yesterday, I also received the Crowned Oval Nestabilities. I cut and embossed black cardstock with the biggest dies and adhered my image on top of it. Champagne Kaisercraft Pearls were added to most of the crown parts of my die cut.

fllckidsatplaycrownedoval.jpg

Two 4″ long strips of Very Vanilla cardstock were cut and embossed with Eyelet Borderabilities and stitched to a 2 3/4″ x 4″ piece of Thrift Store October Afternoon Paper. A 4″ x 5 1/4″ piece of Thrift Store paper was stitched to a 1/4″ bigger piece of basic black cardstock. The smaller strip was adhered to the other layers and yellow ribbon was tied around it. Then the layers were adhered to the card base, a 4 1/2″ x 11 1/2″ piece of Very Vanilla cardstock folded in half.

The sentiment is also from Kids on Play set. It was stamped in Jet Black Archival ink on Vanilla cardstock and cut out with Fancy Tag dies. Yellow Kaisercraft Pearls were added to the top right of the card to finish it off.

fllckidsatplaycrownedovalin.jpg

A small black strip cut and embossed with Eyelet Borderabilities was adhered to more Thrift Store paper. The layers were adhered to 4″ x 5 1/4″ piece of Vanilla cardstock and then stitched to a 1/4″ bigger piece of black cardstock.

Thanks for stopping by! Have a great day! Hugs and smiles

jrsautumnblessingsfauxswide.jpg

I created this card as a sample for the video for the Faux Stitching tutorial. It was very hard for me not to use my sewing machine instead.  I used three different stitches on the card to show them off. On the top right corner I used a non continous stitch, zigzag on the upper edge of the horizontal strip, continous straight stitch on the bottom of the strip.

The image is from JustRite Stampers Autumn Blessings. It was stamped in Tuxedo Black Memento Ink on Neenah Solar White cardstock and colored with Copic Markers (Apples: YR31, R22, R27, R39, Berries: R29, R59, Leaves: G82, G94, G85, Basket: E31, E34, E35, E37, E39, Ground: W1, W2). The image was cut with Classic Circle Nestabilities and airbrushed with YR31. It was then layered on a piece of black cardstock, cut and embossed with Lacey Circle Nestabilities.

jrsautumnblessingsfauxstitc.jpg

A  4 1/2″ wide black cardstock strip was cut and embossed with Lotus Borderabilities and adhered under a 1 7/8″ x 4 1/2″ strip of Early Bird Cosmo Cricket Paper. The strips were adhered to a 4 1/2″ square of different paper from the same pack. After adding the faux stitching May Arts gingham ribbon was tied over the horizontal strip. The main image was adhered over the ribbon with dimensionals.

The sentiment is from JustRite stampers set Seeds of Kindness. It was stamped on Neenah Solar White with Tuxedo Black ink and cut with Spellbinders Tag die. The center was airbrushed with YR31. The sentiment was adhered under the bow with dimensionals. Champagne Kaisercraft Pearls finish off the card.

Here is a video for the visual learner:

[youtube]https://www.youtube.com/watch?v=988pTBT3L-Y[/youtube]

Thanks so much for stopping by! Have a wonderful day!
Hugs and smiles

oclpenguinf4a27wide.jpg

I created this card for Friday’s Free for All Challenge on SCS as well as the Friday sketch from OCL. I used an image from the new OCL set Penguins at play. It was stamped with Tuxedo Black Memento Ink on Neenah Solar White cardstock and colored with Copic Markers (Penguin N0, N1, N3, Beak: YR21, YR23, Snow B0000, Scarf: YG21, YG23, YG25, Sign: E31, E33, E35). The image was cut and embossed with Classic Circle Nestabilities, the sky airbrushed with Copic Marker BG01 and then layered on a black piece of cardstock, cut and embossed with the Fair Isle Pendant die.

oclpenguinf4a27.jpg

A 2″ x 5 1/4″ piece of Good Cheer October Afternoon paper was adhered to a 4″ x 5 1/4″ piece from the same collection. The paper was sanded, then stitched to a 1/4″ bigger piece of Basic Black cardstock. White May Arts ribbon was tied around the horizontal strip before the layers were attached a 5 3/4″ x 9 1/2″ (folded in half) piece of Core’dination cardstock.

To dress up the card Basic Grey and My Mind’s Eye buttons were stitched to the pendant die. 1/2″ linen ribbon was colored with R59 to match the paper and button and placed under a button on the top left of the black frame. Stardust Stickles was added over the snow drift and snow balls.

Thanks so much for stopping by! Have a wonderful Sunday!
Hugs and smiles

craftysecretsfairyenchantin.jpg

Check out this darling little fairy. She is from Crafty Secrets Fairyland set. She was stamped in Tuxedo Black Memento Ink on Neenah Solar White cardstock. The image was cut with Classic Oval Nestabilities, colored with Copic Markers (E0000, E00 skin, Y23, Y26 hair, B21, B00, wings, R30, R32, R35 dress) and airbrushed with Copic Marker Y21. The image was layered on a black piece of cardstock cut and embossed with the second largest of the Crowned Oval Nestabilities. Each crown piece was topped with a Rhinestone from Stampin’ Up!.

craftysecretsfenchantingcro.jpg

A 2 3/4″ wide cardstock strip was cut and embossed with Kaleidoscope Borderabilities and adhered under a 1 3/4″ x 2 3/4″ strip of Cherry Hill October Afternoon Paper. The strips were adhered to the left hand side of a 3 3/4″ x 5″ piece of Material Girl Cosmo Cricket Paper, which was stitched to a 1/4″ bigger piece of Basic Black cardstock.  Melissa Frances white lace was taped on the Cherry Hill strip. A hole was punched over the lace and blue silk ribbon was tied around it. The main image was adhered over the end of the lace with dimensionals.

The sentiment is also from Fairyland. It was stamped in Tuxedo Black memento Ink on the lower left hand side. More Stampin’ Up! Rhinestones on the lower left and upper right hand corner finish off the card.

craftysecretsfenchcroinside.jpg

The inside of the card is kept very simple, like all my cards. I just can’t leave them empty anymore. They feel naked if they are not tied into the card front with matching paper.

Thanks for stopping by! Have a wonderful day! Hugs and smiles

fllcgerberdaisiescc284wide.jpg

I created this card for the last Color Challenge on SCS. We were to use Always Artichoke, Pretty in Pink and Cherry Cobbler. I picked the Flourishes Gerber Daisies again so I could use them for a not so clean and simple card. 🙂

I stamped the Daisies in Tuxedo Black Memento Ink on Neenah Solar White cardstock and colored them with Copic Markers (R20, R21, R29 and E09 Flower heads, BG93, BG96 leaves and BG0000 for the background). It was cut with Petite Oval Nestabilities, layered first on a black oval cutout, then a white scallop oval.

fllcgerberdaisiescc284mmsc6.jpg

The card base is a 4 1/2″ x 11 1/2″ piece of Basic Black cardstock folded in half. A 1 3/8″ x 5 1/4″ strip of Boxer Basic Grey paper was adhered to a 4″ x 5 1/4″ piece of Boxer paper, after a black cardstock strip had been cut and embossed with Eyelet Borderabilities and layered under the paper strip. Pink Silk Ribbon as well as white Melissa Frances lace was taped over the horizontal strip and tied on top with a Basic Grey button and white embroidery floss.

To the right top and botton of the right hand side two small black eyelet die cuts from the pendant pack were adhered and topped with Snow Kaisercraft Pearls.

The sentiment is from the same set. It was stamped on Neenah Solar White paper, cut with Petite Oval Nestabilities. It was colored with R20 and R21 and layered on a black piece of cardstock cut and embossed with Fancy Tag dies. A few more pearls were added to finish off the card front.

fllcgerberdaisiescc284insid.jpg

The inside of the card is simple. A black strip of cardstock was cut and embossed with Eyelet Borderabilities. It was taped under a 1 3/8″ x 4 1/4″ strip of Boxer paper. the strip was adhered to a 4 1/4″ x 5 1/2″ piece of Whisper White cardstock. The butterfly from the Gerber Daisies was stamped on the top left corner and colored with the red markers used for the Daisies. Another black flower die cut was adhered to the lower right hand corner and topped with a pearl.

Thanks so much for stopping by! Have a wonderful day! Hugs and smiles

fllcfuchsiafttc80wide.jpg

I couldn’t wait to play with my new set Fucshia in Bloom. I thought it was perfect for the Flourishes Timeless Tuesday challenge. This time it was a color challenge: Kraft, Black, hot pink and light yellow. I stamped the image in Tuxedo Black Memento Ink on Neenah Solar White cardstock and colored it with Copic Markers (RV10, RV11, RV14 and YR31 Flower heads, YG91, YG93 leaves, picked those colors to keep close to the Kraft color). The image was cut with Petite Oval Nestabilities and airbrushedwith Copic Marker YR31.

fllcfuchsiafttc80.jpg

The card base was cut out of black cardstock with Curved Rectangle Nestabilities. Next is a piece of Kraft cardstock cut  and embossed with the next size smaller die. A thin strip of Cherry Hill October Afternoon Paperwas cut with the same die and layered on the left side of the Kraft die cut, after a white piece of cardstock cut and embossed with Kaleidoscope Borderabilities was layered underneath the patterned paper. White linen ribbon was tied around it, topped with a Basic Grey button that was tied on with black waxed Linen.

The main image was adhered on a piece of black cardstock cut with Label 10 Nestabilities. The layers were attached to the card front with dimensionals. The sentiment is from the same set, stamped with Tuxedo black Memento Ink on Neenah Solar White cardstock and cut with Petite Oval Nestabilities. The oval was airbrushed with YG93. Pearl Kaisercraft Pearls finished off the card front.

fllcfuchsiafttc80inside.jpg

The inside of the card was kept pretty simple. Just another Kraft piece of cardstock cut with Curved Rectangle Nestabilities and layered with a strip of Cherry Hill cardstock. The border stamp from the Fucshia set was stamped over both layers with Tuxedo Black Memento Ink.

Thanks so much for stopping by! Have a wonderful day. Hugs and smiles

Yesterday I made one card for two challenges. The Mojo Monday sketch challenge and the Technique Lover Challenge on Splitcoast. For the technique lover challenge we were to use ribbon for something other then a bow or a tie.

vervewishingyouflowertlc286.jpg

The card base is a 4 1/4″ x 10 3/4″ piece of Chocolate Chip cardstock folded in half. One edge of a 4″ x 5 1/4″ piece of Gina K. Pure Luxury Ivory cardstock was cut and embossed with Eyelet Borderabilities before a 3 3/4″ x 5″ piece of Webster’s Pages was stitched on top of it.

The sentiment is from Verve’s Wishing You stamp set and was stamped in Rich Cocoa Memento Ink on Ivory cardstock. It was cut with Petite Oval Nestabilities and sponged with Antique Linen Distress ink. A dotted border was added with a brown Stampin’ Up! Journaling marker before it was adhered to a Not Quite Navy Cardstock piece that had been cut with Label 10 Nestabilities. I stamped the flower from Because of You on the lower left side of the oval with Antique Linen ink. Over the stamped flower I layered a ribbon flower I had rolled out of Burgundy Silk Ribbon and adhered over a green silk ribbon bow.

Stampin’ Up! lace was adhered on the upper edge of a scalloped rectangle cut out of Chocolate Chip cardstock with Classic Rectangle Nestabilities. The sentiment layers were adhered over the scallop rectangle with dimentionals. Lush Kaisercraft Pearls on top of the Label 10 cutout finish off the card front.

vervewishingyouflowerinside.jpg

For the inside of the card I cut another 4″ x 5 1/4″ piece of cardstock with Eyelet Borderabilities and stitched a small strip of Webster’s Pages over the cut border (leftover from the piece for the front).

 Talking about a great day……Sunday at Dick Blick was great. I had a lot of fun talking about and playing with Copics. The best part though was that I got to meet sweet Charmaine. Charmaine drove all the way from Pittsburgh so we could finally meet. We had a great time first at Dick Blick, then at P.F. Changs.

beate-me-isabelle4-resize.jpg

Charmaine is just as sweet in person as she is on her blog. And her baby girl Isabelle was just the cutest thing. Check out the blue eyes on both of beauties. I can’t wait to hang out with her some more at the Copic Certification in Pittsburgh on September 6th. That will be so much fun!

Thanks so much for stopping by! Have a wonderful day!
Hugs and smiles

© 2012 fresh & fun Suffusion theme by Sayontan Sinha