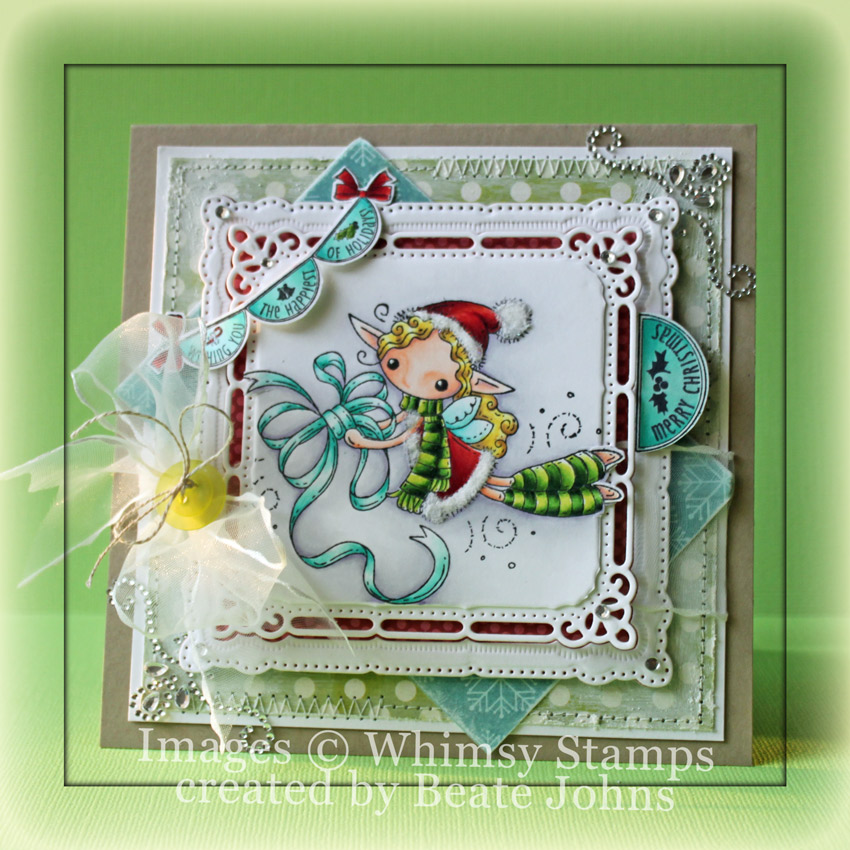
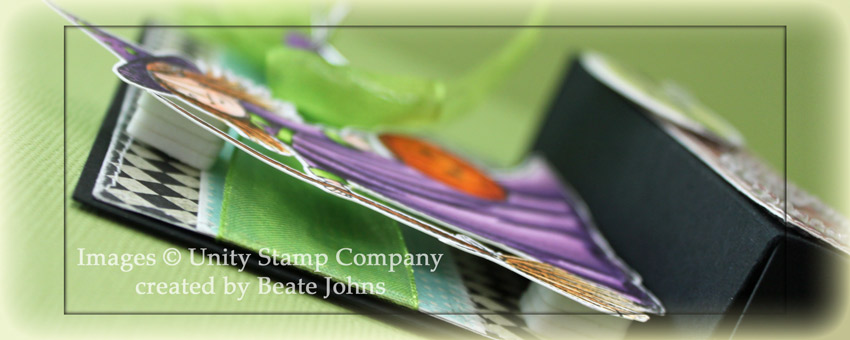
My card today is a multi-tasking card. It is a sample in this week’s tutorial for the Twisted Circular Easel card, a fun variation of the Easel card tutorial that was already in our resource section. It is also a sample for the new Spectrum Noir Marker review on SCS and a sample for Lydia’s HYCCT challenge, which was to create a card that showcases your style.

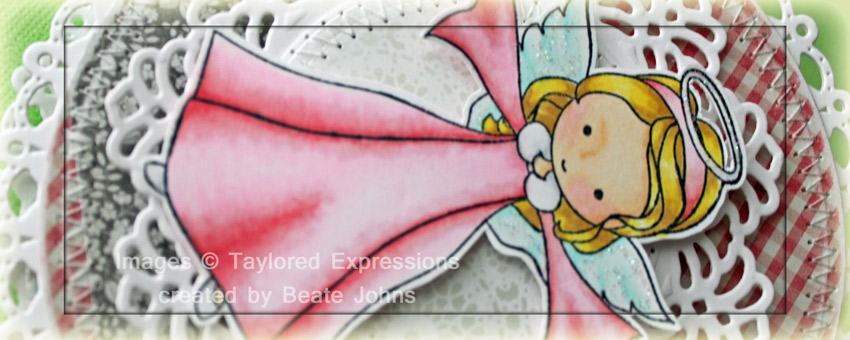
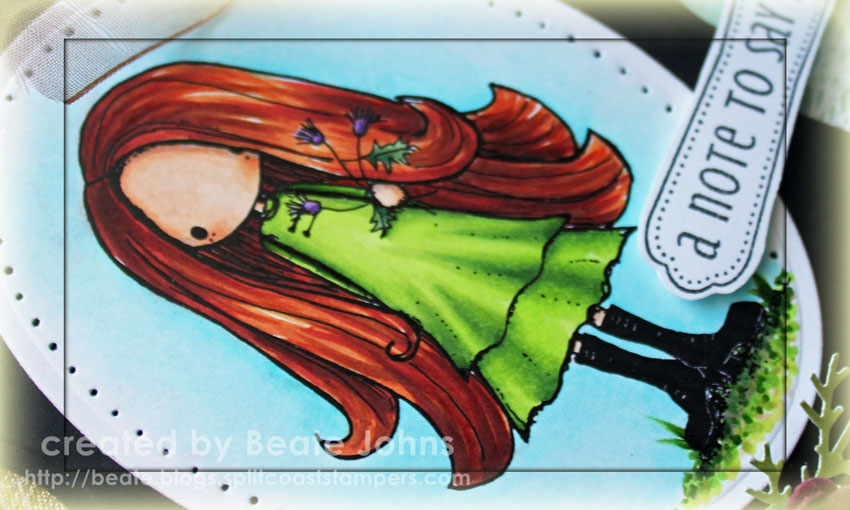
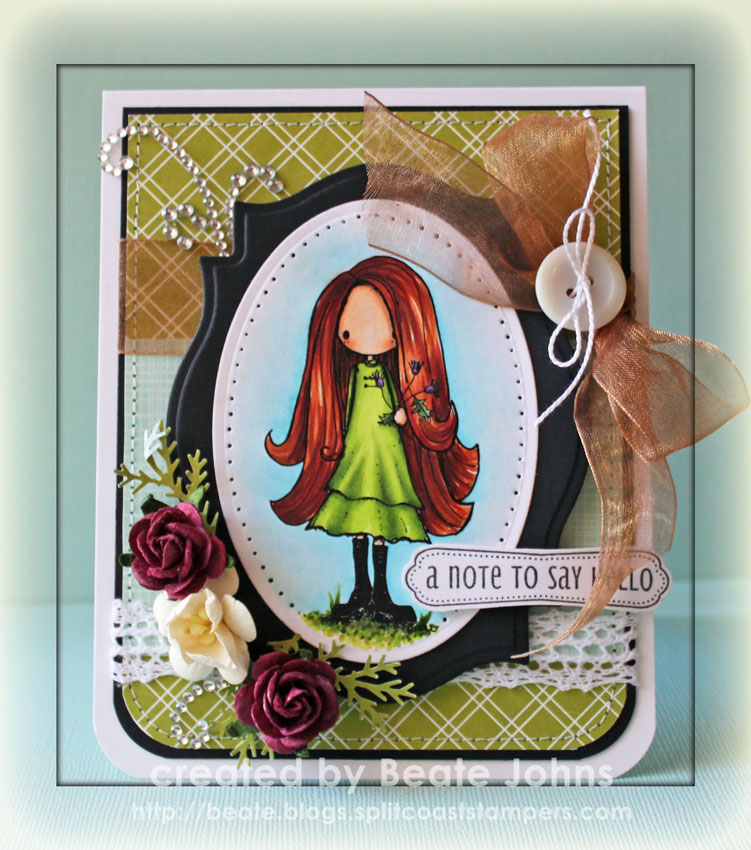
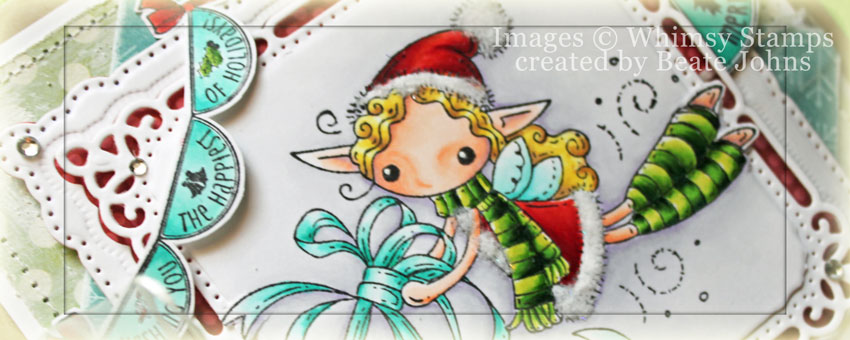
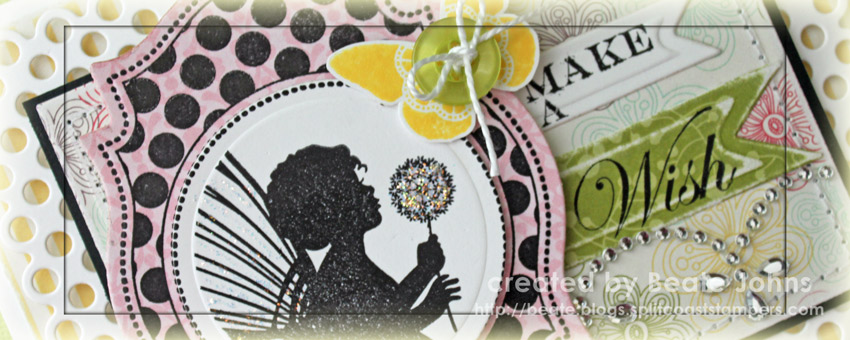
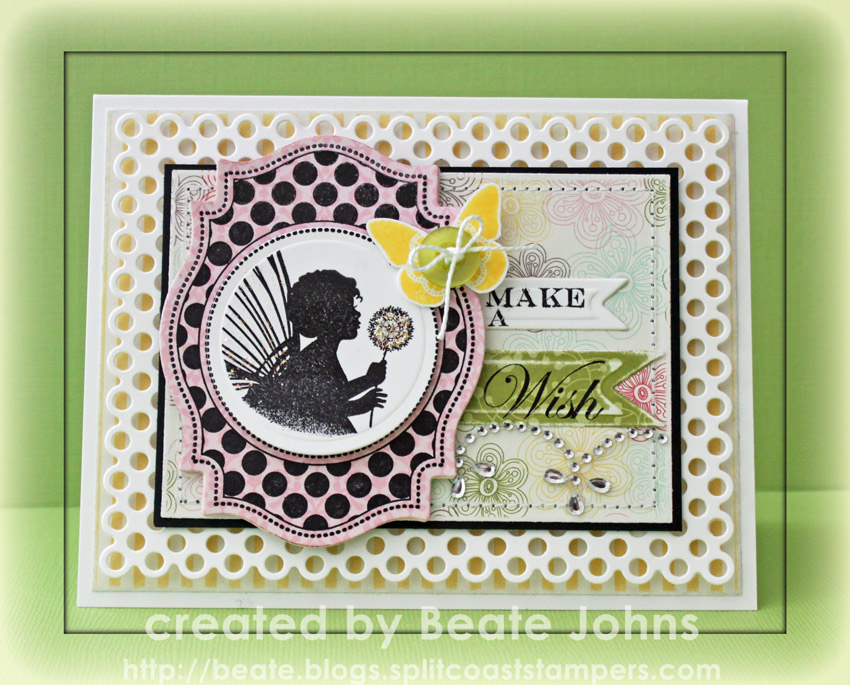
I started by stamping Taylored Expressions Moka Angel image Tuxedo Black Memento Ink on Neenah Solar White cardstock. It was colored with Spectrum Markers (Dress: PP1, PP3, PP5 Skin: FS2, FS3, FS 6 (cheeks), TN2 Wings: BT1, BG2) and cut out.  A piece of white cardstock was cut and embossed with a Vintage Lace Motif die. A piece of My Mind’s Eye Be Happy paper was cut and embossed with a Standard Circle Nestabilities die. The edges were sanded before the circle was stitched to the Vintage Lace circle.  The angel was adhered over the circles with foam adhesive squares. Stardust Stickles was added over the wings and the halo.

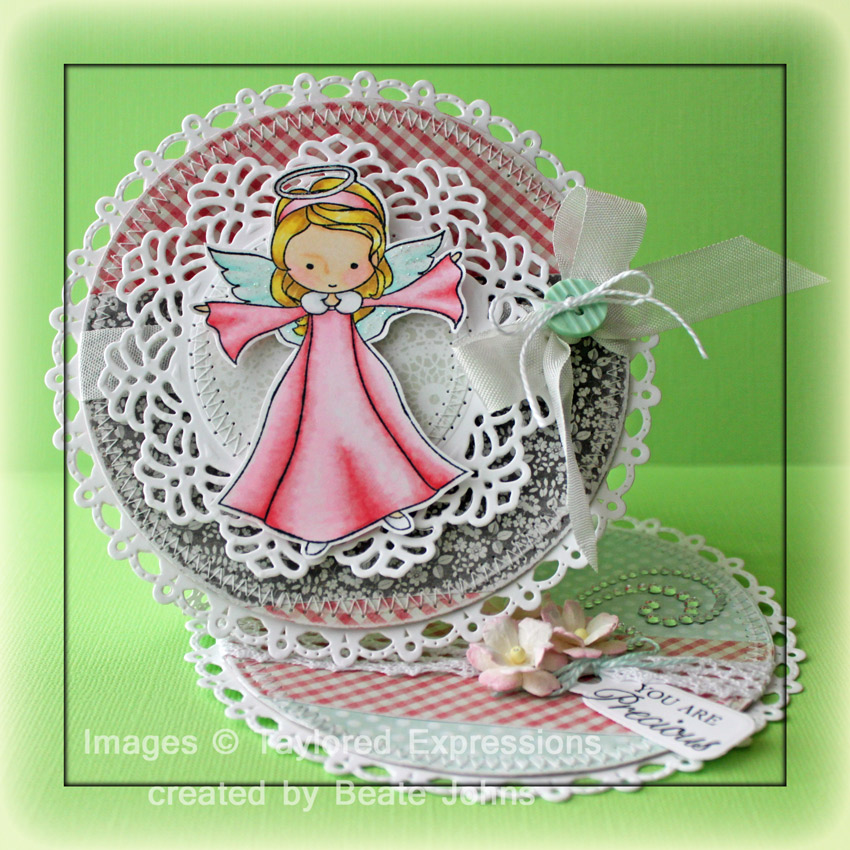
My Mind’s Eye Honey patterned paper was cut and embossed with the smallest Grand Circle Nestabilities die. The edges were sanded and stitched. Seam binding was tied around the layer. The bow was topped with a button, tied on with embroidery thread and the layers were adhered to a piece of white cardstock, cut and embossed with the smallest of the Grand Decorative Circle dies.  The image circles were adhered to the card front center with foam adhesive squares.

The inside of the card was also decorated with Honey patterned paper that had been cut and embossed with a Grand Circle Nestabilities die. White Crochet Ribbon was adhered around the horizontal strip before the layers were stitched.  White cardstock was cut and embossed with a tag die from the new Back to the Basic tag dies. A sentiment from Moka Angel was stitched on it with Jet Black Archival ink. Flowers and part of a Finesse Rhinestone Swirl finish off the card.

Here is a video for the visual learner:

[youtube]https://www.youtube.com/watch?v=1RoUVh0l8yM[/youtube]

Thanks so much for stopping by! Have a great day!
Hugs and smiles

I created this card on Wednesday for the Sketch Challenge on SCS. It’s another CAS card. I seem to be on a CAS kick since the last VSN.  For my card I started by stamping a sentiment from Technique Tuesday’s Thanks for Everything in Jet Black Archival ink on Kraft cardstock and cut it out by hand. The flower from the same set was stamped in Tuxedo Black Memento ink on Neenah Solar White cardstock and colored with Spectrum Markers (BT2, BT4, BT5, BT7, CT2, CT4, GB5, OR1). It was cut out as well and adhered to the left hand side of the sentiment panel.

The card base is a 4 1/4″ x 11″ piece of Kraft cardstock folded in half. The bottom corners were rounded. The edges of a 1 3/4″ x 5 1/2″ strip of Echo Park’s Everyday Eclectic Paper were sanded and top and bottom edge stitched. Another piece of paper from the same Echo Park paper was cut and embossed with the second largest Romantic Rectangle die die and the edges were sanded.

The rectangle was adhered first to the center of the card. Next the stitched strip was adhered partly over the rectangle to the right. White Crochet Ribbon was adhered over the left edge of the strip. The image and flower layers were adhered to the lower right with foam adhesive squares. Part of a Finesse Rhinestone swirl over the flower finishes off the card.


Thanks so much for stopping by! Have a wonderful Sunday.
Hugs and smiles

Another VSN challenge last weekend was to create a card that shows off something physical on your card. I decided to use a sentiment that talks about Dance . I used die cuts that were in my little box of die cuts I cut and then didn’t use, so the card came together pretty quickly.

The sentiment is from Verve’s Beautiful You. It was stamped in Jet Black Archival Ink on white cardstock, cut and embossed with the second largest Floral Oval Nestabilities die.

White cardstock cut and embossed with a Lace Doily Accents die was adhered underneath a 2″ x 3 1/2″ piece of Head over Heels paper . The strip was adhered to  3 1/2″ x 5 1/4″ piece of Handmade Lilybeedesigns paper . The edges were sanded and stitched before gingham ribbon was tied around the top edge of the horizontal strip. the paper was then adhered to the card base, a 3 1/2″ x 11″ piece of Neenah Solar White cardstoc, folded in half.

The sentiment oval was adhered to the center of the card with dimensional foam adhesive. Rhinestones and a Linen fabric flower, created with Bitty Blossoms dies, finish off the card. And yes, that flower was made already as well. I am sure you know how that goes…lol

Thanks so much for stopping by! Have a wonderful day. TGIF
Hugs and smiles

Here is another card that I created quite a while ago and didn’t make it for publication. It’s a darling digital image from Tiddly Inks called Always the Flower Girl. The image was printed with a Laserjet Printer on a piece of Neenah Solar White cardstock, cut and embossed with a Petite Oval Nestabilities die and colored with Copic Markers (Dress: YG01, YG03, YG17   Skin: E50, E51, E53   Hair: E97, E99, E09, E18   Thistles: V12, V17, Lavendar Spica Pen, G21, G26, G28   Ground: YG21, YG23, YG17, E30, E31, W3, W5    Sky: B0000, B000, B00). The image was adhered to a piece of black cardstock that had been cut and embossed with a Label 18 Nestabilities die and the edges of the oval were paper pierced.

A 2 1/4″ x 3 15/16″  piece of Echo Park Walk in the Park patterned paper was adhered over a 3 15/16″ x 5″ piece of the same paper pack. The bottom corners were rounded before the paper was stitched to a 3/16″ bigger piece of black cardstock.  White Crochet Lace was adhered underneath the paper strip and gold organdy Ribbon was tied above it before the layers were adhered to the card base, a 4 3/8″ x 11″ piece of Solar White cardstock folded in half.

The image layers were adhered to the card base with dimensionals. Wild Orchid Crafts Flowers were added to the lower left corner of the image. A sentiment from Friendship Notables 2 was stamped in Tuxedo Black Memento Ink, cut out and adhered to the lower right corner. A button was tied to the ribbon bow with embroidery floss and parts of a Finesse Rhinestone Swirl were added to the upper left corner and underneath the flowers.

Thanks so much for stopping by! Have a wonderful day.
Hugs and smiles


The coming week is all about Halloween projects on the Spellbinders blog. So for my video post today I thought I share how to make this little treat bag. I hope you have time to check it out and tell me what you think. I also posted a couple of pictures of Rebecca there.

Thanks so much for stopping by!
Have a wonderful weekend! Hugs and smiles

Hello and welcome to Day 2 of our September Rubber & Die Release Showcase!

On Wednesday (19 September) Whimsy Stamps released this month’s new rubber designs, Shapeology dies, Whimsy Designer Paper packs and Shape EZ templates. From then until 25 September the Whimsy Stamps DT and Special Guests are showcasing these fabulous new goodies with a daily mini blog hop and I am part of today’s hop!

Each mini blog hop has a new release prize hidden somewhere along the way and you have 24hrs to enter each prize draw.

To be entered into today’s mini blog hop prize draw, be sure to leave a comment on ALL of the DT’s posts listed below by 12.00PM EST tomorrow. All winners will be announced on the Whimsy blog on 26 September.

For my sample today I used the darling new Wee Image called Holly. I stamped it in  Tuxedo Black Memento Ink on Neenah Solar White cardstock . It was colored with  Copic Markers (Skin: E000, E00, E01, BV00 Hair: Y11, YR21, E43 Scarf/Stockings G40, G43, G46 Shirt/socks/berries: YR15, R05, R08, R27 Pants/socks: E41, E42, E43, E44   Leaves: G21, G24, G28   Branch: E23, E27, E29, E97    Wings: Bg10, BG11   Bells: Y35, Y38, E97    Snow: B000, B000    Ear muffs: W0, W1    Background: C0, C1, BV00) and it was cut and embossed with the largest of the Classic Square SM dies. The square was adhered to kraft cardstock, cut and embossed with the largest Label Twenty-Six die.

Vintage Christmas Paper was cut and embossed with the second smallest Grand Square Nestabilities die. The edges were sanded and stitched before it was adhered to white cardstock, cut and embossed with a Grand Scallop Square Nestabilities die. A 2 1/2″ x 4 5/8″ piece of Vintage Christmas paper was sanded and adhered diagonally over the card front. A paper doily was adhered to the lower left corner and the image layers were adhered to the center of the layers with foam adhesive squares.  Glitter was glued over the snow with Glossy Accents, and sparkle was added to the wings with  Frost Smooch Glitz.

Snowflakes were cut and embossed out of white cardstock, stacked with foam adhesive squares and topped with Vintage Glass Glitter Shards. They were added to the edges of the image. Green seam binding was tied into a double bow and topped with a button to be placed to the lower right side of the image.

A sentiment from the new Holiday Notables 2 was stamped in Tuxedo Black on white cardstock. It was cut out and adhered to the lower right of the card front. A piece of Fancy That! Border Bling on the top left finished off the card front. It was then adhered to the card base, white cardstock, folded in half and cut and embossed with the same Grand Scallop Square Nestabilities die.

To take a peek at today’s fabulous new release creations, please click on the links below…


Remember that the entire new release is available to buy right now from the Whimsy Stamps store along with all your Whimsy favorites.

Thanks for stopping by and don’t forget to pop back to the Whimsy blog tomorrow for more new release creations! Have a wonderful day!
Hugs and smiles

Welcome to the Whimsy Stamps September 2012 rubber stamp and die RELEASE (Holiday Collection Part 1)!

Today, Whimsy Stamps is releasing 22 wonderful new rubber stamps & stamp sets, 5 fabulous new Shapeology dies, 2 gorgeous new Shape EZ templates and 2 stunning *BRAND NEW* 6×6 paper packs. These new goodies are available to buy right now from the Whimsy Stamps store along with all your Whimsy favorites.

From today until 25 September the Whimsy DT and Special Guests will be showcasing these new products with a daily mini blog hop. Each mini blog hop has a new release prize hidden somewhere along the way and you have 24hrs to enter each prize draw by leaving a comment on every blog listed for that day.

At the end of release week (Wednesday 26 September) we will post a Release Round-Up on the Whimsy blog. This will include a selection of DT work from the new release week together with a complete list of winners from the daily mini blog hops.

For my sample today, I had to use the darling Gift Bow Christmas Fairy from Meljen’s Design. I LOVE her fairies. I stamped the image in  Tuxedo Black Memento Ink once on Neenah Solar White cardstock and was colored with  Copic Marker (hat/jacket: R22, R24, R29, R39   Scarf: light green YG21, YG25, YG17, dark green YG23, YG17, G28   Skin: E000, E00, E01, E02, BV00    Hair: Y11, Y13, E31  Bow: BG10, BG11, BG13    Background: C00, C1, BV00).

The image was cut and embossed with the out of the box technique and the second largest Marvelous Square Nestabilities die. A piece My Mind’s Eye Winter Wonderland paper was cut and embossed with the largest of the Marvelous Square dies. A piece of Solar White cardstock was cut and embossed with the largest and second largest of the Marvelous Squares dies to create a frame. That frame was adhered over the red layer with liquid adhesive. The image layer was adhered in the center with foam adhesive squares.

A 4 9/16″ square of Winter Wonderland paper was sanded, and stitched to a slightly bigger piece of white cardstock. I added snowtex to the edges of the square to soften the green. The edges of another paper strip were sanded and adhered to the squares before the image layers were adhered with more dimensional foam adhesive. May Arts sheer ribbon was tied around the layers and topped with a button. Everything was adhered to the card base, Kraft cardstock measuring 5 1/4″ x 10 1/2″ folded in half.

The sentiment banner from Raindrop Echo Designs new Holiday Circle Pennants and another sentiment from the same set were stamped in Tuxedo Black Memento Ink on Solar White cardstock and colored with Copic Markers. The banner and Circle pennant were cut out and adhered to the card. Rhinestones from a Sleek Strips Silver Rhinestones pack were adhered to the edges of the Marvelous Squares and parts of Fancy That! Border Bling were added tot he top right and lower left corner. Sugar Sparkly Fluff was added to the rim of the jacket and hat.

To be entered into today’s mini blog hop prize draw, be sure to leave a comment on ALL of the DT posts listed below by 12:00PM EST tomorrow:

For a full reveal of this month’s fabulous release, please visit the Whimsy blog.

Thanks so much for stopping by! Have a wonderful day! Hugs and smiles

Hello, friends! After a much needed summer break, the NinaB Designs team is back to showcase some of Nina‘s designs for our monthly hop. Make sure you check out the new Summer CHA Releases by Spellbinders, Want2Scrap and Penny Black, and her monthly release by The Craft’s Meow.
For this month’s hop, Nina challenged us to create something with gift-giving in mind. For my project I decided to create a tag and a matching small box. You can find the tutorial for the box HERE.

I started by creating a tag. The tag base was cut and embossed out of Kraft cardstock with a die from Tags & Flags. My Mind’s Eye Winter Wonderland paper was cut and embossed with the same die, sanded and cut down on the embossed edge. 3/8″ wide strip of paper from the same paper pack was added before the edges were stitched and seam binding was tied around the paper. It was then adhered to the tag base.
More Winter Wonderland paper was cut and embossed with the tree die from Sweet Folk Art. A small piece of Kraft cardstock was cut and embossed with the same die to create the tree stem. Buttons were stitched to the tree. Handmade Lilybeedesigns paper was cut and embossed with the small star from Sweet Folk Art, sanded and adhered to the top of the tree.
Neenah Solar White cardstock was cut and embossed with the rectangle tag die from Home Sweet Home. A sentiment from The Craft’s Meows Season’s Greetings in Jet Black Archival Ink. It was tied to the seam binding bow along with a button with Linen Thread.  Part of a Finesse Rhinestone Swirl above the bow and three small rhinestones from a Sleek Strips Silver Rhinestones on the bottom left were added to finish the tag.
The box base was created out of Kraft cardstock and was decorated with more Winter Wonderland paper and seam binding. The top corners were cut with Crop-a-Dile Cloud Chomper. Another sentiment from Season’s Greetings was stamped on Solar White cardstock, cut and embossed with a  Nested Lacey Pennant die. Again part of a Finesse Rhinestone Swirl and rhinestones from a Sleek Strip Silver Rhinestones on the bottom left were added to finish the box.
Hershey Nuggets were covered with 1″ wide strips of the Winter Wonderland paper. If I had some Candy Canes, I think I would have added those to my box, but it’s a bit too early to find those in the stores.


Here are these NinaB. Designs products I used for my project:
To welcome you back to our hop, we are giving away these TWO PRIZE PACKAGES:
Prize #2 includes The Craft’s Meow’s Vintage Rides and Retired Layers of Colors Dotted Dahlias and Dotted Peonies Stamp sets:
Winners will be picked randomly from 2 of the designers’ blogs:
Nina
Brackett
* Beate Johns
(you are here!) * Beatriz
Jennings
* Clare Buswell * Heather Jensen * Jennie
Harper
* Julie Overby * Lea Lawson * Linda LucasViola
Mahr

Everybody is welcome to comment and eligible to win. Nina will announce the winners on  September 22 on her blog.
Finally, please consider liking the following Facebook pages that are represented on today’s hop, so you don’t miss the latest news and happenings: 


I hope we’ll inspire you all today! Happy hopping! Thanks so much for stopping by! Have a wonderful day!
Hugs and smiles 

Today’s tutorial was written by the wonderful Patti Gilliam. She is sharing on how to create a darling little box, with a flat back, that allows you display your artwork. I popped my Witch up on four dimensional adhesives, so the box part acts like a stage for her to stand on.

To begin with I stamped Phyllis Harris darling A Tiny Witch in Tuxedo Black Memento Ink on Neenah Solar White cardstock and  colored her with  Copic Markers (Skin: E000, E00, E01, BV10    Hair: Y23, E97, E99   Dress: V12, V15, V17, V09, YG01, YG03, YG17   Broom: E33, E39, YR21, YR23, YR27   Pumpkin: YR12, YR15, YR04, YR27). The witch was cut out and set aside.

The box base was created out of black cardstock. Two pieces of Echo Park Mischievous Patterned Paper were cut to a 3 13/16″ length. The blue strip measures 1 3/8″, the black piece 2 7/8″. Both pieces were sanded before the blue strip was adhered over the bigger black piece and the edges were stitched. May Arts Ribbon was tied around the blue strip and the bow was topped with a button, tied on with a silver cord.

The layered paper was adhered to the back of the box with Scor-Tape and the Witch was adhered over the ribbon. I stacked 4 foam adhesive squares on top of each other so my witch would stand off a bit.

A 7/8″ x 3 13/16″ strip of Mischievous paper was sanded and stitched before it was adhered to the front. A sentiment from the set was stamped in black ink on white cardstock that had been cut and embossed with one of the insert dies from Fancy Framed Tag One set. The center was sponged with Pear Tart Memento Ink before the oval was adhered to the right hand side of the box part. Three rhinestones from a Sleek Strips Silver Rhinestones pack were adhered underneath the sentiment and part of a Finesse Rhinestone Swirl was added next to the sentiment and under the bow.

Here is  video for the visual learner:


I hope you try it out!! This is a fun and super easy box. Thanks so much for stopping by!
Hugs and smiles

P.S.: I hope you are subscribed to Splitcoaststampers Weekly Inkling. Simon Says Stamp has a discount code in there for subscribers. 25% off!!!

We are back from our summer break.  Our first challenge after the break is a sketch. Nina is the hostess. It was a hard sketch for me and I just took it as a guide. I definitely didn’t follow it 100%

I started out by stamping an image from The Craft’s Meow’s Lovely Label 18 in Jet Black Archival Ink on a piece of Echo Park Springtime paper. It was cut and embossed with the 2nd largest Label 18 Nestabilities Nestabilities die. A piece of Neenah Solar White cardstock was cut and embossed with the 3rd smallest of the Standard Circle (lg) Nestabilities dies. It was first stamped with the center of the same Lovely Label 18 die. Next the die was placed back on the cardstock circle and part of the image from Butterfly Kisses was stamped in the center.

Another piece of EP Springtime paper was cut and embossed with the third largest of Card Creator Matte B die. The edges were sanded before it was stitched to a slightly bigger piece of black cardstock. Both layers were adhered to piece of white cardstock, cut and embossed with the largest Card Creator Polka Dot die.

A piece of Springtime paper and a piece of white cardstock were cut and embossed with two  Nested Lacey Pennant dies. The patterned paper was sanded before part of a sentiment from Butterfly kisses was stamped on both. They were adhered next to the image layer, which had been adhered to the left hand side of the Card Creator layers with dimesional adhesive. Part of a Fancy Waves! Border Bling was adhered underneath the patterned paper pennant.

The butterfly of the same set was stamped in Dandelion Memento Ink was on white cardstock, cut out and topped with a button. The butterfly was adhered to the image layer on the right hand side.  Stardust Stickles was added over the dandelion and the butterfly wings.

I was too lazy to cut a card base with the largest Polka dot die, so I made my card base out of a 5 1/2″ x 8 1/2″ piece of white cardstock, folded in half. I added another layer of Springtime paper over the card base, measuring by 4″ x 5 1/4″.

I hope you have time to create a card for the challenge! I am so excited we are back. And check out my fellow challenge members gorgeous creations!

Have a wonderful Sunday! Hugs and smiles

© 2012 fresh & fun Suffusion theme by Sayontan Sinha