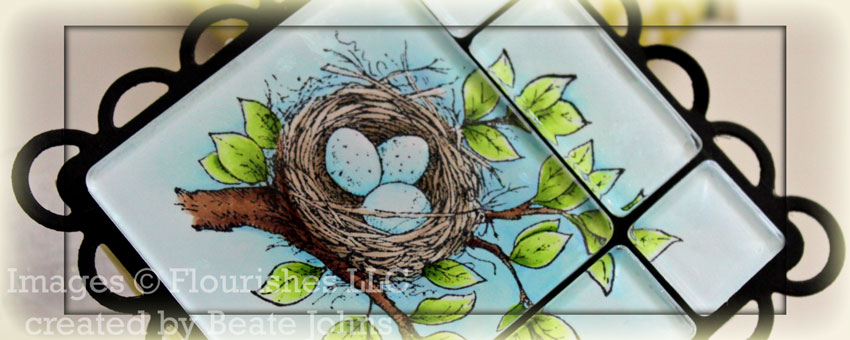
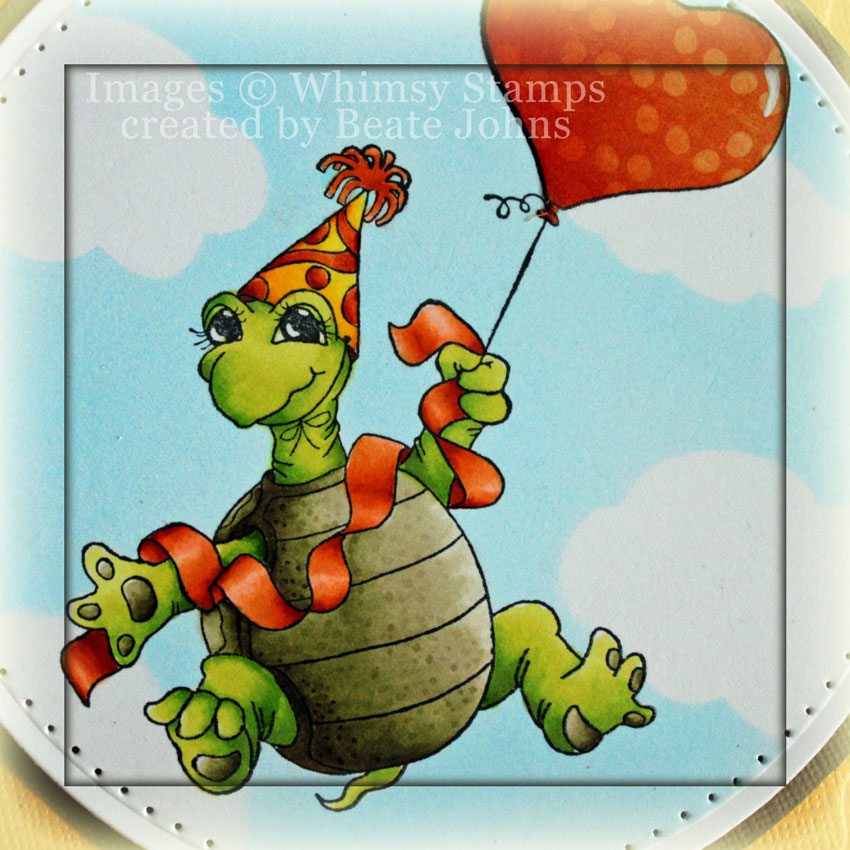
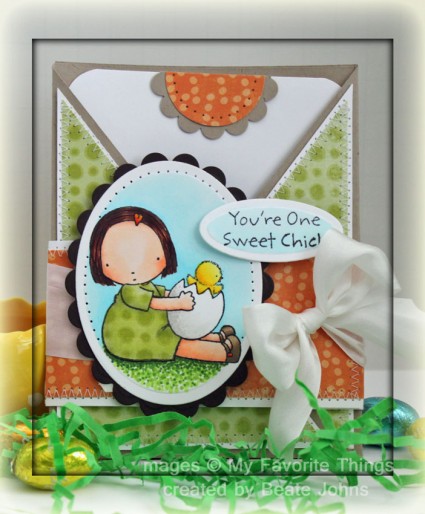
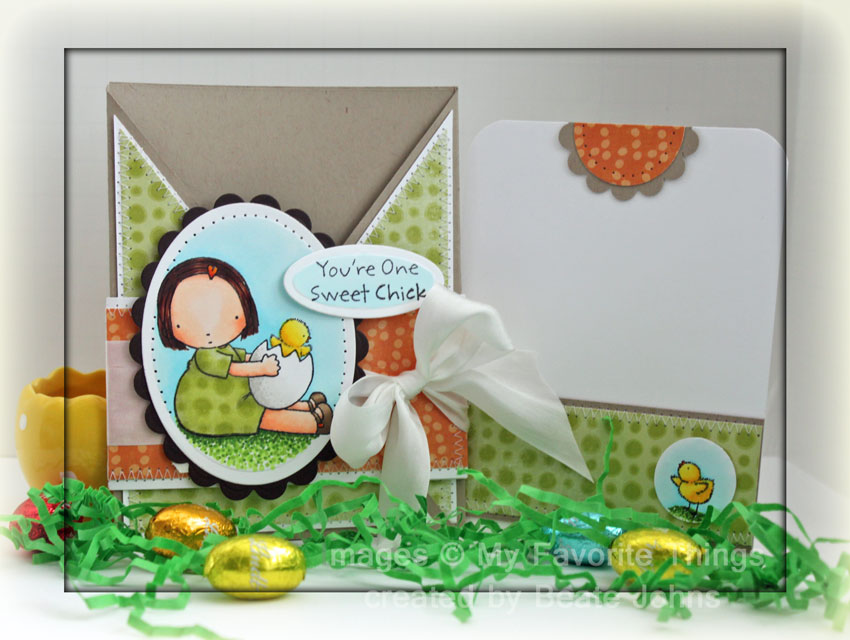
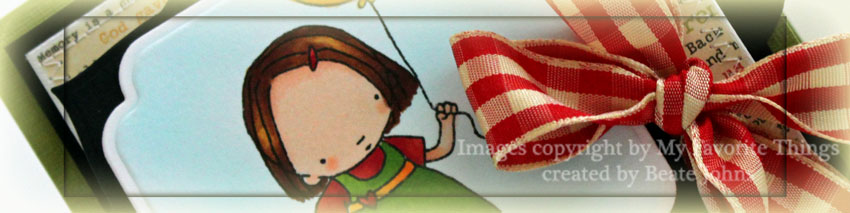
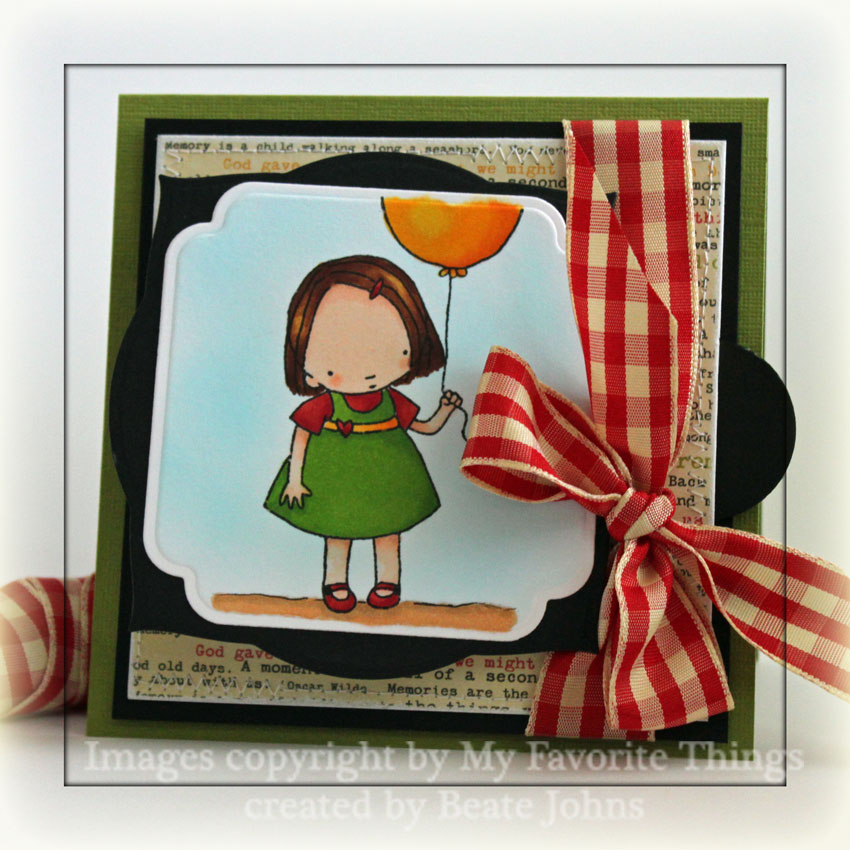
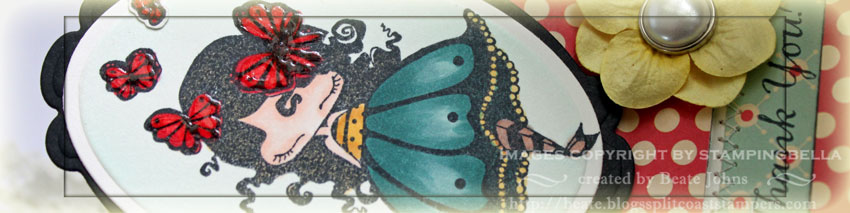
I created this card as a submission for the Norwegian magazine Ett Trykk. I used one of the images from the June Stamp Kit- Fun in the Sun. I stamped her twice in Tuxedo Black Memento Ink, once on Neenah Solar White cardstock, once on Whiff of Joy Patterned Paper Fruehlingserwachen.

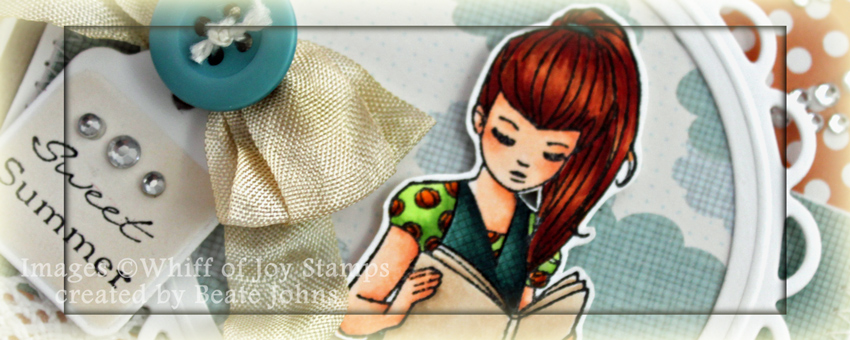
The dress of the image on the patterned paper was colored with Copic Markers (BG72, BG75 and BG78), cut out and paper pieced to the main image, which was colored with Copic Markers (Skin: E000, E01, E02, Hair: E97, E99, E19, Shirt: YG01, YG03, YR15, YR14, E99, Shoes: YG01, YG03, Book: E41, E42, E43). The main image was cut out as well.

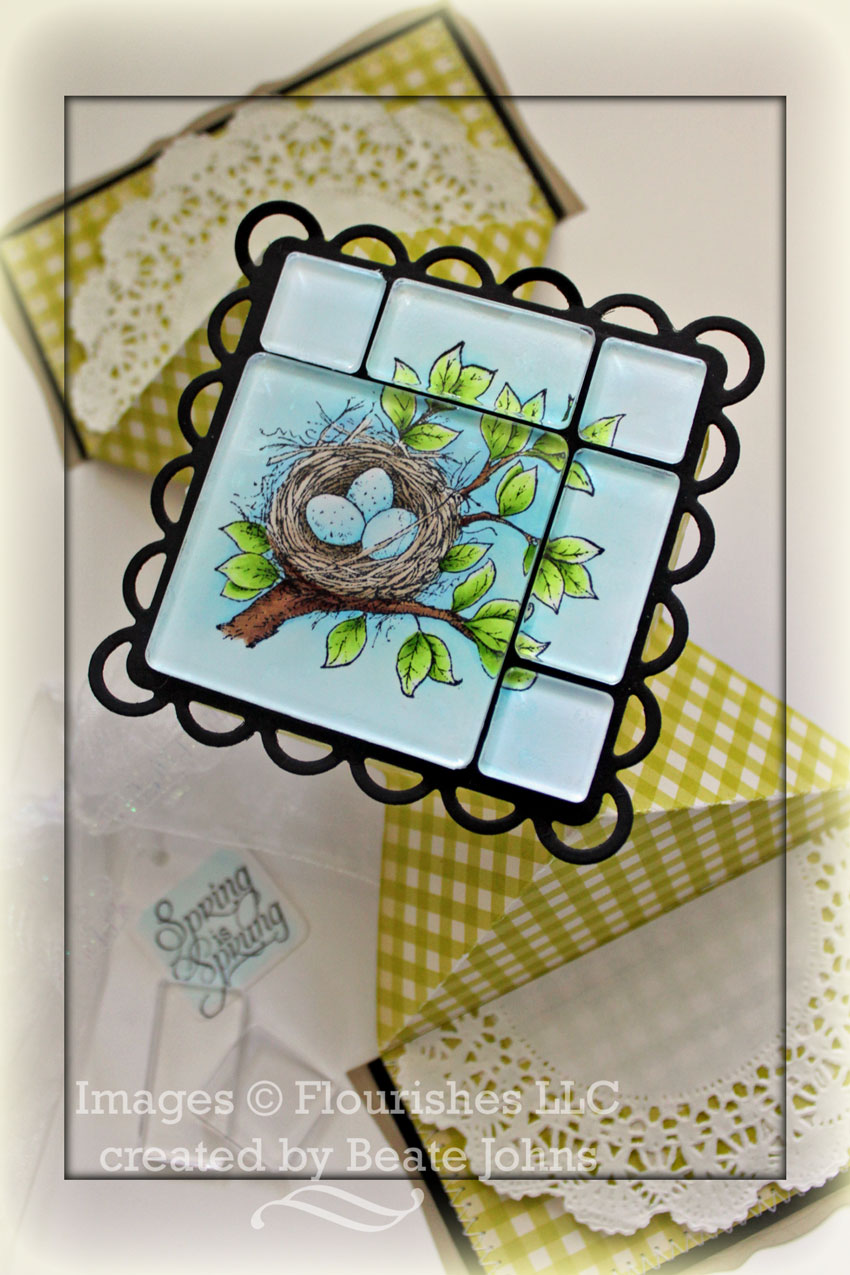
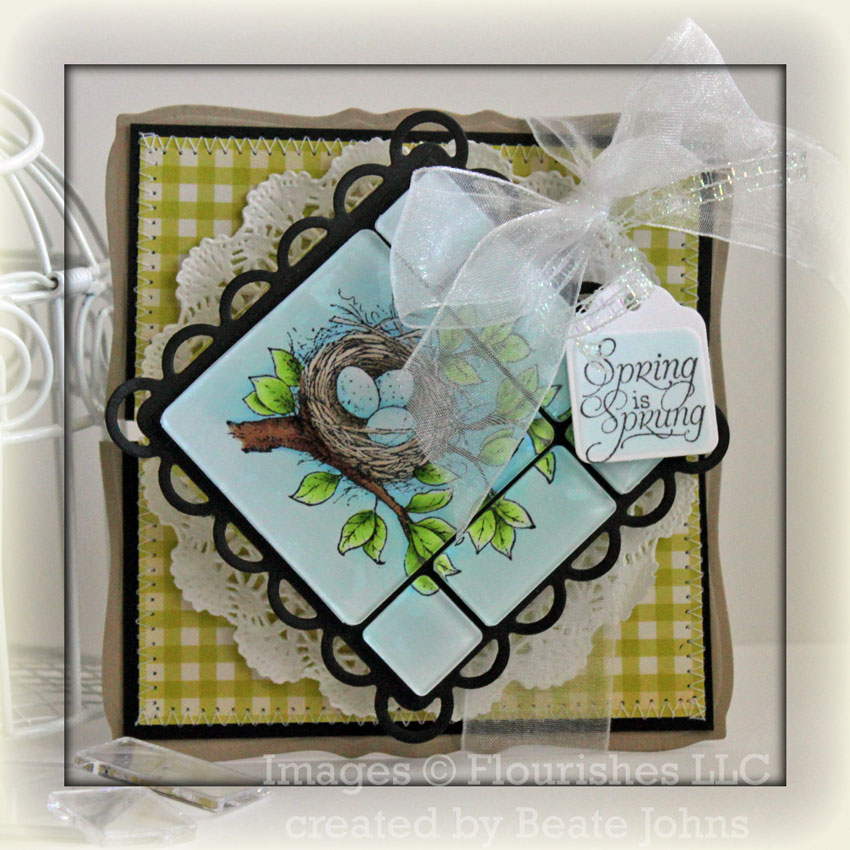
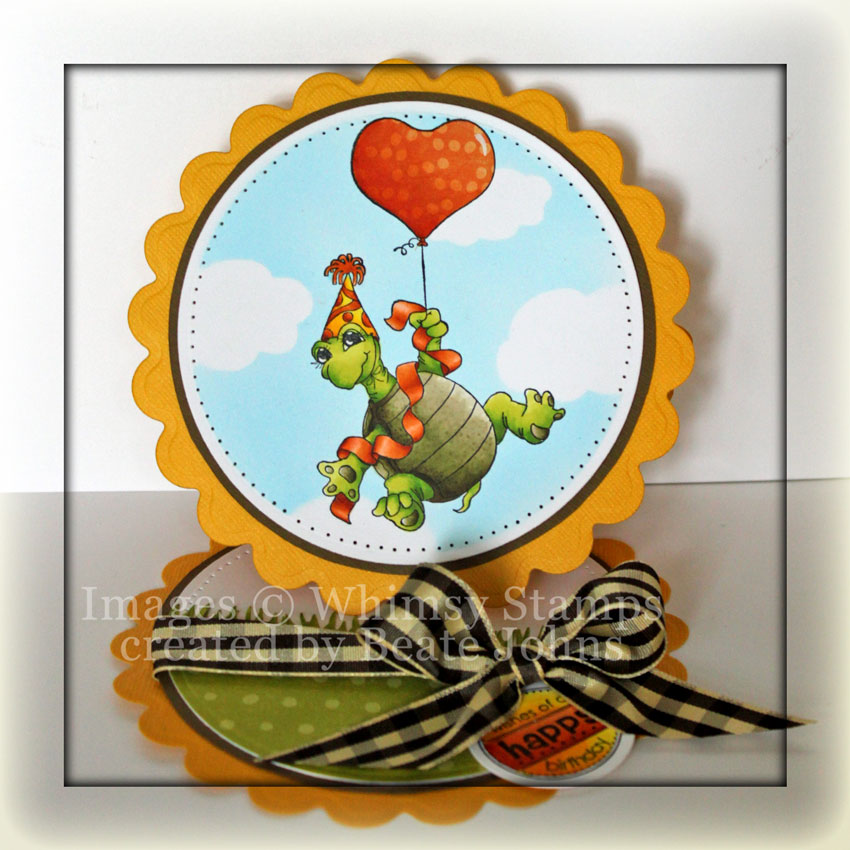
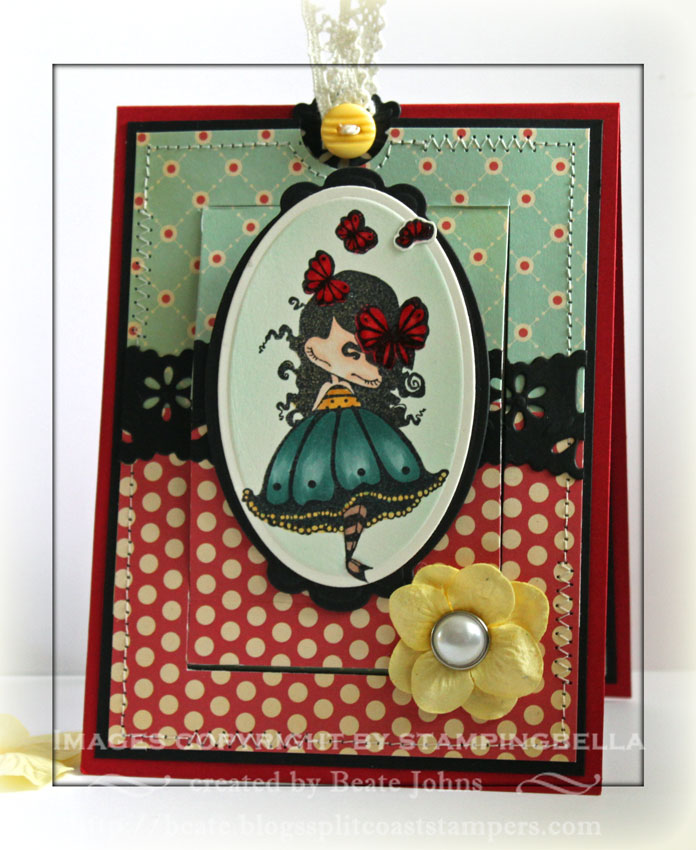
A piece of Neenah Solar White cardstock turned into a frame by cutting and embossing it with Classic Circle and Lacey Circle Nestabilities dies. Another piece of the Paper Fruehlingserwachen was adhered behind it. The image was adhered to the frame with dimensionals.

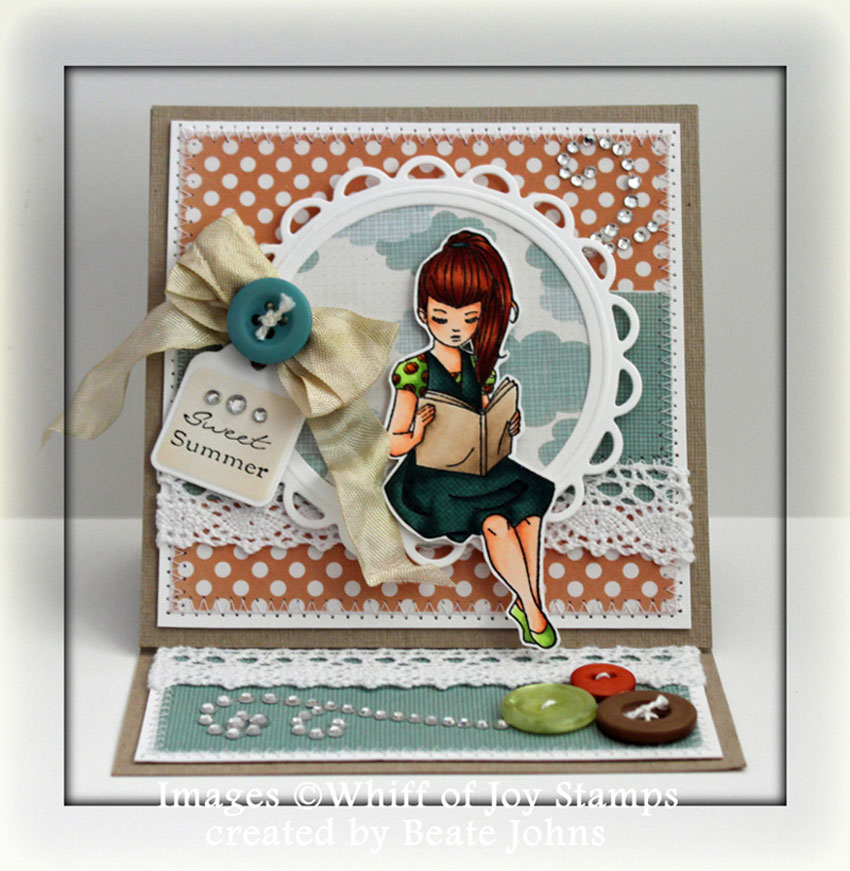
The edges of a  1 3/4″ x 4″ strip of Fruehlingserwachen paper were slightly sanded and adhered to a 4″ square of the same paper pack. White Melissa Frances Lace was adhered underneath the strip before the layers were stitched to a 4 3/16″ square of Whisper White cardstock.  Next everything was adhered to a 4 1/2″ square of textured Kraft cardstock.

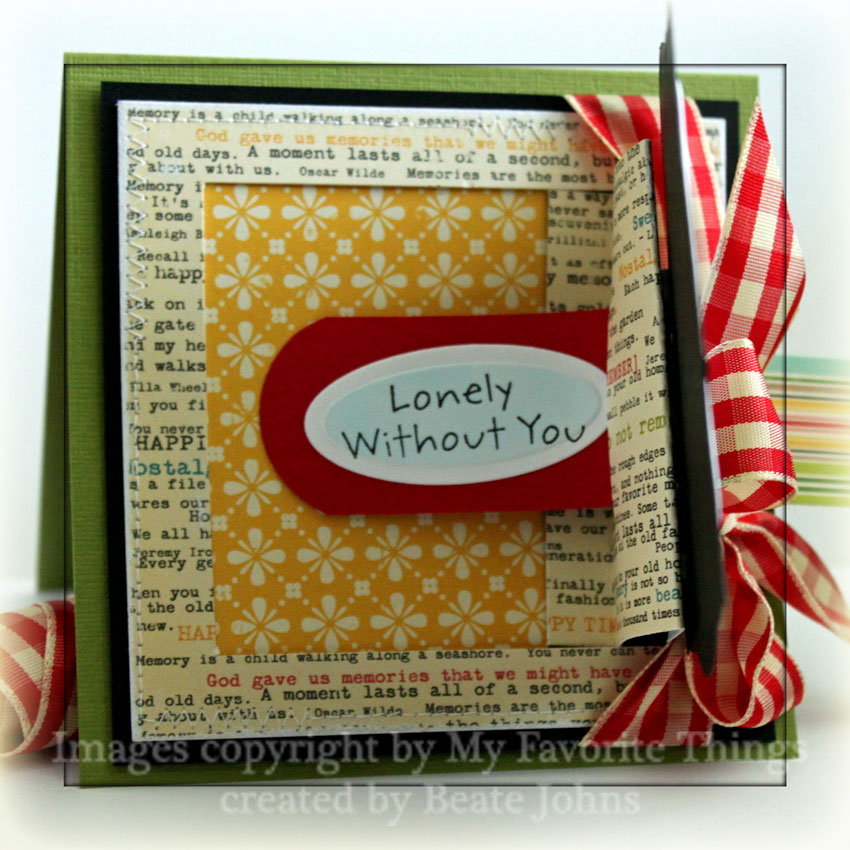
I dyed some off-white seam binding with Frayed Burlap Distress Re-inker and water and tied it into a bow with the Bow Easy.  The sentiment is from the same stamp kit and was stamped on a tag that had been cut with a retired Spellbinders die. The tag was airbrushed with Copic Marker E42. A jump ring was added to the top of the tag and it was tied to the bow with embroidery floss and a My Mind’s Eye button. Three Silver Kaisercraft Rhinestones were adhered above the tag and a Recollections Rhinestone swirl was adhered to the upper right hand side.

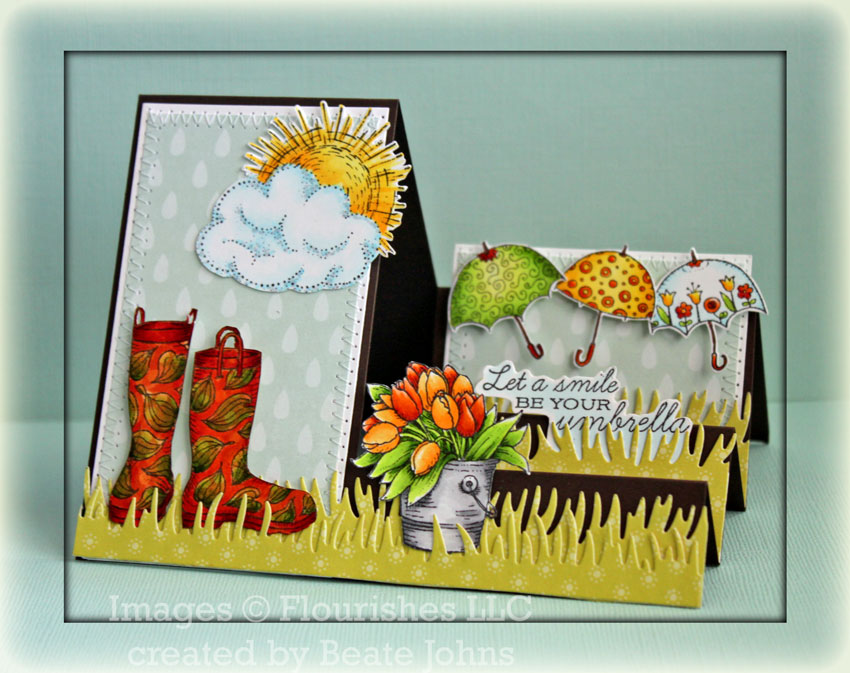
The card front was adhered to an Easel card base, a 4 1/2″ x 9″ piece of textured Kraft cardstock, scored at 2 1/4″ and 4 1/2″.  For the inside of the card the edges of a 1 3/4″ x 4″ piece of patterned paper were sanded, then adhered to a 4 1/4″ piece of White cardstock. More of the white lace was adhered on top of the paper strip and the edges were stitched. Three buttons were stitched to the lower right hand side of the layer before it was adhered to the card base.

Thanks so much for stopping by! Have a wonderful day!
Hugs and smiles

I created this card as a challenge entry for the Come Find the Treasure! VSN challenge. We were to create a card and hide something in the card.

I hadn’t created a Big Buckle Card in a very long time and thought it would be the perfect time to create one for the challenge and then use it as a sample for the video tutorial for that technique.

I recently had purchased the Life is Good Technique Tuesday stamp set at my LSS and thought it would be perfect for a Buckle card. I stamped the image in Jet Black Archival ink on Echo Park Playground paper. The image was cut and embossed with a Classic Circle Nestabilities die. The sky was sponged with Tumbled Glass Distress ink, the ground with Shabby Shutter Distress ink before the image was adhered to a piece of black cardstock, cut and embossed with a Floral Doily Motif die.

The card base was created out of the Neenah Solar White cardstock. The left hand side of the card front was lined with a 2 1/4″ x 5″ piece of Echo Park Playground paper that had been stitched to a  1/4″ bigger piece of Kraft cardstock. Before the stitched panel was adhered to the left hand side of the card front, a white cardstock strip was cut and embossed with the Floral Doily Accent border die and adhered under the panel.

A 1 7/8″ wide strip of Echo Park Little Girl paper was adhered to a 2″ wide White cardstock strip. The corners of the right end were rounded, the left end was adhered under the 4″ x 5 1/4″ piece of Kraft cardstock that was adhered to the inside panel of the card.

The sentiment is also from Life is Good. It was stamped in Jet Black Archival Ink directly on the buckle. Part of the sentiment is hidden to comply with the challenge. The smaller sentiment (really good) that comes with the set, was stamped on the inside of the card underneath the panel. Silver Recollection pearls finish off the card.

Here is a video for the visual learner:

[youtube]https://www.youtube.com/watch?v=ybhwiREtzgw[/youtube]

Thanks so much for stopping by! Have a wonderful day!
Hugs and smiles

Today’s tutorial on Splitcoast is for the Side Step card. It’s a variation of the Stair Step fold card.

My card base was created out of Canyon Brown Neenah cardstock. The grass was cut with the Grass Die-namic die out of Pebbles patterned paper.  The rain pattern paper is from Echo Park’s Springtime patterned paper.

The images are all from Flourishes new set April Showers. The images were stamped on Solar White cardstock in Tuxedo Black Memento Ink and colored with Copic Markers (Sun: Y11, Y13, Y15    Cloud: N1, B0000, Bo00    Bucket: N0, N1, N3, N4, N5     Tulips: YR12, YR15, Y09, Y21, Y23, YR12, YG01, YG03, YG17    Umbrella: YG00, YG01, YG03, R08, R29, E23, E25, YR12, YR15, Y11, Y13, Y15, B000).

The boots were stamped on Echo Park Playground paper, colored with Copic Markers (YR00, YR12, YR15, Rim: YR09, R08, R29).

Here is a video for the visual learner:

[youtube]https://www.youtube.com/watch?v=PCvVJD4kg9U[/youtube]

Thanks so much for stopping by! Have a wonderful day.
Hugs and smiles

Remember the new challenge by Inspiration Emporium? You still have time to make something with Fragments and enter it.  Here is the other card I created for this challenge.

chose another image from Flourishes Spring is Sprung set. I just LOVE that set. I stamped the bird nest in Tuxedo Black Memento Ink on Neenah Solar White cardstock and colored it with Copic Markers (Nest: E41, E42, E43, E44   Eggs: BG000, BG01, BG02   Leaves: YG01, YG03, YG17   Branch: E23, E25, E27, E29   Sky: B12, B000, B0000).

I cut the image to the size of my square and rectangle fragments and adhered the pieces to the fragments with Glossy Accents. One the adhesive dried, I adhered the fragment pieces to a piece of black cardstock, cut and embossed with a Lacey Square Nestabilities die.


The image layers were adhered to a Diamond Fold card base created out of a 4″ x 12″ piece of October Afternoon Weathervane paper. I created a tutorial for it, but that won’t be published until the end of May. It’s pretty easy though. Score your strip at 2″ and 10″. Mark the center of the strip on each side and fold the paper down and back up.

The 2″ x 4″ panels were stitched to a 2 1/8″ x 4 1/4″ piece of black cardstock, then adhered to a piece of Kraft cardstock, cut and embossed with a Curved Rectangle Nestabilities dies. A doily was cut and half and a half was adhered on each panel.


A sentiment from the Spring is Sprung was stamped in Tuxedo Black Memento Ink on Solar White cardstock that had been cut and embossed with the retired Five in one Tag die from Spellbinders. The center of the tag was colored with Copic Marker BG000. The tag attached to the card with the White May Arts Organdy Ribbon that was used to tie the card shut.

Thanks so much for stopping by! Have a wonderful day.
Hugs and smiles


It’s time for the new Whimsy Rubber stamp release. The Whimsy Stamps DT have been sneak peeking these fabulous stamps for the past 5 days, so if you missed them be sure to hop on over to the Whimsy Inspirations Blog for some more inspiration!

This month there are 13 fabulous new Whimsy Stamps plus 2 new wonderful dies to show to you today! These new goodies are available to buy right now from the Whimsy Stamps store along with all your Whimsy favorites.

If you would like to participate in the hop and you didn’t arrive here from Debbie ‘s blog, please CLICK HERE to return to the beginning of the hop at Annika’s blog.

The hop starts today (Wednesday April 13th at noon EST) and ends on Wednesday April 20th at noon EST.

For this hop we have 6 different prize draws! We have not one but TWO grand prize draws, so two lucky hoppers will win a large selection of new release stamps. Grand Prize 1 will be for those who help us advertise the hop, and Grand Prize 2 will be for those who hop along with us. Also, we have 4 mini candy stops throughout the hop where you can enter to win a new release stamp! I’m not going to tell you where they are, so if you haven’t found them you’ll just have go back to the beginning and start hopping!

For my card I used the image Come Fly With Me created by Crissy Armstrong. It was stamped in Tuxedo Black Memento Ink on Neenah Solar White cardstock and colored with Copic Markers (Turtle Shell: E81, YG93, E87   Skin:YG21, YG23, YG63   Ribbon: YR00, YR12, YR15, YR18    Hat: colors of band plus Y02, Y06, Y08).

The balloon of the image was stamped again on Echo Park Playground paper. It was colored with Copic Markers (YR00, YR12, YR15), cut out and adhered to the main image.

The image was cut with a Grand Circle Nestabilities die. A few clouds were cut with the cloud Die-namics die out of Tim’s Mask sheet and adhered over the cardstock circle. The Nestabilities die was placed back over the cardstock and the circle was airbrushed with Copic Marker B02.

The image was adhered to a piece of textured Soft Suede cardstock and it was hand cut into a bit bigger circle layer. The edge of the image layer was paper pierced.


The image was adhered to a round circle easel card base, cut and embossed out of Imperial Core’dinations cardstock.

The inside of the card was decorated to match the card front. I cut the same size white cardstock circle, layered it on Soft Suede cardstock and added Echo Park Playground paper on the bottom half of the circle.


The upper edge of the playground paper was cut with the Grass Die-namics die. May Arts Gingham ribbon was tied around the layers before they were adhered to the inside of the card.

A sentiment from the new Party Mini Letter Seals was stamped in Tuxedo Black Memento Ink and colored with Copic Markers. It was cut and embossed with Circle Nestabilities and adhered underneath the bow.

Thank you so much for stopping by! Next on the blog hop is Donna.

Have a wonderful day!
Hugs and smiles

Last week I created a video for the Criss-Cross card tutorial. This is the sample I used for the video.

The card base was created out of Kraft cardstock. . Two 3 1/2″ x 4 3/4″ pieces of Echo Park Playground paper where cut diagonally. They were stitched to Neenah Solar White cardstock. A 3 3/4″ x 5″ piece of white cardstock had been cut diagonally as well.

The white cardstock for the belly band is 2 1/4″ wide, the orange Echo Park Playground paper 2″.  The strips were 11″ long and after stitching scored at 4 3/8″ and 9 3/4″. White May Arts Silk Ribbon was tied around the belly band.

The image is from the My Favorite Things One Sweet Chick. It was stamped on Solar White cardstock in Tuxedo Black Memento Ink and cut and embossed with a Classic Oval Nestabilities die.  The image was stamped again on the green patterned paper from Playground. The dress was cut out and adhered to the main image. It was colored with Copic Markers (Chicks: Y02, Y06, Y08, W1   Egg Shell: W00, W1, W2   Dress: YG21, W02   Shoes: E0000, E41, E42, E43, E44   Skin: E000, E01, E11   Hair: E33, E25, E29, E49   Heart in hair: YR15, YR09, R08   Grass: YG01, YG03, YG17, YG67   Sky: B0000, B000).

The image was adhered to a piece of Canyon Brown cardstock, cut and embossed with the one of a Scallop Oval Nestabilities and the edges were paper pierced. The sentiment is also from One sweet chick. It was stamped on Solar White cardstock and cut and embossed with a Petite Oval Nestabilities die. The embossed center was colored with Copic Marker B0000.

The insert of the card measures 4″ x 5″ piece of white cardstock. The top corners were rounded with my Corner Chomper.  A half circle was punched out of the orange Playground paper with a 1 3/8″ circle punch. It was layered on a half scallop circle cut out of Kraft cardstock.

A 1 3/8″ x 4″ strip of green patterned Playground paper was stitched to 1 9/16″ x 4″ piece of cardstock and adhered on
the lower end of the card insert. The single chick from the stamp set was stamped on Solar White cardstock, punched out with a 1″ circle punch and colored with Copic Markers. It was adhered to the right side of the strip to finish off the insert.

Here is a video for the visual learner:

[youtube]https://www.youtube.com/watch?v=5L0MzjqZ5sw[/youtube]

Thanks so much for stopping by! Have a wonderful day.
Hugs and smiles

Sorry I have been so quiet. It’s cold here and snowy. That makes me want to snuggle up at the couch, not stamp. Weather like this makes me so lazy!

Yesterday’s tutorial on Splitcoast was for a Swinging Z-Fold Card.  I used the new Nested Heart dies from Spellbinders and Verve’s Glad Tidings along with Bo Bunny patterned paper I picked up at my LSS to create this card.

The Heart was cut and embossed out of Neenah Solar White cardstock and sponged with Stormy Sky Distress Ink and the snowflake were stamped with Walnut Stain Distress Ink. The snowflakes were cut out and topped with Recollection brads. Silver Kaisercraft Rhinestones were added to the heart.

White May Organdy Ribbon was tied around right hand side of the card and hit with the heat gun to antique. I added  a Maya Arts Trinket pin through the bow. It helps keep the card shut by holding the heart down.

Here is a video for the visual learner:

[youtube]https://www.youtube.com/watch?v=E-jwI94d05g[/youtube]

fllcpeachescherriesswingwid.jpg

I recently shot a video for the Swing Card Tutorial. For my sample card I chose Flourishes Cherries and Peaches set. I stamped the bunch of cherries in Tuxedo Black Memento Ink on Neenah Solar White cardstock. The image was colored with Copic Markers (R24, R29, YR15, E25, E29, YG23, YG25, YG17, B000) and cut out.

A 2 1/2″ x 3 3/4″ piece of white cardstock was stitched to a red scalloped cardstock rectangle that had been cut with the Long Scallope Recangle Nestabilities. The cherries were attached to the left hand side of those rectangle layers with dimensionals.

fllcpeachescherriesswingcar.jpg

The card base is a 5 1/2″ x 6 3/4″ piece of Chocolate Chip cardstock that had been scored and cut according to the tutorial. I cut Weathervane October Afternoon paper in 1 1/8″ x 5 3/8″, 1 1/8″ square and 1 1/8″ x 1 3/8″ pieces and sewed them to the layers in the card front. I taped the same pieces on the back (to hide the stitching…didn’t look perfect in the back).

The sentiment is from the same stamp set. It was stamped in Tuxedo Black Memento Ink on Neenah Solar White cardstock, cut with Petite Oval Nestabilities. The inside was colored with Copic Marker B000. Two Tres Jolie My Mind’s Eye buttons were attached to the top left with Scor-Tape to finish of the front.

fllcpeachescherriesswingbac.jpg

For the back side of the swinging part I cut another rectangle scallop and white center piece and stitched them together. I stamped the small cherry image in the lower right corner and colored it with the same markers used for the big image.

Here is a video for the visual learner:
[youtube]https://www.youtube.com/watch?v=0ux1HM4GZZI[/youtube]

Thanks so much for stopping by! Have a wonderful day!
Hugs and smiles

mftlonelymewide.jpg

Here is another T-slide card I prepared for last weeks’ video tutorial. The card base is basically the same as the last slider card. I used a different image and different Nestabilities.

The image is from My Favorite Things Pure Innocence My Balloon. The image was stamped with Tuxedo Black Memento Ink on Neenah Solar White cardstock. It was colored in with Copic Markers (E000, E01, E11, YG25, YG17, R24, R29, Y17, YR16, BG07,  BG09). The image was cut with Label 13 Nestabilities and layered on a piece of black cardstock that had been cut with Label 3 Nestabilities. The background was airbrushed with Copic Marker B00.

mftlonelymetslideclosed.jpg

The card base is a 4 5/8″ x 9 1/4″ piece of Textured Old Olive cardstock folded in half. The edges of a  4″ square of  Thrift Store October Afternoon Paper were sanded and stitched to a 4 1/4″ black cardstock square. Red Gingham Ribbon was tied around the right side of the layers.

mftlonelymetslideopen.jpg

When pulling on a tab on the right, the image lifts up and a hidden message appears. The sentiment is from the same stamp set and stamped on Neenah Solar White cardstock in Tuxedo Black Memento Ink. It was cut with Petite Oval Nestabilities and the inside was colored with Copic B00.

Here is the video again in case you missed it:
[youtube]https://www.youtube.com/watch?v=Jdqh_Z6rR8Q[/youtube]

Thanks so much for stopping by. Have a great day!
Hugs and smiles

bellagertiesurprisepopupwid.jpg

I recently shot a video for the Surprise Pop-Up Card tutorial and created this card as a sample. I used the darling Gertie from Stamping Bella’s Lulu Collection.

bellagertiesurprisepopupclo.jpg

The card base is a 4 1/4″ x 11″ piece of Real Red Cardstock folded in half. Two 3 3/4″ wide pieces of October Afternoon Paper (The Thrift Store and Report Card) were stitched to a 3 15/16″ x 5 3/16″ piece of Basic Black cardstock. After cutting the slider part, a strip of basic black cardstock was cut and embossed with Eyelet Borderabilities. The strip was cut into pieces that fit just over the slider parts and adhered. The strip that was adhered to the middle part only had adhesive on the part under the score line.

Gertie was stamped in Tuxedo Black Memento ink on Neenah Solar White cardstock and colored with Copic Markers(R27, R20, BG72, BG75, BG78, E50, E51). It was cut out with Petite Oval Nestabilities. With the die  still on the cardstock, the oval was airbrushed with Copic Marker BG10.

Strawberry Hydrangea Prima Flowers were topped with a White Recollections Brad and adhered to the lower right corner of the slider with dimensionals.

bellagertiesurprisepopupope.jpg

When you pull up the slider, you find the sentiment of the card. It’s from the Flourishes set Humming Along. It was stamped in Tuxedo Black Memento Ink.

bellagertiesurprisepopupins.jpg

The inside of the card is decorated with The Thrift Store paper and another Hydrangea flower.

Here is a video for the visual learner:

[youtube]https://www.youtube.com/watch?v=8vjtaZoAqPw[/youtube]

Thanks so much for stopping by! Have a wonderful day! Hugs and smiles

© 2012 fresh & fun Suffusion theme by Sayontan Sinha