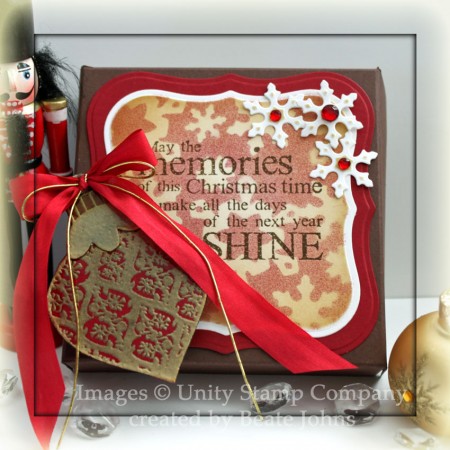
Today’s Tutorial was created by Jenny Gropp. She shows us how to create sturdy magnets as a gift idea. I placed my sample on a pizza box created to match.

The pizza box was created out of Chocolate chip card stock and layered with a piece of Cherry Cobbler card stock, cut and embossed with the largest Label 1 Nestabilities die. A piece of Neenah Solar White card stock was cut with a size smaller die, layered with snowflake die cuts from Create-a-Flake 2 and the Snowflake Borderabilities Petite and airbrushed with Copic Marker R89. With the die still over the card stock, I sponged it with first with Antique Linen all over, then on the edges with Vintage Photo Distress ink.  The sentiment is from Unity’s Embellished Season and was stamped in the center with Walnut Stain Distress Ink.

I airbrushed Copic Marker R89 over a  piece of Neenah Solar White card stock, stamped the ornament (also from Embellished Season) over it with Embossing inkand embossed it with Gold embossing powder. The card stock was adhered to a piece of cardboard that had been backed with Black card stock and cut out. The edges were colored with my black Copic Marker and a strong magnet was adhered to the back. Glossy Accents was added over the entire ornament.

Once the ornament was completely dry, a double bow out of red silk and gold cord was adhered to the top of the ornament. It was secured to the box with a magnet strip. Three small snowflakes were cut and embossed with the Snowflake Borderabilities Petite die out of Neenah Solar White card stock. They were topped with Red Kaisercraft Rhinestones.

Here is a video for the visual learner:

[youtube]https://www.youtube.com/watch?v=6BHSZ52UsbU[/youtube]

Thanks so much for stopping by! Have a wonderful day! Hugs and smiles

Today starts the third annual Holiday Tutorial Blitz on Splitcoaststampers. It starts off with a tutorial for a Treat Box card written by Melanie Schulenberg.

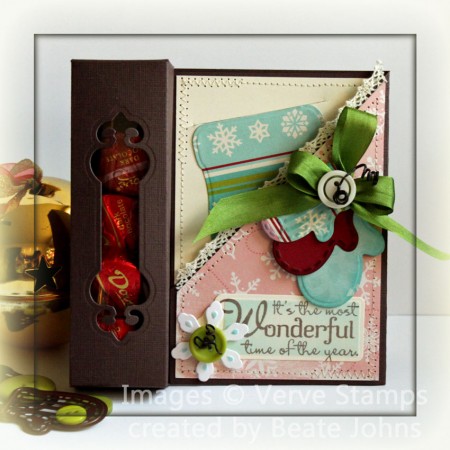
For my treat box card I used Chocolate Chip card stock. Mary Brown came over on Friday and we stamped together. We switched Melanie’s box up just a bit by adding an extra flap on the top of the box so you can open and close it. To do that, just add another 1/2″ to the width of your cardstock. Then cut everything away from that but at the 1 1/2″ for the box top. Add a score line there and corner round the ends. We figured after working for so long on a treat box, it would be nice if you didn’t have to rip open the box to get to the goodies.

Hint: Bette told me she had a hard time with the measurements on the template. Here is how I cut and scored. Start with a 7″ x 12″ piece of cardstock. Score the 7″ side at 1/2″, 1 1/4″ and 6 1/4″.  Flip and score the long side at 3 1/2″, 7″, 8 1/2″, 9 1/4″, 10 3/4″ and 11 1/2″.

Now flip your cardstock back to the 7″ side and cut on the 1/2″ score line all the way to the 9 1/4″ score line. Leave the 1 1/2″ flap and then cut the last 1 1/4″ off. This will be the lid for your box. On the 1 1/4″ score line cut all the way up to the 8 1/2″ score line and then the last 1/2″. That part you fold in. Repeat this cut on the 6 1/4″ line. Cut the lines on the flaps so you can fold the box in and you are ready. (I hope that makes sense without pictures. Just print out the template, draw the extra flap on it and mark the lines on there with the measurements I gave you. That’s what I did.)

My window was cut and embossed with one of the Fancy Tag dies  from Spellbinders. On the back I added a piece of Acetate to make sure my chocolate would stay inside and not fall out.

For the pocket card part I used Good Cheer and Very Merry October Afternoon Paper , May Arts crochet lace as well as the new Nested Mitten dies.  The sentiment is from Verve’s Christmas is in the air. It was stamped in Rich Cocoa Memento Ink on a tag cut with another Spellbinders die. The tag was then sponged with Tumbled Glass Distress ink.

For the back of the pocket I cut and embossed Very Merry October Afternoon Paper. It was adhered to a 3 3/8″ x 4 7/8″ piece of Vanilla card stock. the edges were stitched and the top of the mitten was cut so I could slip a gift card into it.

I hope you have time to try out the new tutotrial! Check back tomorrow for a new project. Thanks so much for stopping by! Have a Happy Halloween! (My kids already went Trick or Treating on Friday. Very strange that we had to do that on Friday instead of today!)

Hugs and smiles

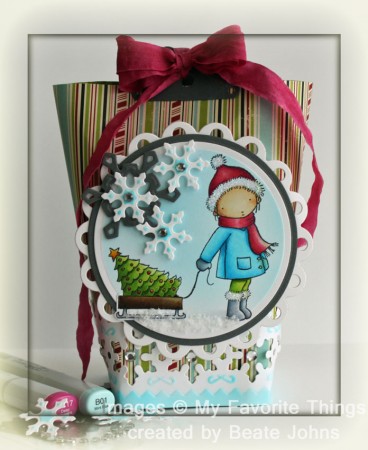
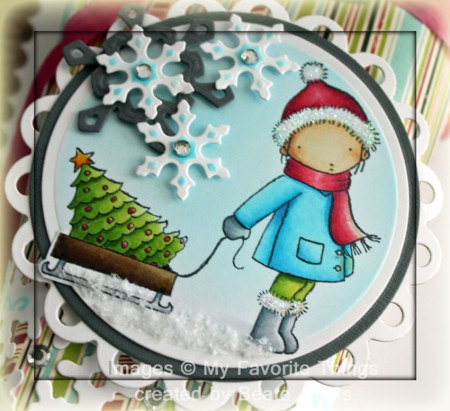
I took a few images to Chicago to color and the new My Favorite Thing Sending You a little Christmas image was one of them. I had stamped it on X-Press it Blending card with Tuxedo Black Memento Ink and colored it with Copic Markers ( Coat: B000, B02, B04  Scarf, hat: RV13, RV14, RV17  Leggings: YG21, YG03, YG25,  Boots and Mitten C1, C3, C5 Skirt: E50, E51, E53). It was cut and embossed with Classic Circle Nestabilities airbrushed with Copic Marker B01. It was then layered first on gray circle cut-out, then on a white Lacey Circle Nestabilities.

I added Polar White Flower Soft as snow on the bottom of the image and fine glitter on the hat and the top of the boots.

The patterned paper used for the bag is from Very Merry October Afternoon. The white cardstock strip was cut and embossed with the Snowflake Borderabilities and airbrushed with Copic Marker B01. I LOVE that border die. It’s big and the snowflakes that are cut out with it are beautiful. I used them (white ones) on the main image topped with Silver Kaisercraft Rhinestones. The gray snowflake was cut and embossed with a die from the Snowflake Pendant dies from Spellbinders.

For the bag holder, I cut two small pieces of gray cardstock in half that they had been cut and embossed with Lacey Nestabilities die.  The crinkled May Arts ribbon was originally white. It had been colored with Copic Marker RV17.

Here is a video for the visual learner:

[youtube]https://www.youtube.com/watch?v=gcTL0gShpLA[/youtube]

As we get closer to the season of giving, let’s take the wraps off your creativity to come up with beautiful ways to gift give. Do you have a fun template for a beautiful box? Or, do you have a beautiful presentation for gift cards? Show us what you’ve got! Link up your Bringing Back Beautiful Challenge card here to enter. If you upload to SCS, please use the keyword BBB03. You have until October 30th to enter! As we unveil our challenge for next month, we’ll share our True Beauties – those card makers who wowed us with this challenge! Winners will be featured on the Flourishes Blog and will receive a True Beauty blog button to display proudly on their blog! 

Make sure to check out the blogs of fellow challenge team members:

Becca Feeken
Cindy Coutts
Kathy Jones
Julie Koerber
Michelle Woerner
Yvonne Hagane

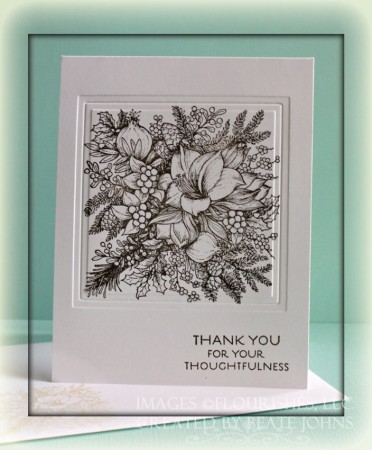
For my sample I used the A2 Card Box tutorial on Splitcoast to create part of Rebecca’s teacher gift for Christmas. I love working ahead. I created 6 simple thank you cards with matching envelopes. I hope the teacher will be able to use them to give to other parents as thank you for their Christmas presents.

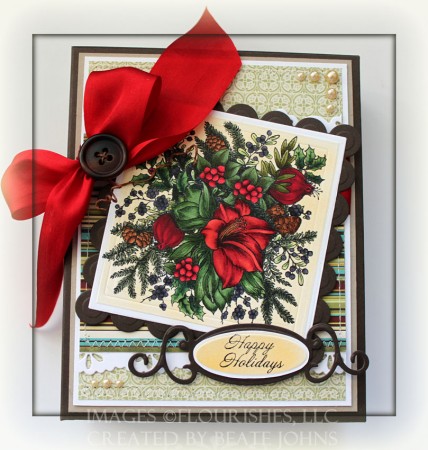
The card base for each is a piece of 4 1/4″ x 11″ piece of Flourishes Classic White cardstock folded in half.  The big Winter Bouquet Image was stamped in Walnut Stain Distress Ink. The sentiment is from the same stamp set and was stamped with Walnut Stain into the lower right corner. A frame was embossed around the image with Classic Square Nestabilities. The envelopes were stamped with the smaller Winter Bouquet image in Antique Linen Distress ink.

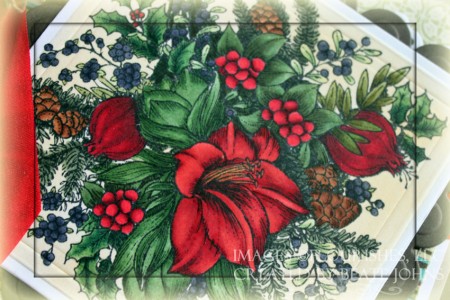
For the box front I stamped the Winter Bouquet again, this time in Tuxedo Black Memento Ink on Neenah Solar White cardstock and colored it with Copic Markers (Lily: R24, R27, R29, R39, YG63, YG67, Holly: R35, R37, R39, G21, G24, G28 Pine Cones: E33, E35, E37 Pine Branches: BG93, BG96 Berries: BV25, BV29, G20, G21, G24, bigger berry leaves: G94, G97 more greens: YG93, YG97, G94, G99). The image was cut and embossed with the Classic Square Nestabilities and then airbrushed with YR21. It was then layered on an Early Espresso cardstock piece that had been cut and embossed with Classic Scallop Square Nestabilities.

The bottom of the box was created with Kraft cardstock, the top with Early Espresso cardstock.

Two 4 1/4″ long strips of Flourishes Classic White cardstock was cut and embossed with Eyelet Borderabilities. They were stitched to a 3 1/2″ x 4 1/4″ piece of Holiday Webster’s Pages paper. A 4 1/4″ x 5 1/2″ piece of a different pattern of Holiday Webster’s Pages was stitched to a 3 /16″ piece of White cardstock. The smaller piece was adhered to the bigger one and Red Silk May Arts Ribbon was tied around the horizontal strip and topped with a brown button. The layers were then adhered to a 4 5/8″ x 5 7/8″ piece of Kraft cardstock which topped the box top.

The sentiment is from Dove and Holly. It was stamped in Tuxedo Black Memento ink on Neenah Solar White cardstock. It was cut and embossed with Petite Oval Nestabilities and sprayed with YR21. It was cut down just a bit and layered on a Early Espresso cardstock cut and embossed with Spellbinders Fancy Tag dies. To finish off the box front, I added Latte Kaisercraft Pearls to the top right and bottom left corner.

Here is a video on how to create this box for the visual learner:

[youtube]https://www.youtube.com/watch?v=LKZiQhSYO5Q[/youtube]

Welcome to JustRite Stampers’ newest Wednesday feature, 12 Weeks of Christmas Blog Hops #4!   Every Wednesday up until Thanksgiving some of your favorite designers will be joining some of the JustRite design team for a series of Christmas blog hops, showcasing JustRite’s entire Christmas Collection of stamps!  This week, it’s the Spellbinders design team!  So mark your calendars for Wednesdays at 9am Central for great Christmas gift, card & project ideas, starting at the JustRite Inspiration blog!

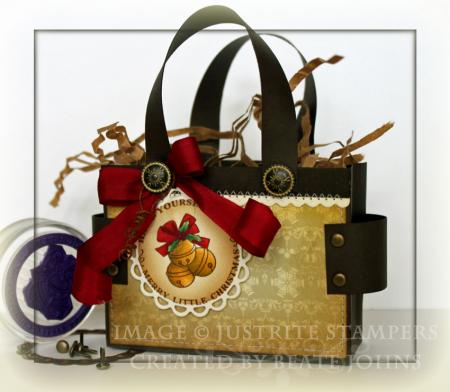
Today’s tutorial on SCS was created by Leigh O’Brien. Four or five years ago, when Leigh was on the Dirty Dozen team on SCS, she created a pattern for a darling tote bag she called Totally Totebag. We had a lot of requests for this tutorial and after such a long time being exclusive to only fan club members, today it is posted as a new tutorial in the resource section.

The base of the tote bag was created with Early Espresso cardstock, the patterned paper is Cosmo Crickets Mitten Weather paper. It was sponged with Vintage Photo Distress ink and stitched to the sides. I cut and embossed Cream Neenah cardstock with long scallop rectangle Nestabilities, cut the long edges off and down to 1/2″ and stitched them under the totebag flaps.

The handles were attached with Vintage Brads (Stampin’ Up!), the side straps with antique golden brads.  The sentiment and image are from JustRite Stampers A Merry Little Christmas . They were stamped with Rich Cooca Memento Inkon Neenah Natural White cardstock and colored with Copic Markers (bow and berries: R27, R29, R39, R89, Leaves: G21, G24, G28 Bells: Y21, Y26,Y29). The image was cut and embossed with Eyelet Circle Nestabilities and sponged with Vintage Photo Distress Ink.  

Here is a video for the visual learner:
[youtube]https://www.youtube.com/watch?v=XyAH4cOG-pc[/youtube]

Please visit these designers’ blogs to see what fabulous Christmas projects they have for you on the hop today!

JustRite Inspiration Blog
Spellbinders Paper Arts
Becca Feeken
Mona Pendleton
Debbie Olson
Ashley Cannon Newell
Sharon Harnist
Eva Dobilas
Kazan Clark
Beate Johns
Kellie Fortin
Margie Higuchi
Kathy Jones
Regina Hanson
Sankari Wegman
Deborah Young
Angela Barkhouse
Michele Kovack
Terre Fry
Barb Schram

Thanks so much for stopping by! Have a wonderful day! Hugs and smiles
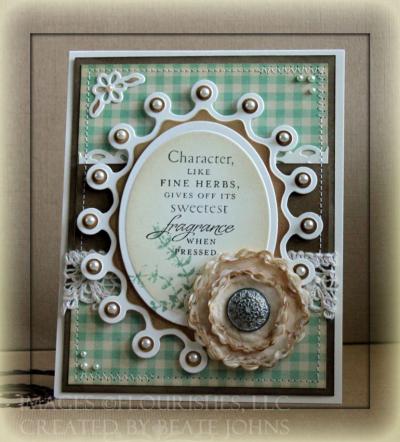
I love Mona Pendleton‘s use of Spellbinder dies. Her work is beautiful. While working on this card, it reminded me of her work. Probably because Mona uses a lot of ivory cardstock and soft patterned paper. She also wrote the Tissue Flower tutorial for Splitcoast, which I used with the new Lacey Circles to create the flower on this card.

fllcherbsdecnesties.jpg

I started by cutting and embossing the biggest of the Crown Oval Nestabilities out of Very Vanilla cardstock. I left the die on and sponged over it with Vintage Photo Distress ink.

A smaller oval was cut out of Vanilla cardstock with Classic Oval Nestabilities. It was sponged with Antique Linen Distress ink. The sentiment is from Flourishes new set Fine Herbs. It was stamped in Walnut Stain Distress ink. An herb from the same set was stamped in Bundled Sage Distress ink. The oval was attached to the crowned oval with dimensionals. Champagne Kaisercraft pearls were added into each center of the crown pieces (all but two on the bottom right where the flower was placed).

I used the two smallest Lacey Circles dies to cut several layers of tissue paper. The tissue circles were first connected with an Antique Brad (Stampin’ Up!), then the edges were sponged with Vintage Photo.

 A 1 3/4″ x 4″ strip of Kraft cardstock was sponged with Vintage photo. A 4″ long strip of Vanilla cardstock was cut and embossed with Eyelet Borderabilities. That strip was taped underneath the top of the sponged Kraft strip. Beige Melissa Frances Lace was taped on the lower edge of the strip.

The layered strip was adhered to a 4″ x 5 1/4″ piece of Fly a Kite October Afternoon Paper, which was stitched to a 4 1/4″ x 5 1/2″ piece of sponged Kraft cardstock. The layers were adhered the card base,  a 4 3/4″ x 11 1/2″ piece of Very Vanilla cardstock folded in half.

A Eyelet Pendant Die cut out of Vanilla cardstock and sponged with Vintage Photo ink was attached to the upper left hand side and topped with a Chino Kaisercraft Pearl. Champagne Kaisercraft pearls on the upper right and lower left finish off the card.

fllcherbsdecnestiesinside.jpg

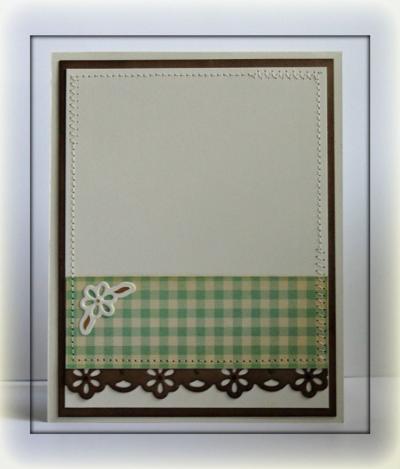
The inside of the card is pretty simple. A 4 1/4″ wide strip of Kraft cardstock was cut and embossed with Eyelet Borderabilities and sponged with Vintage Photo Distress ink. It was adhered underneath a 1 3/4″ x 4″ strip of Fly A Kite paper. The strips were adhered to a 4 1/4″ x 5 1/4″ piece of Vanilla cardstock. It was stitched to a 1/4″ bigger piece of Kraft cardstock that had been sponged before.

Thanks so much for stopping by! Have a wonderful day! Hugs and smiles
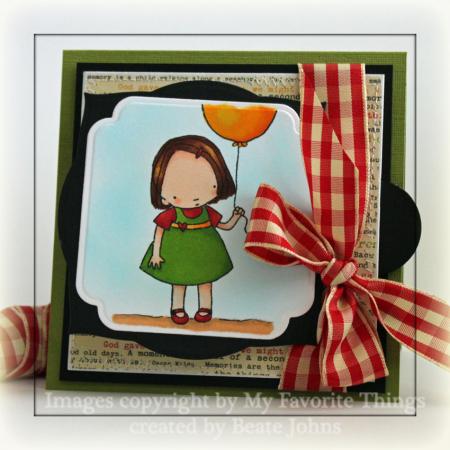
mftlonelymewide.jpg

Here is another T-slide card I prepared for last weeks’ video tutorial. The card base is basically the same as the last slider card. I used a different image and different Nestabilities.

The image is from My Favorite Things Pure Innocence My Balloon. The image was stamped with Tuxedo Black Memento Ink on Neenah Solar White cardstock. It was colored in with Copic Markers (E000, E01, E11, YG25, YG17, R24, R29, Y17, YR16, BG07,  BG09). The image was cut with Label 13 Nestabilities and layered on a piece of black cardstock that had been cut with Label 3 Nestabilities. The background was airbrushed with Copic Marker B00.

mftlonelymetslideclosed.jpg

The card base is a 4 5/8″ x 9 1/4″ piece of Textured Old Olive cardstock folded in half. The edges of a  4″ square of  Thrift Store October Afternoon Paper were sanded and stitched to a 4 1/4″ black cardstock square. Red Gingham Ribbon was tied around the right side of the layers.

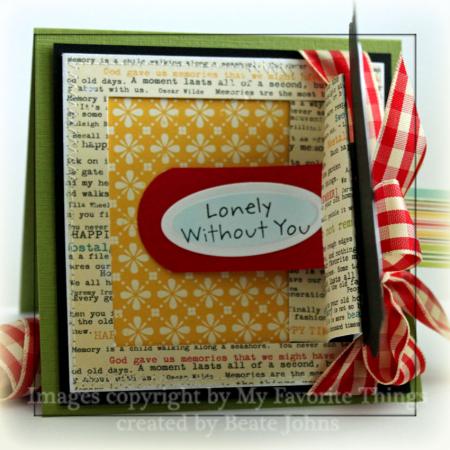
mftlonelymetslideopen.jpg

When pulling on a tab on the right, the image lifts up and a hidden message appears. The sentiment is from the same stamp set and stamped on Neenah Solar White cardstock in Tuxedo Black Memento Ink. It was cut with Petite Oval Nestabilities and the inside was colored with Copic B00.

Here is the video again in case you missed it:
[youtube]https://www.youtube.com/watch?v=Jdqh_Z6rR8Q[/youtube]

Thanks so much for stopping by. Have a great day!
Hugs and smiles

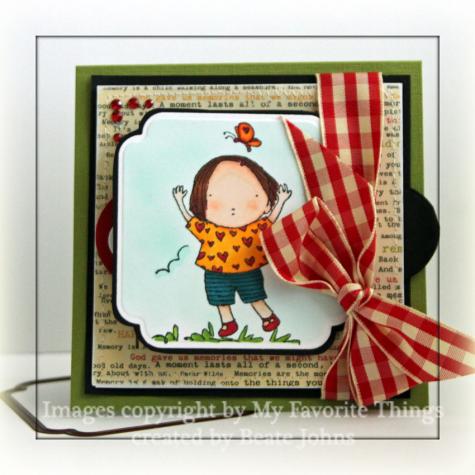
mftsummertslidewide.jpg

Today’s tutorial on Splitcoast is written by new tutorial writer Kim Score. She shows us a different kind of slider card. I created my sample with My Favorite Things Sunshiny Day. The image was stamped with Tuxedo Black Memento Ink on Neenah Solar White cardstock. It was colored in with Copic Markers (E000, E01, E11, YG25, YG17, R24, R29, Y17, YR16, BG07,  BG09). the image was cut with Label 13 Nestabilities. It was layered on a slightly bigger piece of Basic Black cardstock and hand cut around it. The background was airbrushed with Copic Marker B00.

mftsummertslidebeate.jpg

The card base is a 4 5/8″ x 9 1/4″ piece of Textured Old Olive cardstock folded in half. The edges of a  4″ square of  Thrift Store October Afternoon Paper were sanded and stitched to a 4 1/4″ black cardstock square. Red Gingham Ribbon was tied around the right side of the layers. Red Rhinestones were added to the top left corner.

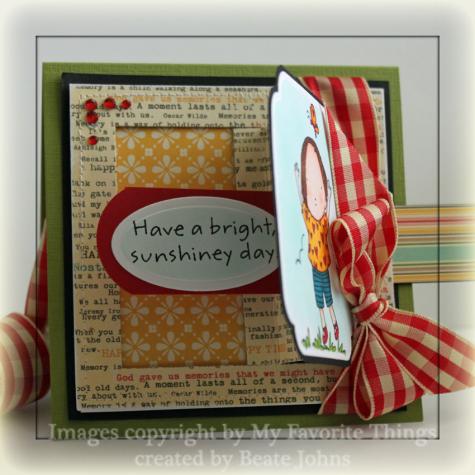
mftsummertslideopen.jpg

When pulling on a tab on the right, the image lifts up and a hidden message appears. The sentiment is from the same stamp set and stamped on Neenah Solar White cardstock in Tuxedo Black Memento Ink. It was cut with Petite Oval Nestabilities and the inside was colored with Copic B00.

Here is a video for the visual learner:
[youtube]https://www.youtube.com/watch?v=Jdqh_Z6rR8Q[/youtube]

Thanks so much for stopping by. Have a great day! Hugs and smiles

vervebeautifulkindnessdrawi.jpg

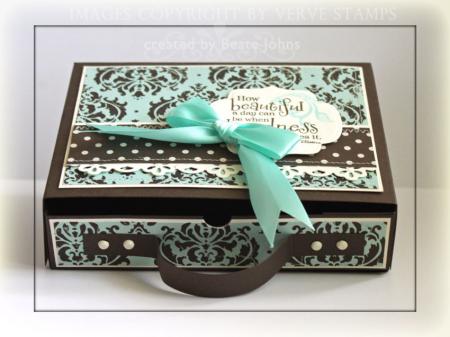
Today’s tutorial on SCS is created by Holly McMillen and is for a darling Drawer Box. It holds regular size cards as well as other treats. Holly says if you use thicker cardstock or thin chipboard, you can use them to store Nestabilities or clear stamp sets. How cool is that.

Mary Brown came over a couple of weeks ago and we stamped together. She brought over a few sheets of the new Early Espresso cardstock from Stampin’ Up! Boy…that is gorgeous. I know I will order lots and lots of it. We used it to make the sample box for my sample for the video tutorial. In the video…I am using Chocolate Chip (she left me enough for the Video piece, I just cut it wrong. DUH).

vervebeautifulkindnessdrawe.jpg

A 4″ x 5 1/2″ piece of Daydream October Afternoon paper was stitched to an 1/8″ bigger piece of Very Vanilla cardstock. A 1 1/4″ x 5 1/2″ piece of Weathervane October Afternoon Paper was stitched to a slightly bigger piece of Very Vanilla that had been cut with Eyelet Borderabilities.

The sentiment is from Verve’s Beautiful Kindness. It was stamped in Walnut Stain Distress Ink and cut out with Label 9 Nestabilities. The swirl is also from that set and was stamped in Aqua Adirondack ink.  The sentiment was adhered to the box top with dimensionals. The Aqua ribbon used here I bought at JoAnn’s.

Here is a video for the visual learner:

[youtube]https://www.youtube.com/watch?v=A6RAUQO7-h4[/youtube]

 Personal Note:
I am sorry I haven’t been visiting blogs and leaving comments and missing on some days of posting cards lately. We had friends visiting over the weekend and since Tuesday morning I only have internet early in the morning. Weird! Time Warner isn’t coming until Friday to check it out. My personal guess is that something is wrong with our cable. When we had really cold weather the cable would be out until noon, then work again until it got cold in the evening. Now it seems my cable doesn’t like hot either and is out from about 9:30 a.m. until 11 p.m. Arrrgh!

Thanks so much for stopping by! Have a wonderful day! Hugs and smiles
fllccherryblossombookmarkwi.jpg

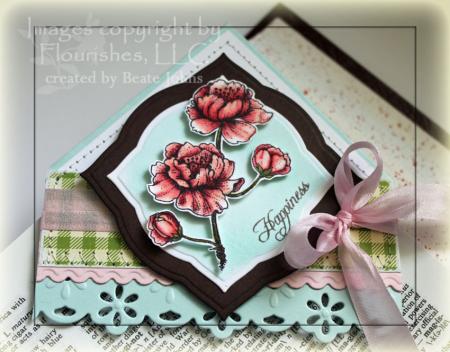
Today’s tutorial on SCS is for a corner bookmark. I made the sample for this back at the VSN at the end of May and thought it would make a great tutorial. It has been a technique challenge on SCS a while ago, but I had never tried it before VSN.

fllccherryblossombookmarkvs.jpg

The bookmark base is a 4″ square of Sno Cone cardstock. The top corners were folded in and the bottom edge was cut and embossed with Eyelet Borderabilities. The edge of a 4″ wide strip of Pink Pirouette cardstock was cut with a Long Rectangle Nestabilities and layered with Fly A Kite October Afternoon Paper. The edges were stitched and a pink silk ribbon was tied around it.

The image is from Flourishes Cherry Blossoms set. It was stamped in Tuxedo Black Memento Ink , colored with Copic Markers (E29, YG93, YG95, YG99, R01, R32, R35, R39) and cut out.  A piece of Solar White Neenah Cardstock as well as a piece of Chocolate chip cardstock were cut with Label 3 Nestabilities. The white piece was airbrushed with Copic Marker BG10 while the Label die was still on. The cut out image was adhered to the label with dimensionals. The Chocolate Chip layer was sponged with Walnut Stain Distress ink before the white later was attached.

Here is a video for the visual learner:

[youtube]https://www.youtube.com/watch?v=OSikT1Gjgyk[/youtube]

© 2012 fresh & fun Suffusion theme by Sayontan Sinha