Here is this week’s sketch:

 wsc94.jpg

To participate in the challenge, make a card with this layout and upload it either to your blog, or to an online gallery. Then either add a comment underneath this post, or add your link into the Mr. Linky box underneath.
If you upload your card on SCS, put WSC94 (NO SPACE INBETWEEN WSC AND 94) in the keyword section. That way we can look at all of them at once!

To see samples made with this sketch now, check out the blogs of

Cambria Turnbow

Charmaine Ikach

Laurie Schmidlin 

Lori Craig

MaryJo Albright

Sharon Harnist

Have fun creating! I can’t wait to see what you come up with.

SCS submissions

ic193sunprintkit.jpg

Today’s inspiration challenge let us pick an image from the Curiosity shoppe as inspiration piece. I picked the Sunprint Kit.

After I picked the image I noticed that I don’t have any silver embossing powder. I wonder what happened to that? It’s already on my order list for next month. 🙂 Good thing I had ordered the Shimmery Paint from the Holiday Mini catalog. I applied that to the stamp from Autumn Days with a foam brush and stamped it on 3 1/2″ square of Ballet Blue cardstock.

autumndaysplatinumshineic19.jpg

The square was layered on a slightly bigger piece of Scallop Square that had been cut with Square Nestabilities out of Brushed Silver Cardstock. The edges were paper pierced. That seemed a little flat so I added tiny Crystal Twinkles over some of the image.

The card base was cut with the Scallop Square Big Shot Die out of Brushed Silver cardstock. It was layered first with a 3 3/4″ square of Ballet Blue, then a with a 1/4″ smaller piece of Whisper White. The edges were again paper pierced. I added a ribbon slit on the lower left hand side of the main image and tied Organza Ribbon through it.

The sentiment is from Teeny Tiny Wishes. It was stamped in Basic Gray on Whisper White. It was punched out with the small oval punch, taped on Brushed Silver cardstock and hand-cut (I don’t like to layer a small oval punch-out over a big oval punch-out. The big one is too big for layering for my taste.). The layers were adhered to the focal point layers and a row of Crystal Twinkles were added under the sentiment.

autumndaysplatinumbeate.jpg

For the inside of the card I layered another 3 3/4″ Ballet Blue square with a 1/4″ smaller Whisper White square. I added a few more branches in second and third generation Basic Gray and paper pierced a border around it.

If you want to see step by step pictures on how I stamped with the paint, click on more.

Continue reading »

When the Dare To Get Dirty Challenges were going on a couple of weeks ago, I really wanted to participate in Sharon’s, but I didn’t have the right designer paper.  I was excited to see black/white Designer paper in the new Mini catalog and ordered it right away. I used it for today’s sketch challenge.

dreamsdujourdtgd09stampersh.jpg

My card base started out as a 4 1/2″ x 8 1/2″ piece of cardstock folded in half. I cut it with the new Scallop Square Clear Die from Big Shot. Next I cut two pieces from the Night & Day Specialty Designer Paper, the darker one measuring 1 3/4″ x 3 7/8″, the lighter one a 3 7/8″ square. I taped the darker strip to the left hand side of the lighter square and tied 5/8″ wide red grosgrain ribbon over the point where the darker designer paper ended.

The sentiment is fromDreams Du Jour and was stamped in Black Stazon on a 1 1/4″ x 3″ piece of Whisper White cardstock. The medallion (oh…I LOVE that stamp) from Friends 24-7 was stamped on the right hand side of the sentiment strip in second generation Real Red ink. It was layered on a slightly bigger piece of Basic Black cardstock. The bottom of that strip had been punched with the Eyelet Border punch. The edges of the White cardstock had been paper pierced. The sentiment strips were adhered to the card base with dimensionals. To finish off the card front I added a Pretties Kit flower that had a Clear Rhinestone Brad in each center.

dreamsdujourdtgd09insidebea.jpg

For the card base I started with a 3 7/8″ square in Real Red. It was layered with a 3 3/4″ Whisper White square. The designer paper strip measures 1″ x 3 3/4″. A small strip of Real Red cardstock that had been punched with the Eyelet Border punch was taped underneath. The top of the Designer Paper was paper pierced and the entire piece sanded. The medallion was stamped in second generation Basic Gray ink. The top left edge was paper pierced.

I hope you have a wonderful weekend! Hugs and smiles 

Sorry I was so quiet over the weekend. I had a great time, just didn’t get to stamp. Friends from Illinois came to visit and stayed until yesterday. Our kids are friends with each other, the men are good friends and so are Sharon and I. Good times, good times.

 Today’s tutorial on splitcoast is written by Lynn Mercurio and is for the Recessed Window. You can make your own little shadowbox. I think it looks so pretty.

charmingrecessedwthanksbeat.jpg

My card base is a 5 1/4″ x 10 3/4 piece of Chocolate Chip cardstock piece scored at 5 1/4″ and 5 1/2″. This will create a small spine as wide as my window. The spine will help the card to lay flat instead of gaping open when you just score the card base regularly.

My window sits 1″ in from each card side. For the frame I taped a 4 3/4″ square of Autumn Traditions Designer Paper on top of a 1/4″ bigger piece of Whisper White. I cut the window 3/4″ in,  paper pierced  and sanded the outer edge.

charminggrommetcloseup.jpg

I finally ordered some small grommets. What the heck was I waiting for? I love how you can use them as outline for brads. I added three to the top right of my frame and added clear Rhinestone brads in each center. White Organza Ribbon was tied around the bottom edge of the frame. The frame was adhered to the card base with dimensionals.

The sentiment is from the stamp set Charming (Holiday Mini catalog). It was stamped in Chocolate Chip on Textured White cardstock. That was cut out and embossed with a small oval Nestabilities. I left the next die on, sponged over it with Soft Suede, stamped over it with a background stamp from Charming in second generation Soft Suede and stamped the medallion stamp from the same stamp set in second generation More Mustard. The oval was layered on a  slightly bigger Chocolate Chip scallop oval that was cut with Nestabilities as well. It was adhered to the frame with dimensionals.

charminglabelcloseup.jpg

For the centerpiece I cut my base out of Textured White cardstock with the Nestabilities Label 1. Again I left the die over the cardstock, sponged Soft Suede over the center and stamped the main image in Chocolate Chip. Then I added the background stamp and medallion stamp over the cardstock just like I did with the sentiment piece. It was layered on the next size up Label 1 cutout out of Chocolate Chip cardstock. The center base is a 3 1/8″ square of Whisper White cardstock followed by a 2 7/8″ square of Autumn Tradition Designer Paper. The edges were paper pierced and sanded.

charmingrecessedinsidebeate.jpg

The inside the card is a 5″ Whisper White cardstock square. A 1 1/4″ strip of Autumn Traditions Designer Paper was added on the lower half. Underneath that is a strip of Soft Suede cardstock that had been punched with the Eyelet Border Punch. For the medallion I stamped the medallion from Charming twice, once on Whisper White cardstock, once on Autumn Tradtions Designer Paper. I punched out the center of the Designer Paper with the 3/4″ circle punch, taped that to the stamped White cardstock. That was punched out with the 1 1/4″ circle punch. Next is a 1 3/8″ Soft Suede circle and a Chocolate Chip scallop circle. A clear Rhinestone Brad was added in the center. The medallion was adhered to the card with dimensionals.

Here is a video for the visual learner:

[youtube]https://www.youtube.com/watch?v=HdFpXaor-ts[/youtube]

I loved Tuesday’s Color Challenge Combo. It had brown in it. 🙂

blushbirdonbranchbeatecc230.jpg

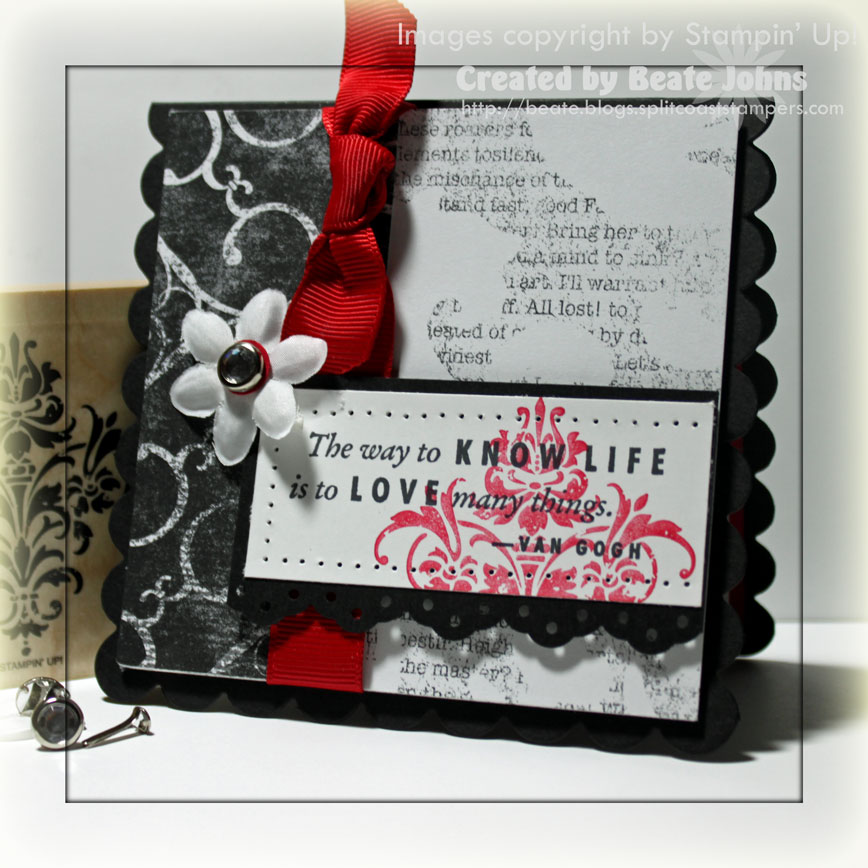
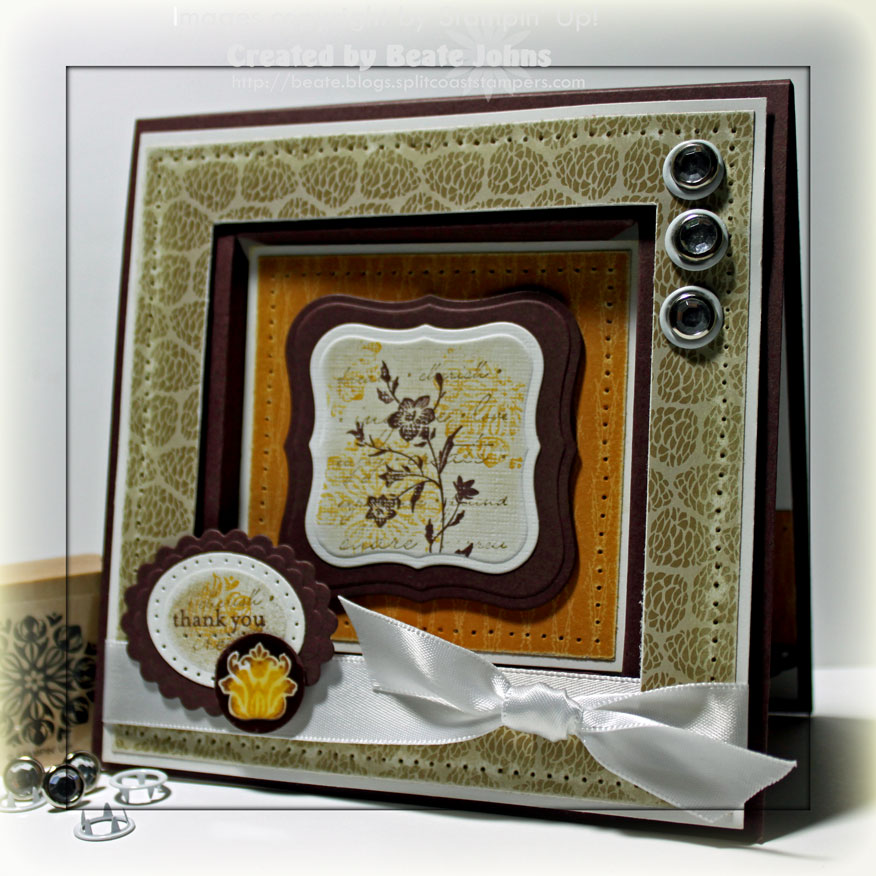
My card base is a 4 1/4″ x 8 1/2″ piece of Close to Cocoa cardstock piece. It was folded and the card front edge was sponged.

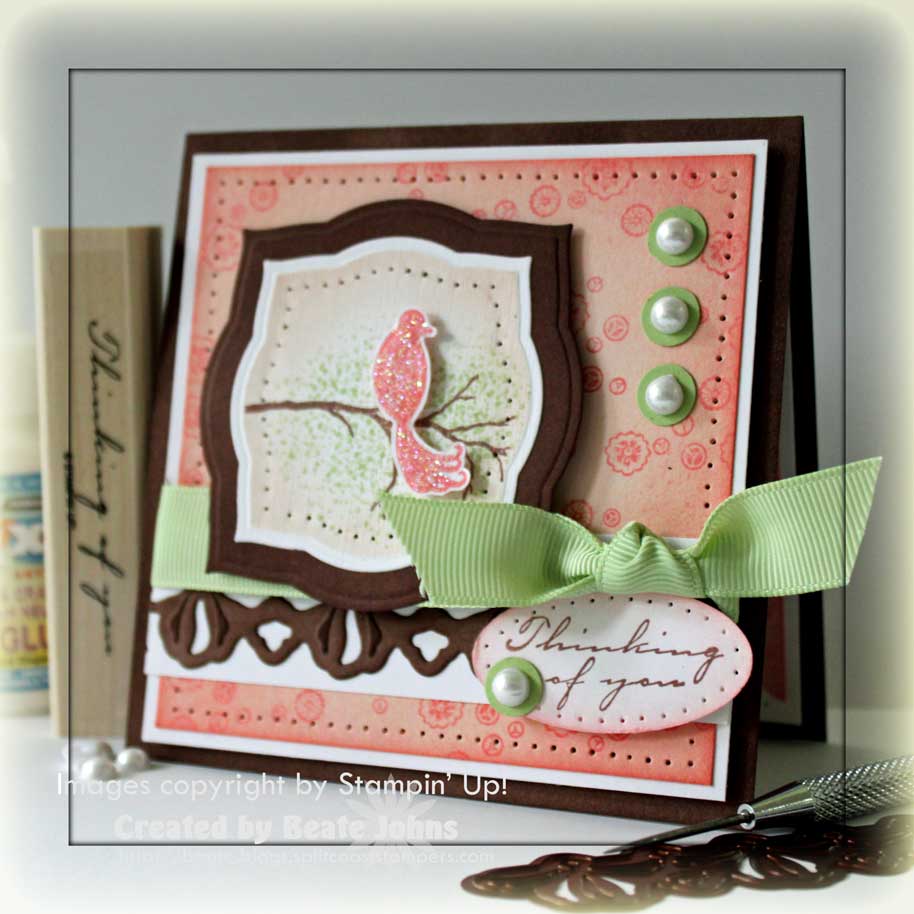
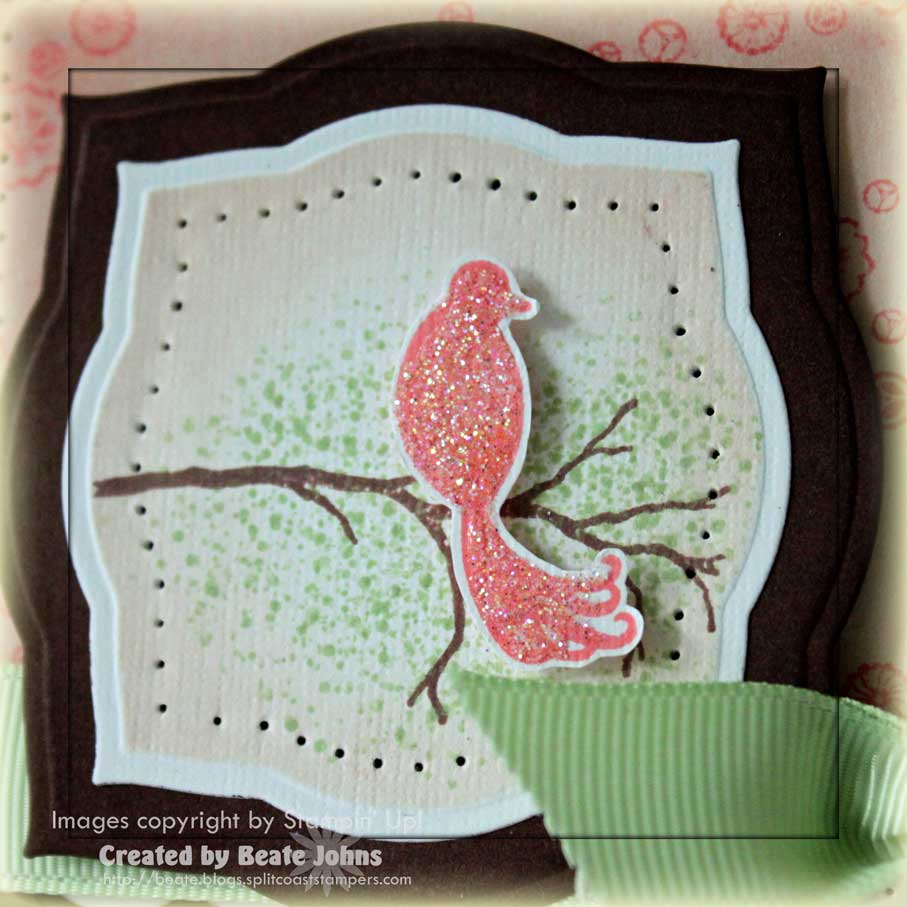
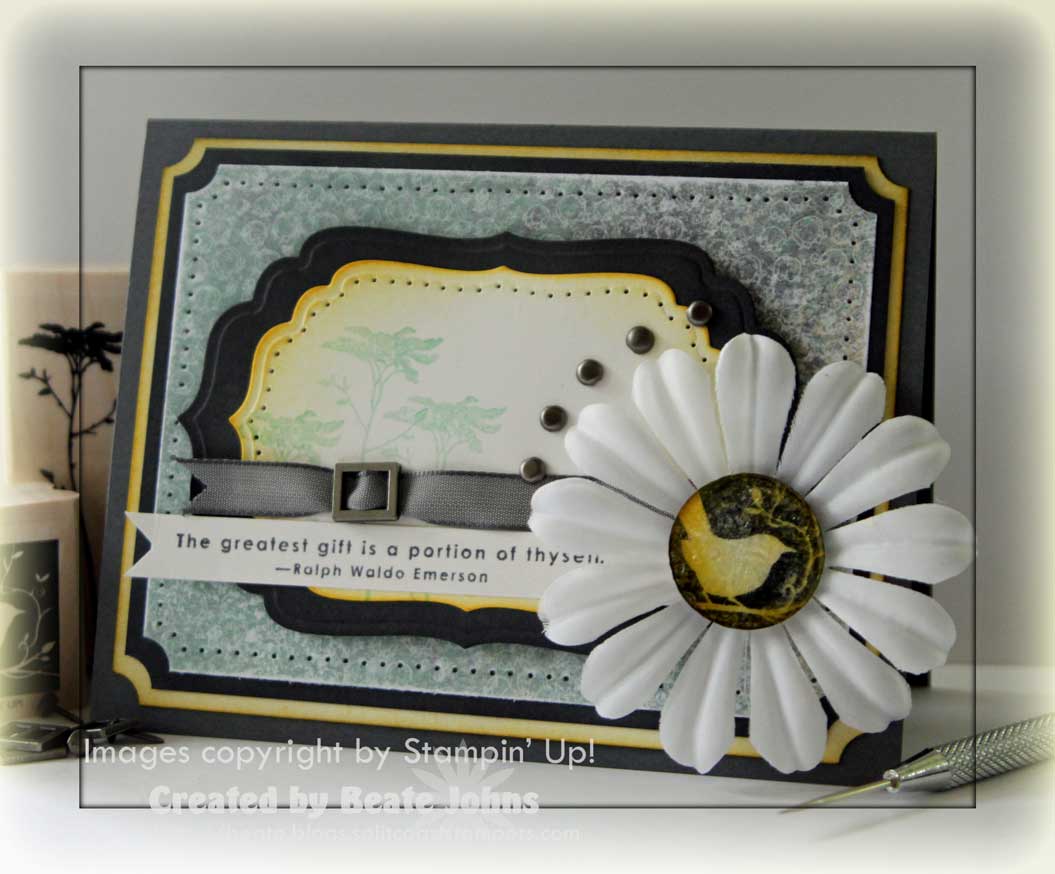
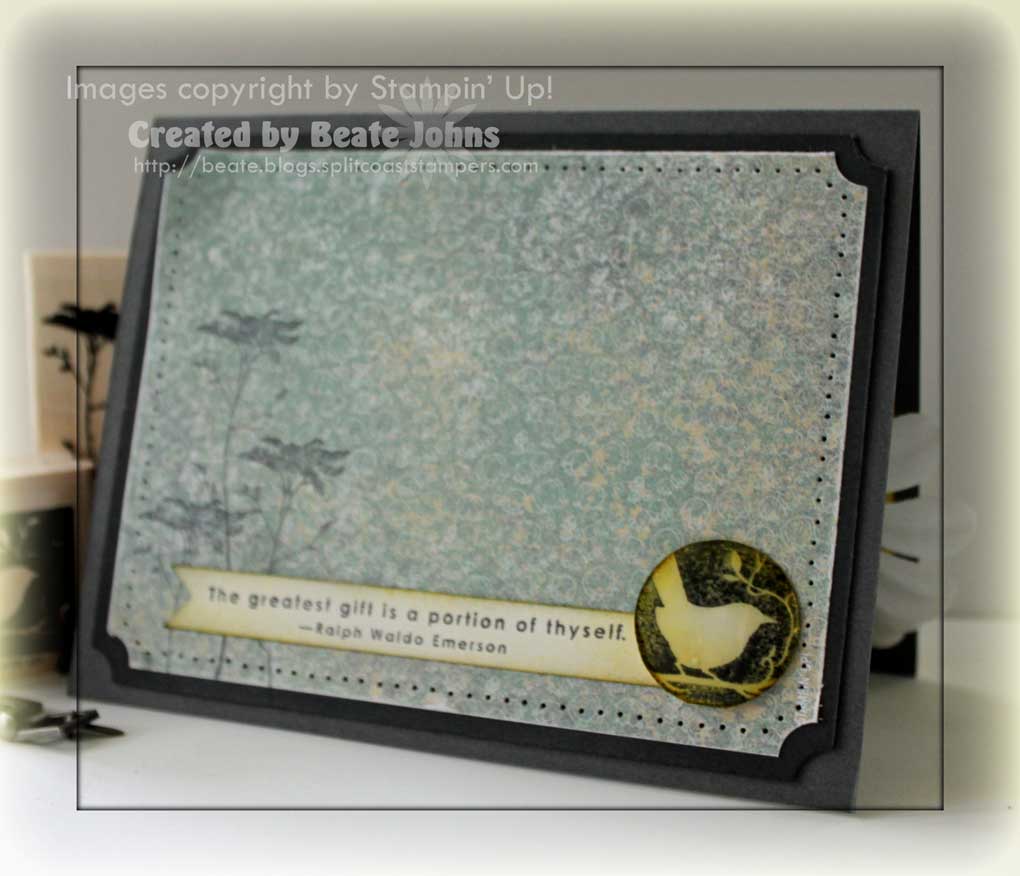
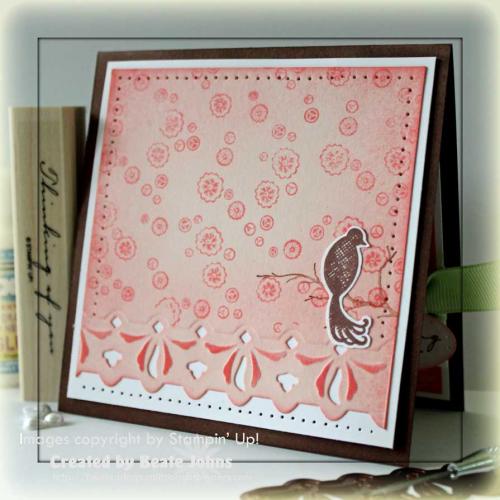
The next layer is a 3 15/16″ square of Whisper White cardstock followed by a 3 3/4″ square of Blush Blossom. The Blush Blossom cardstock was stamped with an image from Bird on a Branch Stamp Set in Cameo Coral. The cardstock edge was sponged first with Blush Blossom, then with Cameo Coral and a paper pierced border was added.

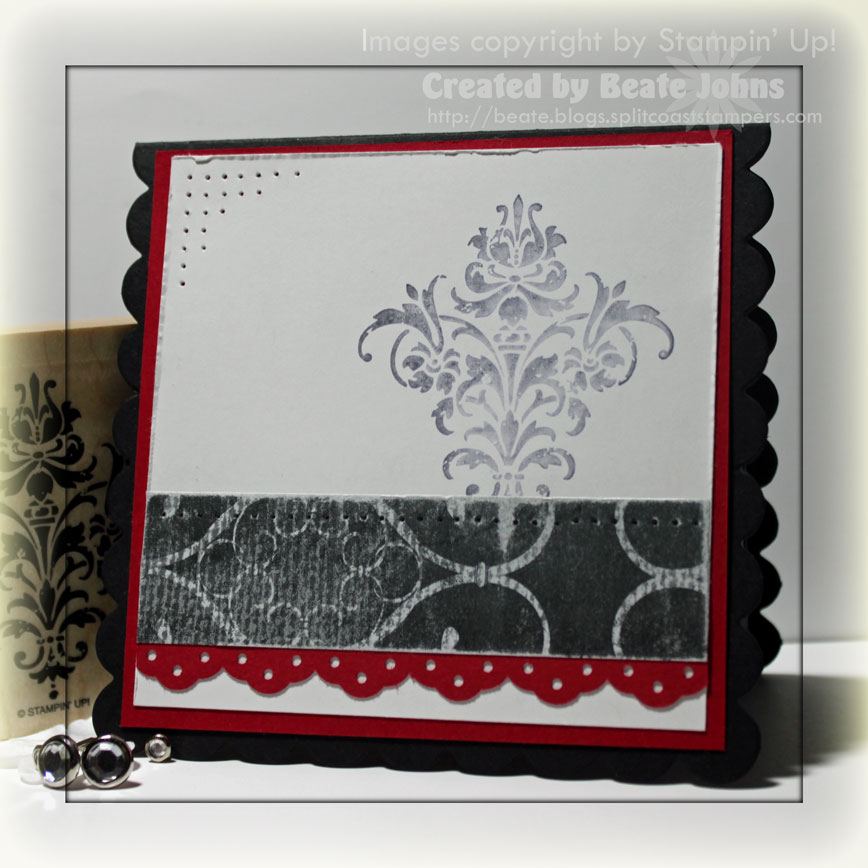
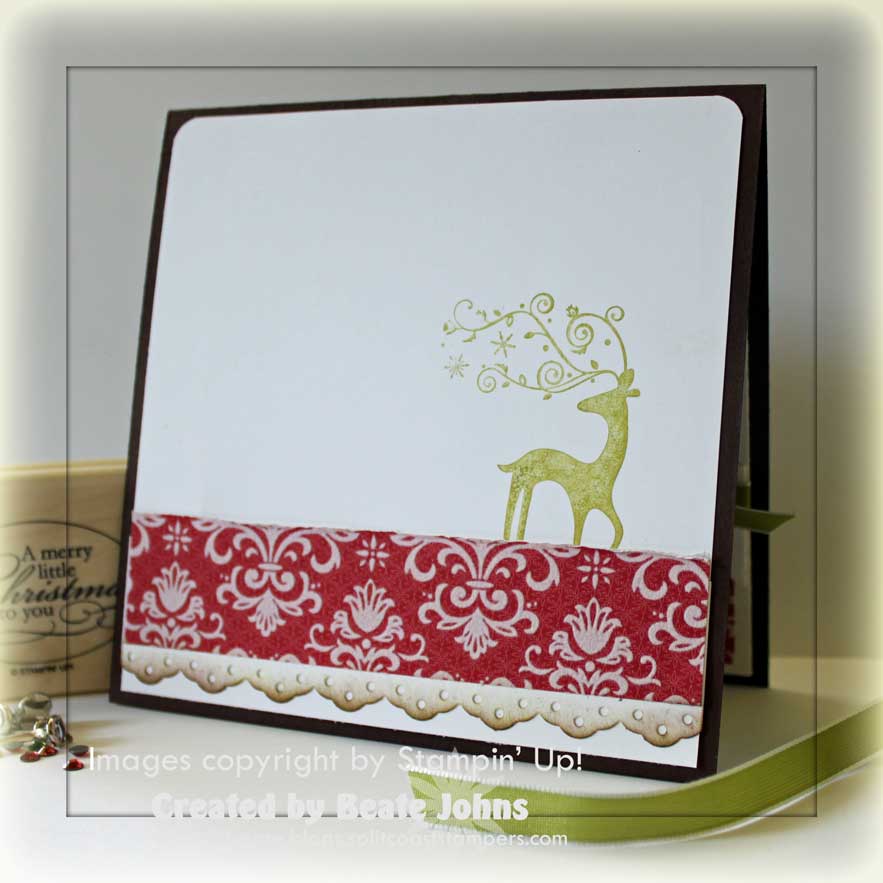
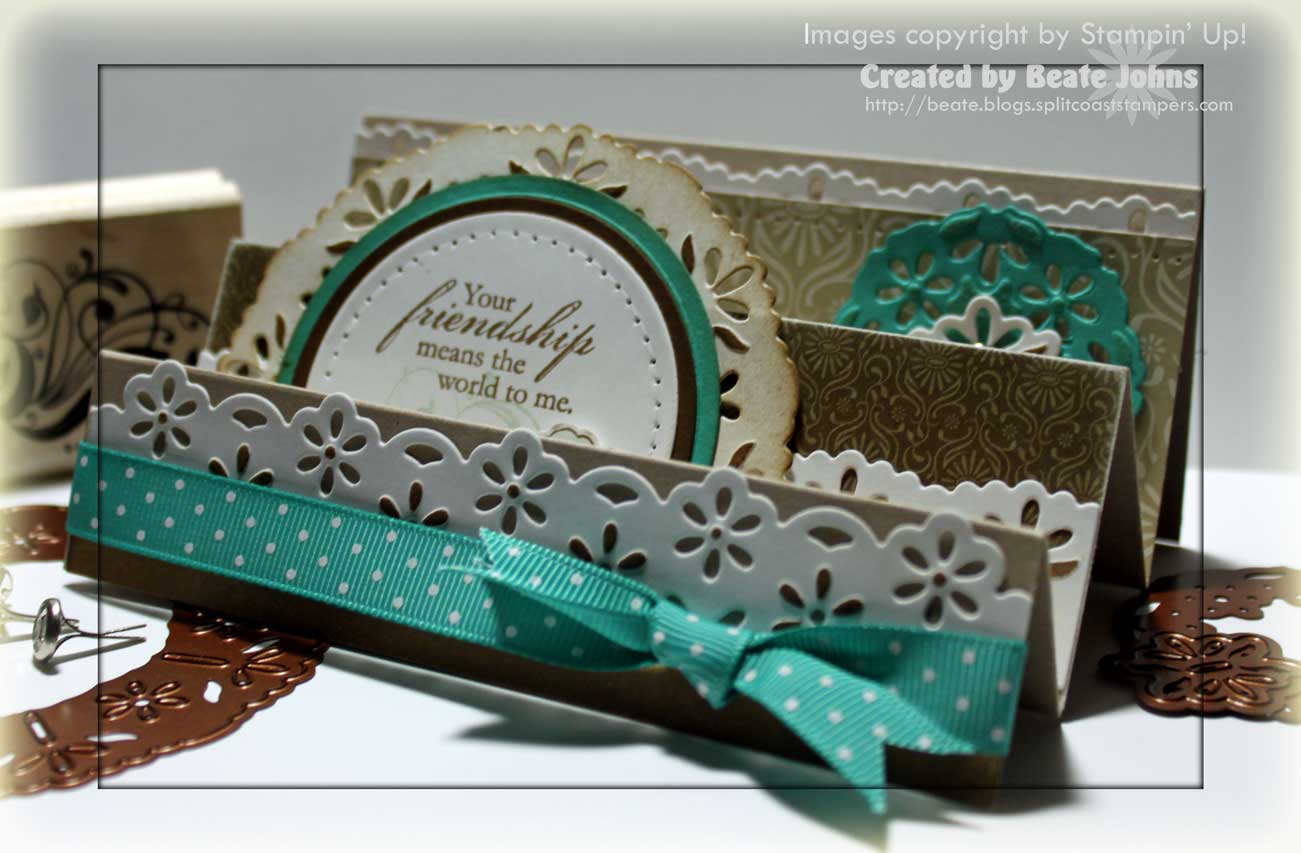
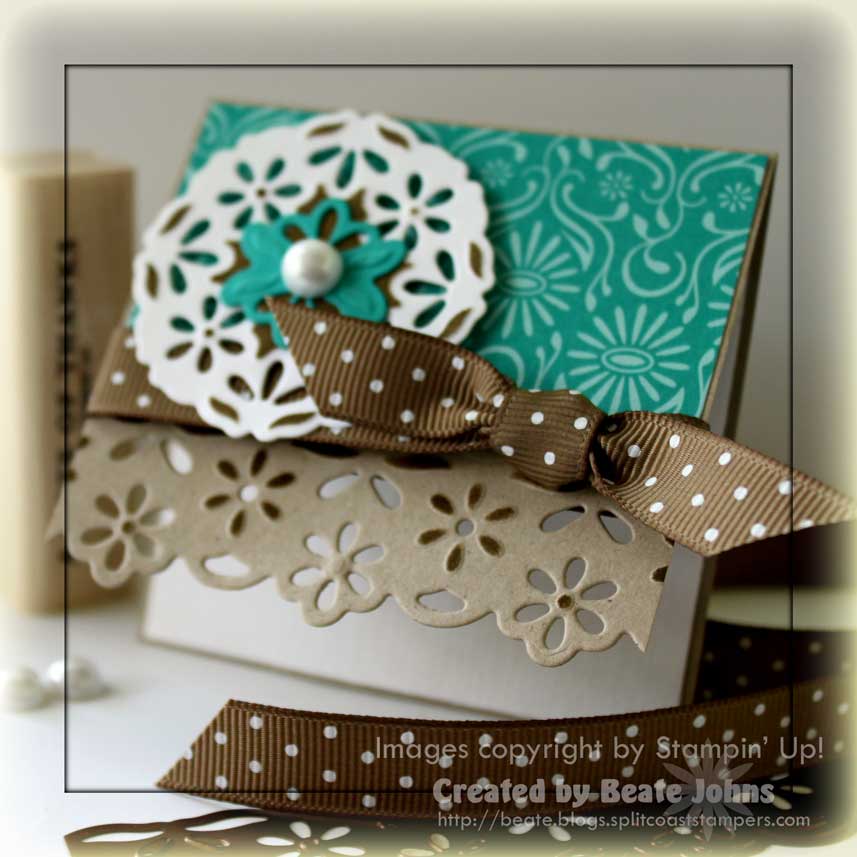
I added a slim strip of Whisper White cardstock on the lower half of the card front and placed a strip of Close to Cocoa Cardstock over that. The Close to Cocoa strip had been cut, embossed and stenciled with the Kaleidoscope Borderabilities. Celery 5/8″ wide grosgrain ribbon was tied above the die cut strip.

birdonbranchblushdetail.jpg

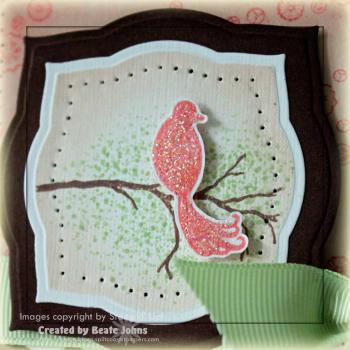
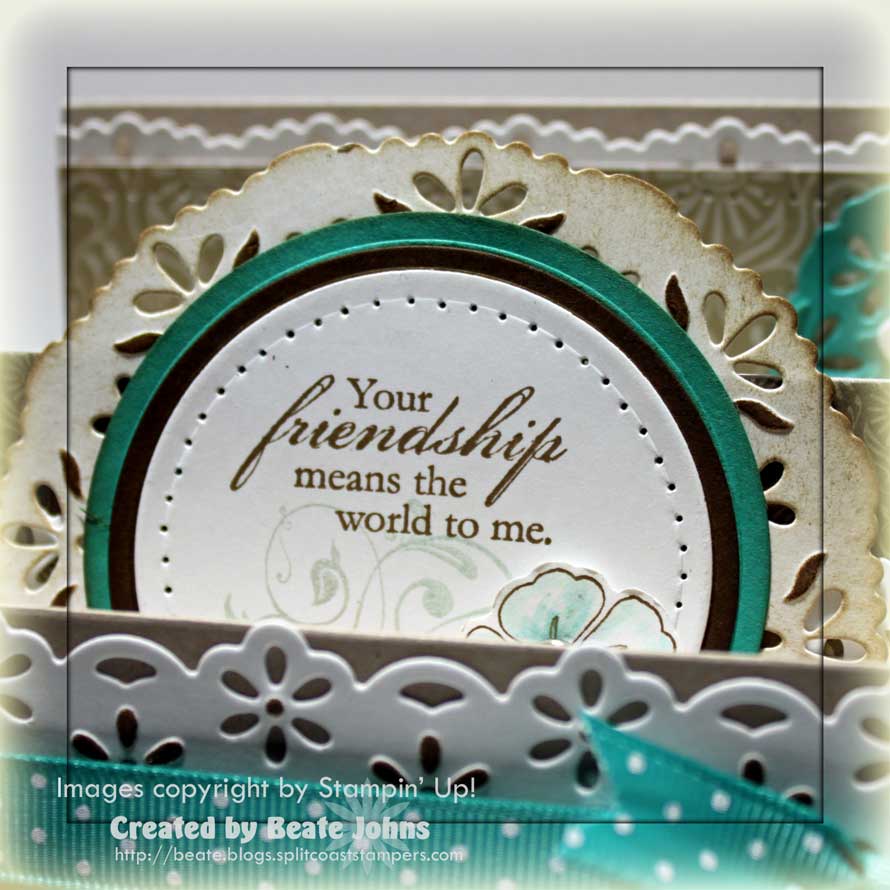
The main image panels were cut with Nestabilities Label 3. All images are from the Bird of the Branch stamp set. The branch was stamped in Close to Cocoa, the leaves in Certainly Celery, the bird in Cameo Coral. I left the Nestabilities die over the textured white cardstock while stamping, and also left it over the cardstock while sponging Blush Blossom over it. Then I layered it on the next size up Label Three cut out of sponged Close to Cocoa cardstock. A paper pierced border was added on the edge of the white cardstock.

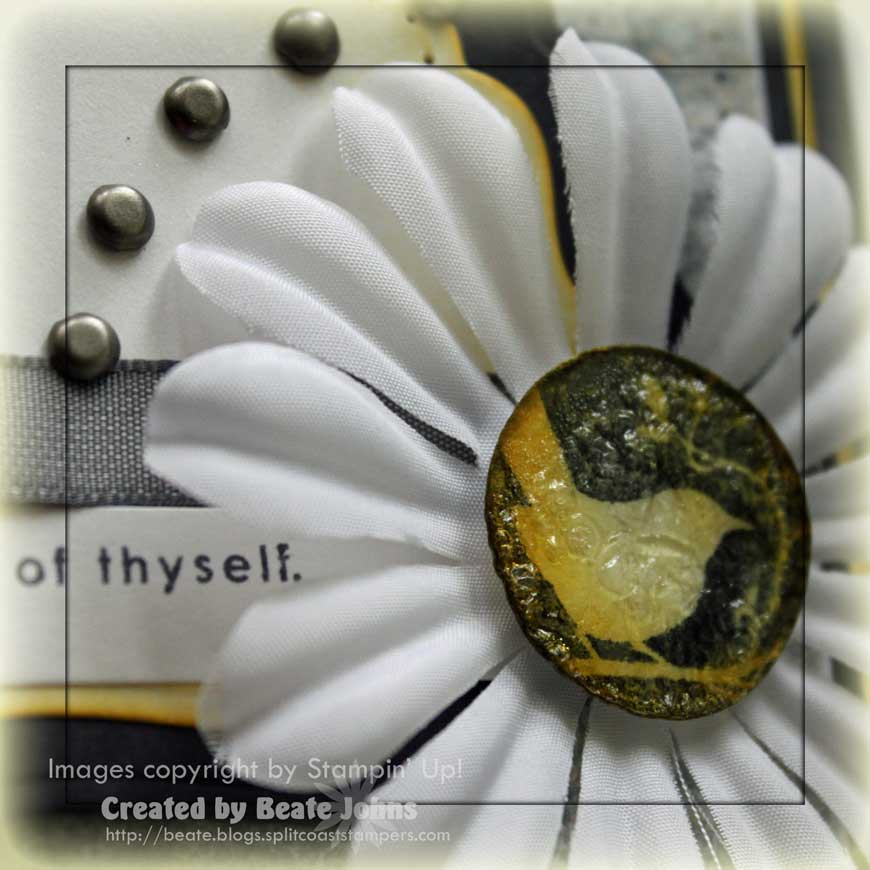
I stamped the bird again in Cameo Coral on Textured white cardstock, cut it out and adhered it over the main panel with dimensionals. I covered the bird in Crystal Effect and sprinkled Dazzling Diamond Glitter over it.

wordpunchcirclemerge.jpg

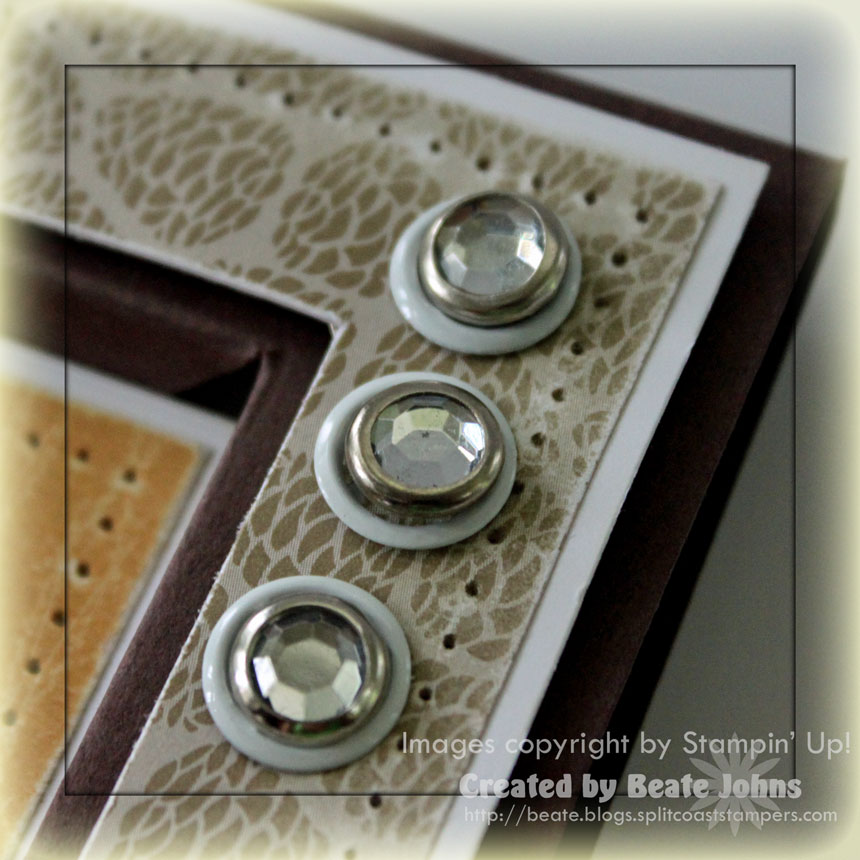
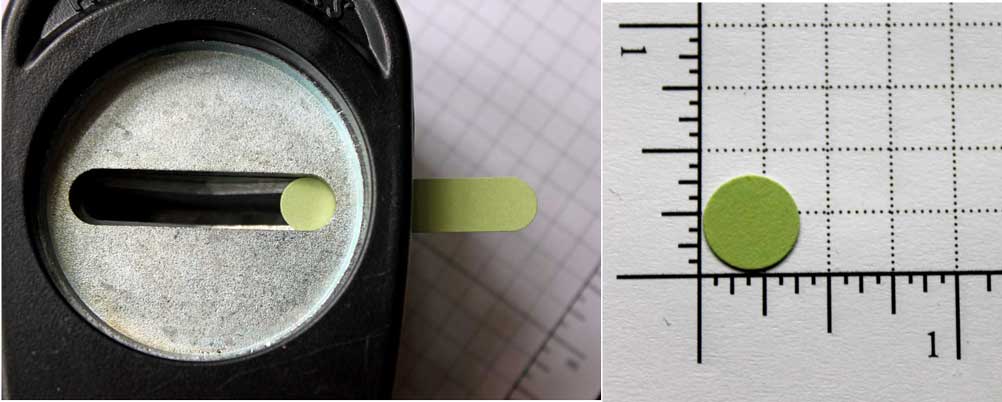
To add more green I decided to add a Certainly Celery circle underneath my Pretties Kit half pearls. Unfortunately the 1/4″ circles were just as big as the pearls and the 1/2″ circle looked too big. So I decided to try the Window Word punch. I first punched a tag out like normal, then slit it back into the punch, lined it up until it looks like a circle and punched. That circle was perfect for my pearls and measured about 3/8″.

blushbirdonbranchinsidebeat.jpg

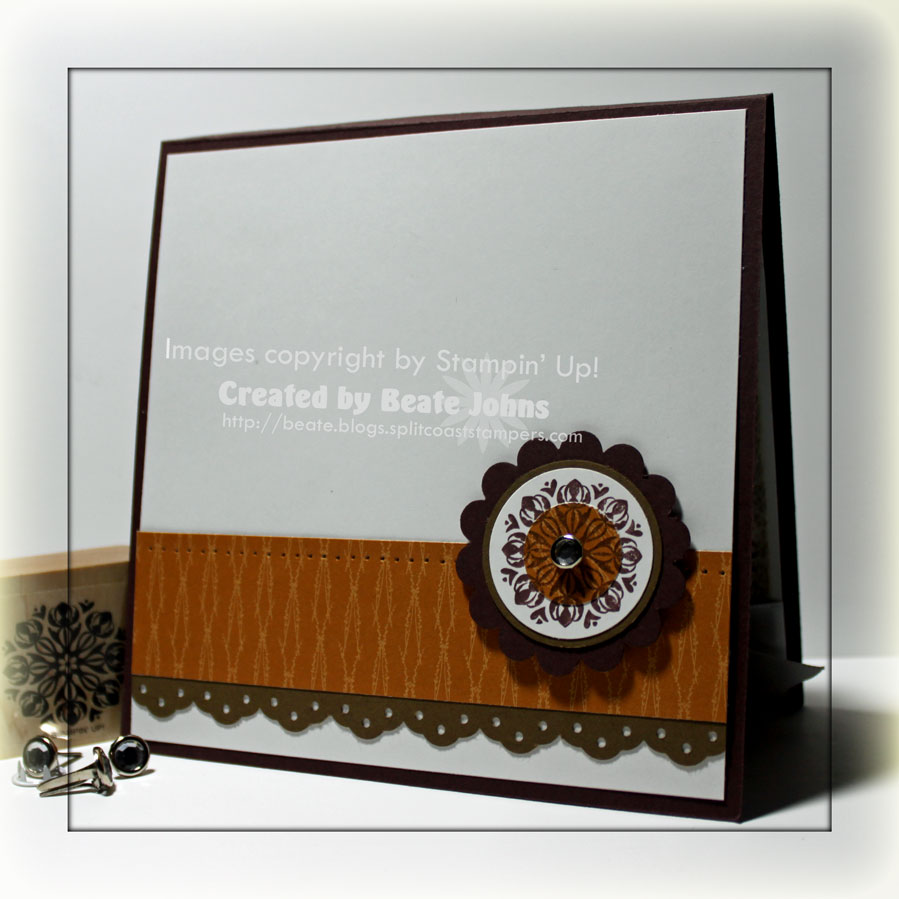
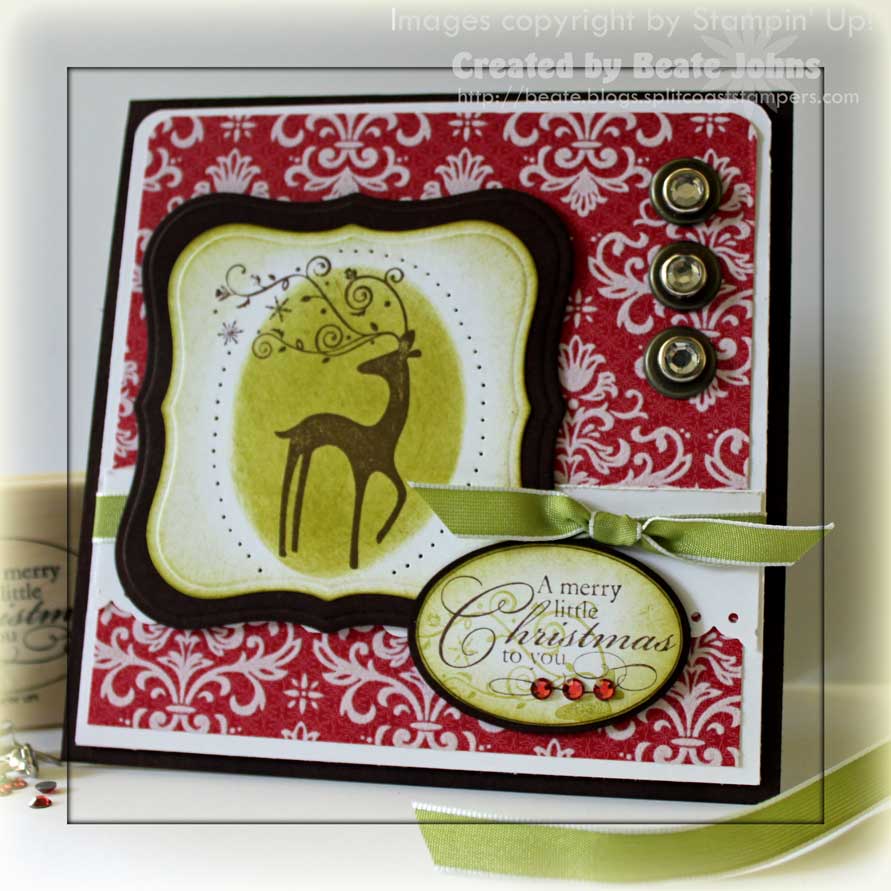
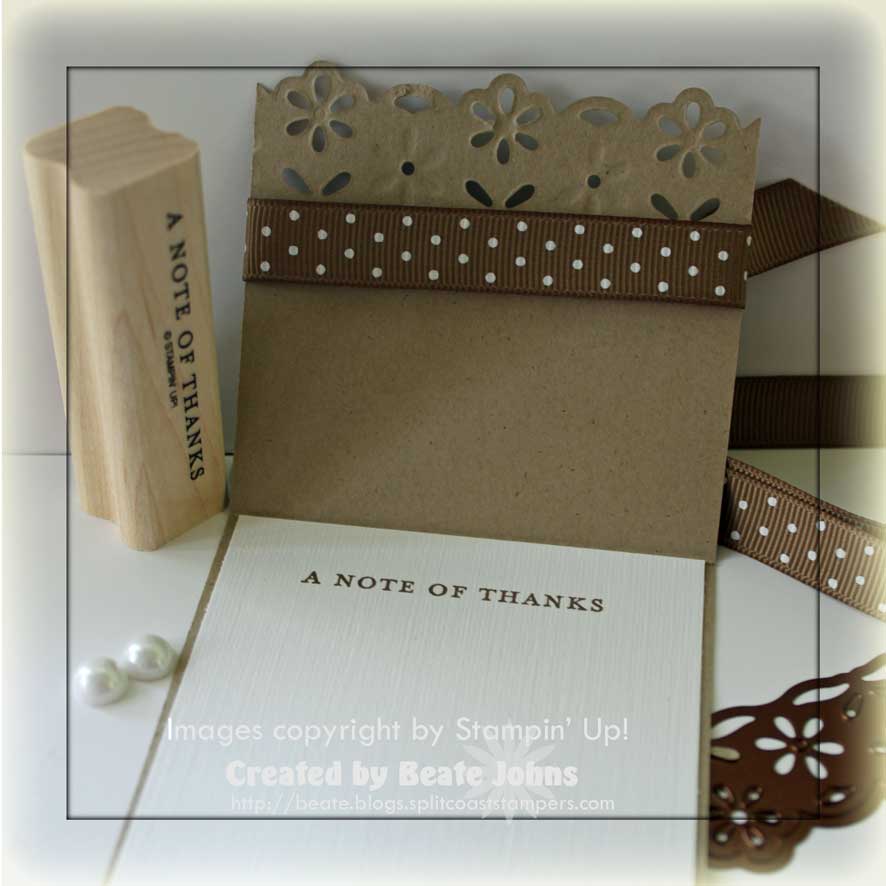
For the inside I created a similar layers then the front. Except for the Blush Blossom layer was cut this time with the second Borderabilities template. The one that only cuts one side, not both. Again the background image was stamped in Cameo Coral and the edges were sponged first with Blush Blossom, then with Cameo Coral ink.

 For the visual learner out there, I shot a video tutorial on sponging. You can find it here:

[youtube]https://www.youtube.com/watch?v=3-HhazuOMjQ[/youtube]

Have a wonderful day! Hugs and smiles

I received my preorder from the Holiday Mini catalog Wednesday evening. I know I had to use some of my new product. I did pick the stamp Dasher and Christmas Punch(Level 2 hostess set – now don’t judge my big spending. LOL), which are not from the mini and the GORGEOUS,  AMAZING, WONDERFUL flocked Christmas Cocoa Specialty Paper. It’s soooo pretty.

dashercocoadpbeatewsc92.jpg

My card base is a 5 1/4″ x 10 1/2″ piece of Chocolate Chip cardstock. The edges of the card front were sponged.  The Whisper White square measures 4 15/16″ piece of Whisper White cardstock. The top corners were rounded with the corner rounder.  I love the new Christmas paper from the Mini catalog. Looks how pretty it is. The layer measures 4 3/4″ square. Again the top two corners were punched with the corner rounder.

On the lower half I added a  1 1/4″ x 4 15/16″ strip of Whisper White strip of cardstock. The lower edge had been punched with the Eyelet Corner Punch. I distressed the upper edge just a bit with the Cutter Tool kit. Then I tied the Olive Taffeta from Sleigh Bell Ribbon pack on the upper half of that strip.

I cut and embossed two Label one Nestabilities, the smaller one out of Whisper White, the larger one out of Chocolate chip cardstock. The chocolate cardstock was sponged. On the white layer I stamped Dasher in Chocolate chip ink. I topped it with an oval Nestabilities die and spongedon the inside of that die template as well as lightly on the outside of it with Old Olive ink. Then I sponged the edges of the white layer as well. The white layer was adhered to the Chocolate chip cardstock, then an oval border was paper pierced around the sponged oval.

The sentiment is from the Level 2 Hostess set Christmas Punch. Look how pretty that script is. I LOVE IT!  I stamped the sentiment in Chocolate Chip on Whisper White cardstock and cut right outside the stamped oval, sponged the edges with Old Olive and stamped the reindeer head with antlers in third generation Old olive over the sentiment. I punched a Chocolate chip layer with my wide Oval punch, sponged the edges and taped the sentiment on top of it. Last I added some bling. Isn’t that pretty. They are Swarovski Crystal’s from My Favorite Things. I saw it at our booth at the CHA when we went through quite a few boxes of them for our SCS make and take. The sentiment as well as the image layers were attached to the designer paper/White cardstock layer with dimensionals.

Next I added three Antique Brass Jumbo Eyelets to the upper right hand side of the layers. I placed a large clear circle Rhinestone brad in each Eyelet center and adhered those layers to the card front with dimensionals as well.

dashercocoainside.jpg

My inside is mirroring the card front layers. The Whisper White square measures 4 15/16″ and the top corners were rounded with the corner rounder.  I added another Dasher image stamped in third generation Old Olive on the right hand side. The Designer Paper strip measures 1  3/8″ x 4 15/16″. A thin white strip that was punched with the Eyelet Border punch was adhered underneath the designer paper and sponged with Chocolate chip.

I am excited! A good friend of mine is coming for a visit over the weekend along with her family. Not sure how much posting I will get done. Have a wonderful weekend! Hugs and smiles

I am sorry I am so late announcing this. I tell you, between catching up with work after Orlando, my kids thinking they should be fed and me trying to get the video thing worked out completely, I am one busy bee.

 Random.org picked #20 as the winner of the Challenge. That is Allison with this beauty.

wsc91winner-alison.jpgwsc91winner-alison.jpgwsc91winner-alison.jpg

Thank you all for playing. I haven’t seen all your entries yet, but I will look through as soon as I can! Make sure you check the blog tomorrow for the next challenge sketch! Hugs and smiles

Today’s tutorial is for the Stair Step Fold card. It was a Technique challenge  last fall and took off like crazy.

wingsoffriendshipeyeletpend.jpg

I thought this card style would be perfect to show off die cuts made with the Borderabilities and Pendants (Eyelet) from Spellbinders.

My card base is a 5 1/2″ x 10 1/2″ piece of Kraft cardstock. It was scored at 1 1/4″, 2 1/2″, 4 1/4″, 6″ and 8 1/4″.

The paper, you guess it, is Thoroughly Modern Designer Paper from Stampin’ Up! I used Whisper White, Bermuda Bay and Soft Suede Cardstock as additional cardstock. The circles were cut with Circle Nestabilities. The ribbon is Bermuda Bay Polka Dotted Ribbon.

wingsoffriendshipeyeletclos.jpg

The sentiment was stamped in Soft Suede. It is from the Hostess set Wings fo Friendship.

The swirl is stamped underneath in third generation Bermuda Bay. The flower from the same set was stamped in Soft Suede, colored with Bermuda Bay and Blender Pen and adhered to my main image with dimensionals. A clear rhinestone brad in the center of the flower finishes it off.

For visual learner, check the video tutorial here:

[youtube]https://www.youtube.com/watch?v=FAPJ9gwyUcE[/youtube]

I had meant for my sample to be a strict only Stampin’ Up! card, but then my order of Nestabilities from Ellen came in and I had to use my new label set.

 oftheearthwsc91beate.jpg

I wanted to use some colors I usually don’t use. It was hard and I am not sure I like what I came up with. I had to leave to Orlando though…so I don’t have a choice. This is my sample. LOL

I am going to keep this post super short. It was a long day. I got up at five, my plane was taking off at 7 a.m., was at Orlando at 11 a.m.  and spend all afternoon with the SCS team (Jenn, Lori and Daven). Daven took me through the show really quick, then it was time to set up the SCS booth.

We just came back from dinner and it’s already after midnight.

oftheearthwsc91closeup.jpg

Stamps: Of The Earth (Level 1 Hostess set)

Ink: Crushed Curry, Basic Gray

Paper: Basic Gray, Shimmery White, Designer paper (the one with Sage Shadow and Gray…can’t remember the name)

Acc.: 1″ circle punch, Pretties Kit, retired Pewter Hodgepodge Hardware kit, gray Taffeta ribbon, Crystal Effect, Dimensionals, Nestabilities

oftheearthwsc91inside.jpg

I am having a crazy day today. The cable guys were here to drill a hole through our wall and lay me a cable input in my stamp room. They had to go into our crawl space and I had dirt everywhere. That’s especially bad on a Tuesday when I just cleaned the whole house yesterday. (It is clean again thanks to a good vacuum and some good old fashioned cleaning) Plus our air conditioner is leaking and I am expecting repairman for that. 

 Despite all that I got my walk in and already worked on two tutorials for the week after next AND I had time to play a little. So maybe it isn’t as bad of a day then I thought it would be…. 🙂

thankyoukindlyborderclose.jpg

I tried out my new Eyelet Borderbilities and Pendants today!

FUN, FUN, FUN!

You got to know I love THAT look. I only use Stampin’ Up!’s Eyelet border punch on almost every card.

Here is a medallion I punched with the Pendant dies. The cool thing is that Spellbinders including cutting sandwich instructions in the package! That took all the guesswork out of the cutting and embossing.

thankyoukindlyborderoutside.jpg

Check out that beautiful cut, embossed and stenciled border.

I didn’t want to take away from that and the medallion, so I only added a little Thoroughly Modern Designer Paper and Soft Suede Polka Dot Ribbon and was done with my card front.

The card base is a 3″ x 6″ piece of Kraft cardstock folded in half. The edge of the card front was cut, embossed and stenciled with the Eyelet Borderabilities.

For the Medallion I cut Whisper White with the medium size pendant die, Bermuda Bay cardstock with the small template. I sponged Soft Suede classic ink over the medium die with a sponge dauber and topped the Bermuda layer off with a medium size pearl from the Pretties Kit.

thankyoukindlyborderbilitie.jpg

The inside of the card is lined with a 2 7/8″ square of textured Whisper White cardstock. The sentiment is from the stamp set Thank you Kindly and was stamped in Soft Suede on the top center.

I think will make a few more of these cards. I have a few thank yous to send out.

Tomorrow is another tutorial day….and Thursday I am leaving to go to the CHA. I am soooo excited about that. Jenn and Lori are already there today. Daven will arrive tomorrow. It will be good to hang out with them. I can’t wait to go so I can meet so many people that I only know through SCS or blogs or that I haven’t seen in ages! It will be “GOOD TIMES” indeed.

Have a wonderful day! Hugs and smiles

© 2012 fresh & fun Suffusion theme by Sayontan Sinha