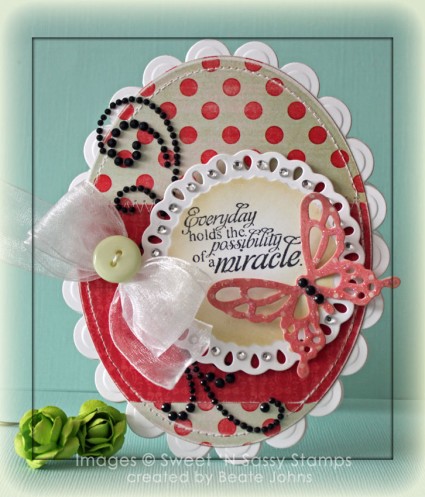
Here is another card I created for the Sweet ‘n Sassy Blog as well as for a HYCCT Challenge. Wendy challenged us to use Butterflies on our project. It was the perfect time to use Everyday Miracles.

A sentiment from the set was stamped in Tuxedo Black Memento Ink on a piece of Neenah Solar White cardstock that had been cut and embossed with a Tear Drop Circle Nestabilities die. The inside was sponged first with Antique Linen, then the edges with Vintage Photo Distress ink. Baby Bling Rhinestones were added to the rim of the circle.

MME  Lost & Found Market Street paper was layered, then cut with Grand Oval Nestabilities dies. The edges were sanded before the layers were adhered to the card base, Neenah Solar White cardstock cut and embossed with a Grand Scallop Oval Nestabilities die. A black Finesse Rhinestone swirl was cut apart and adhered to the card base before the sentiment panel was adhered to the card base with dimensionals.

White Organdy Ribbon was tied into a bow with help of the Bow-Easy. It was topped with a green button and adhered next to the sentiment circle. A butterfly was cut out of Market paper with the new Donna Salazar Wonderful Wings dies. The butterfly was adhered to the circle and topped with Stardust Stickles. Three black Baby Bling Rhinestones finish of the butterfly and card.

Thanks so much for stopping by! Have a wonderful day!
Hugs and smiles

Today’s tutorial is written by the wonderful Cindy Lawrence. She shows us how to tailor an envelope or as she puts it “Hip to be a Square”.

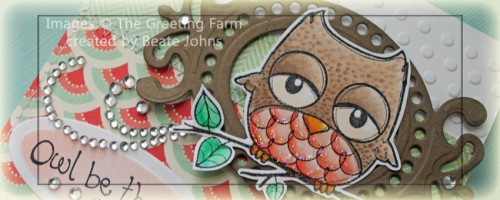
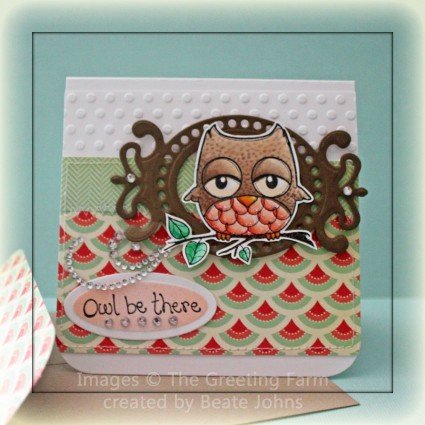
For my card that matches the tailored envelope I started by stamping the owl from The Greeting Farm’s Forest Friends in Tuxedo Black Memento Ink on Neenah Solar White cardstock. The image was colored with Copic Markers (R00, R01, R02, R05, E41, E42, E43, E44 G00, G02, G05, E50) and cut out. I chose the owl image so the card would work for Patty’s Hope you Can Cling To challenge.

A frame was cut and embossed with a Fancy Tag 3 and Classic Oval Nestabilities die out of Stampin’ Up!’s Soft Suede cardstock. The owl was adhered to the frame and a Baby Bling Rhinestone was adhered to each end.

The card base is a 4″ x 8″ piece of Solar White cardstock scored in half. The bottom corners were rounded.

A 3/4″ x 4″ piece of Cosmo Cricket Clementine paper was stitched slightly over a 2 1/2″ x 4″ piece of the same paper pack.  A 1 1/2″ wide strip of white cardstock was embossed with Cuttlebug’s Polka Dots embossing folder and adhered under the layers. Everything was taped to the card base.

A sentiment from the set was stamped on a piece of white cardstock that had been cut and embossed with the smallest of the Petite Oval Nestabilities die and airbrushed with Copic Marker R02. It was adhered to the lower right edge of the horizontal layers. Baby bling was lined up under the sentiment and  part of a Finesse swirl was adhered slightly over it. The frame with owl was adhered to the card base with dimensionals.  Stardust Stickles over the pink feathers of the owl finishes off the card.

Thanks so much for looking! Have a wonderful day.
Hugs and smiles

Here is another card for one of the HYCCT challenges. The hostess for this challenge was Barbara Anders. She challenged us to create a card with two sizes of any geometric shape on your project: Circles, rectangles, squares, ovals, you choose, just use two sizes!

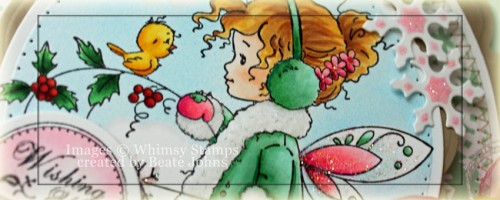
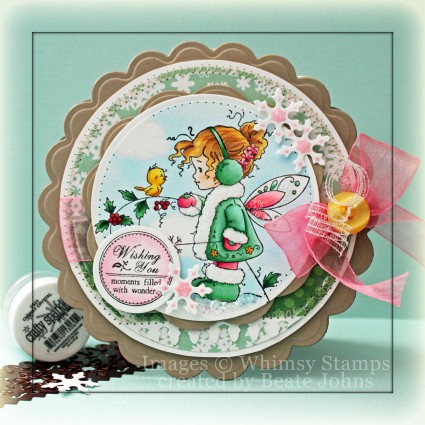
I knew I wanted to use another Wee Image. I bought three of them, but I think I might get them all. The girl is just so cute. Since the Winter Fairy image was pretty even all around, I chose to cut it with the largest Circle Nestabilities die after I stamped her in Tuxedo Black Memento Ink on Neenah Solar White cardstock.

The image was colored with Copic Markers (Skin: E0000, E00, R30    Hair: Y21, Y23, E31, E33     Coat: G12, G14, G16    Leaves: G07, G16, G28      Berries: R08, R29, R39     Flowers/mitten: RV21, RV23, RV25), masked, a few cloud masks were added and the image was airbrushed with Copic Marker B02. The coat trim was covered with Sugar Sparkly Fluff and the ground was covered with Chunky Crystal Crafty Sparkles.  The image was adhered to a piece of Kraft cardstock that had been cut and embossed with Big Scalloped Circles. The edges or the image were paper pierced.

A 1 3/4″ strip of one pattern of Patterned Paper from Echo Parks Holly Jolly Christmas collection was adhered over a 5″ square of another pattern of the same pack. A white strip of cardstock had been cut and embossed with a Snowflake Borderabilities. It was adhered under the green horizontal strip. The paper was cut and embossed with one of the Grand Circle Nestabilities and stitched to as lightly bigger white cardstock circle.

White Organdy Ribbon was colored with Copic Marker RV25 (I don’t have any bright pink ribbon) and tied around the horizontal strip. The bow was topped with a yellow button that was tied on with iridescent curling ribbon.  The snowflakes that came out of the Borderabilities cut were airbrushed with Copic Marker RV23 and two were adhered to the upper right of the image.

A sentiment from Whimsy’s Magical Whimsy Seals was stamped in Tuxedo Black Memento Ink on a piece of white cardstock, cut and embossed with a Classic Circle Nestabilities die. The seal was colored with Copic Marker RV10 and RV00. Another snowflake was adhered next to the sentiment panel.

Stardust Stickles was added to the wings of the fairy and the pink parts of the snowflakes. Everything was adhered to the card base, Kraft cardstock cut and embossed with Grand Scallop Circle Nestabilities.

Thanks so much for stopping by! Have a wonderful day.
Hugs and smiles

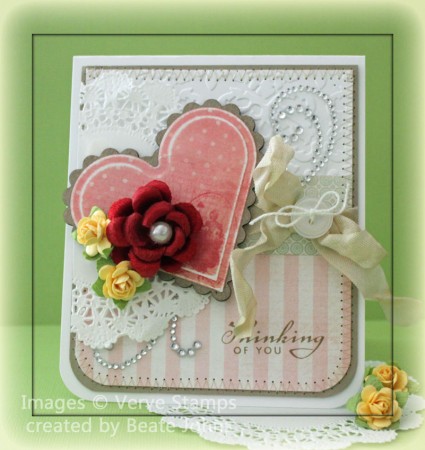
I created this card for another Hope you Can Cling to Challenge. Teresa Kline was the hostess and challenged us to use at least one heart on our card.  At first I wasn’t sure if I wanted to use a stamp image with a heart on it. After looking through my images I just couldn’t decide what to use so I went another route.


For my heart I used a a Nestaboard Scallop Heart as a base. I used a slightly smaller regular heart Nestabilities die to cut and emboss a piece of MME Lost & Found Market Street. The heart was sanded and adhered to the Nestaboard.

A 3 3/4″ x 4 1/2″ piece of Neenah Solar White cardstock was embossed with the Cuttlebug Brocade Embossing folder. Two different pieces of Market Street paper were adhered over it and the two bottom corners were rounded. The layers were stitched to a 3/16″ bigger piece of Kraft cardstock.  Parts of a Finesse Silver Rhinestones were  adhered to the upper right hand side and lower left of the layers.

A piece of seam binding that I had stained a while ago (not sure when or with what color, it was in my ribbon box) was tied around the horizontal layer and topped off with a button. The heart was adhered to the left of it after part of a doily was adhered underneath it. The red flower is a Prima flower, the smaller yellow ones are Recollection flowers (Michaels brand).

A sentiment from Verve’s Blessing stamp set was stamped to the lower right side of the layers with Frayed Burlap Distress ink. Everything was adhered to a 4 1/4″ x 10″ piece of white cardstock, folded in half.

Thanks so much for stopping by! Have a wonderful day!
Hugs and smiles
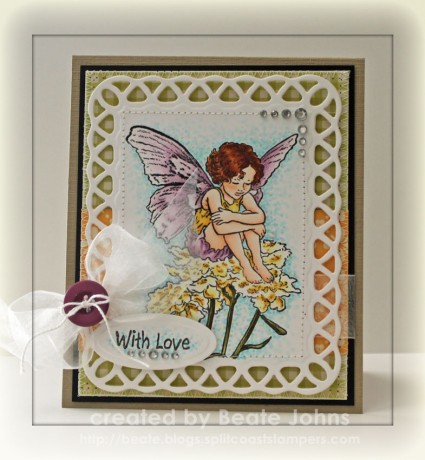
The Crafter’s Companion has quite a few adorable stamp images on their site. One of the stamp groups is called Flower Fairy Friends and one of the images is called Candtuft. I used the image to create a card for Holly‘s Hope you Can Cling to Challenge.

A piece of Neenah Solar White cardstock was cut and embossed with the largest of the Lattice Rectangle Nestabilities dies. The image was stamped on that piece with Tuxedo Black Memento Ink and colored with Copic Markers (Wings and Shorts: V01, V12, V15, Skin: E0000, E00, E01, Hair: YR24, E37, E39, E29 Stems: YG93, YG95, YG97 Bloom: Y00, Y11, Y13, Y15 Background: B0000, B000, B00, B01, V01, Y11). The inner edges of the rectangle were sewn and Silver Kaisercraft Rhinestones were added to the upper right hand corner. Stardust Stickles was applied to the wings, Yellow Stickles to the flowers.

A piece of Fly A Kite October Afternoon paper was adhered to a 4 1/4″ x 5 1/4″ piece of Weathervane OA paper before both layers were stitched to a 3 /16″ bigger piece of black cardstock.  The image was adhered to the layers with dimensionals. I threaded White Organdy Ribbon through one of the lattice holes of the rectangle, tied a bow and topped it with a Basic Grey Button.

A sentiment from the same stamp set was stamped to a piece of cardstock cut and embossed with Petite Oval Nestabilities. It was ahhered under the bow and decorated with more Silver Kaisercraft Rhinestones.

Thanks so much for stopping by! Have a wonderful day.
Hugs and smiles

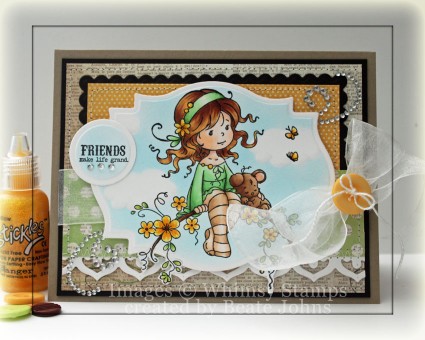
Two days ago I cyber stamped with sweet Heather Jensen. I needed a stamping friend to get started. I have had quite a lot of headaches lately. While my migraine gets better with the new medicine, it makes me tired and I do not fee like stamping. So it’s good to have friends to get you back in the groove. We picked a HYCCT Challenge and both made a card for it!

I just love the new Whimsy Wee Stamps. I had to order some right away. For this sample I used the new Sweet Blossom image. It was stamped in Tuxedo Black Memento Ink on Neenah Solar White cardstock and cut with a Label 18 Nestabilities die and the Out of the Box Technique.  The image was colored with Copic Markers (Skin: E000, E00     Hair: Y21, Y23, E31, E33     Headband/shirt: YG11, YG13, YG17     Stockings: E0000, E30, E31     Flowers: Y11, Y15, Y17      Branch: E35, E39, E29    Leaves: YG21, YG23 Bear: E30, E31, E33).

The image was masked, some cloud masks were added and the label was airbrushed with Copic Marker B02. Yellow Stickles was added over the flowers and butterflies.


I chose the colors for this card so it would fit for Lori’s Hope You Can Cling to Challenge. The challenge was to use the colors brown, green and yellow which represent Hope and Comfort. The layout is from this weeks Sketch challenge.

A yellow piece of Rosy MME Lost & Found Two paper was stitched to a slightly bigger piece of  Canyon Brown cardstock, cut and embossed with a Long Scallop Rectangle Nestabilities die. A 4″ x 5 1/4″ piece of paper from the same paper pack was stitched to a 3/16″ bigger piece of Canyon Brown cardstock. The scalloped rectangle layer was adhered to the layers.

A  white paper strip was cut and embossed with a Floral Doily Accent die and stitched to a 1 1/4″ x 5 7/16″ strip from yet another patterned paper from that pack. The strip was adhered under the rectangle layers. White Organdy ribbon was tied around the layers and topped with a yellow Basic Grey Button. The image was adhered over the layers with dimensionals.

A Finesse Rhinestone swirl was into pieces and parts were used on the top right and lower left of the image.  A sentiment from Whimsy’s The Good Life Tickets Stamp set. It was stamped in Tuxedo Black ink on a piece of Neenah Solar White cardstock, cut and embossed with a Circle Nestabilities die and airbrushed with copic Marker B02. It was adhered to the left side of the image. Three silver Rhinestones were adhered underneath the sentiment. The layers were adhered to the card base, as 9″ x 5 3/4″ piece of Kraft cardstock, folded in half.

Thanks so much for stopping by! Have a wonderful day.
Hugs and smiles

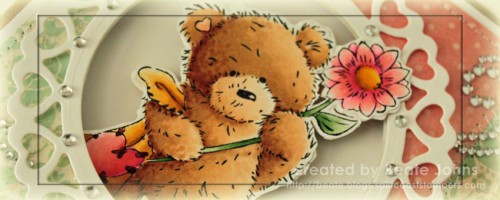
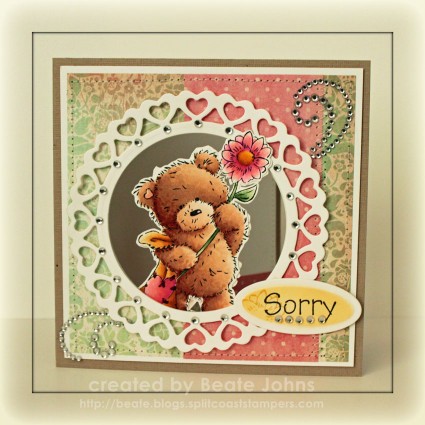
Thursday’s HYCCT challenge hostess was the wonderful Bev Gerard, aka. Texasgrammy. Bev asked us to create a card with a window. I had just received this Popcorn Bear image that has a front and back and thought it would be a great for this challenge.

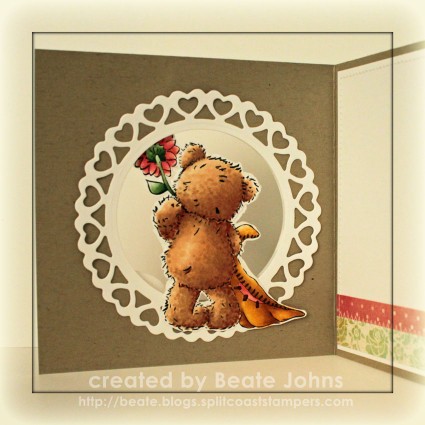
I stamped both the front and back in Tuxedo Black Memento Black on Neenah Solar White cardstock, colored them with Copic Markers (Fur: E0000, E30, E31, E33   Flower: RV21, R20, R21 , R22, G21, G24, G28   Blanket: Y21, Y23, YR23, YR24, E39, E29) and cut them out.


A 2 1/8″ x 4 1/2″ piece of MME Lost & Found Market Street was adhered to a 4 1/2″ square of the same paper pack. A window was cut through it with a Classic Circle Nestabilities die. The layers were stitched to a 4 3/4″ square of white cardstock and then the same die was used to cut the circle window through that layer as well.

The card base is a 5″ x 10 piece of Textured Kraft cardstock. It was scored in half. The layers were adhered with repositionable adhesive and the die was used to cut the window in the card front. The cut didn’t go through all three layers, so after I ran it through once, I took the other layers off. I placed the die on the impression it left through the first run through the die cut machine and cut the window into the card base.

A piece of white cardstock was cut with the largest Heart Circle Die and a Classic Circle die to create a frame for my window. It was adhered with dimensional to the window. Baby Rhinestone Bling pieces were added under each heart. A Rhinestone swirl was cut apart. Part was adhered to the upper right, another to the lower left of the card front.

The sentiment is also from the Popcorn Bear set. It was stamped on a piece of white cardstock, cut and embossed with the smallest Petite Oval Nestabilities. The center was airbrushed with Copic Marker Y21. The flower from the main image was stamped to the left side of the oval with Scattered Straw Distress Ink and the sentiment was stamped in Tuxedo Black Memento ink.

For the left inside of the card I cut another frame like the one in the front. The bear was adhered on the front top and the bottom on the inside.  On the right side two small strips of patterned paper were stitched to the lower half of a 4 3/4″ square of white cardstock .

Thanks so much for stopping by! I hope you have time this month to make at least one card for the HYCCT challenges and send it to the hospital. Have a wonderful day!

Hugs and smiles
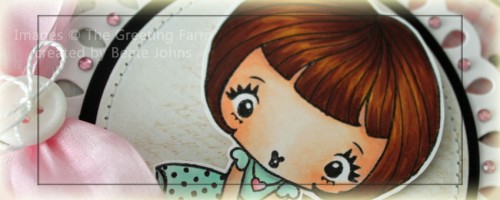
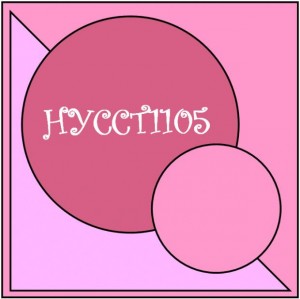
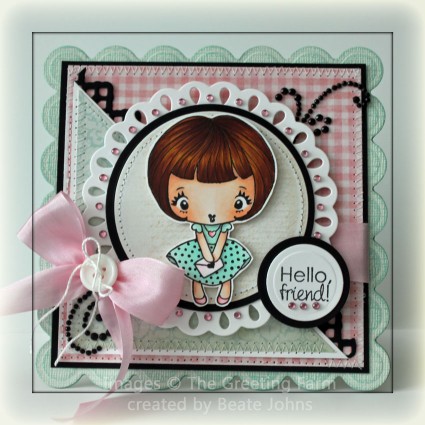
Isn’t this image darling? I used Stella from The Greeting Farm for Jimmi’s Hope You Can Cling To Challenge. She gave us this sketch to  use.

I new I wanted to use Stella and new dies and build my card around that.  I started by stamping the image in Tuxedo Black Memento Ink on Neenah Solar White cardstock. It was colored with Copic Markers ( Skin: E0000, E00, E01, BV00   Hair: YR24, E39, E29   Dress: G0000, G00, C2   Heart and shoes: RV00, RV10, RV13).

A piece of MME Lost & Found Two Blush Paper was cut and embossed on Classic Circle Nestabilities dies. It was stitched to black cardstock piece that had been cut and embossed with the next size circle die. A piece of white cardstock was cut and embossed with the largest of the Tear Drop Circle Dies. Pink Baby Bling Rhinestones were added between each tear drop. Stella was cut out and adhered to the center of the circles with dimensionals.

A 4 3/4″ square of Blush paper was stitched to a 3/16″ bigger piece of black cardstock. A 4 1/8″ mint green square of Blush cardstock was cut in half diagonally. It was stitched to a slightly bigger white cardstock triangle. A black cardstock was cut and embossed with the Lace Doily Accents Border die. The strip was adhered under the triangle layers before those were adhered to the lower left of the card front.

Before the image was adhered to the layers with dimensionals, pink silk ribbon was run through one of the tear drops and tied around the layers. The bow was topped with a button that was tied on with embroidery floss. A black Rhinestone Flourish was cut apart and adhered to the lower left and upper right of the layers.

The card base was cut and embossed with one of the Grand Scallop Square Nestabilities die out of Whitewash Core’dination cardstock. A sentiment from Sweet ‘n Sassy Stamps Simple Pleasures was stamped in Tuxedo Black Memento Ink on a white cardstock piece, cut and embossed with Classic Circle dies. It was layered on a slightly bigger black cardstock circle, adhered to the lower right of the main image. Pink Baby Bling was added underneath.

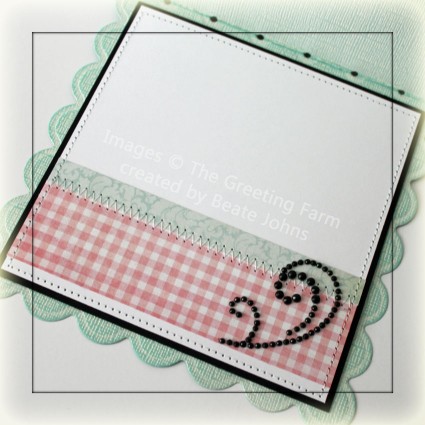
The inside of the card was kept pretty simple. Extra pieces of Blush paper were adhered to a 4 1/2″ square of white cardstock before they were stitched to a 1/4″ bigger piece of black cardstock. Another part of the black Rhinestone swirl was adhered to the lower right of the layers.

Thanks so much for stopping by! Have a wonderful day!
Hugs and smiles
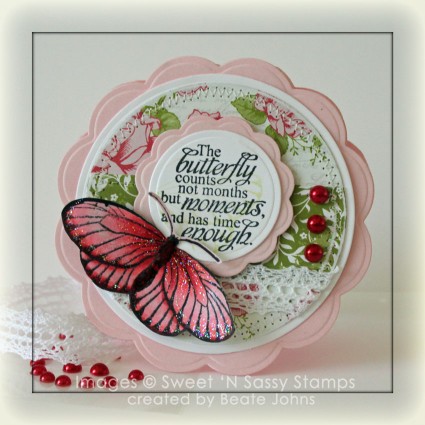
I created this card for a Hope You Can Cling To Challenge on Splitcoaststampers. I was the hostess and my challenge was to create a circle card. It was also the first card I shared at the Sweet ‘n Sassy Stamps blog. I am excited to be the Guest Designer there this month.

The card base was cut with the largest of the Large Scallop Circle Nestabilities dies out of Pink Pirouette cardstock. Patterned paper from the Echo Park Victoria Garden pack was cut with a Classic Circle Nestabilities die. Before it was stitched to a slightly bigger white cardstock circle, May Arts Crochet Lace was taped under the horizontal layer.

The sentiment is from Everyday Miracles. It was stamped in Tuxedo Black Memento Ink on Neenah Solar White cardstock. The sentiment was cut and embossed with a Classic Circle Nestabilities die. One of the butterflies from the same set was partially stamped on the sentiment circle in second generation Shabby Shutter Distress ink. The sentiment was adhered to a slightly bigger pink layer cut with one of the Large Scallop Circle Nestabilities dies.

The butterfly that was used in the sentiment panel was stamped again on a piece of Victoria Garden Echo Park paper with Tuxedo Black Memento Ink. The butterfly was cut out and colored with Copic Markers (RV10, R43, R46 and E27). It was adhered to the lower left of the sentiment panel. Stardust Stickles was added to the darker parts of the wings and Glossy Accents to the body.

Red Kaisercraft Pearls finish off the card! Thanks so much for stopping by! Have a wonderful day!
Hugs and smiles
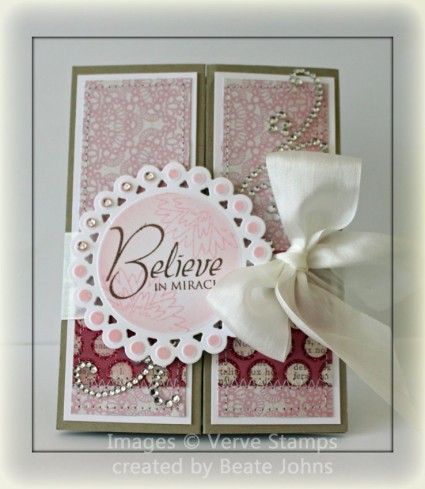
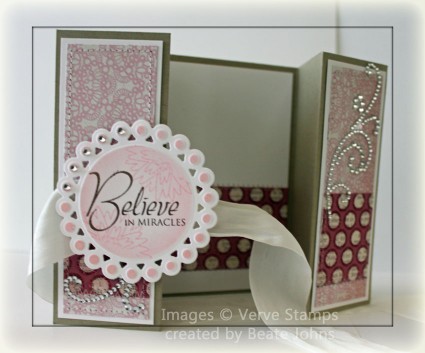
Today’s tutorial on Splitcoast is for the Double Z-Fold card. It looks like a Gatefold card closed, but has another fold to it when you open it up. I think it’s a great fold for invitations.

My card base is a 5 1/4″ x 12″ piece of Textured Kraft cardstock scored at 2″, 4″, 8″ and 10″. 1 1/2″ x 4 3/4″ pieces of My Mind’s Eye Lost & Found Two Blush paper were stitched to a 1/4″ bigger piece of Neenah Solar White cardstock before they were adhered to the card base panels.A Rhinestone swirl was cut apart. Part was adhered to the upper right, the rest to the lower left of the card base.

A piece of white cardstock was cut and embossed with one of the Beaded Circle Nestabilities dies. It was sponged with Spun Sugar Distress ink before a sentiment from Verve Believe Stamp set was stamped in its center with Rich Cocoa Memento ink. A medium sized flower was stamped over the panel twice with Spun Sugar for a more textured look.

White Silk Ribbon was tied around the card before the sentiment panel was adhered with dimensionals. Baby Bling Rhinestones on the upper left hand side of the sentiment panel finish off the card front.

The inside is very simple. A 2″ x 3 3/4″ strip of Blush Paper was stitched to a 3 3/4″ x 5″ piece of white cardstock.

Here is a video for the visual learner:

[youtube]https://www.youtube.com/watch?v=f616k3NoKGU[/youtube]

Thanks so much for stopping by! Have a wonderful day!
Hugs and smiles
© 2012 fresh & fun Suffusion theme by Sayontan Sinha