Today’s Waltzingmouse sketch is another fun one. Some embossing, a sentiment panel and BAM, you are done. I am starting to get the hang of CAS cards. They are still not easy for me, but they are getting easier.

For this card I used the Teeny Trees stamp set. Ever since I got that set, I was itching to try out the circles as a background. I stamped several in Shabby Shutter, Wild Honey and Tumbled Glass Distress inks on the lower half of a regular size Solar White card base.

The lower corners of the card were rounded before 2/3rd of the card front were embossed with Tim’s Retro Circle Embossing Folder.

A 3/4″ x 4 1/4″ piece of MME Fine and Dandy patterned paper was adhered above the embossing and two brown brads were added.

The sentiment was stamped in Rich Cocoa Memento Ink on a piece of Solar White cardstock that had been cut and embossed with Classic Circle Nestabilities. The layer was adhered to a piece of Canyon Brown cardstock that had been cut and embossed with a Parisian Accent die.

I stamped another small circle image in Tumbled class, cut it out and adhered leaves stamped in Shabby Shutter under them. The flower was adhered to the upper left hand side of the sentiment panel to finish off the card.

Thanks so much for stopping by! Have a wonderful weekend!
Hugs and smiles

I love this weeks Tuesday Trigger image. LOVE the colors and love that gorgeous mirror. So far I have created two cards for it and I am thinking there might be more. LOL

For this weeks sketch, the mirror was my main inspiration! I had just received my Fancy Tag Three dies and had to use them right away. I cut Real Red cardstock with one of the dies and sponged it with Fired Brick Distress Ink.

To top it I cut and embossed Solar White cardstock with a Classic Oval Nestabilities die. A sentiment from Fancy Phrases was stamped in the oval with Rich Cocoa Memento Ink. The edges of the oval were sponged with Antique Linen Distress ink.

With my Fancy Tag dies, I also received the new Foliage dies. I cut and embossed Wild Wasabi cardstock with two of the dies and sponged them with Peeled Paint Distress Ink. The leaves were adhered under the frame and three aqua Recollections flowers were added.

Two corners of a 3 3/4″ x 5″ piece of October Afternoon Thrift Store paper were rounded. The paper was stitched to a 3/16″ bigger piece of Kraft cardstock after a piece of white Melissa Frances ribbon was adhered across the layers.

The layers were adhered to the card base, a 5 1/2″ x 8 1/2″ piece of Solar White cardstock folded in half. The frame was adhered to the card base with dimensionals.

I hope you have time to play one or both of the challenges. I LOVE the sketch and the inspiration piece.

Thanks so much for stopping by! Have a wonderful weekend! Hugs and smiles

It’s Saturday which means it’s time for another Waltzingmouse Sketch challenge as well as the Inspiration challenge on Splitcoast. This week I got to combine both because Stef picked a site I suggested as the inspiration site. When I went through my Pinterest craze, I found the English site Cox & Cox.  For my sample I picked this gorgeous wooden hanging heart as my inspiration piece.

The card sketch is a simple one which worked great for what I had in mind.  To invoke the painted wooden feel of the heart I brushed on Snowcap Adironback Paint dabber all over a 3 1/4″ x 5 1/4″ piece of Kraft cardstock. Once it dried I embossed it with Tim’s Damask Embossing Folder.  The raised part of the embossing was sanded to let the Kraft cardstock show through.

The bottom corners of the layer were rounded before the edges were stitched. A piece of Solar White cardstock was cut and embossed with one of Spellbinders new Grommet Tag dies.  A frame and sentiment from Waltzingmouse’s Fancy Phrases was stamped in it’s center with Frayed Burlap.

The sentiment tag was attached to the embossed layer with silk ribbon. The bow was topped with an EK success ribbon flower, I picked up at Target. The layer was adhered to a 3 1/2″ x 11″ piece of Solar White cardstock folded in half. The bottom corners were rounded again to finish off the card.

Thanks so much for stopping by! I hope you have time to participate in one or both of the challenges! Have a wonderful weekend! Hugs and smiles

Today’s Waltzingmouse sketch challenge is to create mini cards. How fun is that? As inspiration for my cards I used this Tuesday’s Trigger challenge.

I LOVED the color combo and composition of the piece and kept it all. My cards are tiny 3″ x 3″ cards. They were created out of 3″ x 6″ Solar White cardstock folded in half.

I started by stamping a label from Very Vintage Label No. 4 in Broken China Distress Ink.  I stamped a different sentiment into the frame of each card with the same ink. All sentiments are from the Fancy Phrases set.

The border stamp from Victorian Frippery was stamped in Spiced Marmelade on the right edge of the cards. The left side of the card was embossed with the Damask Embossing Folder.

After making the cards I decided to make a matching note card tote, following this tutorial on Splitcoaststampers.  It’s simple and almost like the cards. I did use a bigger frame from the Very Vintage Label set and added a little scroll on the top and bottom of the sentiment.

The top corners of the box were punched with the Crop-a-Dile Cloud Chomper. The handle is a 3 /4″ x 8″ piece of Pumpkin pie. It was adhered to the outside of the box with silver brads. This way you can move the handle back while adding the cards into the box (this cool hint was posted under the video tutorial).

Here is a video (with a different box that I will share later) for the visual learner:

[youtube]https://www.youtube.com/watch?v=VR-Ht2uOyv4[/youtube]

I created this card last weekend for a fellow SCS member I met at CHA several times. She is expecting her first baby in May. Her best friend contacted me and asked if I could send a card to her that she could give her friend at her baby shower. How sweet is that?

I used the Waltzingmouse sketch #38 for my layout and this wreath from Kirkland as my inspiration, since that was the site for that Saturday’s inspiration challenge.

I printed Mo Mannings Baby and Bunny on Neenah Solar White cardstock, cut it with a Classic Oval Nestabilities die and colored it with Copic Markers (Skin: YR0000, YR000, YR00, Hair: Y21, Y23, Y26, Pillow: YG00, YG01, YG03, Bunny: E40, E41, E42, E43, E44, R20, Ground: T0, T1, T3, Sky: B0000, B000).

The image was then layered on a piece of textured Kraft cardstock, cut and embossed with a Classic Scallop Oval Nestabilities die. Part of a doily was adhered under the upper half of the image

Two pieces of Pebbles Happy Go Lucky Patterned Paper were adhered together, cut and embossed with a Grand Nestabilities Circle die and stitched to a piece of Kraft cardstock that had been hand cut into a slightly bigger circle.

White lace (bought at JoAnn’s) was adhered over where the two papers meet and green sheer ribbon was tied over that. The image was adhered over the ribbon and lace with dimensionals and three buttons were stitched to the upper left hand side of the layers.

The sentiment is from Whimsy Stamps Oval Snippets set. It was stamped in Tuxedo Black Memento Ink on Solar White cardstock that had been cut and embossed with one of the Tag Trio dies. The tag was tied to the sheer ribbon bow with May Arts Curling Iridescent ribbon.

The card base is a piece of Textured Whisper White cardstock folded in half, cut and embossed with a Scallop Grand Nestabilities dies. A Recollection Rhinestone Swirl on the bottom left finish off the card.

Thanks so much for stopping by! Have a wonderful day.
Hugs and smiles


Today’s Waltzingmouse Challenge is a fun one. More pennants, but this time just one big one! I cut my pieces with TCP’s CutUp Pennant dies out of Neenah Solar White cardstock and October Afternoon Ducks in a Row patterned paper. The pieces were stitched together and topped with green buttons that were threaded with embroidery  thread.

The card was created for this weeks Way to Use it Challenge on Splitcoaststampers. Kim challenged us not to use black, brown or white ink. I stamped the little sheep from L’il Buddies in Ocean Depth VersaMagic ink on Solar White cardstock that had been cut and embossed with Classic Circle Nestabilities dies. The image was colored with Copic Markers (R000, R00, No, N1, N2, YG01, YG03, BG0000, BG000) and the layer was adhered to a piece of Kraft cardstock cut and embossed with the next size circle die.

A 3 3/4″ x 5″ piece of Ducks in a Row paper was stitched to a 3/16″ bigger piece of white cardstock before the layers were adhered to the card base, a 4 1/4″ x 11″ piece of Kraft cardstock folded in half. The sentiment is also from the L’il Buddies stamp set. It was stamped in Ocean Depth ink on Solar White cardstock, cut into a banner and topped with a pink button.

Hint: When stamping with VersaMagic ink, don’t touch the lines with your Copic Markers. The ink will smear and stain your tip.

Thanks so much for stopping by! I hope you have time to play! It’s a fun, different layout!
Hugs and smiles

Today’s Waltzingmouse Sketch challenge is a fun one, a banner over a big rectangle.

How fun is that? For my card I started by cutting banner pieces with MFT’s Banner Day Die die out of Hazel Stella & Rose My Mind’s Eye paper. The small strip on top was cut out of textured Basic Black cardstock. Before that piece was adhered to the triangle pieces, part of the border stamp from Victorian Frippery was stamped over it with Jet Black Archival Ink. Small holes were pierced at each end and the banner pieces were strung together with Fine Natural Burlap String.

The card base is a 4 1/4″ x 11″ piece of Kraft cardstock folded in half. The card front was embossed with Brocade Embossing folder and sponged with Frayed Burlap Distress Ink.

A 3 1/4″ x 4 1/2″ piece of Hazel paper was embossed with the same embossing folder and stitched to a 1/4″ bigger piece of black cardstock. The layers were adhered to the card base and the banner was adhered over the upper part of the rectangle.

More Hazel Paper was cut and embossed with a Fancy Tag die and stamped with a frame and sentiment from the Fancy Phrases set.  It was adhered over a doily that had been cut smaller and sponged with Frayed Burlap ink. The layers were adhered to the lower right edge of the rectangle layer. Latte Kaisercraft Pearls were added in each corner.

A piece of dyed Seam binding I had left over from another project was rolled into a flower, topped with a Black Kaisercraft Pearl and adhered next to the image. A swirl cut out of textured black cardstock with a Sizzix die and a couple of leave cut with MFT’s Upsy Daisy Die-namics die were added to the left hand side of the sentiment panel to complete the card.

This was a fun sketch to play with. I hope you have time to try it out! Thanks for stopping by! Have a wonderful weekend. Hugs and smiles

Today’s Waltzingmouse sketch is a circular card. I LOVE round cards. They are so much fun! I created this card on Tuesday for Splitcoaststampers Color challenge. For those who know my purple dislike you will be surprised to read that I really liked this color combo. I actually made TWO cards for the challenge.

I started out by stamping one of the Holiday Label No.14 in Purple Hydrangea VersaMagic ink on Neenah Solar White cardstock. The sentiment is from Rescue Remedies Additions. It was stamped in Rich Cocoa Memento Ink in the center of the label. A decor from the Holiday Label No.14 was also stamped in Rich Cocoa Memento Ink underneath the sentiment. The label was cut and embossed with Label 14 Nestabilities dies. Chocolate Kaisercraft Pearls were adhered on the decor under the sentiment.

A 6″ x 12″ piece of  Kraft cardstock was folded in half, then it was cut and embossed with Grand Scallop Circle Nestabilities. Echo Park Springtime Paper was cut and embossed with Grand Classic Circle Nestabilities and stitched to a piece of Solar White cardstock, that had been hand cut into a slightly larger circle.

A 6″ long Kraft cardstock strip was cut and embossed with Fair Isle Borderabilities die and adhered over the point  where both Springtime papers overlap. White Silk Ribbon was tied over the layers vertically. The label was adhered over the ribbon with dimensionals.

White Kaisercraft Pearls were adhered to the upper left corner in form of a swirl. Three Recollection flowers were adhered to the upper right side of the sentiment panel. Everything was adhered to the card base with Scor-Tape.

I hope you have time to play along with the sketch! It is a fun one.

Thanks so much for stopping by! Have a wonderful day. I will be teaching a class at Simply Scrapbooks today. That will be fun!
Hugs and smiles

I have some very exciting news. Not only did I order me a few Waltzingmouse stamps, but I was also invited to become a Waltzingmouse Mischief Maker. I get to play with Claire’s  sketches early. How fun is that? I love sketch challenges.

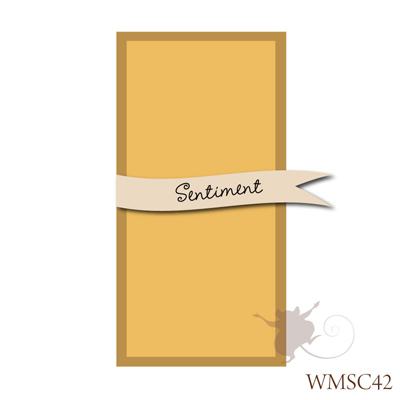
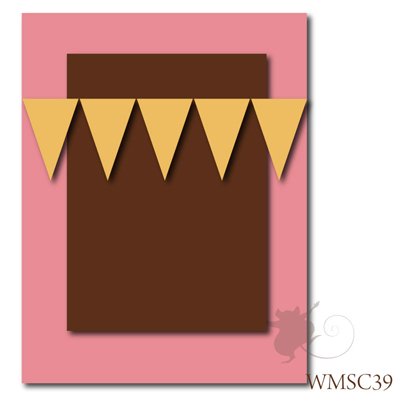
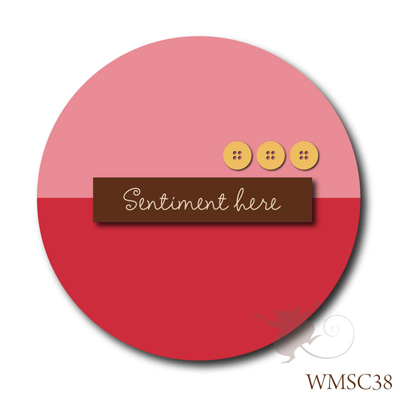
Today is my first official day as Mischief Maker. I used this sketch as my starting point to create my card for Thursday’s Way to Use it Challenge. We were to use Polka Dots on our card. A sketch and Polka Dots….through in Copic Markers and Spellbinders Dies and I am in heaven. 🙂


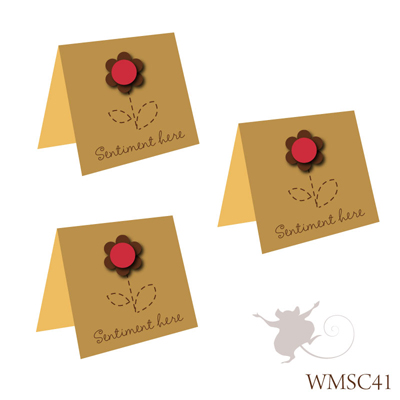
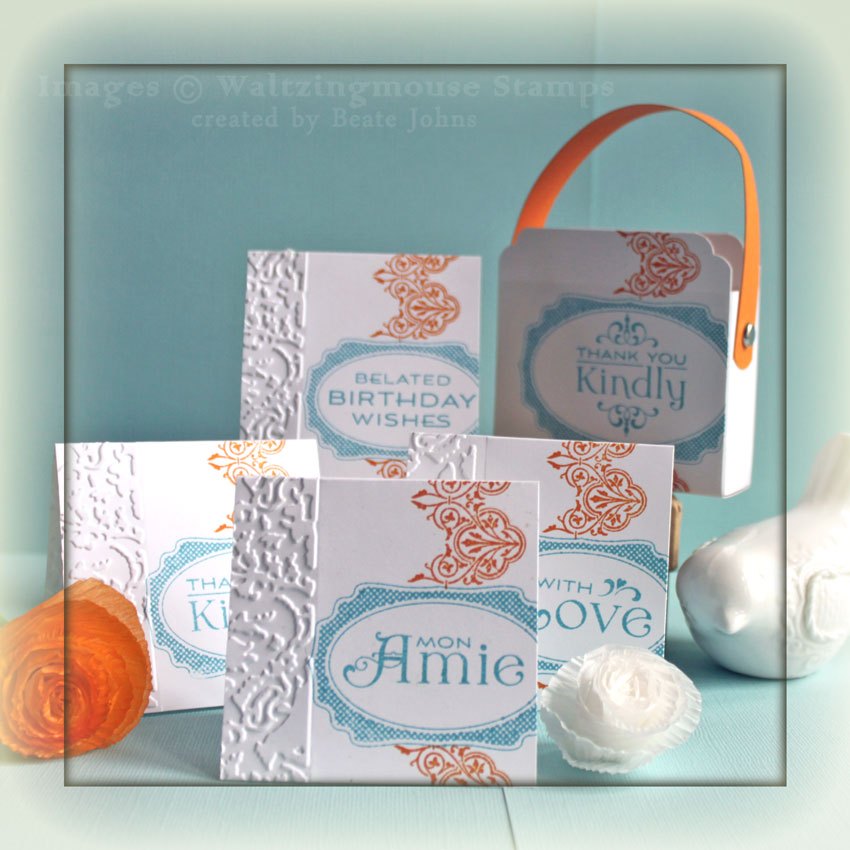
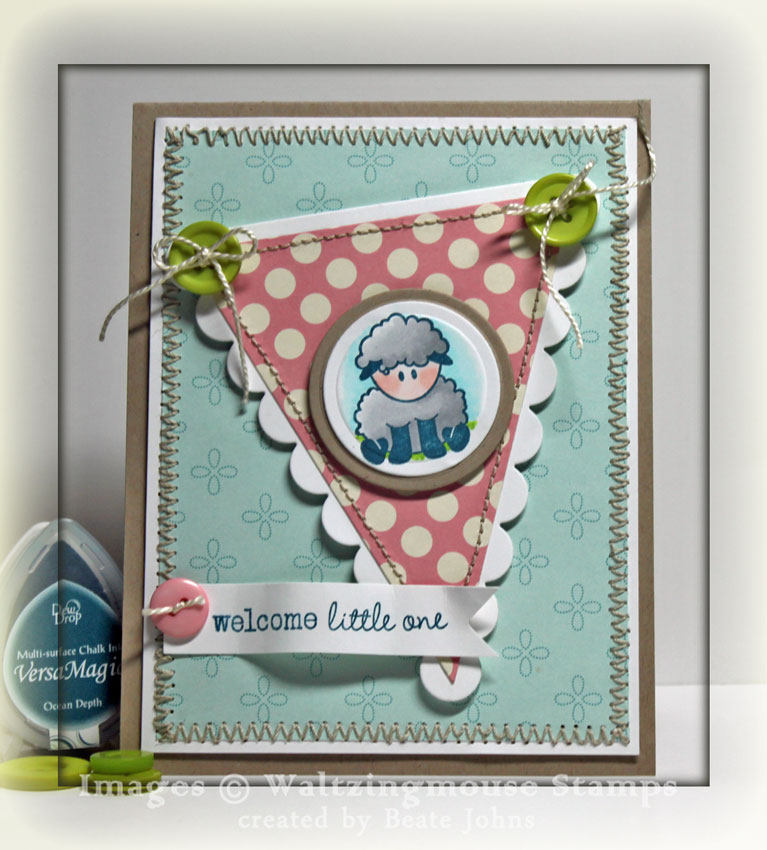
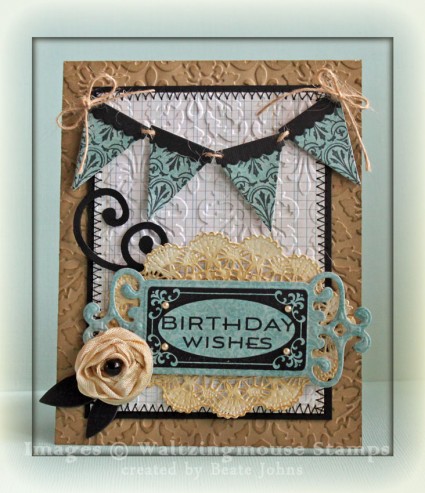
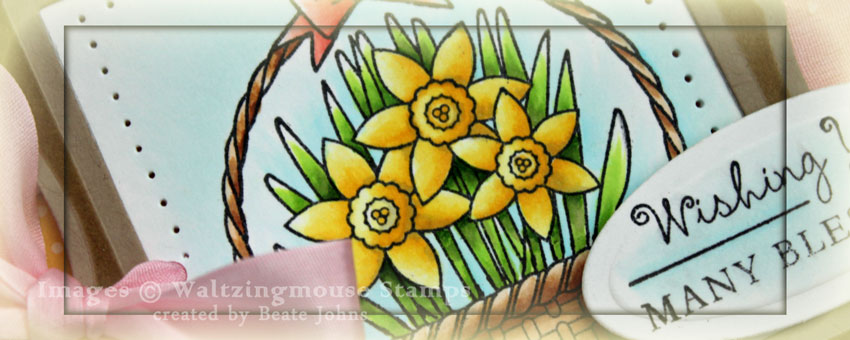
For my sample I picked the Stamp set Spring Baskets. I stamped first the Basket, then the Daffodils in Tuxedo Black Memento Ink on Neenah Solar White cardstock, cut and embossed the image with Classic Square Nestabilities dies and colored it with Copic Markers ((Bow: R20, R21, R22, Flowers: Y11, Y13, Y15, Leaves: YG01, YG03, YG17, Basket: E30, E31, E33, Background: BG0000, BG000, BG01, Ground: T0, T1, T3).

A piece of Kraft cardstock was cut into a frame with a Label 1 and a Classic Square Nestabilities die, sponged with Vintage Photo Distress ink and adhered over the image. The image layer was paper pierced.

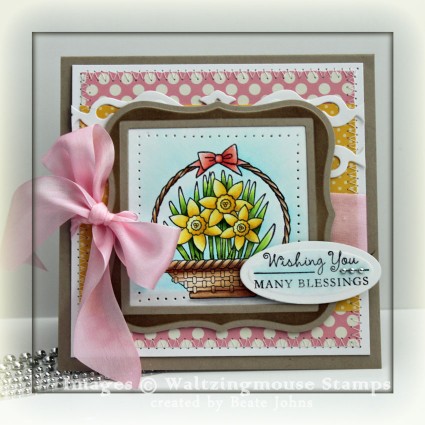
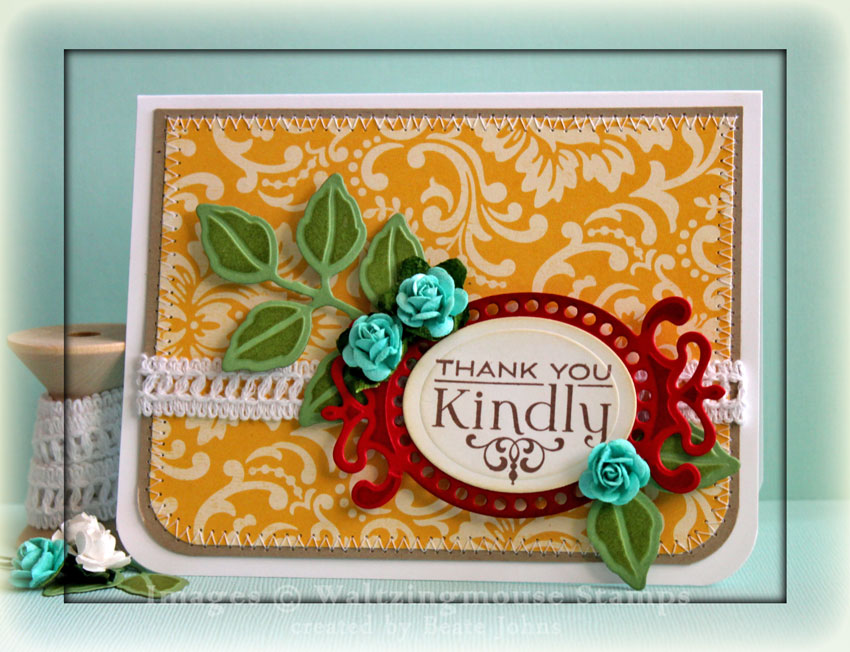
A 3″ x 4″ piece of yellow polka dotted Modern Homemaker October Afternoon paper was adhered to a 4″ square of pink Ducks in a Row paper. The layers were stitched to a 4 1/4″ white square of cardstock. A 4″ long strip of white cardstock was cut and embossed with the Lattice Borderabilities die and adhered to to the upper edge of the yellow paper.

A small hole was punched in the center of left edge of the image layer. The image was adhered to the layers with dimensionals and pink silk ribbon was threaded through the hole and tied into a bow.

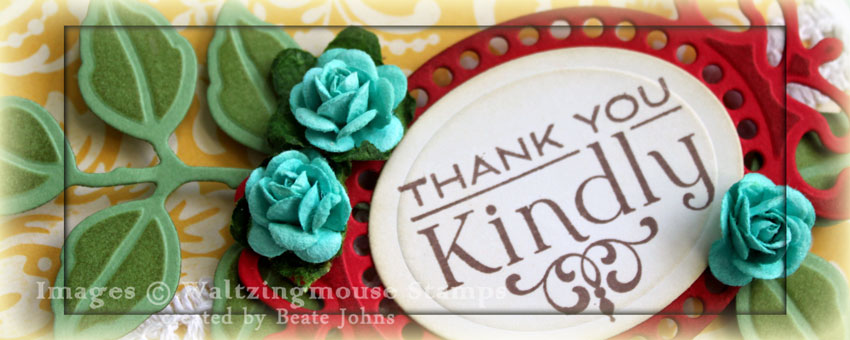
The sentiment is also from Spring Baskets. It was stamped in Tuxedo Black Memento Ink on a piece of Solar White cardstock that had been cut and embossed with Petite Oval Nestabilities die. The center of the oval was colored with Copic Markers BG0000 and BG000.  The sentiment was adhered to the layers with dimensionals and finished of with three tiny Recollections silver pearls. The layers were adhered to a 4 5/8″ x 9 1/4″ piece of Kraft cardstock folded in half.

After Wednesday’s tutorial was posted on Splitcaoststampers I had a lot of questions about how to cut a frame with Nestabilities. Because of that I created and posted a tutorial that day. So here is a video on creating frames with Nestabilities for the visual learner:

[youtube]https://www.youtube.com/watch?v=3G_-KNAx2jk[/youtube]

Thanks so much for stopping by! I hope you get a chance to try out the sketch! It’s an easy one. Have a great day!
Hugs and smiles

© 2012 fresh & fun Suffusion theme by Sayontan Sinha