Splitcoaststampers invites you to join us for a very special celebration on World Cardmaking Day. Spend your Saturday in our challenge forum,where you can celebrate the power of a handmade card with our community, and just maybe get a surprise or two!Splitcoaststampers invites you to join us for a very special celebration on World Cardmaking Day. Spend today in our challenge forum, where you can celebrate the power of a handmade card with our community, and just maybe get a surprise or two!

To kick it off, Lydia, Lori and I will host a challenge today. But the campaign will go on all month long!  Mine is:

Thinking of Breast Cancer awareness – you can’t help but think about….boobies!! Now that might make you think about all the cute lingerie out there designed to show them off.

So my challenge is to get inspired by lingerie. Think lacy, think pattern, think satin and bows – have some girly fun with it!

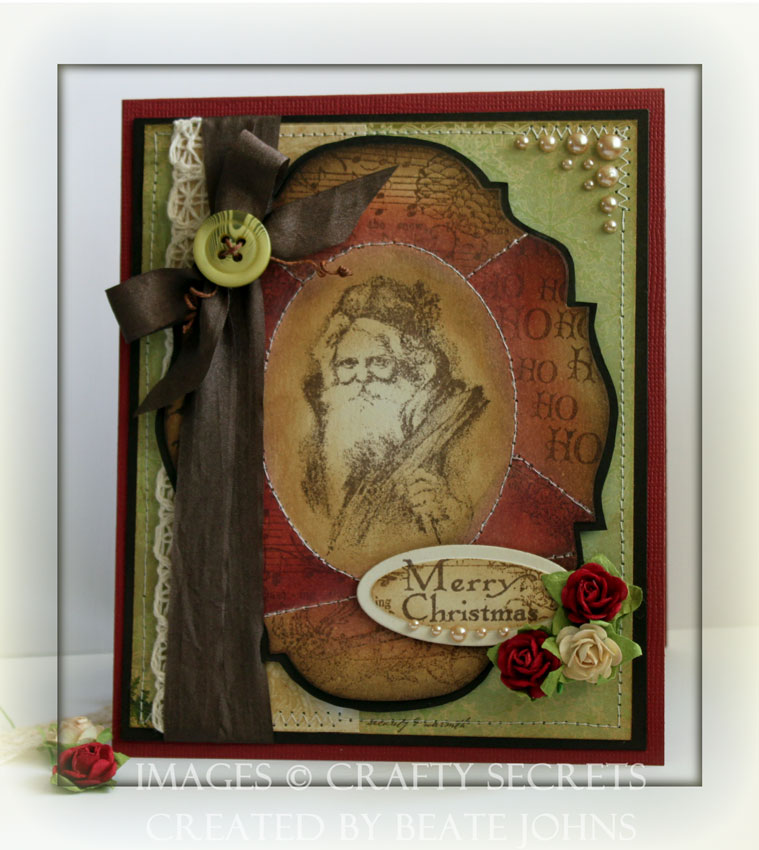
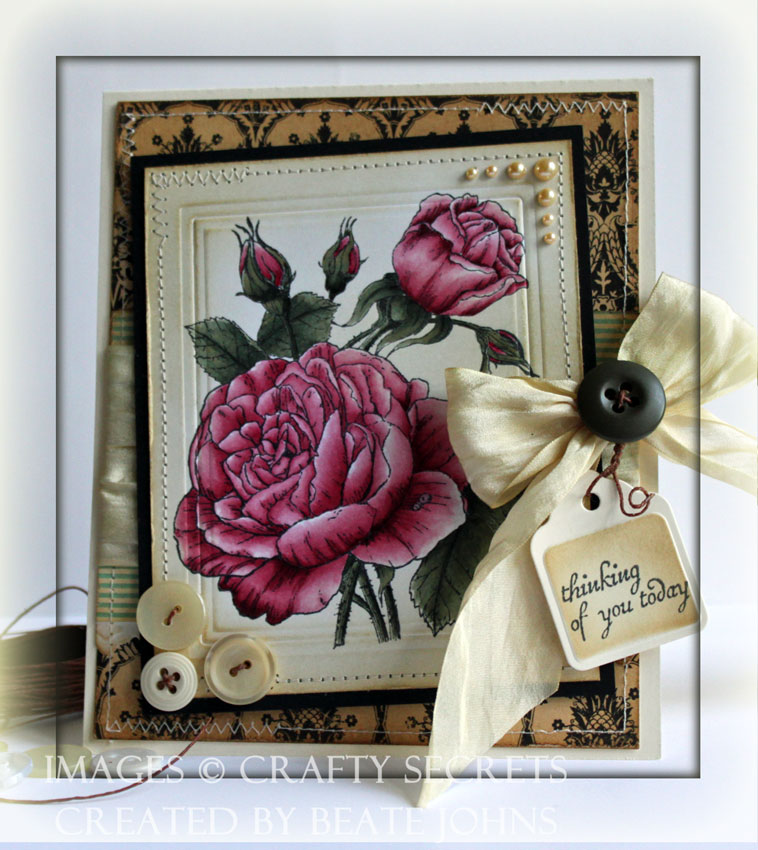
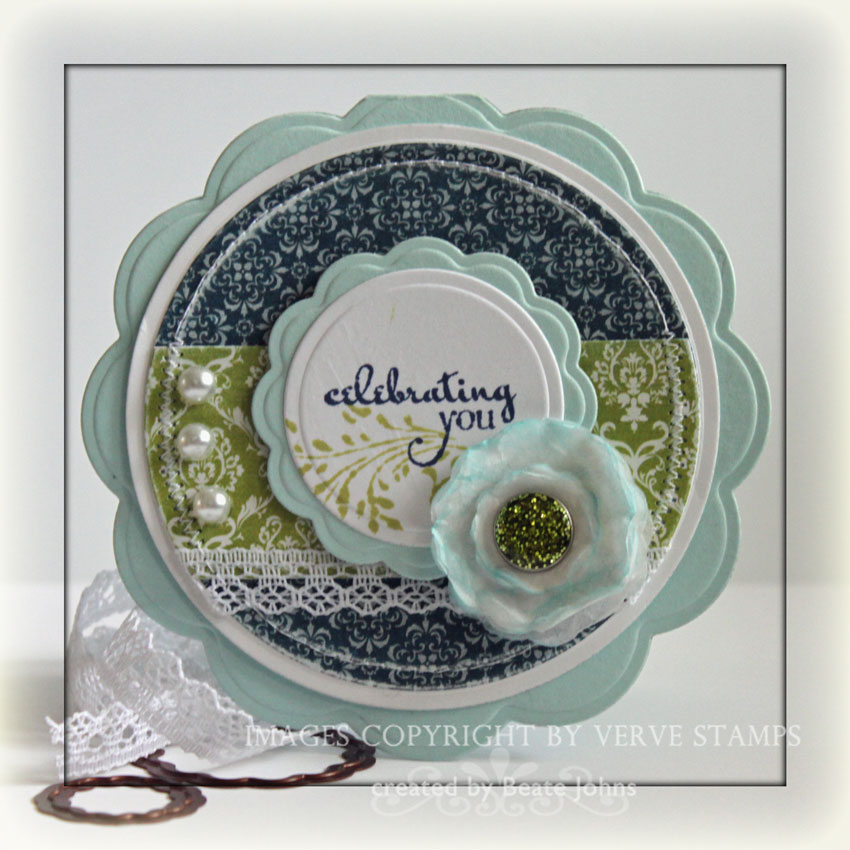
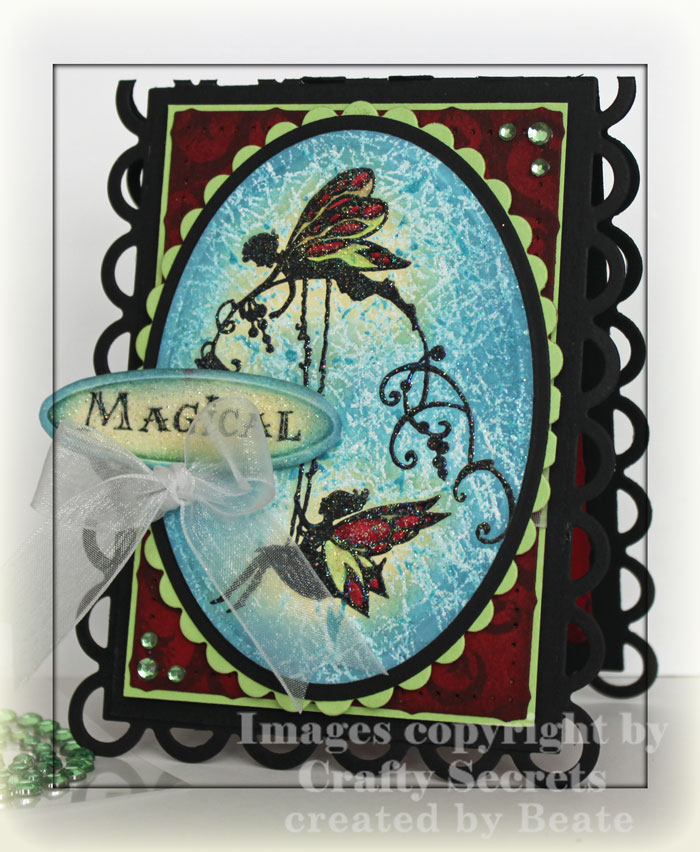
For my card I started with an image from the Girlfriend Creative Scrap from Crafty Secrets. I layered it on a slightly bigger piece of Natural White Neenah cardstock. The next layer is a piece of Early Espresso cardstock cut and embossed with the Scallop Frame Spellbinder die.

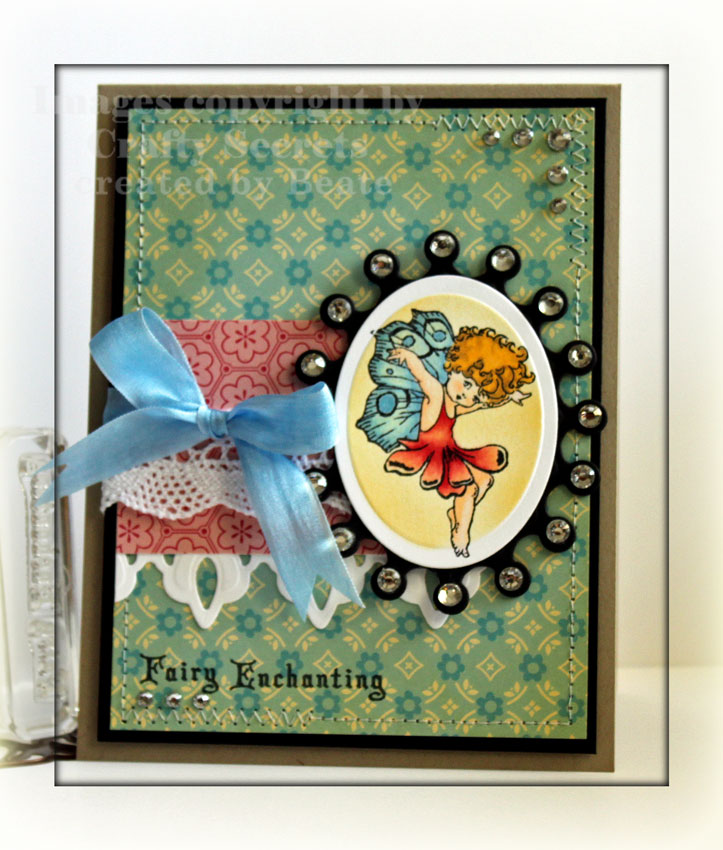
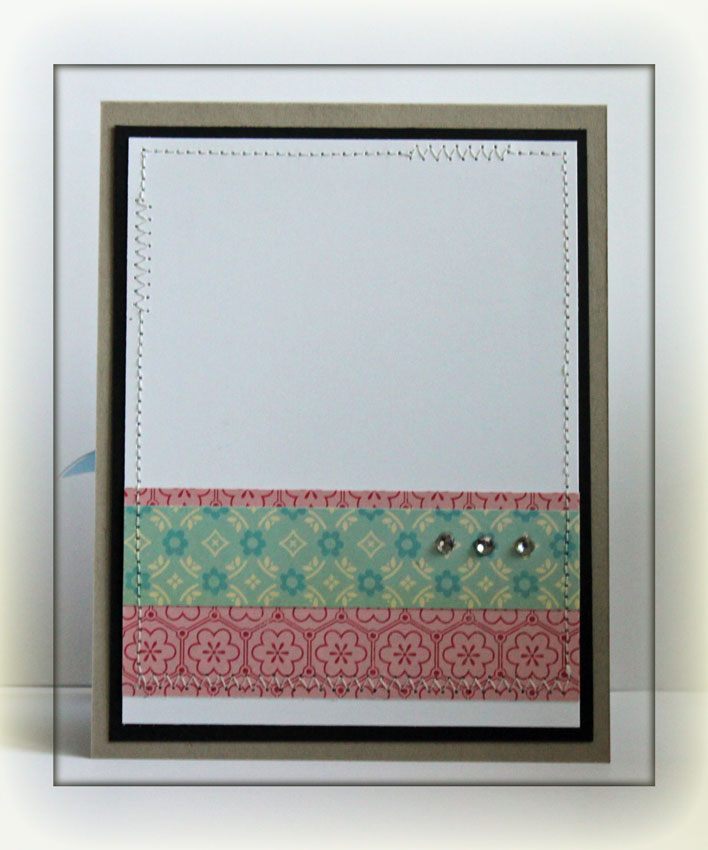
A 4 3/8″ x 5 3/4″ piece of Webster Pages patterned paper was stitched to a 3/8″ bigger piece of Natural White cardstock.  Two smaller pieces of Webster Pages paper adhered together, lace was adhered over the smaller one and the pieces were stitched together. These smaller layers were adhered to the bigger one.

The card base measures 4 3/4″ x 6 1/8″ out of Early Espresso. To create that size, I cut one piece 4 3/4″ x 6 1/8″, another piece 4 3/4″ x 7″. The longer piece was scored at 6 1/8″ and the smaller piece was adhered to the scored tab.

To dress it up I created a lace flower out of Websters Pages ribbon and topped it with a Webster Pages Scalloped Sparklers. The sentiment is also from the Girlfriends Creative Scraps. I adhered it next to the lace flower. More rhinestones were added.

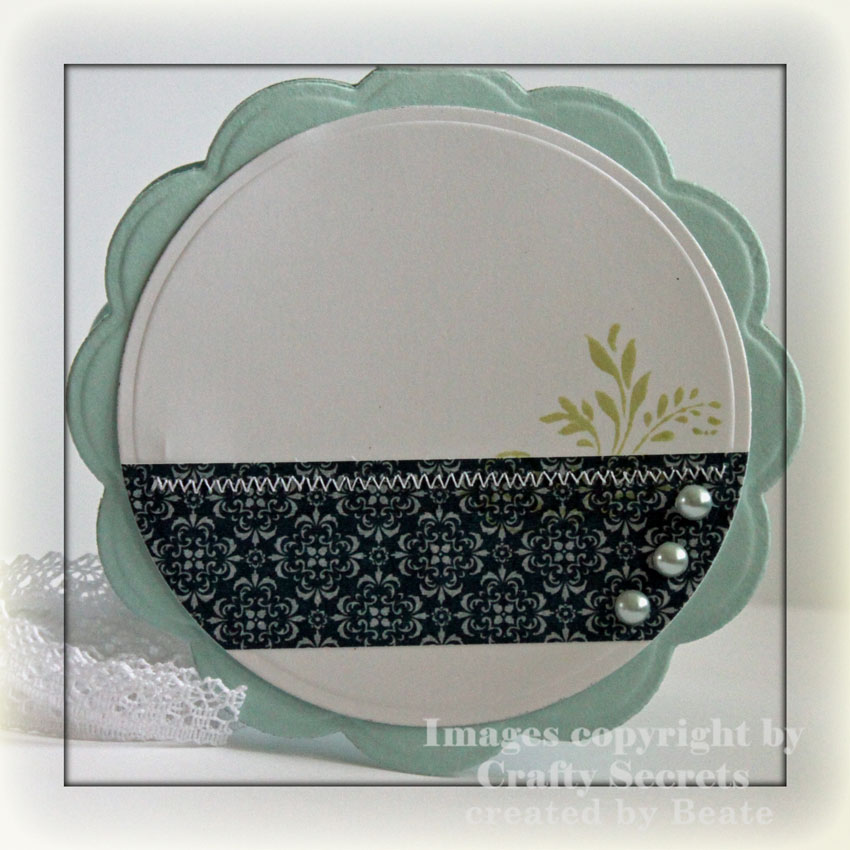
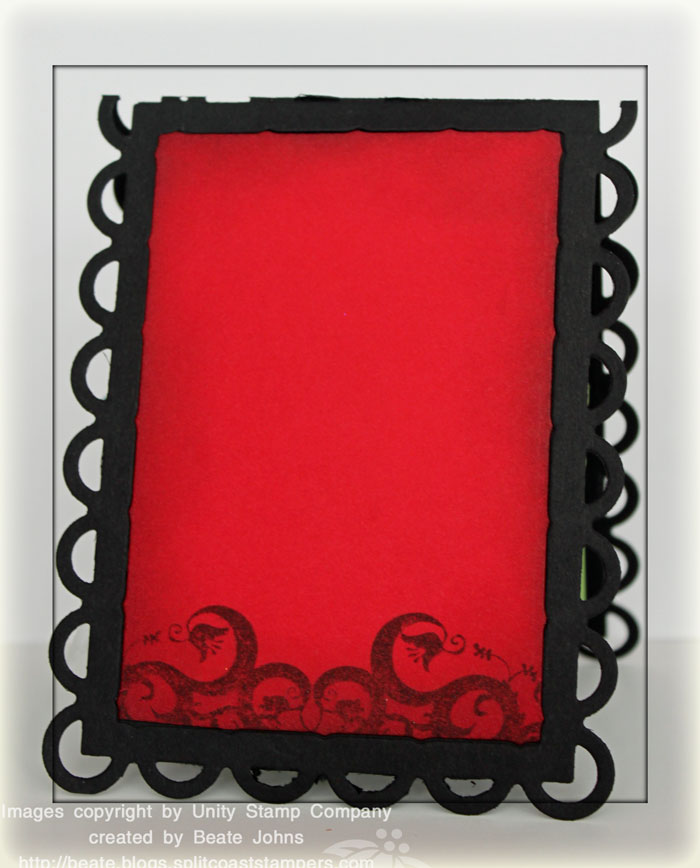
For the inside of the card I used another piece of the Girlfriend Creative Scraps, along with Websters Pages paper and scalloped sparkler.

I hope you have time to play along! Have a wonderful weekend! Hugs and smiles

I love the Vintage Christmas set from Crafty Secret. The santa is gorgeous and so are the coordinating stamps. So when I was looking for a set to use for creating a sample for the Retiform video tutorial, that set popped into my mind.

I cut a piece of Natural White cardstock with Tim Holtz Baroque Sizzix die and stamped the Santa in Rich Cocoa Memento Ink in it’s center. Next I created a reverse mask out of copier paper with a Classic Oval Nestabilities die and sponged an oval around the Santa first in Vintage Photo, then just the edges of the Oval in Walnut Stain Distress Ink.

I removed the reverse mask and covered the sponged oval with the copy paper oval I had cut in order to create the reverse mask.  More copy paper was used to sponge several panels. One side of the sponged lines was created with Vintage Photo, the other with Fired Brick Distress Ink.

Once the panels were sponged, I covered all up but one and stamped an image in from Vintage Christmas. After all panels were filled, the layer was adhered to a bigger piece of Early Espresso cardstock . I cut around it to create the matching layer. I sewed over the sponged lines.

The sentiment is from Season’s Greetings. It was stamped in Walnut Stain Distress Ink on Natural White Neenah cardstock, cut and embossed with Petite Oval Nestabilities. I left the die over the cardstock, stamped the musical score over it with Vintage Photo and then sponged the panel with the same ink. Latte Kaisercraft Pearls were adhered underneath the sentiment and three Prima Mini Roses were adhered to the right of it.

A 1 3/4″ x 5 1/2″ strip of Webster’s Pages Holiday Paper was adhered to the left on to a 4 1/2″ x 5 1/2″ piece of different pattern of the same paper pack. Melissa Frances lace was adhered to the left of the vertical paper strip before the layers were stitched to a 3/16″ bigger piece of Early Espresso cardstock. Brown Wrinkled May Arts Ribbon was wrapped around the layers twice before it was tied into a bow. It was topped with a green button that was attached to the ribbon with Butterscotch waxed Linen. I twisted the ends of the waxed linen around my paper piercer to curl them up.

5″ x 12″ piece of red Core’dinations cardstock was folded in half and used as card base. More Latte Kaisercraft Pearls were added to the top right corner to finish off the card front.

Here is a video for the visual learner:

[youtube]https://www.youtube.com/watch?v=UCKcRcBQTzE[/youtube]

Thanks so much for stopping by! Have a wonderful Sunday! Hugs and smiles

I created this card as a sample for yesterday’s tutorial on SCS : Faux Barn Board. Sharon Field wrote the tutorial and at first told me she couldn’t shoot the video because she didn’t have the right equipment. I shot the video after asking her a few questions and when she replied she told me she could shoot the video with the help of a friend. Since mine was already done, I thought I can share it here. Make sure to check her video, too. She is way better at this technique then I am.

craftysecretspoppiesclosup.jpg

Since I thought Barn board sounded country, I worked my whole card around that idea. I stamped Poppies from Crafty Secrets new Poppy set in Tuxedo Black Memento Ink on X-Press It Blending card and colored them with Copic Markers (Poppies: R32, R35, R39, N5, N7 and a touch of E97 Leaves and stem: YG11, YG63, YG67 Glow: 1/5th YR31, 4/5 blending solution). The image was cut down to a 3 3/8″ x 4 1/4″, the edges were distressed and it was adhered to a 1/4″ bigger piece of Early Espresso Cardstock (SU), that had it’s edges distressed as well. The top right edge of each of the two layers was rolled, then the rest of the edge of the layer was paper pierced.

craftysecretspoppiesfauxbar.jpg

The card base is a 5 1/2″ x 11″ piece of Early Espresso cardstock folded in half. A 5 1/4″ Whisper White square had it’s edges colored with YR31 and distressed. Next I sanded the edges of a 5″ square of Cosmo Cricket Mitten Weather paper and sponged the edges with Antique Linen distress ink.  The paper layer was stitched to the white cardstock before both were adhered to the card base.

The Faux Barn Board sample measures 3 3/8″ in length. The edges were distressed and it was stitched to a 1/4″ bigger piece of Early Espresso, which edges were distressed as well. Two Antique Brads (Stampin’ Up!) were added to the upper edge. A bow tied out of May Arts Gingham ribbon was topped with a bigger antique brad and adhered to the lower edge to finish off the card.

Here is my video for this technique:

[youtube]https://www.youtube.com/watch?v=M4drdrMSgs8[/youtube]

Thanks so much for stopping by! Have a wonderful day!
Hugs and smiles

 P.S.: Did you notice that I didn’t use one Spellbinders die for this card? It almost never happens because I LOVE them!

When I looked through Garnet Hill’s website for last Saturday’s Inspiration Challenge and saw a ruffled pink scarf, I knew right away I wanted to use that as my inspiration piece. I recently got the new Rose set from Crafty Secrets and was eager to try it out. It’s such a beautiful image.

craftysecretsrosecloseupic2.jpg

I stamped the image in Tuxedo Black Memento Ink on X-Press it Blending card and colored it with Copic Markers (Rose: R81, R83, R85, R89, Leaves: BG93, BG96, BG99, E55). I cut the cardstock down to 3 ¾” x 4 5/8” and embossed a rectangle in it with Classic Rectangle Nestabilities. The edges of the cardstock were sponged first with Antique Linen, then with Vintage Photo Distress ink before the layer was stitched to a ¼” bigger piece of black cardstock. Three buttons from my Mom’s button collection were sewn on to the bottom left corner with Butterscotch waxed Linen.

A 4 5/8” wide white cardstock piece was cut and embossed with Lattice Nestabilities, then sponged with Antique Linen Distress Ink. It was adhered to a 2 5/8” x 4 5/8” Thrift Store October Afternoon paper.  The edges of a 4 5/8” x 5 5/8” piece of Thrift Store paper were sponged with Vintage Photo Distress ink. The 2 5/8” wide strip was adhered to the lower half and the edge was stitched.

craftysecretsroseic250bj.jpg

Ivory May Arts Ribbon was sprayed with a mix out of Vintage Photo Distress Re-inker and water, dried and then tied around the paper layers. It was topped with a dark green button. A tag was cut and embossed with Spellbinders Tag die, the center was sponged lightly with Vintage Photo distress ink.  The layers were adhered to the card base, a 5″ x 12″ piece of Vanilla cardstock folded in half.

The sentiment is also from the Rose set and was stamped on the tag with Tuxedo Black Memento ink. It was tied to the bow with the Waxed Linen piece that had been used to tie the button to the bow. Champagne Kaisercraft Pearls on the top right finish off the card.

Thanks so much for stopping by! Have a great day!
Hugs and smiles

I recently got my first Creative Scraps from Crafty Secrets. I had to use one from the Little Blessings right away for Tuesday’s Color Challenge. I love this image and I thought it didn’t need much to make a beautiful card. Just some Lacey squares, some sponging and sewing and voila…..quick vintage looking card.

craftysecretswingedblessing.jpg

I cut the image out of the Creative Scrap sheet and sponged the edges with Antique Linen Distress ink. It was stitched to a piece of Cream Neenah cardstock that had been cut and embossed with Lacey Square Nestabilities. The next size Lacey square die was used to cut and emboss Marina Mist cardstock (SU). A 3 1/2″ square of the Classic Paper pack from Crafty Secrets had been sanded and was stitched to the blue square.

1/2″ off white seam binding was misted with water, then sponged with Antique Linen. Then it was crumpled up and heated with the heat gun. I tied the binding around the bigger square in a double bow and topped it with an Antique Brad from Stampin’ Up!. Then the smaller squares were attached over the bigger one with dimensionals.

The card base is a 4 3/4″ x 9 1/2″ piece of Kraft cardstock folded in half. The edges were sponged with Antique Linen Distress ink. The edges of a 4 3/4″ square of cream cardstock were distressed, sponged with Antique Linen and then stitched. It was adhered to the card base, then the Lacey square layers were taped to that square to finish off the card.

Thanks so much for looking! Have a wonderful day!
Hugs and smiles

craftysecretsvintagesantawi.jpg

Sunday last week the Featured Stamperon Splitcoast was Heather Prince. She is a very sweet fellow challenge chaser on SCS and a wonderful stampers. I picked this card of hers to case. I kept the colors, the Christmas theme and even the pink paper. I added sewing, switched the ribbon to a different spot and exchanged the main image shape to an oval.

For my main panel I cut an oval with Petite Oval Nestabilities out of Classic Cream Neenah cardstock. With the die still on I stamped the music background from the Crafty Secrets set Vintage Christmas in Antique Linen over it. Then I sponged the oval first with Antique Linen, then with Victorian Velvet Distress Ink. The sentiment is from the same set stamped in Walnut Stain Distress ink.

The oval was layered on Canyon Brown Neenah cardstock cut and embossed with Label 11 Nestabilities. A bow was tied with the Bow-Easy and Stampin’ Up! Espresso Ribbon and attached to the ovals with a Recollection Brad (Michaels). Scor-Tape was added the the lower edge on the backside of the oval. Crochet Trim was folded over it to add a ruffled edge.

craftysecretsvintagesantafs.jpg

The card base is a 4 3/4″ x 9 1/2″ piece of Neenah Classic Cream Cardstock folded in half. A 4 1/4″ square of the same cardstock was embossed with the Snowflake Impressabilities. I left the Impressabilities on and sponged Antique Linen Distress Ink all over it. The layer was stitched to a 4 7/16″ square of Canyon Brown cardstock.

The edges of a 2 1/2″ x 3 3/4″ piece of Very Merry October Afternoon Paper were sponged with Victorian Velvet Distress Ink and stitched to a 3/16″ bigger piece of Canyon Brown cardstock. Two 1 1/2″ x 3″ pieces of Good Cheer October Afternoon paper were stitched to Canyon Brown cardstock pieces cut with Long scallop Rectangle Nestabilities. The layers were adhered on top of each other. Latte and Champagne Kaisercraft pearls were added to finish off the card front.

Thanks so much for stopping by! Have a wonderful day. Hugs and smiles

craftysecretsfairyenchantin.jpg

Check out this darling little fairy. She is from Crafty Secrets Fairyland set. She was stamped in Tuxedo Black Memento Ink on Neenah Solar White cardstock. The image was cut with Classic Oval Nestabilities, colored with Copic Markers (E0000, E00 skin, Y23, Y26 hair, B21, B00, wings, R30, R32, R35 dress) and airbrushed with Copic Marker Y21. The image was layered on a black piece of cardstock cut and embossed with the second largest of the Crowned Oval Nestabilities. Each crown piece was topped with a Rhinestone from Stampin’ Up!.

craftysecretsfenchantingcro.jpg

A 2 3/4″ wide cardstock strip was cut and embossed with Kaleidoscope Borderabilities and adhered under a 1 3/4″ x 2 3/4″ strip of Cherry Hill October Afternoon Paper. The strips were adhered to the left hand side of a 3 3/4″ x 5″ piece of Material Girl Cosmo Cricket Paper, which was stitched to a 1/4″ bigger piece of Basic Black cardstock.  Melissa Frances white lace was taped on the Cherry Hill strip. A hole was punched over the lace and blue silk ribbon was tied around it. The main image was adhered over the end of the lace with dimensionals.

The sentiment is also from Fairyland. It was stamped in Tuxedo Black memento Ink on the lower left hand side. More Stampin’ Up! Rhinestones on the lower left and upper right hand corner finish off the card.

craftysecretsfenchcroinside.jpg

The inside of the card is kept very simple, like all my cards. I just can’t leave them empty anymore. They feel naked if they are not tied into the card front with matching paper.

Thanks for stopping by! Have a wonderful day! Hugs and smiles

Today is Lydia Fiedler‘s, aka. UnderstandBlue on Splitcoast, birthday. Lydia is our website manager on Splitcoast and blue is her favorite color! So I created this card for her. I used the sketch challenge from Waltzingmouse because I LOVE circle cards. I really need to get some of their stamps. They go so well with the Nestabilities dies. I also used colors from the Inspiration challenge and made it work to fit for the Free For All Challenge, by using Verve and Crafty Secrets stamps.

vervecraftylydiabirthdayfro.jpg

The card base was created by folding a 4 1/2″ x 8 1/2″ piece of Sno Cone cardstock in half and cut and embossed with the biggest of the Big Scalloped Nestabilities die.  A 1 1/8″ wide piece of 365 degree Pink Paislee paper was adhered to a 4″ square of a different pattern from the same paper pack and cut with Classic Circle Nestabilities. A thin strip of Lace (Walmart) was adhered on the lower edge of the horizontal trip. Then the layers were stitched to a white circle, cut with the next size up circle Nestabilities die.  The circles were then adhered to the card base.

The sentiment is from Verve’s Celebrating You was stamped in Chipped Sapphire on Neenah Solar White cardstock. The swirl from Crafty Secrets Cupcake Party was stamped in Shabby Shutter ink. The sentiment was cut with Classic Circle dies, then layered on a Big Scalloped circle cut and embossed out of Sno Cone paper.

Tissue paper was cut with the two smallest dies of the Big Scalloped Nestabilities dies, connected with a Reconnection brad and sponged with Tumbled Glass Distress Ink. The flower was adhered to the lower right edge of the sentiment . Snow Kaisercraft Pearls were attached to the left side of the green paper strip.

vervecraftylydiasbirthdayca.jpg

For the inside of the card I adhered a 1 1/8″ strip of 365 degree Pink Paislee paper on a white cardstock square and cut it with Classic Circle dies. I stamped another swirl in Shabby Shutter to the right side of circle and added three Snow Kaisercraft pearls.

Thank you for stopping by! If you have a minute, hop on over to Lydia’s blog and wish her a happy birthday!
Have a wonderful day! Hugs and smiles

craftysfairyrmwide.jpg

Today I want to share with you another card I made for a video tutorial. I usually don’t really like the look or the Rolling Marble background, but I do like how this card turned out. It almost looks like my fairies are under water.

I added just a few steps to the regular technique to achieve this look. First I stamped the Fairies from Crafty Secrets in Black Soot Distress ink on Neenah White cardstock and embossed them with clear embossing powder. One of the great things about the Distress inks is that they stay wet longer. That is great for sponging and also great because you have time to heat emboss with these inks. I colored the wings of the fairies with Copic Markers. Next colored over the wings with a Versamarker and embossed them with Iridescent Ice Embossing Powder (Stampin’ Up!).

craftysfairyrmbeate.jpg

Next I used Versamark and Broken China Distress ink re-inker for the Rolling Marble background and embossed those lines with Iridescent Ice Embossing powder. Once the Embossing Powder cooled, the image was cut out with Oval Nestabilities. I sponged around the Fairies with Scattered Straw Distress ink. The rest of the image was sponged with Broken China ink, the edges with Faded Jeans. The image was first adhered to a slightly bigger black cardstock oval, then to a scalloped oval cut out of Core’dinations Cardstock.

The card base was created with Spellbinders Scalloped Edge Frame out of black cardstock. I cut the red pieces with the same die, sponged them with Aged Mahogany Distress ink and used Unity’s Border of Bells with the same ink to add pattern to the cardstock. The red piece was adhered to a slightly bigger Core’dinations cardstock rectangle and taped to the card base.

The sentiment is also from the Fairies set. It was stamped in Black Soot Ink. It was cut with one of the dies from Spellbinders Ribbon Tag Trio. The ribbon slots were cut off. After the sentiment was completely dry, the center was lightly sponged with Scattered Straw, the edges with Broken China Distress ink. The center was covered with the Versamarker and embossed in Iridescent Ice Embossing powder. It was adhered to the main image with dimensionals. A white organdy bow was added under the sentiment. Kaiser Rhinestones on the top right and bottom left corner finish off the card.

craftysfairyrminside.jpg

The inside of the card is kept very simple. I added another red layer in the center of the Frame. The edges had been sponged with Aged Mahogany Distress ink and the bottom edge had been stamped with Unity’s Border of Bells.

Here is a video for the visual learner:

[youtube]https://www.youtube.com/watch?v=4LtbcEPau8s[/youtube]

Thanks for stopping by! I hope you have a Happy New Year filled with Health, Happiness and Love!
Hugs and smiles

craftysvintagechristmastopn.jpg

Today is the last day of the Holiday Blitz week on Splitcoaststampers.  Angie Tieman came up with a Pizza box covered with Top Note die cuts last year and she agreed to write a tutorial for us. Make sure to check out her Top Note Box tutorial. It’s easy, fast and GORGEOUS!

craftysvintagectopnotebj.jpg

I used Kraft colored cardstock for my box and stamped images from the Vintage Christmas set from Crafty Secrets on the box with Frayed Burlap Distress ink. I sponged the edges of all pieces with Frayed Burlap as well.

The main image was stamped in Tuxedo Black Memento Ink on Neenah Solar White cardstock and colored it in with Copic Markers (W00, W1, W3, Y28, E44, R29, R59, Yr14, YR21, E30, BG96, E51, R12).  The image was cut out with Oval Nestabilities, layered on a slightly bigger black oval and a scallop red oval. Green May Arts Silk ribbon was tied around the box and the image was attached over it with dimensionals.

To finish the box off I added some Dimensional pearls on the Holly on the Santa hat and another Snowflake Medallion on the top left. The snowflakes were cut out with Create a flake 1 dies from Spellbinders, sponged with Shabby Shutters ink and Shard Vintage Glitter was added with Crystal Effect.  The medallion was topped off with a button from my Mom’s stash and Linen thread.

Here is a video for the visual learners:

[youtube]https://www.youtube.com/watch?v=taGqWS1IMDM[/youtube]

© 2012 fresh & fun Suffusion theme by Sayontan Sinha