Okay….I promise this is the last post that leads you somewhere else for a while. I have another post on the Spellbinders blog today. I actually showcase four different new die sets (Homespun, Label 28, Vintage Lace Motifs and Fancy Framed Tags one). The sentiment is from Gina K. Designs Fanciful Tags.

I hope you have time to hop on over and check out the entire post. I will be back with a full card image tomorrow. 🙂

Thanks so much for stopping by! Have a wonderful day.
Hugs and smiles

It’s my turn to share a card on the Spellbinders blog created with dies from the upcoming summer release. I LOVE the new dies coming out and used two different new die packs. You can find the entire card here.

Thanks so much for stopping by! Have a wonderful day.
Hugs and smiles

Today’s card was created a couple of weeks ago for a sketch challenge at  StampTV.

Two 3 3/4″ x 5″ pieces of Once Upon a Springtime Graphic 45 paper was cut in quarters and sewn together over a 3/16″ piece of Canyon Brown cardstock.

Ivory Silk Ribbon was tied around the layers horizontally before the layers were adhered to the card base, a 4 1/4″ x 11″ piece of Kraft cardstock, folded in half.

A label was from Gina K’s Lovely Labels 1 was stamped in Brilliance Coffee Bean ink on Classic White cardstock. A sentiment from It was cut and embossed with Label  9 Nestabilities. A sentiment from GKD Smile was stamped inside the label. The label was adhered to the card with dimensionals. Rose Kaisercraft Pearls underneath the sentiment finish off the card.

Thanks so much for stopping by! Have a wonderful day!
Hugs and smiles

Saturday Jenn, Lori and I cyber stamped again. She picked the colors, I picked the sketch. I had just received new stamps from Gina K. Designs and new right away that I wanted to use her new gorgeous Framed Greetings set.

I stamped the image in Rich Cocoa Memento ink on Neenah Classic Cream cardstock. The image was colored with Copic Markers (Flowers: V12, V15, V17, YR31, YR23,    Butterfly: 1/5th YR31, YR31, YR25, E25,    Leaves: YG93, YG95, YG97….Frame: YG91, 1/5th YR31, E40, E25, E47) and cut out.

A 2″ x 4 1/2″ piece of Webster’s Pages was adhered horizontally over a 4 1/2″ square also from Webster’s Pages. A piece from Melissa Frances Beige Collection. A 1 1/4″ x 4 1/2″ strip was adhered vertically to the layers before everything was stitched to a 3/16″ piece of Chocolate chip cardstock.

Retired Webster’s Pages Bloomer Deluxe Trim was adhered over the vertical strip. Before everything was adhered to the card base, a 5″ x 10″ piece of Classic Cream cardstock, folded in half.  Part of a Zva Flourish was adhered on top right and lower left of the card before the images was adhered with dimensionals.

Thanks so much for stopping by! Have a wonderful day!
Hugs and smiles

Thursday’s Way to Challenge on Splitcoast was to use Gray on your project.  Gray is the main color here in Ohio in the winter. Gray skies, gray dirty snow….. the winter was long and I can’t wait to see the first blooms to appear. So I combined my wish for Spring with the Gray challenge to create this card.

I started out stamping the Crocus image from Flourishes Year in Flowers 1 in Tuxedo Black Memento Ink on Neenah Solar White cardstock. It was cut down to a pretty small square and colored with Copic Markers (Flower Petals: Y11, Y13, Y15, W3,    Leaves: YG91, YG93, YG95,    Background: B0000, B000).

Next I stamped one of Gina K.’s gorgeous Lovely Labels 2 with Lightning Black Brilliance Ink. It was cut and embossed with  Classic Circle and Label 15 Nestabilities dies and adhered over the image. The layers were adhered to a piece of black cardstock, cut and embossed with Lacey Square Nestabilities dies.

A 4 3/4″ long strip of white cardstock was cut and embossed with a Lattice Borderabilities and adhered under a 2 3/8″ x 4 3/4″ piece of Pink Paislee’s Queen Bee paper. The layers were adhered to 4 3/4″ square of another piece from the paper pack. The layers were stitched to a 3/16″ bigger piece of black cardstock.

May Arts Organdy Ribbon was tied around the horizontal layer and topped with a Queen  Been Brad before the layers were adhered to a 5 1/4″ x 10 1/2″ piece of White cardstock folded in half. The image layers were adhered to the card base with dimensionals.

The sentiment is from Flourishes Tag Lines. It was stamped in Tuxedo Black Memento Ink on a piece of Neenah Solar white cardstock, cut and embossed with JustRite Stampers Exlusive Nested Sentiments Spellbinders die. Silver Recollection Pearls finish off the card.

Thanks so much for stopping by! Have a wonderful day!
Hugs and smiles

I loved how Deb Felts colored this bird and had to color my bird blue as well.

The bird is from Gina K.’s Winter Wings. It was stamped in Rich Cocoa Memento Ink on Neenah Classic White cardstock. It was cut and embossed with Classic Square Nestabilities. I masked the image and with the die still over the cardstock stamped the Music border from Vintage Borders in Antique Linen over the square. The square was first sponged in Antique Linen, then with Vintage Photo Distress Ink.

The bird was then colored with Copic Markers (Bird: B91, B93, B95, T0, T1, T2, Leaves: YG63, YG67, Berries: R27, R29, R89, Beak: Y32, Y38).

A piece of Neenah Canyon Brown cardstock was cut and embossed with Label 16 Nestabilities and the Floral and Stone Impressabilities. The layer was sponged with Walnut Stain Distress Ink before the image was stitched to it.

A 1 1/2″ x 4  1/2″ piece of Webster’s Pages Petite Papers was adhered to a 4 1/2″ square of a different Petite Papers pattern. A piece of Webster’s Pages Trim (retired) was adhered over the strip and the layers were stitched to a 1/4″ bigger piece of Classic White paper.The layers were adhered to the card front of a 5″ x 5″ Canyon Brown card base.

Off White Seam Binding was stained with diluted Vintage Photo Distress Reinker. It was turned into a bow and topped with an Antique Brad (Stampin’ Up!).

The sentiment is also from Winter Wings. It was stamped on a small tag with Rich Cocoa Memento Ink, cut and embossed with a retired die out of Classic White cardstock. The center was sponged lightly with Vintage photo and the tag was adhered underneath the bow.

Thanks so much for stopping by! Have a wonderful Sunday!
Hugs and smiles

Today’s tutorial on Splitcoaststampers is for a basic technique: Paper Piercing. I know it’s not a fancy technique tutorial, but we didn’t have a tutorial for that technique yet. I love to use paper piercing to add an extra border to my images when it just needs a little something something.

For my sample I an image from  Gina K. Designs Winter Wonderland stamp set. The image was stamped in Tuxedo Black Memento Ink on Neenah Solar White cardstock and colored with Copic Markers (C00, C1, BV20, BV21, R01, R02, R08, R29, G21, G24, G28). It was cut with Classic Circle Nestabilities, overstamped with the background script from the same set in Antique Linen Distress Ink and sponged with the same color.

The image was layered on piece of Basic Grey cardstock, cut and embossed with Lacey Circle Nestabilities. The edge of the circle was paper pierced.

For my card layout I used CPS Sketch 199. The card base is a 5 1/2″ x 11″ piece of Basic Grey cardstock folded in half. The edges of the card front were sponged with Pumice Stone Distress Ink. All four corners were rounded with the W R Memory Keepers Cropadile Corner Chomper and the edges were paper pierced.

The edges of a 4 3/4″ square of Cosmo Cricket 1934 Paper (I LOVE that paper pack and need to order more) were rounded and the square was stitched to a 1/4″ bigger piece of White cardstock. Both layers were adhered to the card base.

Melissa Frances lace from the beige ribbon pack was adhered under a white cardstock strip and adhered to the right center of the layeres. The image circle was adhered over the strip with dimensionals.

The sentiment is also from Winter Wonderland Stamp set. It was stamped in Tuxedo Black Memento Ink on Neenah Solar White cardstock. The sentiment was cut and embossed with Petite Oval Nestabilities and airbrushed with Copic Marker BV20. Snow Kaisercraft Pearls finish off the card.

Here is a video for the visual learner:

[youtube]https://www.youtube.com/watch?v=7jZ31hY0bpE[/youtube]

Have a wonderful day! Hugs and smiles

I created this card for last week’s sketch challenge on Splitcoast. I started out with a 2 5/8″ x 3 3/4″ piece of  Neenah Classic Cream cardstock. I stamped a sentiment from Gina K. Designs Winter Wonderland stamp set in Walnut Stain Distress Ink in the center, then added the small Pine tree from the same set twice on the lower left hand side. The Pine Tree had been inked with mostly Peeled Paint and a bit of Pine Needle Distress Ink. Snowflakes were stamped with Antique Linen Distress ink and the edges were sponged with the same ink.

The sentiment layer was adhered to a piece of Neenah Canyon Brown cardstock cut and embossed with Label 17 Nestabilities and the edges were paper pierced. A snowflake was cut out of Cream cardstock with Whimsy Stamps Winter Jewel Die. The snowflake was sponged with Vintage Photo and a bit of Walnut Stain Distress ink. The snowflake was adhered to the sentiment layer with a dimensional and was topped with a Recollection pearl brad.

The card base is a 5 1/2″ x 8 1/2″ piece of Kraft cardstock folded in half. A 3 3/4″ x 5″ piece of Pink Paislee Father Christmas patterned paper was stitched to a 3/16″ bigger piece of Canyon Brown cardstock and adhered to the card base.

A 4 1/4″ long Classic Cream cardstock strip was cut and embossed with Eyelet Borderabilities die and stitched to a 1 3/4″ x 4 1/4″ piece of Father Christmas paper. Ivory May Arts Silk Ribbon was tied around the strip before it was adhered to the card base. The sentiment panel was adhered over the vertical strip with dimensionals.

Have a wonderful day! Hugs and smiles

Sorry I have been so quiet. Besides prepping for my next class at Simply Scrapbooks in December, my internet is giving me trouble again. It just came back on after being off for 1 1/2 days. Before that it only worked for a little at a time. I hope I get this post up before it breaks again.

Today’s tutorial on Splitcoast is for a flower created out of ribbon or lace. For my sample I stamped a Label from Gina K. Lovely Labels 2 stamp set in Vintage Photo Distress Ink on Natural White Neenah cardstock. I cut and embossed the label with the matching Label 16 Nestabilities die and the center with Classic Circle Nestabilities. With both dies still on the cardstock I sponged the paper first with Antique Linen Distress Ink, then the edges with Vintage Photo Distress Ink.

In the circle I stamped the sentiment from Winter Wings in Vintage Photo Distress Ink.

The card base is a 4 1/4″ x 9 7/8″ piece of Kraft cardstock folded in half. The edges of the card front and inside were sponged with Vintage Photo Distress ink.  Two 3 3/4″ wide strips of Webster’s Pages patterned paper were sewn to a 4″ x 4 5/8″ piece of Natural White cardstock before the layers were adhered to the card base. Three dew drops from the Mint Chocolate Chip bottle were adhered to the top right side of the patterned paper layer.

The label was adhered in the center of the card with dimensionals, the circle in it’s center with a double layer of dimensionals. Three Bliss Kaisercraft Pearls were adhered to the bottom of the sentiment circle.

The flower was created out of now retired Webster’s Pages Trim. It was topped with a silk ribbon bow that was topped with a Basic Grey button.

Here is a video for the visual learner:

[youtube]https://www.youtube.com/watch?v=ACyJK-YRZRI[/youtube]

Have a wonderful Thanksgiving weekend! Hugs and smiles

Sorry I am so quiet lately. It seems I am only on the road lately driving kids to and from school and after school activity. But I have something to share with you today. Not only another video perfect for the colder season, but some personal news as well.  We heard that we are probably moving to Tinker AFB in Oklahoma. That’s in Oklahoma City. While it is not Florida or Texas as we were hoping, it is closer to the South then we are now. And it is in the States. There were a lot of overseas jobs open. With the boys both finishing High School next place we go, I am excited that we will stay in the States for that.

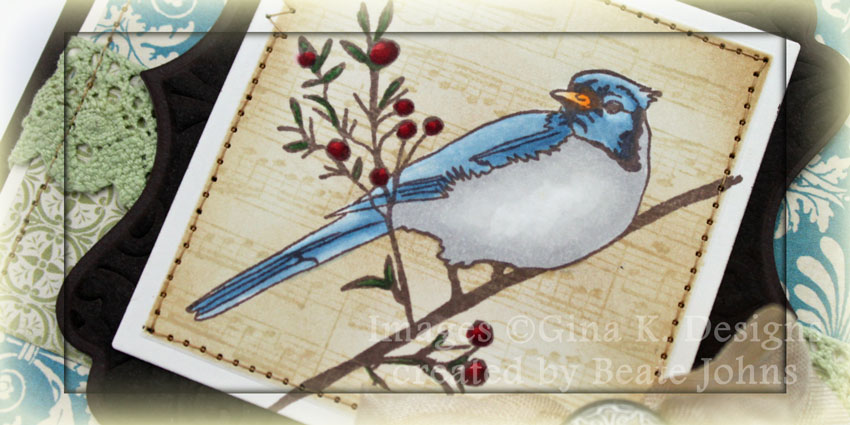
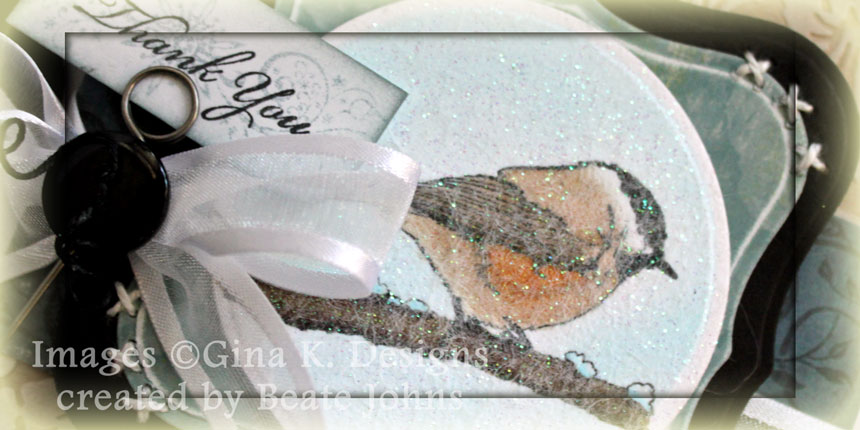
Yesterday I created a video tutorial for the Dryer Sheet Technique. I love this technique for winter cards. It adds such a soft look to your image. For my sample I used Gina K.’s Winter Wings stamp set. I stamped one of the birds in Tuxedo Black Memento Ink on Neenah Solar White cardstock and colored it with Copic Markers (Bird: E42, E43, E44, YR23, YR24, N7, N9, Branch: E44, E47, E49, snow: B000). I tried to color the bird like a Chickadee. The image was cut and embossed with Classic Circle Nestabilities and airbrushed with Copic Marker B000.

I then ran the image face down through my Xyron, added a used dryer sheet over it and cut it again with the same Circle Nestabilities die I had used earlier. Next I rubbed Cosmo Crystal Crafty Sparkles all over the image and tapped off the access.

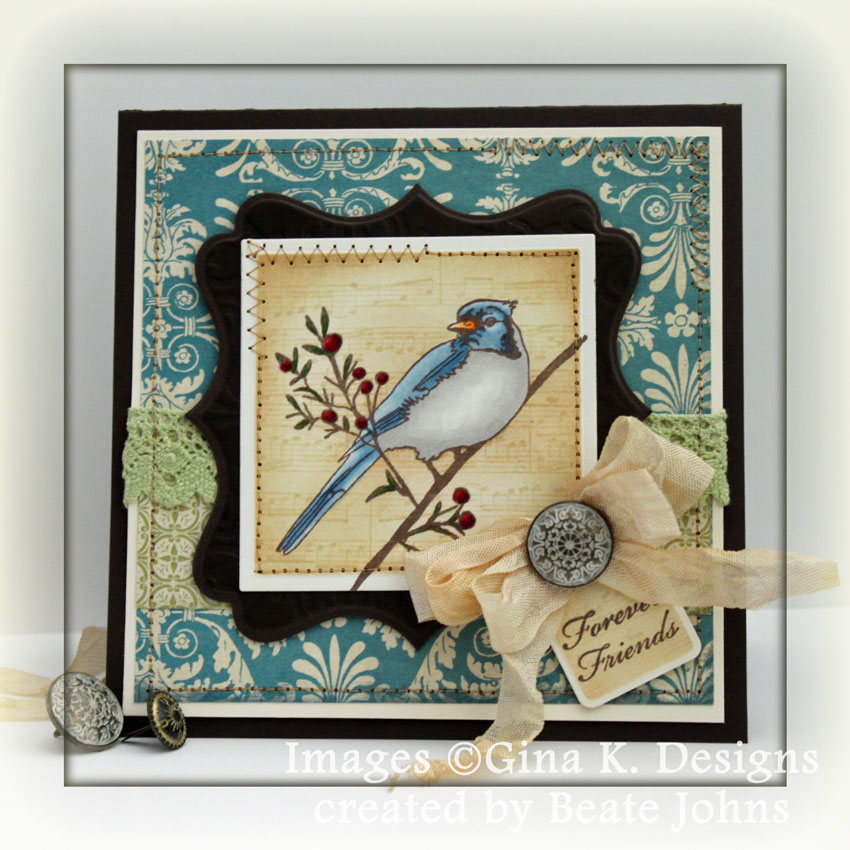
A piece of 7Gypsies Nottinghill patterned paper was cut and embossed with Label 1 Nestabilities, sanded and then adhered to a black card stock piece cut and embossed with the next size Label 1 Nestabilities die. The image was adhered to both layers with dimensionals.

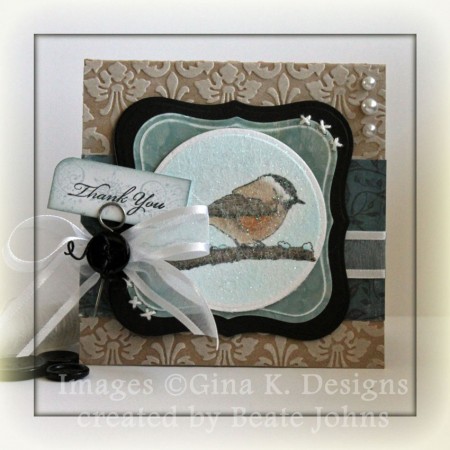
The card base is a 4 1/4″ x 8 1/2″ piece of Pure Luxury Kraft card stock folded in half. It was embossed with Kassie’s Brocade Cuttlebug embossing folder. The raised image was highlighted with Adirondack Snow cap pigment ink.

A 2 1/4″ x 4 1/4″ piece of 7Gypsies Nottinghill paper was adhered in the center of the card base and ribbon from Gina K.’s latest TV kit was tied around the paper strip. The ribbon was tied into a bow and topped with a black Basic Grey button tied on with black waxed Linen.

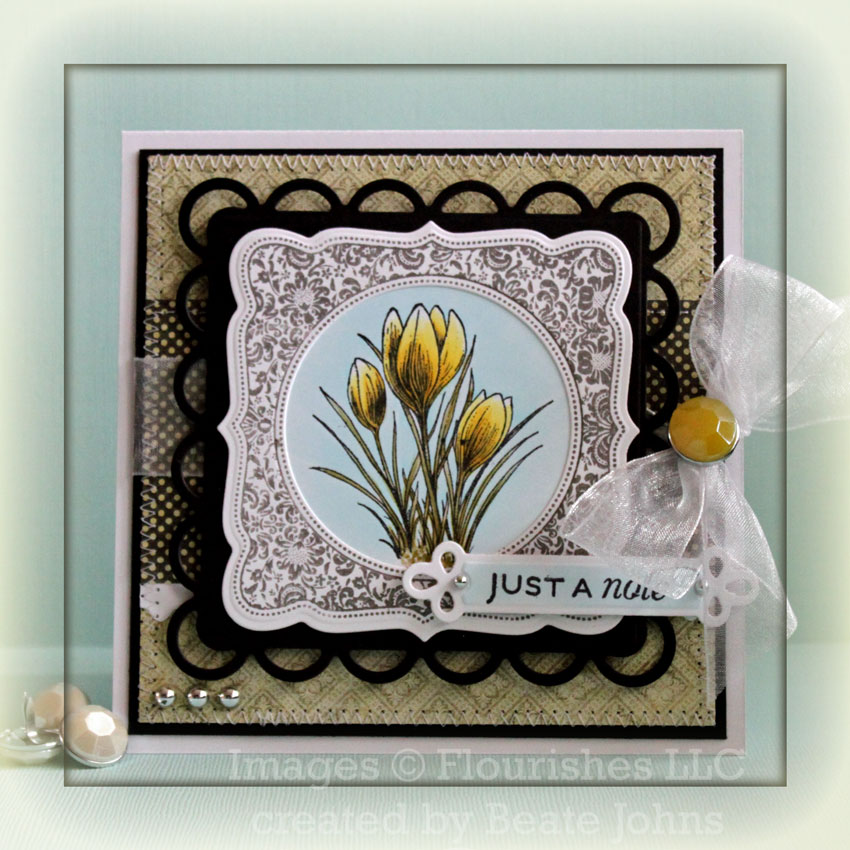
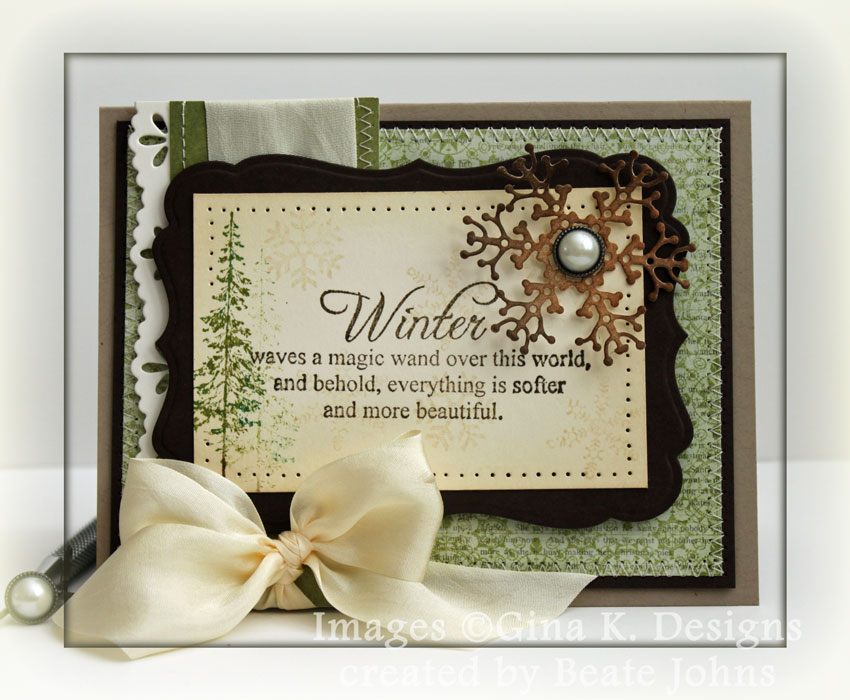
The sentiment is also from Winter Wings. It was stamped in Tuxedo black Memento Ink on a 3/4″ x 1 7/8″ piece of Neenah Solar White card stock. A background border from Vintage Borders was stamped in second generation (stamped off once) Stormy Sky Distress Ink, two of the corners were rounded and the edges were sponged with Stormy Sky. The sentiment was attached to the card with one of Tim Holtz Memo Pins. To finish the card off three Snow Kaisercraft Pearls were added to the upper right hand side.

Here is a video for the visual learner:

[youtube]https://www.youtube.com/watch?v=A1JUgGHL118[/youtube]

Thanks so much for stopping by! Have a wonderful day! Hugs and smiles

© 2012 fresh & fun Suffusion theme by Sayontan Sinha