verveblessingssc295wide.jpg

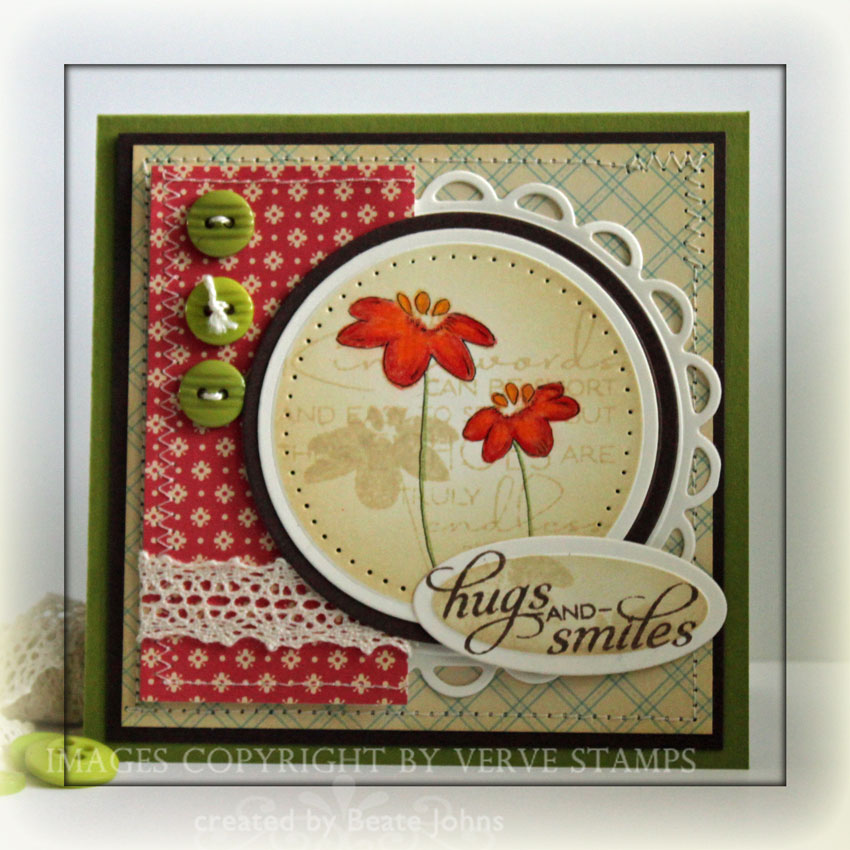
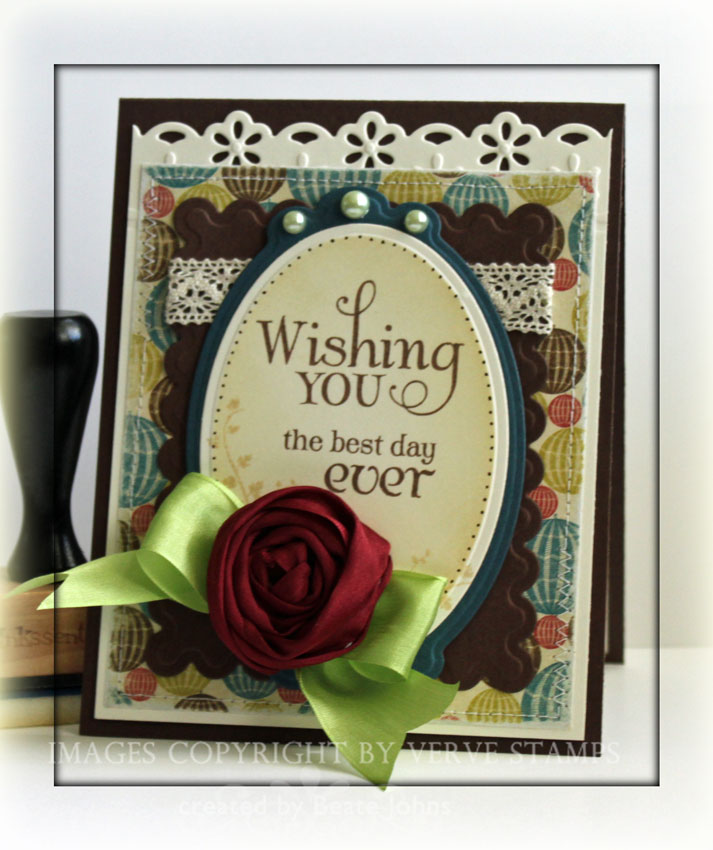
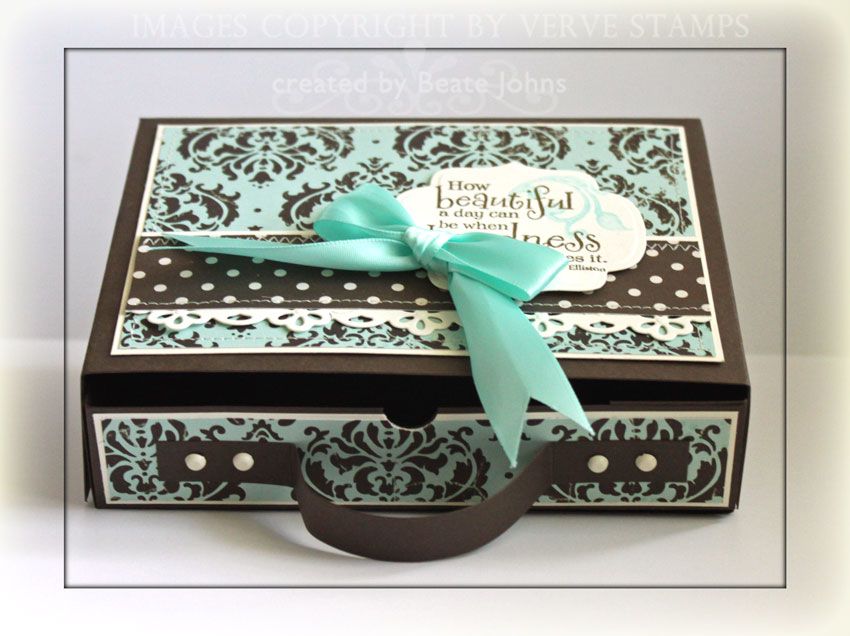
I created this card last Wednesday after I received my Verve order in the mail. I had to use the gorgeous Blessings set right away. It was perfect for the Sketch challenge that day.

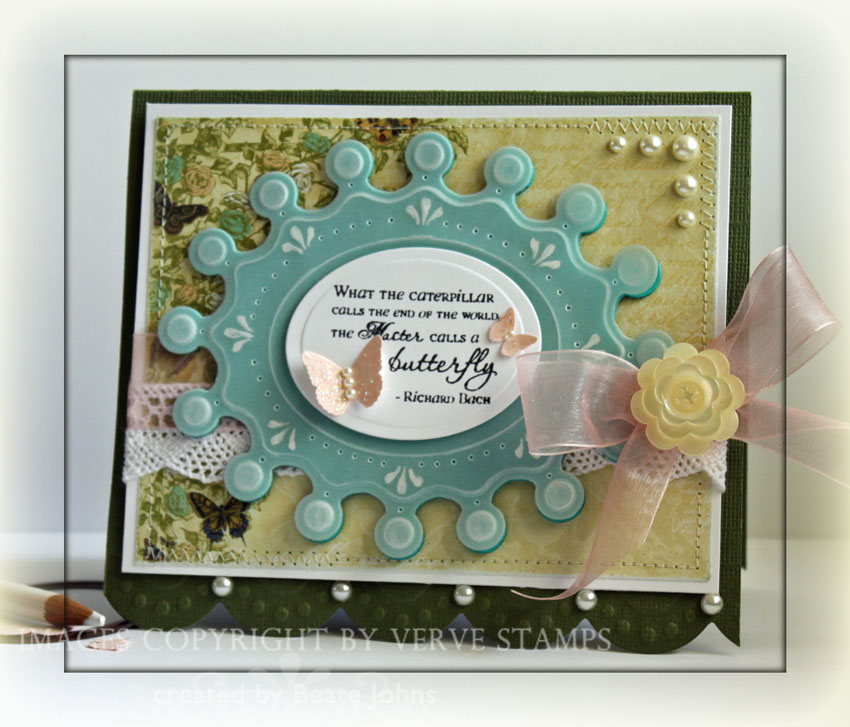
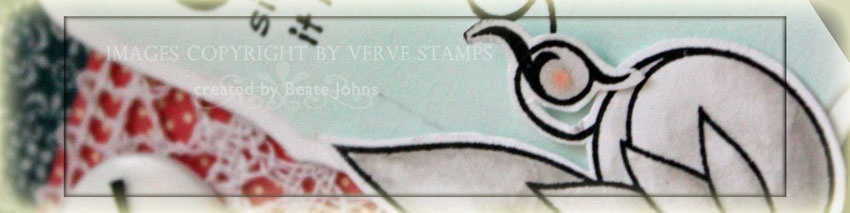
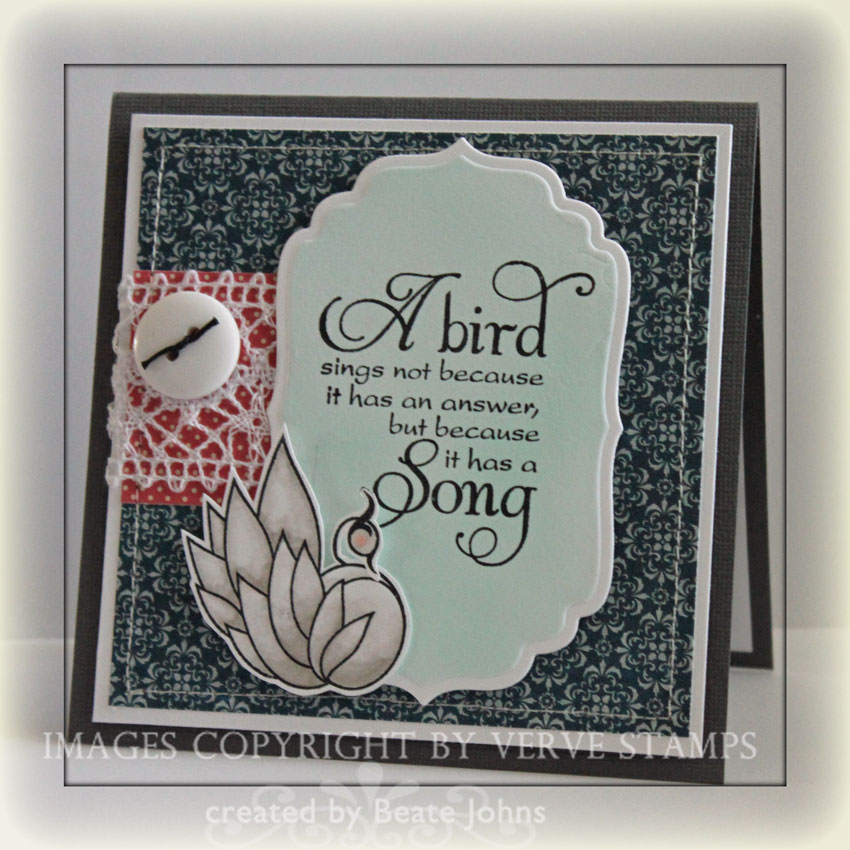
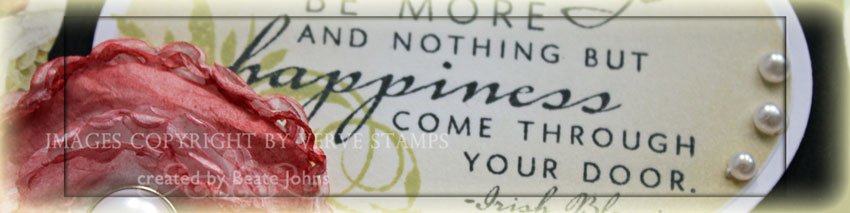
I cut an oval out of Neenah Solar White cardstock with Petite Oval Nestabilities, stamped the sentiment with Tuxedo Black Memento Ink, the swirl with Shabby Shutter Distress ink and sponged the oval with Antique Linen.

verveblessings-sc295beate.jpg

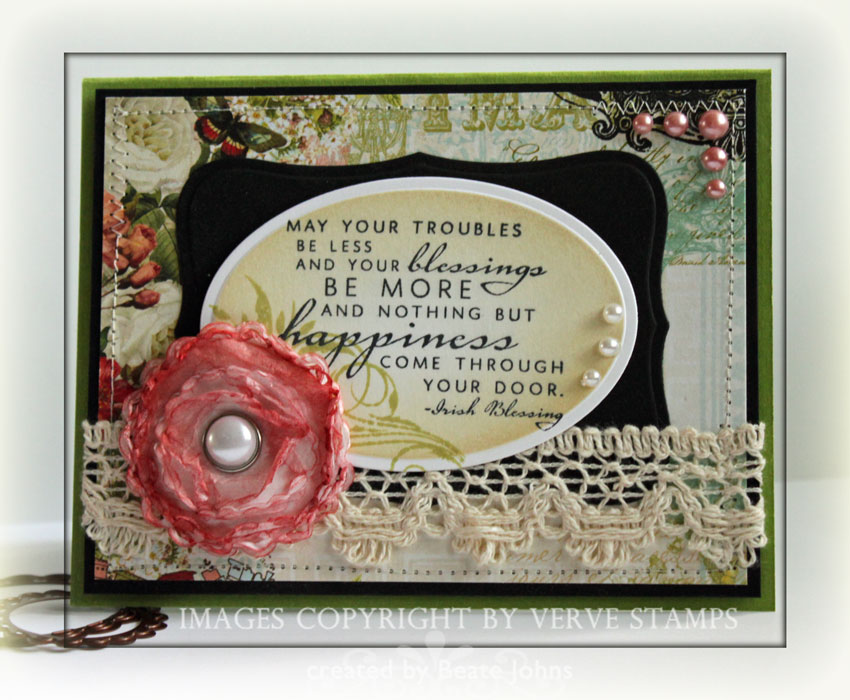
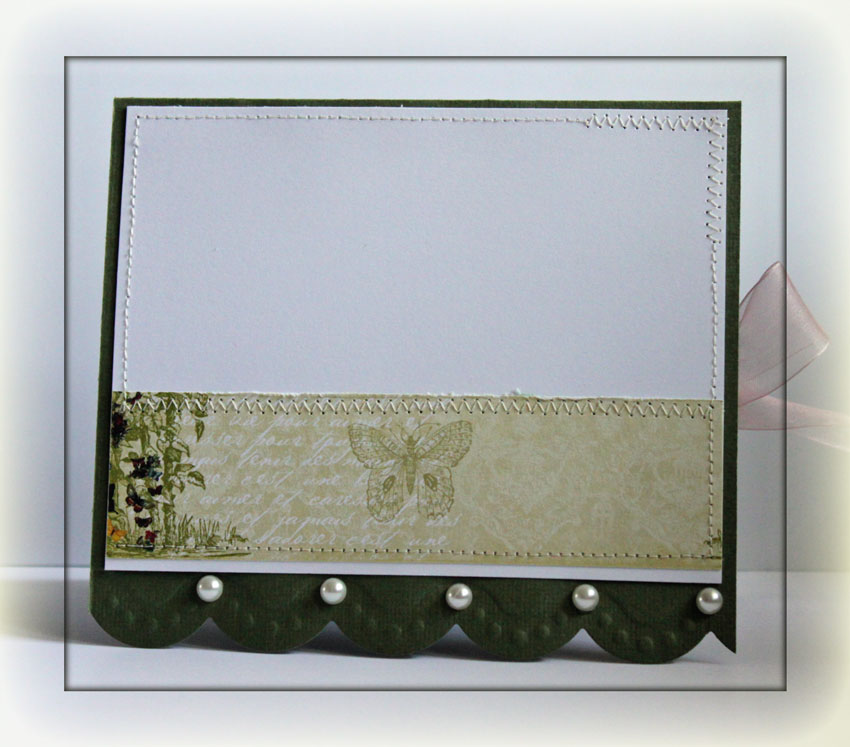
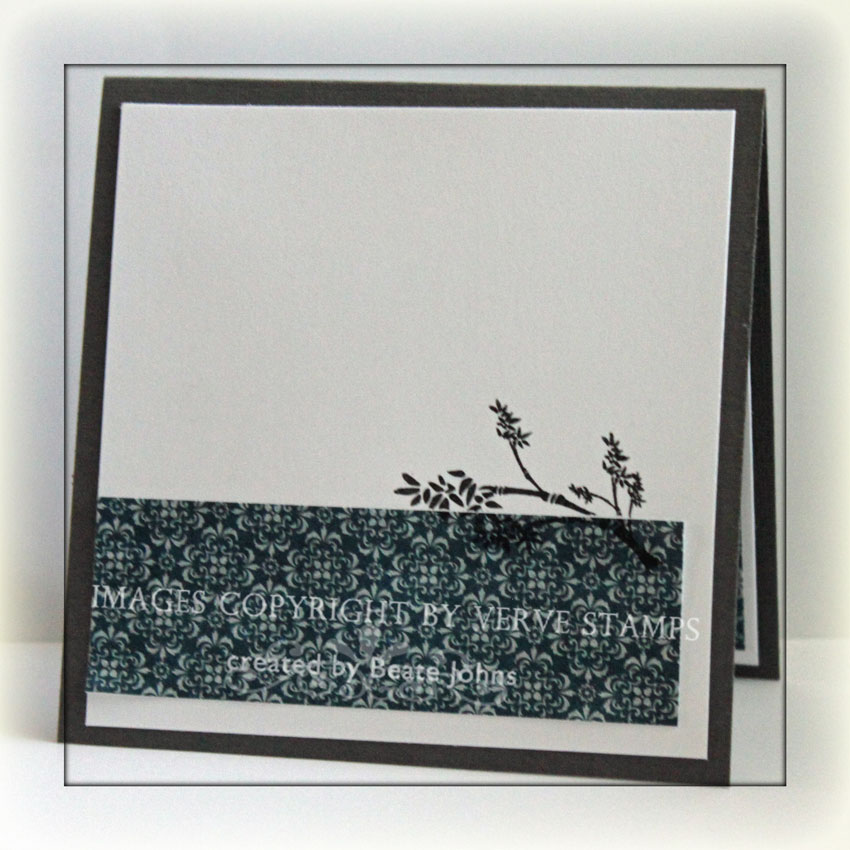
The card base is a 5 1/2″ x 8 1/2″ piece of Core’dination cardstock folded in half. A 3 3/4″ x 5″ piece of Webster’s Pages paper was stitched to a 1/4″ bigger piece of black cardstock. A black piece of cardstock cut with Label 8 Nestabilities and adhered in the center of the paper.Melissa Frances lace was adhered over the lower half of the paper, partly over the black label. The oval was adhered over the label with dimensionals.

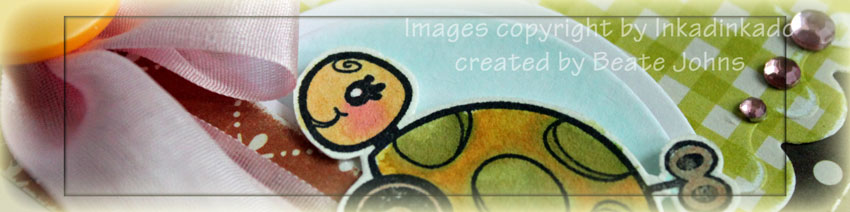
I created another tissue flowerwith the Lacey Circle Nestabilities, secured the layers with a Recollection Brad (Michaels) and sponged it with Fired Brick Distress Ink. It was adhered to the lower left of the oval. Snow Kaisercraft pearls were added to the right of the oval and Rose Kaisercraft pearls on the top right corner to finish off the card.

Thanks so much for stopping by! Have a wonderful day!
Hugs and smiles

Today’s tutorial on SCS is written by Lydia Fiedler and it called “Blended Pencils“. You stamp a silhouette stamp with a light colored ink and add colored pencils over it.

vervekindwordsblendedpencil.jpg

For my sample I used Verve’s new set Kind Words and this weeks Midnight Madness sketch. I stamped the image in Antique Linen Distress Ink on Neenah Classic Creamand colored it with Prismacolor Pencils. It was cut with Classic Circle Nestabilities and spongedwith Antique Linen Distress Ink and layered on a Chocolate Chip cardstock circle. One of the sentiments of the set was stamped in Antique Linen over the image and the edge of the layer was paper pierced.

The card base is a 4 1/4″ x 6 1/2″ piece of Old Olive cardstock folded in half. A 3 3/4″ square of Cosmo Cricket Togetherness patterned paper was stitched to a 1/4″ bigger piece of Chocolate Chip cardstock. On the left is another patterned paper from the same pack measuring 1 3/4″ x 3 1/2″. Three sides of that paper strip were stitched and three green buttons were added to the top left of the strip. Lace was added to the lower half of it.

A Lacey Circlewas cut and embossed out of Neenah Classic Cream cardstock and adhered to the card base a bit off center. The patterned paper strip was adhered over it with dimentionals and the main image was adhered over it. The sentiment is also from the set Kind Words. Look what it says!!! How cool is that? And I didn’t even notice it until I was stamping with the set today. Made me smile big time!

I had to ink the sentiment in parts and stamp it a bit closer together with Rich Cocoa Memento Ink on Classic Cream cardstock. It was cut with Petite Oval Nestabilities and sponged with Antique Linen cardstock. The sentiment was adhered over the image circle to finish off the card.

vervekindnessblendedpencils.jpg

The inside of the card was decorated with same patterned paper and stamps as the card front.

Thanks so much for stopping by! Have a wonderful day
Hugs and smiles (*grin*….I can stamp that now! LOL)

verveaccentnotesvellumwide.jpg

For yesterday’s product review we ran a tutorial by the sweet and talented Linda Duke. I had seen her gorgeous embossed Vellum Nestabilities die cut during the Spellbinders blog hop and asked her if we could run it for our review. She graciously agreed. I loved her card so much, that I had to try it out right away. I didn’t have the beaded Oval Nestabilities dies Linda used, so for my sample I used the largest of the Crowned Oval die.

verveaccentnotesvellumdie.jpg

For my Frosted Nestabilities I used a small stamp from Verve’s Accent Notes. I drew it on the back of my vellum cardstock with my white opaque pen after I cut, embossed and paper pierced it. The Vellum was adhered to a Bermuda Bay Crowned Oval. I don’t have Vellum tape yet (I know, I need some), so I just added adhesive where I later placed my smaller white oval, that had been cut and embossed with Classic Oval Nestabilities. The classic oval was stamped in Tuxedo black Memento Ink with a sentiment from Verve’s Beautiful You.

The card base started out as a 5 3/4″ x 10 1/2″ piece of Evergreen Core’dinations cardstock. It was folded in half and the bottom edge was cut and embossed with the Jumbo Scalloped Borderabilities. The edges of a 4 1/8″ x 5 1/8″ piece of Webster’s Pages patterned paper were sanded before the layer was stitched to a 1/4″ bigger piece of Neenah Solar White cardstock. White lace (Jo’Ann’s) was adhered horizontally and Antique Rose Sheer ribbon was tied around it and topped with one of Tim’s gorgeous button.

The Crowned Oval die-cuts were adhered to the card base with dimensionals. Butterflies were punched out of the retired Blush Blossoms cardstock (Stampin’ Up!) wand adhered to the sentiment. The wings were covered with Stardust Stickles. The center of the bigger butterfly received Pearl Kaisercraft pearls, the smaller one White Opal Liquid Pearls. More Pearl Kaisercraft Pearls were added to the top right as well as on the top of each scallop to finish of the card front.

verveaccentnotesvelluminsid.jpg

The inside of the card was kept was very simple. A 1 1/2″ wide strip of Webster’s Pages patterned paper was stitched to a white piece of cardstock. Pearl Kaisercraft Pearls were adhered to the top of each scallop.

Thanks so much for stopping by! Have a wonderful day! Hugs and smiles

Update:

I just saw the new Beaded and Lacey Decorative Nestabilities in the Flourishes store. Along with two of the new label dies. I so ordered them already!

Today is Lydia Fiedler‘s, aka. UnderstandBlue on Splitcoast, birthday. Lydia is our website manager on Splitcoast and blue is her favorite color! So I created this card for her. I used the sketch challenge from Waltzingmouse because I LOVE circle cards. I really need to get some of their stamps. They go so well with the Nestabilities dies. I also used colors from the Inspiration challenge and made it work to fit for the Free For All Challenge, by using Verve and Crafty Secrets stamps.

vervecraftylydiabirthdayfro.jpg

The card base was created by folding a 4 1/2″ x 8 1/2″ piece of Sno Cone cardstock in half and cut and embossed with the biggest of the Big Scalloped Nestabilities die.  A 1 1/8″ wide piece of 365 degree Pink Paislee paper was adhered to a 4″ square of a different pattern from the same paper pack and cut with Classic Circle Nestabilities. A thin strip of Lace (Walmart) was adhered on the lower edge of the horizontal trip. Then the layers were stitched to a white circle, cut with the next size up circle Nestabilities die.  The circles were then adhered to the card base.

The sentiment is from Verve’s Celebrating You was stamped in Chipped Sapphire on Neenah Solar White cardstock. The swirl from Crafty Secrets Cupcake Party was stamped in Shabby Shutter ink. The sentiment was cut with Classic Circle dies, then layered on a Big Scalloped circle cut and embossed out of Sno Cone paper.

Tissue paper was cut with the two smallest dies of the Big Scalloped Nestabilities dies, connected with a Reconnection brad and sponged with Tumbled Glass Distress Ink. The flower was adhered to the lower right edge of the sentiment . Snow Kaisercraft Pearls were attached to the left side of the green paper strip.

vervecraftylydiasbirthdayca.jpg

For the inside of the card I adhered a 1 1/8″ strip of 365 degree Pink Paislee paper on a white cardstock square and cut it with Classic Circle dies. I stamped another swirl in Shabby Shutter to the right side of circle and added three Snow Kaisercraft pearls.

Thank you for stopping by! If you have a minute, hop on over to Lydia’s blog and wish her a happy birthday!
Have a wonderful day! Hugs and smiles

Yesterday I made one card for two challenges. The Mojo Monday sketch challenge and the Technique Lover Challenge on Splitcoast. For the technique lover challenge we were to use ribbon for something other then a bow or a tie.

vervewishingyouflowertlc286.jpg

The card base is a 4 1/4″ x 10 3/4″ piece of Chocolate Chip cardstock folded in half. One edge of a 4″ x 5 1/4″ piece of Gina K. Pure Luxury Ivory cardstock was cut and embossed with Eyelet Borderabilities before a 3 3/4″ x 5″ piece of Webster’s Pages was stitched on top of it.

The sentiment is from Verve’s Wishing You stamp set and was stamped in Rich Cocoa Memento Ink on Ivory cardstock. It was cut with Petite Oval Nestabilities and sponged with Antique Linen Distress ink. A dotted border was added with a brown Stampin’ Up! Journaling marker before it was adhered to a Not Quite Navy Cardstock piece that had been cut with Label 10 Nestabilities. I stamped the flower from Because of You on the lower left side of the oval with Antique Linen ink. Over the stamped flower I layered a ribbon flower I had rolled out of Burgundy Silk Ribbon and adhered over a green silk ribbon bow.

Stampin’ Up! lace was adhered on the upper edge of a scalloped rectangle cut out of Chocolate Chip cardstock with Classic Rectangle Nestabilities. The sentiment layers were adhered over the scallop rectangle with dimentionals. Lush Kaisercraft Pearls on top of the Label 10 cutout finish off the card front.

vervewishingyouflowerinside.jpg

For the inside of the card I cut another 4″ x 5 1/4″ piece of cardstock with Eyelet Borderabilities and stitched a small strip of Webster’s Pages over the cut border (leftover from the piece for the front).

 Talking about a great day……Sunday at Dick Blick was great. I had a lot of fun talking about and playing with Copics. The best part though was that I got to meet sweet Charmaine. Charmaine drove all the way from Pittsburgh so we could finally meet. We had a great time first at Dick Blick, then at P.F. Changs.

beate-me-isabelle4-resize.jpg

Charmaine is just as sweet in person as she is on her blog. And her baby girl Isabelle was just the cutest thing. Check out the blue eyes on both of beauties. I can’t wait to hang out with her some more at the Copic Certification in Pittsburgh on September 6th. That will be so much fun!

Thanks so much for stopping by! Have a wonderful day!
Hugs and smiles

vervebeautifulkindnessdrawi.jpg

Today’s tutorial on SCS is created by Holly McMillen and is for a darling Drawer Box. It holds regular size cards as well as other treats. Holly says if you use thicker cardstock or thin chipboard, you can use them to store Nestabilities or clear stamp sets. How cool is that.

Mary Brown came over a couple of weeks ago and we stamped together. She brought over a few sheets of the new Early Espresso cardstock from Stampin’ Up! Boy…that is gorgeous. I know I will order lots and lots of it. We used it to make the sample box for my sample for the video tutorial. In the video…I am using Chocolate Chip (she left me enough for the Video piece, I just cut it wrong. DUH).

vervebeautifulkindnessdrawe.jpg

A 4″ x 5 1/2″ piece of Daydream October Afternoon paper was stitched to an 1/8″ bigger piece of Very Vanilla cardstock. A 1 1/4″ x 5 1/2″ piece of Weathervane October Afternoon Paper was stitched to a slightly bigger piece of Very Vanilla that had been cut with Eyelet Borderabilities.

The sentiment is from Verve’s Beautiful Kindness. It was stamped in Walnut Stain Distress Ink and cut out with Label 9 Nestabilities. The swirl is also from that set and was stamped in Aqua Adirondack ink.  The sentiment was adhered to the box top with dimensionals. The Aqua ribbon used here I bought at JoAnn’s.

Here is a video for the visual learner:

[youtube]https://www.youtube.com/watch?v=A6RAUQO7-h4[/youtube]

 Personal Note:
I am sorry I haven’t been visiting blogs and leaving comments and missing on some days of posting cards lately. We had friends visiting over the weekend and since Tuesday morning I only have internet early in the morning. Weird! Time Warner isn’t coming until Friday to check it out. My personal guess is that something is wrong with our cable. When we had really cold weather the cable would be out until noon, then work again until it got cold in the evening. Now it seems my cable doesn’t like hot either and is out from about 9:30 a.m. until 11 p.m. Arrrgh!

Thanks so much for stopping by! Have a wonderful day! Hugs and smiles

savervesapphirecarvsnwide.jpg

I created this card for theVSN challenge Dreaming of May. You had to change color, image or texture from left to right. At first I was stumped, but then I decided to stamp the same image multiple times without re-inking and sponge the left side darker then the right.

Tim Holtz Truck from Mini Muse was stamped on a 2 3/8″ x 4 1/4″ piece of Vanilla cardstock with Chipped Sapphire Distress ink. The background is from Wendy Vecchis stamp set Love to Make Art. It was stamped in Antique Linen. The edges were distressed, then the layer was stitched to a 1/4″ bigger piece of Chocolate chip cardstock that had been sponged with Walnut Stain Distress Ink.

Two Copper brads were added to the upper left hand side, Chocolate Taffeta ribbon was tied to the right edge.

savervesapphirecarvsnbeate.jpg

A 3 3/4″ x 5″ piece of A Proper Gentleman from Graphic 45 paper was sanded, sponged with Antique Linen and the edges were distressed. It was then stitched to a 3 3/4″ x 5 1/4″ piece of Vanilla cardstock that had also been sponged with Antique Linen. The card base is a 5 1/2″ x 8 1/2″ piece of Chocolate Chip cardstock folded in half. The edges of the card had been sponged with Walnut Stain Distress ink.

The sentiment is from Verve’s Just for You. It was stamped in Walnut Stain Distress ink. It was cut with Circle Nestabilities and sponged with Antique Linen. To finish it off I added a paper pierced row under the sentiment.

Thanks for stopping by! Have a great day! Hugs and smiles

inkadinkadoturtlewide.jpg

Isn’t this turtle adorable? I created this card for the Inkadinkado Product Review a while back. I stamped the Turtle in Tuxedo Black Memento Ink on Watercolor paper and colored her with Aqua Painter and Inkadinkado Watercolor Markers.

inkadinkadoturtlewatercolor.jpg

The card base is a 4 1/4″ x 8 1/2″ piece of Kraft cardstock folded in half. A 3 3/4″ piece of Weathervane October Afternoon Paper was sanded and stitched on a 3 15/16″ square of Whisper White cardstock. The next layer is another piece of Weathervane October Afternoon Paper. It was cut with Square Nestabilities.

A 7/8″ x 4 1/4″ piece of October Afternoon paperwas sanded and then stitched to white piece of cardstock strip, that had been cut with Scalloped Scallop Die-namic die. Pink Silk Ribbon was tied around the layers and topped with a Basic Grey button.  I cut a 1/2″ circle with Circle Nestabilities out of Neenah Solar White cardstock and colored the inside of the circle with the sky blue watercolor Marker. The turtle was taped over the circle with dimensionals.

The sentiment is from Verve’s Bountiful Backgrounds. I love the backgrounds in the set, but I love the sentiments and the fonts they are written in even more. The sentiment was stamped in Tuxedo Black Memento Ink on the top left of the scalloped paper square. Three pink Kaisercraft Rhinestones were added to the top right of that square to finish off the card.

Thanks so much for stopping by. Have a wonderful day! Hugs and smiles

verveswansongvsnwide.jpg

I think this is the last card I haven’t shown that I made for VSN in May. I used Verve’s Swan Song stamp set. I stamped the sentiment on Neenah Solar White cardstock, cut it with Label 4 Nestabilities and airbrushed with BG10Copic Marker. The swan was also stamped with Tuxedo Black Memento ink on Neenah Solar White cardstock and colored with Copic Markers (W1, W3, E01).

verveswansongvsnmayaabeate.jpg

The card base is a 4 1/4″ x 8 1/2″ piece of Textured of Basic Grey cardstock folded in half. A 3 3/4″ square of 365 degrees Pink Paisley Patterned Paperwas stitched on a 3 15/16″ square of Whisper White cardstock. A 1 1/2″ x 2″ piece of Fly A Kite October Afternoon Paper wast adhered to the middle of the left side of the square. May Arts Crochet Lace was adhered over it, topped with a Basic Grey Button that was tied with Black Waxed Linen. The image was adhered to the card front with dimensionals.

verveswansongvsnmayaainside.jpg

The inside of the card is very simple. Just a 3 15/16″ square of Whisper White cardstock topped with a 1 1/4″ x 3 3/4″ piece of 365 paper strip. The branch images is also from the set Swan Song. It was stamped with Tuxedo Black Memento Ink half on, half off the paper strip.

Thanks so much for stopping by. Have a wonderful day! Hugs and smiles

vervebeautifulyoujff13wide.jpg

I created this card a while back for the last VSN as well as one of the Just For Fun Color challenges. For this card I used a sketch from the Go to Sketches magazine.

The card base is a 4 1/4″ x 8 1/2″ piece of Basic Black cardstock folded in half. The bottom two corners were rounded with a retired corner rounder from Stampin’ Up!.

A circle was cut out of October Afternoon Thrift Store paper and layered on a Medallion cut out of Neenah Solar White cardstock with the Kaleidoscope Pendant die from Spellbinders. Seashell silk ribbon was tied around the lower part of the circle layers.

vervebeautifulyoujff13.jpg

The flower was cut with Kaleidoscope Pendant die and the flower that comes with the Scallop frame out of beige Tissue paper. I mixed Spiced Marmelade Reinker, water and Copper Perfect Pearls in a Mini Mister to create my own shimmer spray. The flower pieces were held together with a Recollection Brad and then sprayed with the shimmer spray. I dried it with my heat tool and repeated that process several time. Once the flower was a color I liked, I fluffed it up after the flower was dry.

The sentiment is from Verve’s Beautiful You. It was stamped on Neenah Solar White cardstock in Tuxedo Black Memento Ink and cut with Ribbon Tag die from Spellbinders. While the die was still over the cardstock, I sponged Spiced Marmelade Distress ink over it and stamped the accent stamp of Beautiful you in the same color. A small filigree brad (Stampin’ Up!) with a smaller Recollection brad was added to the left edge of the sentiment.

vervebeautifulyoujff13insid.jpg

The inside of the card was layered with 4″ Whisper White cardstock that had the bottom two corners rounded like the card base. A 1 1/8″ x 4″ strip of October Afternoon paper strip was added to the lower half and the accent stamp was used with Spiced Marmelade to add a bit more interest.

Thank you so much for stopping by. Have a wonderful day! Hugs and smiles

© 2012 fresh & fun Suffusion theme by Sayontan Sinha