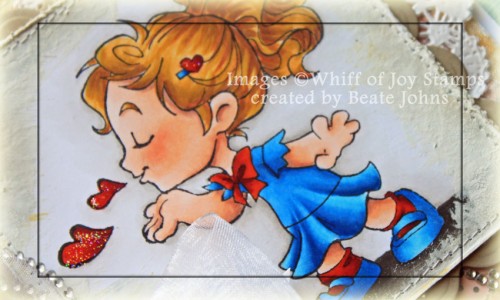
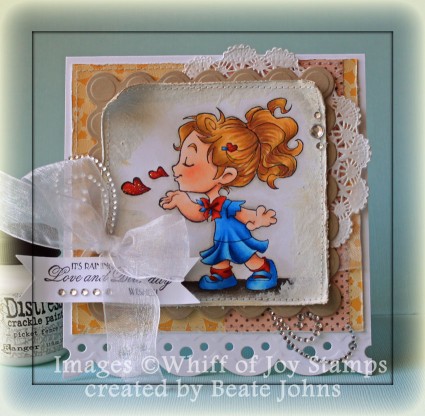
Today’s Whiff of Joy Challenge is “Love is in the Air. I hadn’t used my “Nora blowing Kisses” image yet and thought it would be perfect for this challenge. The image was stamped in Tuxedo Black Memento Ink on  a 4″ square of Neenah Solar White cardstock. The image was colored with Copic Markers (Skin: E000, E00, E01, E11, BV00    Hair: Y23, Y26, E35, E97    shoes/dress: Booo, B12, B14, B16   hearts/socks: YR07, R08, R27, R39   Ground: W4, W5, W7  background: W00, W0, W1). Stardust Stickles was added over the hearts.

The edges of the image square were distressed and Picket Fence Crackle Paint was added to the edges.  Once it was dry the edges were  sponged with Pumice Stone Distress ink and a border was stitched around the edges. The image was adhered to  a piece of Kraft cardstock, cut and embossed with the largest of the  Beaded Square Nestabilities dies.

A 2″ x 4 3/4″ piece of October Afternoon Farmhouse paper was stitched to a 4 3/4″ square of the same paper pack. A hole was punched to the lower right corner of the image layers and White Organdy ribbon was threaded through it. The image layer was adhered to the paper with dimensionals and the ribbon was tied into a bow.

The layers were adhered to the card base a 5″ x 11″ piece of Solar White cardstock folded in half. The bottom edge of the card base was cut and embossed with Classic Scallop Edgeabilities dies. A sentiment from the General Sayings sentiment set was stamped on a strip of Solar White cardstock. The edges of the strip were punched with a square punch, the strip was shaped into a banner and adhered under the ribbon bow. Rhinestones on the sentiment panel and the upper right hand corner of the image  and parts of a Finesse Rhinestone Swirl finish off the card.

Thank you so much for stopping by! I hope you have time to participate in the challenge.  Have a wonderful day!
Hugs and smiles


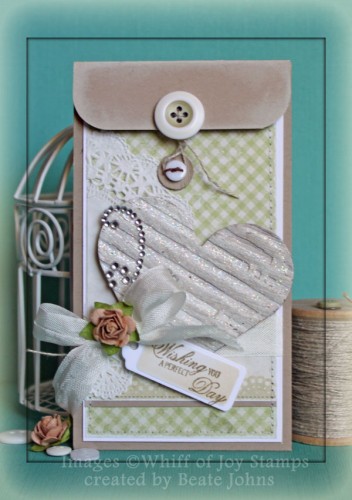
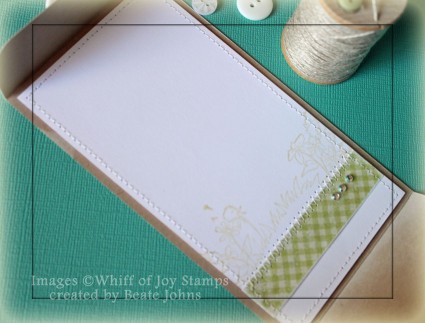
I created this card at the end of November for a color challenge on Splitcoaststampers. The colors were White, Kraft and Pear Green. Having just received an order with Simple Stories Baby Steps Paper, I knew I wanted to use the green crosshatch patterned paper for it.


I started with a 3″ x 12″ strip of Kraft cardstock and scored it at 5 1/2″ and 11″. The corners of the 1″ flap were roundedAdirondack Snowcap ink was dragged across the edges of the card front, flap and inside of the card.

A 2 1/2″ x 5″ piece of that cross hatched paper was adhered to a 1/4″ piece of Neenah Solar White cardstock. A 1 1/4″ x 2 1/2″ piece of the same paper pack was adhered over the green layers and the edges of the big layer were stitched. Part of a Paper Doily was adhered to the upper left hand side. Seam Binding was tied around the horizontal layer and topped with a Recollection Flower.

A piece of corrugated cardstock was painted with White Acrylic Paint Dabber , embossed with Iridescent Ice Embossing Powder (Stampin’ Up!) and cut embossed with a Classic Heart Nestabilities die. The heart was adhered next to the bow and topped with part of a Finesse Rhinestone Swirl.

A sentiment from Elizabeth Bells’ Accessories and Sentiment collection was stamped in Rich Cocoa Memento ink on a piece of Neenah Solar White cardstock, cut and embossed with a Tag Trio die (retired). The inside of the tag was sponged with Antique Linen Distress ink. The tag was tied onto the bow with Linen Thread.

Butterscotch Waxed Ribbon was used to tie a tiny button to a 1/2″ Kraft circle. It was adhered underneath the flap. A bigger button was threaded with Linen thread and adhered on to the flap. I left Linen Thread hanging off the big button so I could use that to tie the flap card shut.

For the inside of the card a 1/2″ x 2 3/4″ strip of patterned paper was stitched to the lower edge of a 2 3/4″ x 4 3/4″ piece of white cardstock. A background stamp from the same set was stamped over the paper strip in Antique Linen. Three baby Bling Rhinestones on the right of the paper strip finish off the inside of the card.

Thanks so much for stopping by! Have a wonderful day.
Hugs and smiles


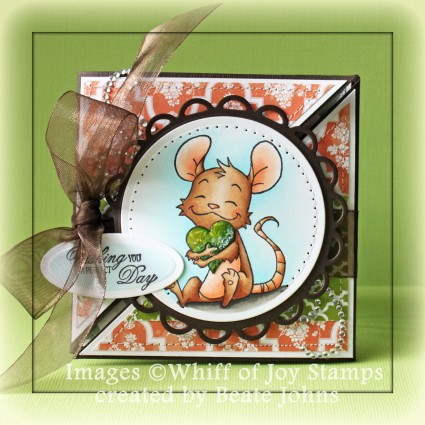
Today’s tutorial on Splitcoaststampers is created by Monique Trappeniers. She shows us how to create a Six Fold Card. I used the technique to create a sample for today’s Whiff of Joy Challenge, which is to use Charms or Bling. Since I love Bling, I went with Bling.

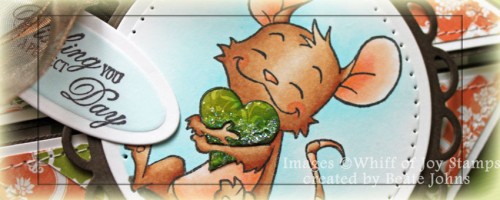
I started by stamping Henry with Heart in Tuxedo Black Memento Ink on a piece of Neenah Solar White cardstock with Tuxedo Black Memento Ink. The image was cut and embossed with a Standard Circle Nestabilities and colored with Copic Markers (Henry: E30, E31, E33, E00, E93, E95   Heart: YG21, YG23, YG17   Ground: W3, W5, W7   Sky: B0000, B000). The circle was adhered to a piece of brown cardstock, cut and embossed with a Lacy Circle Nestabilities die. The edges of the image circle were paper pierced.


The card base was created out of textured Espresso cardstock and decorated with Echo Park Victoria Garden Patterned Paper. The card base measures 4″ square when folded. I cut a 3 3/4″ square of white cardstock and a 3 1/2″ square of patterned paper. Pieces of a Finesse Rhinestone Swirl were adhered to the top left and bottom right of the card front and brown Organdy ribbon was used to tie the card shut. The image layer was adhered to one part of the card front with dimensionals.

A sentiment from Elisabeth Bell Accessories and Sentiments was stamped in Tuxedo Black Memento ink on a piece of Solar White cardstock, cut and embossed with the smallest Petite Oval Nestabilities die.  The center was colored with Copic Marker B0000 and the sentiment was adhered to the lower left of the image circle.

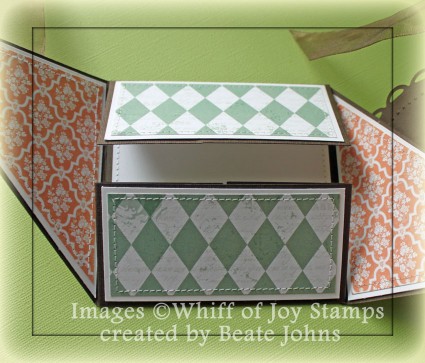
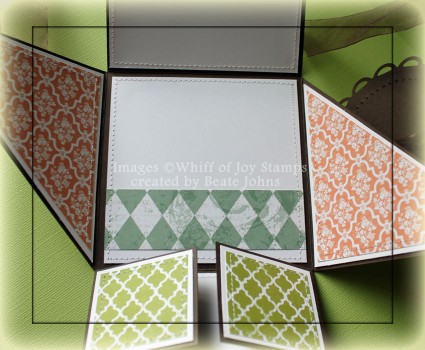
When you open the diagonal panels, you will find two horizontal strips that were also lined with Victoria Gardens paper. You fold those layers down…

to unveil the inside panel of the card. The front horizontal strip has two little gatefold doors that can be unfolded as well.

Here is a video for the visual learner:

[youtube]https://www.youtube.com/watch?v=r-fPo9_tNXM[/youtube]

Thanks so much for stopping by! Have a wonderful day!
Hugs and smiles
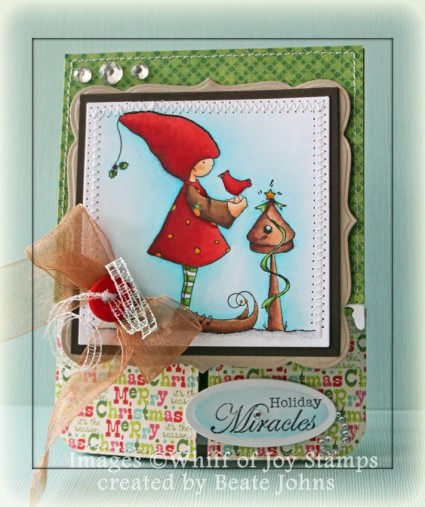
Today’s tutorial on Splitcoast is written by Patty Bombyk. She shows us how to create a unique card fold she calls Double Dutch fold. It’s like a mix of a vertial card and a gatefold.

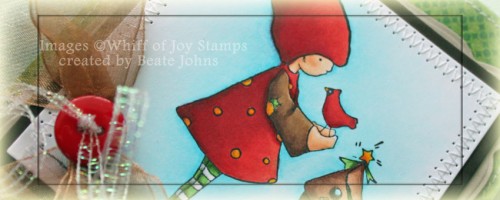
(Since I thought this tutorial would run last week, I made it a Christmas card. So bear with me and allow me to show you another Holiday card.) For my video tutorial sample I used the adorable Uru and Bird image from Whiff of Joy. The image was stamped with in  Tuxedo Black Memento Ink on Neenah Solar White cardstock, cut out with a Classic Square Nestabilities die and colored with Copic Markers (Hat, Shirt and Bird: R12, R14, R27, R29, E09   Star and dots on Shirt: Y15, Y17, E97   Shoes and Shirt: E55, E57, E59   Leggings and Ribbon: YG13, YG17, YG67, C0, C2   Bird House: E21, E23, E25, E27   Background: BG0000, BG000, BG01). The square was stitched to a slightly smaller square cut and embossed out of  Canyon Brown cardstock before the layers were adhered to a piece of Kraft cardstock, cut and embossed with a Label 15 Nestabilities die.

My card base was created out of Kraft cardstock. The bottom two corners were rounded. MME 12 Days of Christmas patterned paper was used to decorate the panels. A bow out of gold organdy Ribbon was topped with a red button, tied on with iridescent curling Ribbon and adhered to the lower right corner of the image. The image was adhered to the top part of the card with dimensionals.

A sentiment from Whiff of Joy’s Seasonal Greetings. was stamped in Tuxedo Black in on Solar White cardstock and cut and embossed with the smallest Petite Oval Nestabilities die. The embossed center was colored with Copic Marker BG0000, BG000. The sentiment was adhered to the lower right corner of the card front. Rhinestones from the 72 Count Rhinestone pack finish off my card front.

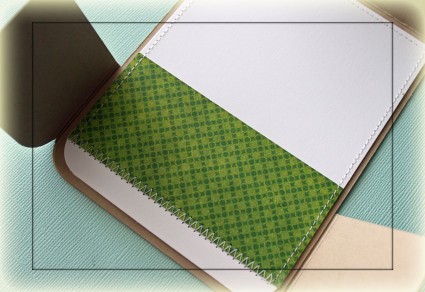
The inside of the card is kept simple as always. A slightly smaller piece of white cardstock, stitched with matching paper from the front and voila….done.

Here is a video for the visual learner:

[youtube]https://www.youtube.com/watch?v=6gUK5AsUO6s[/youtube]

Thanks so much for stopping by! Have a wonderful day!
Hugs and smiles
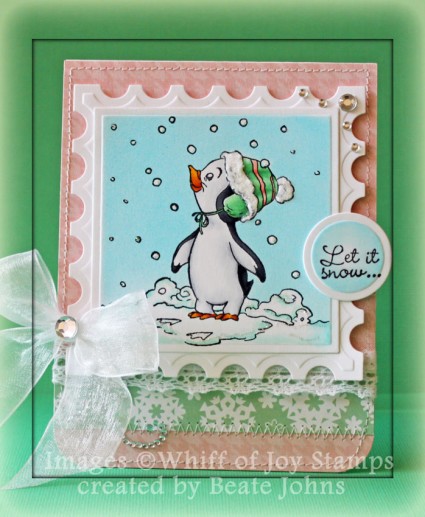
It’s Virtual Stamp night over on Splitcoaststampers. The first challenge is hosted by Lydia. She is asking us to create a card with something that gives us the “Warm Fuzzies”. Who wouldn’t get the warm fuzzies looking at this darling image. Plus the sweet penguin has a warm looking hat on.

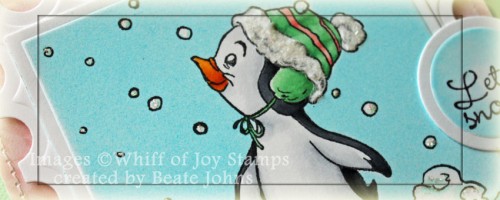
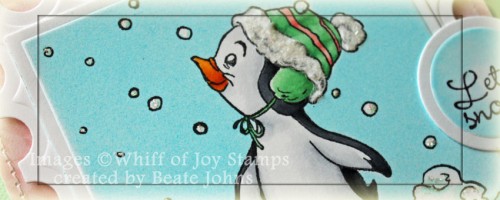
To start out I stamped the Penguin’s first Snow image in Tuxedo Black Memento Ink on Neenah Solar White cardstock. The image was cut out with a Classic Square Nestabilities die and colored with Copic Markers ( Penguin: C00, C1, C3, C5, C7, C9, Y17, YR15, YR18   Hat: YG41, YG45, R30, R32   Snow: BG10, BG11). I covered the main image with a mask cut with Eclipse tape. But the snow flakes were too small for that, so I used Liquid Masking Fluid. The image was airbrushed with Copic Marker B04.

Stardust Stickles was added to the snow and snow flakes. Sugar Sparkly Fluff was added to the hat rim and pom-pom. The image was adhered to a piece of Solar White cardstock, cut and embossed with the largest Postage Stamp Nestabilities die.

A 1 1/4″ x 4 1/4″ strip of Echo Park Holly Jolly patterned paper was adhered to the lower part of a 4 1/4″ x 5 1/2″ piece of the same paper pack. The lower corners were rounded. White Crochet Lace was adhered above the paper strip before White Organdy Ribbon was tied above teh paper strip. The image was adhered over the ribbon with dimensionals.

The sentiment is from Whiff of Joy’s Seasonal Greetings. It was stamped in Tuxedo Black Ink on Neenah Solar White cardstock, cut and embossed with Standard Circle Nestabilities die. The center of the circle was colored with Copic Markers B0000 and B000. The layers were adhered to a card base a 4 1/4″ x 11″ piece of Solar White cardstock, folded in half.  Part of a Finesse Rhinestone Swirl and additional Rhinestones finish off the card.

Thanks so much for stopping by! I hope you have time to play with us tonight.
Have a great evening.
Hugs and smiles

Here is a sneak peek of my first challenge card for tonight. I will post the entire card when VSN begins at SCS tonight.

Starting at 5 p.m. EST tonight the Winter Wonderland Virtual Stamp Night will begin at Splitcoaststampers. From 5 until 9 p.m. on Friday and 1:00 to 10:00 p.m. on Saturday new challenges will be posted hourly with a Winter Wonderland theme. I hope to see you there later today.

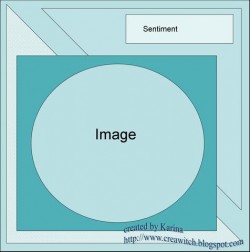
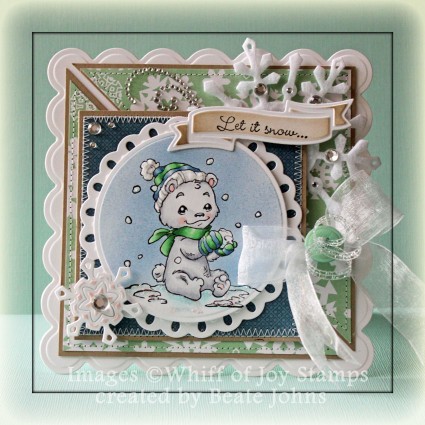
Wohoo! Today is the first day of me being officially on the Whiff of Joy Challenge team. This week’s challenge is easy. It’s a beautiful sketch from Katharina.

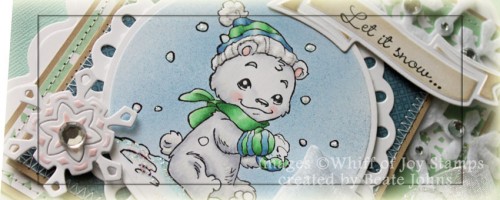
I had just received my latest order and new right away I wanted to ink up the darling Ice-Beary Greetings stamp right away. The image was stamped in Tuxedo Black Memento Ink on Neenah Solar White Cardstock, colored with Copic Markers (Bear: C00, C1, C3   Scarf: YG41, YG45   Hat/Mittens: B41, B52, B45) and cut and embossed with a Standard Circle Nestabilities die. The image was then masked and airbrushed first with the medium nib of Copic Marker B93, then with the Brush tip of Marker B95 (brush tip gives a more speckled look).

Sugar Sparkly Fluff was added the hat trim and pom pom, Stardust Stickles over the snow. Subtle highlights were added with Copic Opaque White. The circle was then adhered to a piece of Solar White cardstock, cut and embossed with the largest Tear Drop Circle Die.The image layers were adhered to a 4″ square of Winter Park Paper after that was stitched to a 1/4″ bigger piece of Kraft cardstock.

A 5″ square of Echo Parks Holly Jolly Christmas Paper was cut in half diagonally. The triangles were stitched to triangles cut out of a 5 3/8″ square of Kraft cardstock.  On the triangle going on the right side of the card front I punched a hole on the lower left side and tied White organdy ribbon through it. The bow was topped with a button, tied on with Silver Curling Ribbon.

Next I cut a piece of felt with Spellbinders 2010 Snowflake Pendant. I put a piece of scrap paper underneath the felt. I help cut the felt right through. The snowflake was adhered to the upper right corner of the image layers. A piece of white cardstock was cut and embossed with the smaller dies of that pendant pack, airbrushed with Copic Marker R00 (I used that for the little bears cheeks). That snowflake was adhered to the lower left corner of the image layers.

The card base was cut and embossed with a Grand Square Nestabilities die out of Solar white cardstock. The layers were adhered to that and dressed up with part of a Finesse swirl and Silver Rhinestones.

A sentiment from Whiff of Joy’s Seasons Greetings was stamped in Tuxedo Black on a piece of Solar White cardstock, cut and embossed with a die from Spellbinders Ribbon Banners. The inside of the banner was sponged with Pumice Stone Distress ink. The sentiment was adhered with dimensionals over the felt snowflake and part of the image.

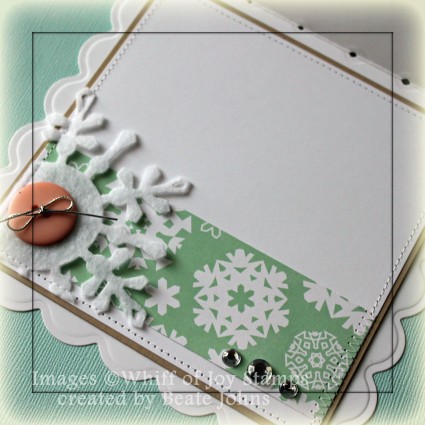
The inside was dressed up to match the outside of the card The white square measures 5″. It was topped with a 1 5/8″ wide strip of Holly Jolly paper and stitched to a 3/16″ bigger piece of Kraft cardstock. A partial snowflake was added to the lower left corner, topped with a Basic Grey button that was tied on with silver string. Three Silver Rhinestones finish off the card.

Thanks so much for stopping by. Please check out my fellow team members listed on my right side bar. I hope you have time to participate in the challenge. It’s a fun sketch and you could win prizes, if you use a Whiff of Joy stamp on your card.

Have a wonderful day! Hugs and smiles


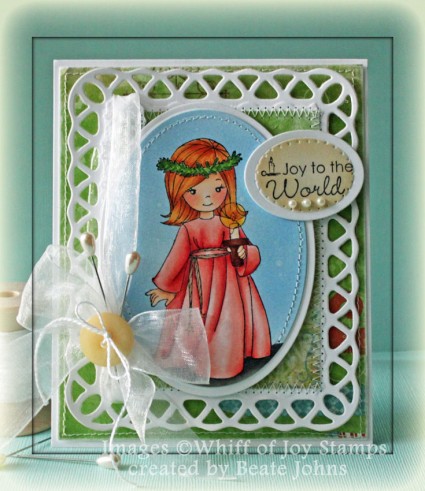
I have exciting news. Starting next week I will be on the Whiff of Joy Challenge Team. I love their images and am thrilled they are now one of Splitcoaststampers Member companies.

The current challenge is to create a card with Pins and Lace. For my sample I stamped the image from Christmas Light in Tuxedo Black Memento ink on Neenah Solar White cardstock. The image was cut and embossed with a Petite Oval Nestabilities die and colored with Copic Markers (Dress: R00, R11, R12, R14    Belt: E42, E43, E44     Wreath: G20, G21, G24, G28     Candle Holder: E31, E34, E37    Skin: E50, E51, E53, BV00    Hair: Y21, Y23, E97    Ground: W3, W5, W7, W9). The image was masked and the background was airbrushed with Copic Marker B45. I tried to match the colors for last weeks Color Challenge on SCS. The panel was stitched to a slightly bigger white oval.

A 3 3/4″ x 4 7/8″ piece of Bo Bunny Blitzen Collection paper was stitched to a piece of white cardstock, cut and embossed with the largest Lattice Rectangle Nestabilities die. On the left side a piece of May Arts Crochet lace was adhered through the lattice before May Arts Organdy Ribbon was tied over it. The bow was topped with a Basic Grey Button, tied on with embroidery thread. Two pearl pins were added behind the bow.

The edges of a 4 1/4″ x 5 1/4″ piece of Blitzen paper were sanded and a border was stitched around the edge before the paper was adhered to the card base, a 4 1/2″ x 11″ piece of Neenah Solar White cardstock, folded in half.

A sentiment from Season’s Greetings was stamped in Tuxedo Black ink on a piece of white cardstock, cut and embossed with a Classic Oval Nestabilities die. The center was airbrushed with Copic Marker E51. The edges of the sentiment panel were paper pierced before the sentiment was adhered to the upper right hand side of the image with dimensionals. Baby Bling Pearls under the sentiment finish off the card.

You still have a week to participate in the Whiff of Joy challenge. If you use Whiff of Joy Images, you might win a $25 credit voucher for Simon Says Stamp.

Thanks so much for stopping by! Have a wonderful day!
Hugs and smiles
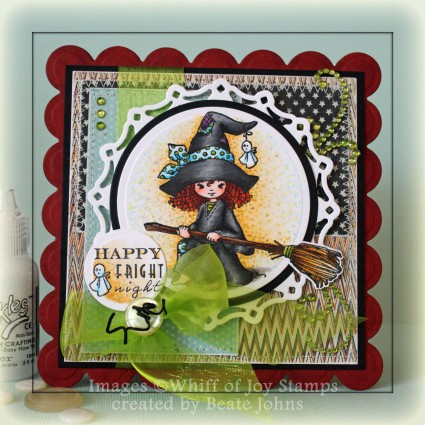
Happy Halloween!!!! I hope you will have a safe and fun holiday tonight! I thought I should create a Halloween card to post today.

I created this card for the Whiff of Joy Challenge. It’s a sketch this week and a fun one to boot. It also works for Lori Tecler’s Blogger Challenge, which is to create a Happy Haunting card.

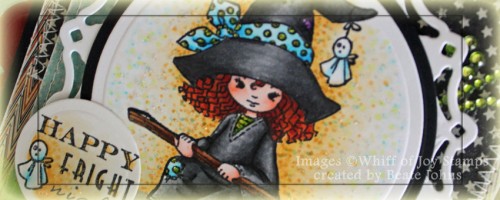
I stamped the Little Witch image in Tuxedo Black Memento Ink on Neenah Solar White cardstock and colored her with Copic Markers (coat and hat: N3, N5, N7, N9   Hair: YR16, E99, E07   Skin: R000, R01, R02   Blue: B000, B00, B2   Broom: E35, E37, E39, Y21, Y23, E99  Patch: V12, V15, V09   Background: YR30, 1/5th YR31, YR31).

The image was cut and embossed with a Classic Circle Nestabilities die and the Out of the Box Technique. It was layered first on a slightly bigger piece of black cardstock, then aon a piece of white cardstock, cut and embossed with the Kaleidoscope Pendant. Diamond Stickles was added to the green dots of the blue fabric as well as dotted on the background.

The edges of two pieces of MME Mischievous patterned paper were sanded and adhered to a 4 1/4″ square of the same paper pack. The layers were stitched to a 3/16″ bigger piece of black cardstock piece. Green Organdy Ribbon were tied around the the layers vertically before the image was adhered to the layers with dimensionals. A button was tied over the bow with black waxed linen.

The sentiment from this set was stamped in Tuxedo Black ink on a white cardstock circle. The image and background was colored just like the main image and it was adhered to the lower right of the image. Baby Bling Rhinestones were added to the top left corner of the layers and parts of a Finesse Swirl to the top and bottom right. Both the swirl and the baby bling Rhinestones were colored with Copic Marker YG25 before they were added to the layers.

The card base was cut and embossed with a Grand Classic Scallop Square Nestabilities die out of dark orange cardstock from Stampin’ Up!. The edges of the cardstock were colored with Copic Marker E07 to match the witches hair. A

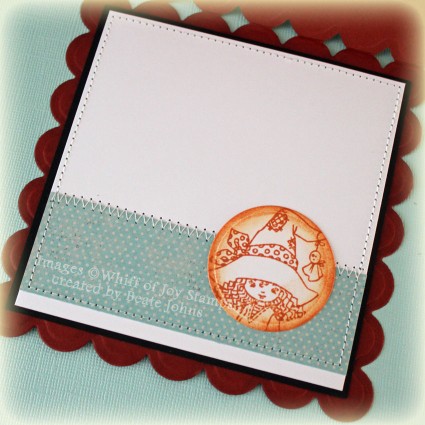
The inside of the card is pretty simple A 1 3/4″ x 4 1/4″ strip of Mischievous paper was adhered to a 4 1/4″ white cardstock square. That was stitched to a 3/16″ bigger piece of black cardstock and everything was adhered to the inside of the card. The witch image was stamped in Rusty Hinge Distress ink to a white cardstock circle and the edges were sponged with the same color.

Whiff of Joy is looking for Design Team Members for their Sketch Challenge team. To apply make a card for this sketch and add DT behind your name when you enter the challenge. I think I might try. I like challenges and I adore Whiff of Joy images.  Wish me luck!

Happy Halloween!


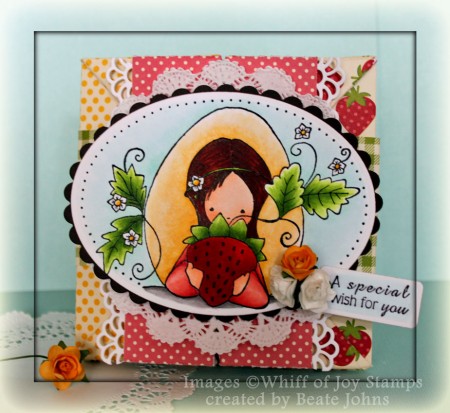
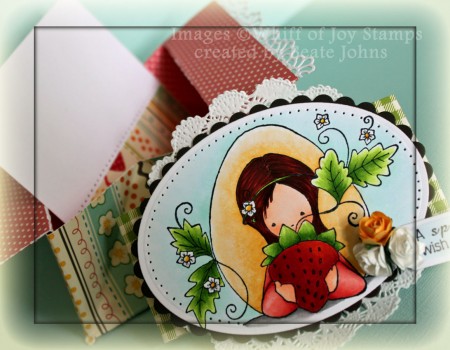
I created this card back in February for a Technique Challenge. I remember making this box card a long time ago. The page that I got the instructions from became inactive and I hadn’t written them down. I liked it so much, I created a tutorial for the resource section for it.

I started out stamping Whiff of Joy’s Strawberry Girl in Tuxedo Black Memento Ink on Neenah Solar White cardstock.  The image was cut and embossed with a Petite Oval Nestabilities die and colored with Copic Markers (Flowers: Y13, Y15, Y17 C2,  Leaves: YG01, YG03, YG17, Egg: 1/5 YR31 + 4/5 Blending solution, YR31, Skin: YR000, YR00, YR01, YR02, Hair: E08, E18, E19, Shirts: R20, R21, R22, background: BG0000, BG10).

A piece of Canyon Brown cardstock cut and embossed with Scallop Petite Oval Nestabilities die. The image was adhered to the scalloped oval and the edges were paper pierced.

The sentiment is from Whiff of Joy’s Magical Wishes. It was stamped in Tuxedo Black Memento Ink on Neenah Solar White cardstock. It was cut and embossed with a Spellbinders tag die. It was adhered to the right hand side of the image and topped with three Zva Creative Flowers.

The card box base was created out of a 8 1/2″ x 11″ piece of October Afternoon Fly A Kite paper. Two strips of white cardstock were cut with the Faux Crochet Die-namics Border die. The strips were adhered under the side flaps of the box.

A 2″ wide strip of Fly A Kite October Afternoon paper was used to create the Belly Band. A doily was adhered to it’s front before the image layers were adhered to dimensionals.

A 3 7/8″ white square was decorated with a slim strip of matching paper to finish of the box card.

Here is a video for the visual learner:
[youtube]https://www.youtube.com/watch?v=-SEiZeFGSZg[/youtube]

Thanks so much for stopping by! Have a wonderful day.
Hugs and smiles

© 2012 fresh & fun Suffusion theme by Sayontan Sinha