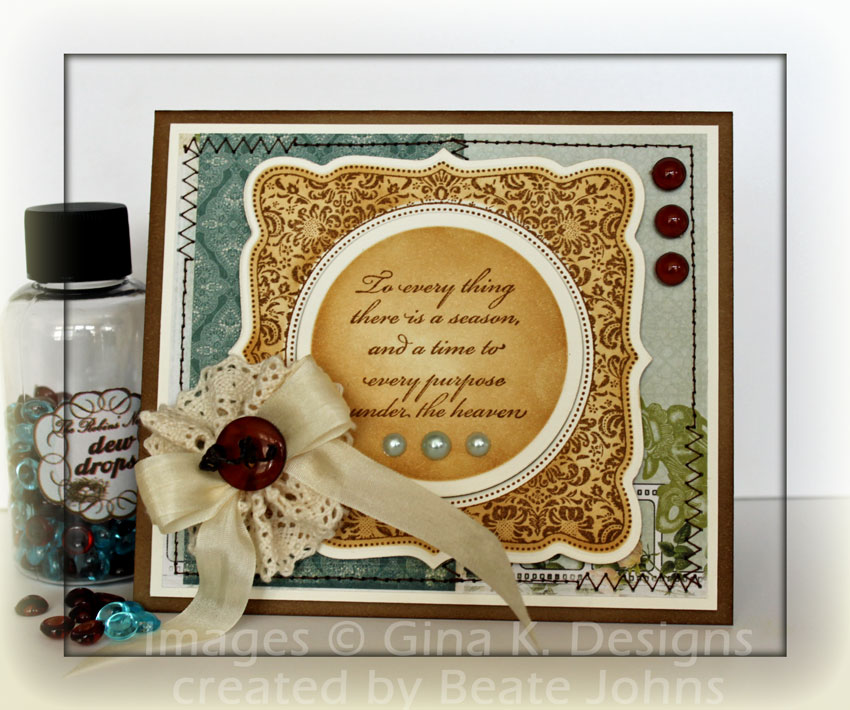
Today’s tutorial on Splitcoaststampers is on how to create rolled ribbon flowers. They are fun and easy! For my sample I rolled a flower out of May Arts Yellow Silk ribbon. It was adhered to a piece of Neenah Solar White cardstock that had been cut and embossed with a Beaded Oval Nestabilities die and topped with a Sage Green Pearl from Want2Scrap.

Two leaves were cut and embossed out of Cosmo Cricket Odds & Ends paper with one of the Foilage dies. The leaves were sponged with Peeled Paint Distress Ink and adhered under the ribbon flower.

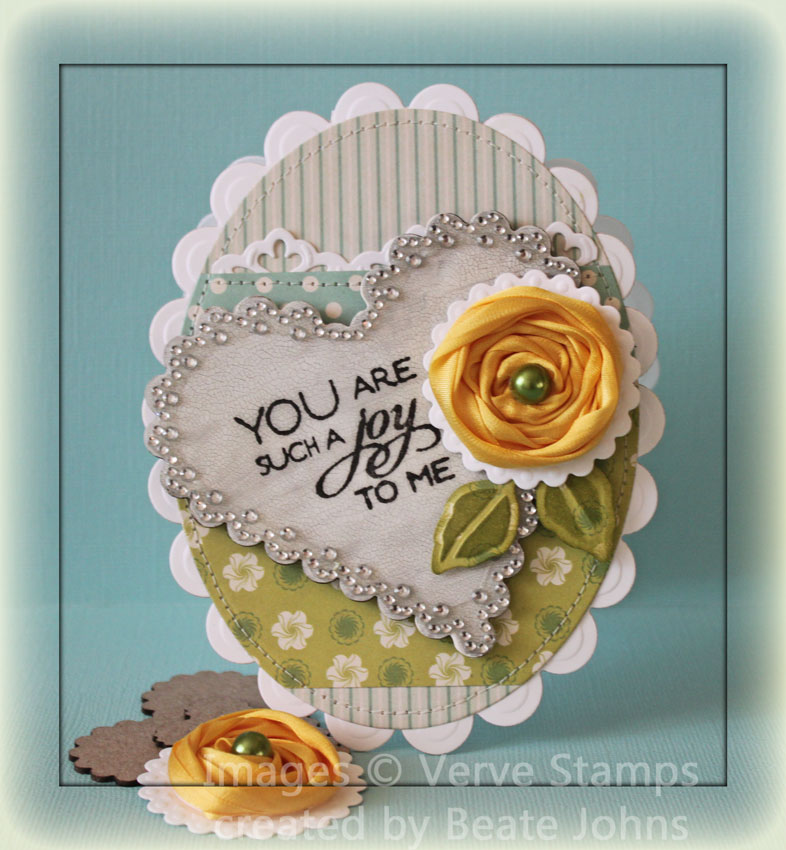
The card base was cut with the second smallest Scallop Oval Grand Nestabilities die out of Neenah Solar White cardstock. Another single piece of white cardstock was cut with the same die.

A small strip of white cardstock was cut and embossed with a Parisian Accent die. It was adhered under a strip of Cosmo Cricket Odds & Ends paper. The strip was adhere two other pieces of the same paper pack. The layers were cut and embossed with the second smallest Oval Grand Nestabilities die. The layers were stitched to the single scallop oval layer before that was adhered to the card base.

The second largest Scallop Heart Nestaboard piece was painted with White Crackle Paint. After it dried a sentiment from Verve’s Kind Words was stamped over the cracked area with Black Acrylic paint. It was then embossed with UTEE. I saw this cool technique over at Shelley Hickox blog. She is an amazing artist. Once it cooled down, I added a Rhinestone Heart Nestabling to it’s edge. The heart was adhered to the card base and topped with the ribbon flower.

Here is a video for the visual learner:

[youtube]https://www.youtube.com/watch?v=e3NHFX9yd5U[/youtube]

Thanks so much for stopping by! Have a great day.
Hugs and smiles


Remember the card I made for the Inspiration Emporium challenge last month? I created a tutorial for the Diamond fold card for Splitcoast and it’s being published today. My sample is the same as the Fragment card, except for without the fragments. Instead of  those, I paper pierced the edges of the square.

I chose another image from Flourishes Spring is Sprung set. I just LOVE that set. I stamped the bird nest in Tuxedo Black Memento Ink on Neenah Solar White cardstock and colored it with Copic Markers (Nest: E41, E42, E43, E44   Eggs: BG000, BG01, BG02   Leaves: YG01, YG03, YG17   Branch: E23, E25, E27, E29   Sky: B12, B000, B0000).

he image layers were adhered to a Diamond Fold card base created out of a 4″ x 12″ piece of October Afternoon Weathervane paper. I created a tutorial for it, but that won’t be published until the end of May. It’s pretty easy though. Score your strip at 2″ and 10″. Mark the center of the strip on each side and fold the paper down and back up.

The 2″ x 4″ panels were stitched to a 2 1/8″ x 4 1/4″ piece of black cardstock, then adhered to a piece of Kraft cardstock, cut and embossed with a Curved Rectangle Nestabilities dies. A doily was cut and half and a half was adhered on each panel.

A sentiment from the Spring is Sprung was stamped in Tuxedo Black Memento Ink on Solar White cardstock that had been cut and embossed with the retired Five in one Tag die from Spellbinders. The center of the tag was colored with Copic Marker BG000. The tag attached to the card with the White May Arts Organdy Ribbon that was used to tie the card shut.

Here is a video for the visual learner:

[youtube]https://www.youtube.com/watch?v=QzPyoUja4DI[/youtube]

Thanks so much for stopping by! Have a wonderful day.
Hugs and smiles

Today’s tutorial on Splitcoast is for the Side Step card. It’s a variation of the Stair Step fold card.

My card base was created out of Canyon Brown Neenah cardstock. The grass was cut with the Grass Die-namic die out of Pebbles patterned paper.  The rain pattern paper is from Echo Park’s Springtime patterned paper.

The images are all from Flourishes new set April Showers. The images were stamped on Solar White cardstock in Tuxedo Black Memento Ink and colored with Copic Markers (Sun: Y11, Y13, Y15    Cloud: N1, B0000, Bo00    Bucket: N0, N1, N3, N4, N5     Tulips: YR12, YR15, Y09, Y21, Y23, YR12, YG01, YG03, YG17    Umbrella: YG00, YG01, YG03, R08, R29, E23, E25, YR12, YR15, Y11, Y13, Y15, B000).

The boots were stamped on Echo Park Playground paper, colored with Copic Markers (YR00, YR12, YR15, Rim: YR09, R08, R29).

Here is a video for the visual learner:

[youtube]https://www.youtube.com/watch?v=PCvVJD4kg9U[/youtube]

Thanks so much for stopping by! Have a wonderful day.
Hugs and smiles

Last Monday the technique challenge on Splitcoast was to create a different shaped card. I had wanted to create a circle Easel Card for quite a while and the challenge was all the motivation I needed to get started.

I cut a piece of Neenah Solar White cardstock with the largest of the Classic Circle Nestabilities die, stamped the hill image from Taylored Expressions Hello Spring in Tuxedo Black Memento Ink and colored it in with Copic Markers (Sheep skin: N0, N1, N3,    Sheep Face: R00, R20,    Hooves: N5, N7, N9  Hill: YG01, YG03, YG17).

I masked the image with Eclipse Tape, covered the edges back up with my Circle die and airbrushed the sky first with the Chisel tip side of Marker B00, then switched to the brush tip of marker B04 and ever so slightly added stipple flecks with that. I had added some cloud masks at different points of the airbrushing. Those clouds were cut out of Tim’s Mask sheets with the Cloud Die-namics die. White cardstock was cut with the Picket Fence Border die and adhered to the bottom of the hill.

The image was adhered to Basic Gray cardstock, which was cut by hand into a slightly bigger layer. The edges of the image were paper pierced before the layers were adhered to a Scalloped circle cut out of with the smallest of the Sour Apple cardstock Grand Scallop Circle Nestabilities dies.

A Sour Apple cardstock strip was folded in half and and a base was cut with the same Scallop circles. One of the circles was folded in half and the card top was adhered to one half of the folded side. The bottom/inside of the card was decorated similar then the top.

The sentiment is from the same stamp set. It was stamped in Tuxedo Black Memento ink on Solar White cardstock. It was cut into banner form and tied to the fence on the bottom of the page with Lemondrop Twine. Three Recollection Flowers over Little Boy Echo Park paper finish off the card.

Thanks so much for stopping by! Have a wonderful day! Hugs and smiles

Click on more if you want to see a couple of pictures on how to create a circular Easel card.

Continue reading »

Today’s tutorial on Splitcoast is on Double Embossing. For my sample I created a card for an Inspiration Challenge on Splitcoast a while back. My inspiration piece was this rose frame.

To start out with I embossed a piece of Neenah Solar White cardstock with the Regal Flourishes Embossing Folder and Label 13 Nestabilities die. I masked the embossed part and stamped the big image of Flourishes Paperwhites with Tuxedo Black Memento Ink and colored it with Copic Markers (N0, N1, N2, N3, N4, N5).

The layer was cut down to 4″ x 5″ and stitched to a 3/16″ bigger piece of Basic Grey cardstock. The layers were adhered to a 4 1/2″ x 5 1/2″ white cardstock base.

A piece of Neenah Solar White cardstock was cut and embossed with the two largest of the Label 13 Nestabilities dies to create a frame. That frame was used to frame the image.

Another piece of Neenah Solar White cardstock was cut and embossed with a Spellbinders Fancy Tag die. A sentiment from Flourishes Tag Lines was stamped in its center with Tuxedo Black Memento ink and the center was colored with N2 Copic Marker.  Two dimensionals were stacked on top of each other in the middle of the sentiment, the ends received Scor-Tape to adhere the sentiment down.

A Recollections flower was colored with Copic Marker N3 and adhered to the upper right hand side of the sentiment panel. Pewter Kaisercraft Pearls were adhered to the upper left hand corner to finish off the card.

Here is a video for the visual learner:

[youtube]https://www.youtube.com/watch?v=6XFtZFgmvy4[/youtube]

Thanks so much for stopping by! Have a wonderful day! Hugs and smiles

Today’s tutorial on Splitcoaststampers is for a basic technique: Paper Piercing. I know it’s not a fancy technique tutorial, but we didn’t have a tutorial for that technique yet. I love to use paper piercing to add an extra border to my images when it just needs a little something something.

For my sample I an image from  Gina K. Designs Winter Wonderland stamp set. The image was stamped in Tuxedo Black Memento Ink on Neenah Solar White cardstock and colored with Copic Markers (C00, C1, BV20, BV21, R01, R02, R08, R29, G21, G24, G28). It was cut with Classic Circle Nestabilities, overstamped with the background script from the same set in Antique Linen Distress Ink and sponged with the same color.

The image was layered on piece of Basic Grey cardstock, cut and embossed with Lacey Circle Nestabilities. The edge of the circle was paper pierced.

For my card layout I used CPS Sketch 199. The card base is a 5 1/2″ x 11″ piece of Basic Grey cardstock folded in half. The edges of the card front were sponged with Pumice Stone Distress Ink. All four corners were rounded with the W R Memory Keepers Cropadile Corner Chomper and the edges were paper pierced.

The edges of a 4 3/4″ square of Cosmo Cricket 1934 Paper (I LOVE that paper pack and need to order more) were rounded and the square was stitched to a 1/4″ bigger piece of White cardstock. Both layers were adhered to the card base.

Melissa Frances lace from the beige ribbon pack was adhered under a white cardstock strip and adhered to the right center of the layeres. The image circle was adhered over the strip with dimensionals.

The sentiment is also from Winter Wonderland Stamp set. It was stamped in Tuxedo Black Memento Ink on Neenah Solar White cardstock. The sentiment was cut and embossed with Petite Oval Nestabilities and airbrushed with Copic Marker BV20. Snow Kaisercraft Pearls finish off the card.

Here is a video for the visual learner:

[youtube]https://www.youtube.com/watch?v=7jZ31hY0bpE[/youtube]

Have a wonderful day! Hugs and smiles

Sorry I have been so quiet. It’s cold here and snowy. That makes me want to snuggle up at the couch, not stamp. Weather like this makes me so lazy!

Yesterday’s tutorial on Splitcoast was for a Swinging Z-Fold Card.  I used the new Nested Heart dies from Spellbinders and Verve’s Glad Tidings along with Bo Bunny patterned paper I picked up at my LSS to create this card.

The Heart was cut and embossed out of Neenah Solar White cardstock and sponged with Stormy Sky Distress Ink and the snowflake were stamped with Walnut Stain Distress Ink. The snowflakes were cut out and topped with Recollection brads. Silver Kaisercraft Rhinestones were added to the heart.

White May Organdy Ribbon was tied around right hand side of the card and hit with the heat gun to antique. I added  a Maya Arts Trinket pin through the bow. It helps keep the card shut by holding the heart down.

Here is a video for the visual learner:

[youtube]https://www.youtube.com/watch?v=E-jwI94d05g[/youtube]

Sorry I have been so quiet. Besides prepping for my next class at Simply Scrapbooks in December, my internet is giving me trouble again. It just came back on after being off for 1 1/2 days. Before that it only worked for a little at a time. I hope I get this post up before it breaks again.

Today’s tutorial on Splitcoast is for a flower created out of ribbon or lace. For my sample I stamped a Label from Gina K. Lovely Labels 2 stamp set in Vintage Photo Distress Ink on Natural White Neenah cardstock. I cut and embossed the label with the matching Label 16 Nestabilities die and the center with Classic Circle Nestabilities. With both dies still on the cardstock I sponged the paper first with Antique Linen Distress Ink, then the edges with Vintage Photo Distress Ink.

In the circle I stamped the sentiment from Winter Wings in Vintage Photo Distress Ink.

The card base is a 4 1/4″ x 9 7/8″ piece of Kraft cardstock folded in half. The edges of the card front and inside were sponged with Vintage Photo Distress ink.  Two 3 3/4″ wide strips of Webster’s Pages patterned paper were sewn to a 4″ x 4 5/8″ piece of Natural White cardstock before the layers were adhered to the card base. Three dew drops from the Mint Chocolate Chip bottle were adhered to the top right side of the patterned paper layer.

The label was adhered in the center of the card with dimensionals, the circle in it’s center with a double layer of dimensionals. Three Bliss Kaisercraft Pearls were adhered to the bottom of the sentiment circle.

The flower was created out of now retired Webster’s Pages Trim. It was topped with a silk ribbon bow that was topped with a Basic Grey button.

Here is a video for the visual learner:

[youtube]https://www.youtube.com/watch?v=ACyJK-YRZRI[/youtube]

Have a wonderful Thanksgiving weekend! Hugs and smiles

Welcome to the 11th week of JustRite Stampers’  Wednesday feature, 12 Weeks of Christmas Blog Hops!  Every Wednesday up until Thanksgiving some of your favorite designers will be joining some of the JustRite design team for a series of Christmas blog hops, showcasing JustRite’s entire Christmas Collection of stamps!  Don’t forget that JustRite has some Christmas stamps in their newly released CLING line of stamp sets, too — you can find them HERE.  This week, the designers joining the JustRite design team are the Stampers Dream design team and a few other special guests!

For the month of November, we thought we would switch gears a little and throw in some holiday gift ideas using your JustRite stamps, so be watching for those, too, on November’s hops!  And in celebration of JustRite’s Christmas Blog Hops, they have a huge surprise for you — take 25% off All JustRite Original Christmas Stamps now through November 29 — Don’t forget to tell Santa!

For my sample today I used the new Sparky the Snowman Cling stamp set. I love how the new cling stamps stamp. I stamped the snowman in Tuxedo Black Memento Ink on X-Press It! Blending card and colored it with Copic Markers (hat/broom stick: E57, E59, E49, broom top: Y23, Y26, Y28, E33, Cardinal: R08, R27, R29, R39, YR24, C7, Scarf, Mitten: Rv10, RV13, RV14, Jacket: BG11, BG13, BG15, BG18, Snow: B0000, B000, B00, Trees: YG63, YG67, G28). I colored over the snow with a clear Spica pen and cut out the snowman.

I used the largest of the three JustRite Stampers Acrylic blocks and inked it up with Spun Sugar, then the edges with Worn Lipstick Distress ink. Next I sprayed the block with water from my Mini Mister and then stamped it on a 3 3/4″ x 4 5/8″ piece of Neenah Solar White cardstock. Snowflakes from the Sparky set were stamped over the background with Spun Sugar ink.  The layer was stitched to a 3/16″ bigger piece of Neenah Canyon Brown cardstock.

The card base is a 4 1/4″ x 11″ piece of Core’dination cardstock folded in half. The sentiment is also from the Sparky set. It was stamped in Tuxedo Black Memento Ink on the left hand side of the background. Sparky was adhered over the background in dimensionals. To finish the card I added two small snowflake cut and embossed with the Snowflake Borderabilities. They were topped with Dew Drops.

This background technique has been popping up all over the internet. Lydia told me about it first after she had made a card with it during a SCS shoe box swap from Lisa Spangler. I thought it would be fun to have a tutorial for it on Splitcoast. You can check it out here.

Here is a video for the visual learner:

[youtube]https://www.youtube.com/watch?v=yJaOxVOjQt8[/youtube]

Please visit these designers’ blogs to see what fabulous JustRite Christmas inspiration they have for you on the hop today!

JustRite Inspiration Blog
Beate Johns

Debbie Olson

Sankari Wegman
Tosha Leyendekker

Kazan Clark

Lori Craig

Amy Sheffer

Stephanie Kraft

Denise Marzec

Michele Kovack

Carolyn King

Barb Schram

Jenn Balcer

Cindy Lawrence

Angela Barkhouse

Christina Fischer

Heidi Blankenship

Mariana Grigsby

Terre Fry

Teresa Kline

Thanks so much for stopping by! Have fun checking out everyone’s wonderful creations! Hugs and smiles

I cut Brushed Silver, Shimmery Ivory cardstock as well as Cosmo Cricket’s Mitten Weather patterned paper with  Eyelet Circle Nestabilities, the Snowflake Pendant and Create-a-Flake 2 Spellbinders dies. The die-cuts were layered, sewn together and covered with Silver Kaisercraft Rhinestones to create a Snowflake Garland. You can find the photo tutorial for this project here.

Thanks so much for stopping by! Have a wonderful weekend! Mine will be  good. My oldest is turning 16 years old. That’s crazy. I remember when he was just a cute chubby toddler, not this thin, tall young man! Time flies. And I will be flying too. Sunday I am flying to Richmond, VA. Monday I will be assisting Colleen Schaan during a Copic Certification. I can’t wait.

Hugs and smiles

© 2012 fresh & fun Suffusion theme by Sayontan Sinha