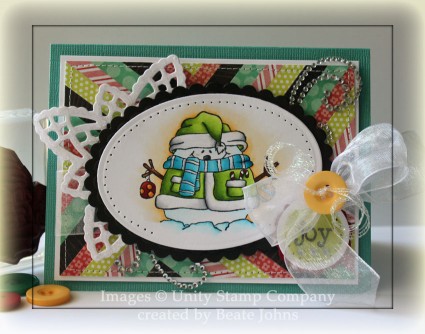
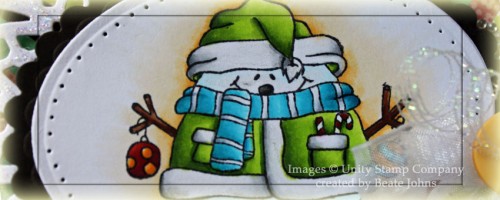
Today’s tutorial on Splitcoast is for the Herringbone technique. It’s a  great way to get rid of your small patterned paper strips. For my sample I used an the Itty Bitty Unity image called Roly Poly Winter Joy. I had it colored since the CHA Supershow. It had been stamped with Tuxedo Black Memento Ink on Neenah Solar White cardstock and colored with Copic Markers (not sure about the colors, sorry). The image was cut and embossed with a Petite Oval Nestabilities die. It was adhered to a piece of Canyon Brown cardstock, cut and embossed with a Scalloped Petite Oval Nestabilities die. The edges of the image oval were paper pierced.

The Herringbone background was created with MME Lime & Twist Life of the Party patterned paper. It measured 3 1/2″ x 4 3/4″. It was stitched to a 3/16″ bigger piece of Neenah Solar White cardstock. White Organdy Ribbon was tied around the layers. A Basic Grey button was tied over the bow with Iridescent Curling Ribbon.

A piece of white cardstock was cut and embossed with a Lace Doily Accent die. It was adhered behind the image layers were before those were adhered to the Herringbone layers with dimensionals. The Lace Doily die cut was covered with Stardust Stickles. A sentiment from the Roly Holy set was stamped in Tuxedo Black on a piece of white cardstock cut and embossed with a Classic Circle Nestabilities die. The inner part was airbrushed before the circle was adhered to a piece of Cherry Cobbler Cardstock cut and embossed with a Scallop Circle die. The edges of the sentiment circle were paper pierced before it was adhered under the bow.

The card base is a 5 1/2″ x 8 1/2″ piece of Core’dinations cardstock folded in half. The layers were adhered to the card base and parts of a Finesse Rhinestone swirl finish off the card front.

Here is a video for the visual learner:

[youtube]https://www.youtube.com/watch?v=AMbHmMdUTC8[/youtube]

Thanks so much for stopping by! Have a wonderful weekend!
Hugs and smiles

This week I picked the Paper Clip Bookmark for the Tutorials from the Archives for the Newsletter.

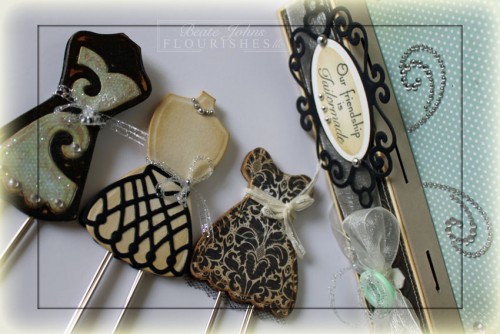
I started with cutting thin coasters with Spellbinders gorgeous new Dress Form dies. (You can purchase them at now at Crafters Home stores or starting in February everywhere.) I LOVE these new dies and had to use them as soon as I got them.

Two of the dress forms were layered with MME Lost & Found  2 Sunshine Paper, one with part of the fourth dress form die, cut and embossed from black cardstock. The patterned paper layers were first sanded, then sponged with Vintage Photo Distress ink.

Jumbo Paperclips were adhered on the back of one of the dress form with Glossy Accents, before a second one cut and layered the same was adhered over it with dimensionals. I had purchased the Paper clips a couple of years ago at Walmart.

The pieces had been dressed up with Silver half Pearls (Recollections, Michaels), May Arts Silver Curling ribbon and thin beige ribbon, Stardust Stickles as well as Baby Bling Rhinestones.


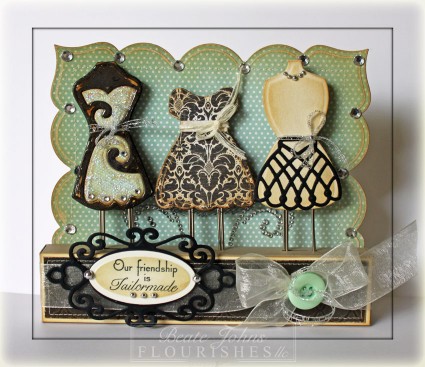
I decided to create a box with a backdrop to show off the bookmarks. I started with a 5″ x 8 1/2″ piece of Kraft cardstock piece. The 5″ side was scored at 3/4″, 2 1/4″, 3″ and 4 1/2″. The 8 1/2″ side was scored at 3/4″ and 7 3/4″.  Before the box was put together, I cut three 3/4″ slids about 1/16″ wide in the top of the box.

A 1 1/2″ x 7″ piece of Natural White cardstock was sponged with Vintage Photo Distress ink. The edges of a 1 3/8″ x 6 7/8″ piece of Sunshine paper were sanded, then sponged with Vintage Photo ink. The patterned paper was stitched to the sponged white cardstock before those were adhered to the box front.

May Arts Ivory Organdy Ribbon was tied around the box. The bow was topped with a button tied on with more silver curling ribbon. A sentiment from Flourishes Feminine Charms was stamped in Tuxedo Black Memento Ink on a piece of Natural White cardstock, cut and embossed with a Petite Oval Nestabilities die. The oval was sponged with Vintage Photo before it was adhered in the center of a piece of black cardstock that had been cut and embossed with a Fancy Tag 2 die.

For the backdrop I cut a piece of Sunshine paper with a Grand Label 23 Nestabilities die. It was stitched to a piece of Natural white cardstock, cut with the same die for more stability.  The edges were first sanded, then lightly sponged with Vintage Photo. The Label was adhered behind the box and decorated with Rhinestones and Finesse Rhinestone swirls.

Here is a video for the bookmarks for the visual learner:

[youtube]https://www.youtube.com/watch?v=cnzBBDIVvIU[/youtube]

Thank you so much for stopping by! Have a wonderful weekend!
Hugs and smiles
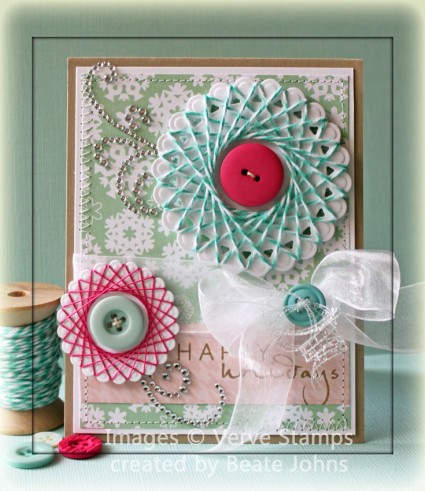
Today’s tutorial on Splitcoaststampers is written by Susie Nelson. She shows us how to create Spirelli – String Art. For my sample I used two different strings: Caribbean Twine from the Twinery and 20 count pink thread from Lizbeth (Hobby Lobby). I cut and embossed Neenah Solar White cardstock with the second and third smallest die from the Beaded Circle Nestabilities dies and wrapped my string around the scallops.

I first thought to use the Spirelli circles as flowers, but I can’t help myself. I am in LOVE with Echo Parks Holly Jolly Christmas paper and thought I could use them as funky snowflakes. I added a button in each snowflake center with Linen Thread.

A sentiment from Verve’s Frosty Flakes was stamped in Frayed Burlap Distress ink on a 1 1/4″ x 3 3/4″ strip of Holly Jolly Paper. It was adhered to a 3 3/4″ x 5″ paper from the same paper pack. Both pieces were stitched to a 4″ x 5 1/4″ piece of Solar White cardstock. White Organdy Ribbon was tied above the horizontal strip. A button was tied over the bow with Silver Iridescent Ribbon and the layers were adhered to the card base, a 4 1/4″ x 11″ piece of Kraft cardstock, folded in half. Parts of a Rhinestone Finesse Swirl next to the Spirelli circle finish off the card front.

Here is a video for the visual learner:

[youtube]https://www.youtube.com/watch?v=r2ZJUBdCfHg[/youtube]

Thank you so much for stopping by! Have a wonderful day!
Hugs and smiles

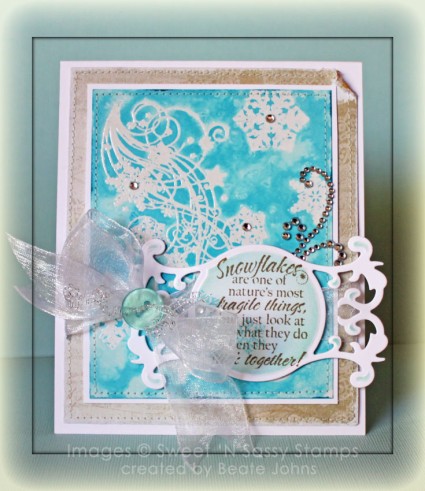
One of last weekend’s VSN challenges was to create a card with the Salted Background Technique. That was the perfect time for me to create a a video for that technique.

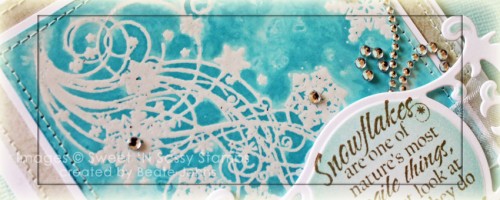
I had received the newest order from Sweet ‘n Sassy Stamps latest release. I knew I wanted to use the gorgeous Snowflake Swirl image for that technique. I embossed the Swirl and a few snowflakes on a 3 1/2″ x 4 1/2″ piece of Glossy Cardstock Tumbled Glass Distress Re-inker was brushed over the cardstock, rock salt was sprinkled over it and the cardstock was misted with water. After the background dried, it was adhered to a 1/4″ bigger piece of Neenah Solar White cardstock.

A 4 1/4″ x 5 1/4″ piece of MME Lost & Found 2 Sunshine paper was sanded and the edges were stitched. The salted background layers were adhered to the paper.

A sentiment from the Snowflake swirl was stamped in Frayed Burlap on a piece of Neenah Solar White cardstock that had been cut and embossed with a Fancy Tags 3 die. The embossed parts were sponged with Tumbled Glass ink.

White Organdy Ribbon was threaded through the tag and tied around the layers. The bow was topped with a button that was tied on with silver curling ribbon.  The layers were adhered to the card base, a 4 1/2″ x 11″ piece of white cardstock folded in half. Baby Bling and parts of a Finesse Rhinestone swirl finish off the card.


Here is a video for the visual learner:

[youtube]https://www.youtube.com/watch?v=ULQ1XTRI304[/youtube]

Thanks so much for stopping by! Have a wonderful day!

Hugs and smiles

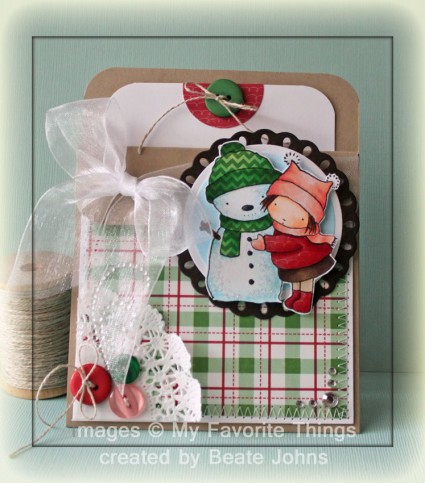
Every  week I try to shoot a video for one of the older tutorials. This week I picked the Pocket Card Tutorial. I am loving Echo Parks Holly Jolly Christmas patterned paper so much right now, I had to use it again (and should probably order more).

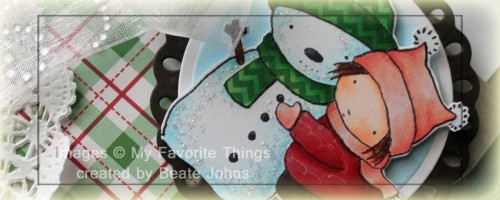
For my main image of the card I picked the image from MFT’s Merry KISSmas stamp set. It was was stamped in Tuxedo Black Memento Ink on Neenah Solar White cardstock. It was stamped again on pieces of Holly Jolly Christmas paper. Parts were cut out and adhered to the main image. The paper pieces as well as the main image were colored with Copic Markers ( hat/scarf: R00, R30, R32     Shirt/boots: R32, R35, R37     Stockings: E40, E42   Skirt: E43, E44, E47     Skin: E0000, E00, E01    Hair/branch: E23, E25, E29    Snowman: B0000, B000    Hat: G00, G02, G05, G07    Buttons: C5, C7, C9) and cut out.

The image was adhered with dimensionals on a piece of Solar White cardstock, cut and embossed with a Classic Circle Nestabilities die and airbrushed with Copic Marker B02. That circle was adhered to a piece of Canyon Brown cardstock, cut and embossed with a Tear Drop Nestabilities die.

The card base was created out of a 4 1/4″ x 11″ piece of cardstock, scored at 1 1/4″ and 5 1/2″. The four corners were rounded. A 3 3/4″ square of Holly Jolly paper was stitched to a 1/4″ bigger piece of whtie cardstock. A quarter of a paper doily was adhered to the lower left of the the stitched layers and three buttons were tied to it with Linen Thread.

Part of a Finesse Swirl was adhered over the buttons and more Rhinestones were adhered to the lower right corner. The layers were adhered to the card base. Before the flap was taped down, May Arts Organdy Ribbon was tied around it. The image were adhered over the flap with dimensionals.

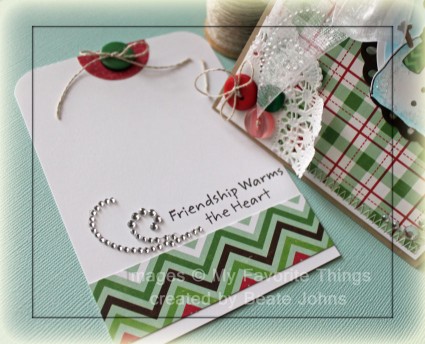
The inside tag is a 3 1/2″ x 5″ piece of Solar White cardstock. The top corners were rounded and a 1 1/8″ wide strip of Holly Jolly paper was adhered to the lower half. A sentiment from the Merry KISSmas set was stamped above the strip with Tuxedo Black ink and part of Finesse swirl was adhered next to it.

I punched a half circle out of Holly Jolly paper with a 1 1/4″ circle punch, adhered it to center of the top of the tag and tied another button on with Linen thread.

Here is a video for the visual learner:

[youtube]https://www.youtube.com/watch?v=PrH-I8Op-O0[/youtube]

Thanks so much for stopping by! Have a great day.
Hugs and smiles

This weeks “From the Archives” Tutorial in the Weekly Inkling was the Tunnel Card. I used to love these cards and I haven’t made one of them in years.

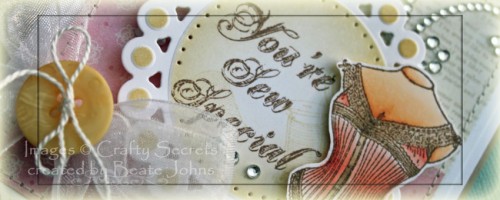
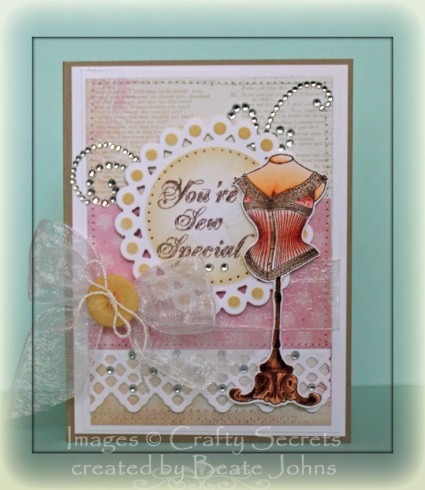
For my sample I started by creating the card front. The mannequin image of Crafty Secrets Sew Special was stamped in Rich Cocoa Memento Ink on Neenah Solar White cardstock. It was colored with Copic Markers (Corset: R00, R11, R12, R14 Body: E50, E51, E53 Stand: E21, E23, E25, E27) and cut out. Clear Spica Pen was added over the lacy part of the corset.

A piece of white cardstock was cut and embossed with a Beaded Circle Nestabilities die. A sentiment from Sew Special was stamped in it’s center with Rich Cocoa ink and the panel was sponged with Antique Linen Distress ink. Images from the same set were stamped in it’s center with Antique Linen to give it some texture. The inner edge of the circle was paper pierced.

A 3 1/2″ wide strip of white cardstock was cut and embossed with a Lace Doily Accent Die. It was adhered under a 2 1/4″ x 3 1/2″ piece of MME Lost & Found Madison Street Patterned Paper which was in turn adhered to a 3 1/2″ x 5″ piece of the same paper pack. The layers were stitched to a slightly bigger piece of white cardstock.

White organdy Ribbon was tied around the horizontal layer and a yellow button was tied on top of the bow with embroidery floss. The sentiment panel was adhered over the panels with dimensionals and the mannequin was adhered slightly over it that. Baby Bling Rhinestones and a Finess Swirl finish off the card front layers. They were adhered to the card front,  a 8 1/4″ x 5 1/2″ piece of Kraft cardstock folded in half.

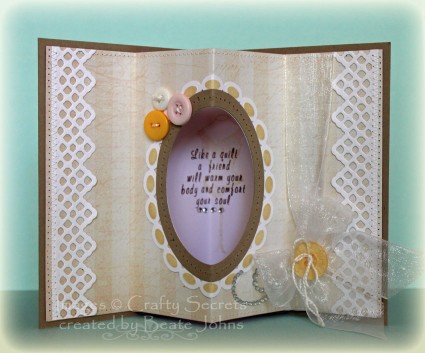
The inside of the card was created out of a 5 1/4″ x 8″ piece of MME Lost & Found Madison Street paper. It was scored at 2″, 4″, 6″ and 8″. A window was cut in it’s center with a Classic Oval Nestabilities die. A frame was cut with Beaded and Classic Oval Nestabilities dies out of Neenah Solar White cardstock and sponged with Antique Linen Distress ink. It was topped with a slim frame cut out Kraft cardstock. The Kraft frame was paper pierced before it was adhered around the window.

The top and bottom edge of the layer was stitched before two pieces of white cardstock, cut and embossed with the Lace Doily Accent die, were zig zag stitched to the side edges. Three buttons were stitched to the upper left of the frame. Before the inner layer was adhered, a sentiment was stamped in the center of a piece of  5″ x 7 3/4″ white cardstock in  Rich Cocoa Memento Ink. The mannequin image was stamped lightly over it in Antique linen. The white cardstock piece was adhered to the inside of the card, before the inner, scored layer was adhered just to the side edges of the card.

White organdy ribbon was tied on the left hand side and topped with a yellow button. I get a lot of questions on how to mail my cards. Usually I just send them in a slightly bigger envelope. This one is quite bulky because of the inside of the card. I will either mail this card unfolded in a 6″ x 9″ envelope with crimped cardstock pieces on top and bottom of the card, or in a small box along with a gift.

Here is a video for the visual learner:

[youtube]https://www.youtube.com/watch?v=V8w9waiPUKw[/youtube]

Thanks so much for stopping by! Have a wonderful day.
Hugs and smiles

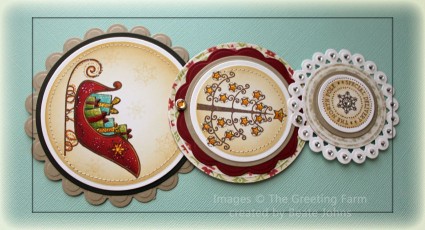
A couple of month ago Joanne ran a Technique Challenge called Layered cards. It had a great response and we had a lot of requests for a tutorial for that card after that challenge. So today we are posting the Telescoping Card in the resource section.

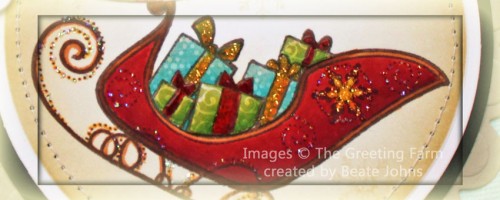
For my sample I used stamps from The Greeting Farms Clearly Christmas Stamp set. The images were stamped on Neenah Solar White cardstock with Rich Cocoa Memento Ink and colored with Copic Markers (Sleigh: R24, R27, R29, R39, E97, E99, E37   Stars: Y15, Y17, E97). The images were cut with Classic Circle Nestabilities and first sponged with Antique Linen Distress ink
, then a bit with Vintage Photo Distress ink.

I left a large part of the Sleigh circle open to write a note in and stamped snowflake images from Clearly Christmas with Antique Linen over the open areas. The gifts from the sleigh were stamped twice on different paper from Echo Parks Season’s Greetings. The gifts were shaded with Copic Markers (YG21, YG25, YG17, B000, B02), cut out and adhered over the main image. Stardust and Yellow Stickles were added to the sleigh image.

The sleigh circle was first stitched to a slightly bigger Canyon Brown cardstock circle, then to a piece of cardstock, cut and embossed with a Beaded Circle Nestabilities die.

The tree image was first stitched to a Kraft cardstock circle, then on a piece of Cherry Cobble cardstock (Stampin’ Up!) cut and embossed with a Jumbo Circle Nestabilities die and lastly on an Echo Park Season’s Greeting Paper circle.

For the top layer the sentiment circle was first layer on Kraft cardstock circle, then on a patterned paper circle and lastly on a piece of Neenah Solar White cardstock cut and embossed with a smaller Beaded Circle Die. Stardust Stickles was added over the snowflake and Baby Bling Rhinestones were added on each bead but one, that holds the brad connecting it to the medium size circle layers.

Here is a video for the visual learner:

[youtube]https://www.youtube.com/watch?v=ik-t2AXlZSo[/youtube]

Thanks so much for stopping by! Have a wonderful day!
Hugs and smiles

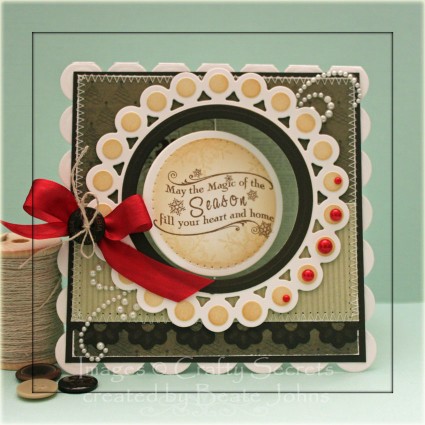
I created this card as a sample for the video tutorial for the Suspension card as well as another HYCCT challenge. Wanda is the hostess of that challenge and she challenged us to have a hanging element on your project. I thought it was the perfect occasion to create a suspension card.

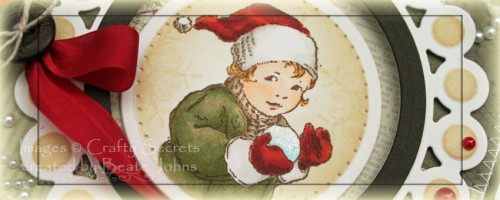
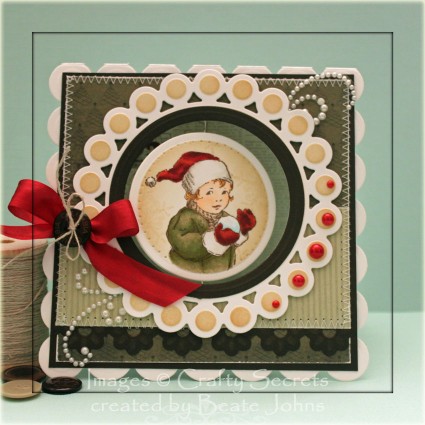
I cut and embossed two circles out of Neenah Solar White cardstock. On one I stamped an image from Crafty Secrets Winter Wishes in Rich Cocoa Memento Ink, on the other a sentiment from the same set. The image was colored with Copic Markers (Hat/Gloves: R05, R24, R29, R39 Coat: YG91, YG93, YG95 Skin: E0000, E00 Hair; Y23, E33) before it was masked and the circle was sponged with Antique Linen and Vintage Photo Distress ink. A snowflake image of that set was stamped over the circle with Antique Linen.

I created a frame for my window on the card front with a Beaded Circle Nestabilities die as well as a Classic Circle die out of Neenah Solar White cardstock. The frame was sponged lightly with Vintage Photo distress ink before a slim circle frame cut with Classic Circle dies out of Canyon Brown cardstock was added over the frame.

A strip of Canyon Brown cardstock was cut and embossed with a Floral Doily Accent die. It was adhered under a 1 7/8″ x 4  1/2″ piece of MME Lost & Found Christmas paper that was adhered to a 4 1/2″ square of the same paper pack. The layers were stitched to a 3/16″ bigger piece of Canyon Brown paper. A window was cut into the layers with a Classic Nestabilities die. It didn’t quite cut through the three layers and I used a Hobby Knife to finish the cut. A pearl swirl was cut in pieces. Part of it was adhered to the top right, part to the lower left of the window.

The card base was cut with one of the Grand Scallop Square Nestabilities dies out of white cardstock. Again a window was cut in the center with the same circle die used to cut the window in the other layers. The card front was adhered to the card base.

Here is a video for the visual learner:

[youtube]https://www.youtube.com/watch?v=i1geoRxwtEQ[/youtube]

Thanks so much for stopping by! Have a wonderful day.
Hugs and smiles

Taylored Expressions is hosting a Holiday Hoopla today and I’m excited to be a part of it. You should have arrived here from Sankari‘s blog.  If you didn’t (or if you get lost along the way) you can head back to the beginning at Taylor’s blog for the full list of participants. There are 22 designers showcasing Christmas/Winter/Holiday stamps sets from TE with samples that include all sorts of projects from cards to gifts and beyond!  We want to inspire you to get your holiday crafting and card making into high gear!  Be sure to stick with me all the way to the end of the post to get a coupon code for 25% off holiday stamp sets at Taylored Expressions!


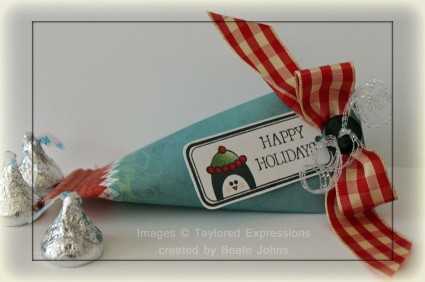
The set I’m showcasing is Tag You’re It. It’s great to create fast Christmas gift tags.

For my sample I wanted to show a quick and easy gift idea with Taylor’s Tag You’re Are It! stamp set. I stamped the Penguin tag in Tuxedo Black Memento Ink on Neenah Solar White cardstock. The image was cut out and colored with Copic Markers (YG61, YG63, R08, R27, R29, YR15).

A sour cream container was created with a 4 1/2″ x 5″ piece of Bo Bunny Blitzen paper. A bow was tied with gingham ribbon with the help of the Bow-Easy. Curling Ribbon was used to tie the tag to the bow and the bow to the container.

Here is a video on how to create a sour cream container for the visual learner:

[youtube]https://www.youtube.com/watch?v=QsgcPQCTe8M[/youtube]

Creating for this hop caused to me to go back and look at some of my previous creations and I wanted to share one of those with you today too.  You can find it here.

Are you getting in the mood to stamp?  Be sure to check out Taylor’s 12 Days of A Handmade Christmas Video Series for lots of easy gift ideas.

Now, who loves a SALE? Use Coupon Code HOOPLA2011 to get 25% off the following holiday stamp sets (released in 2009 and 2010) at Taylored Expressions now through November 2:


Christmas Blessings, Enjoy!, From the Heart, Hangin’ Out –  At the North Pole, Holiday Wonder, Home Sweet Home, Keeping Tabs, Merry Little Cocktail, Penguin Pals, Season’s Sweetings, Sparkle & Cheer, Tag Treats , Tag You’re It, Take Note – Holidays , Wings of Joy, Winter Wonderland.

The coupon code is case sensitive. Follow these instructions to apply the discount to your order:


1. Add the desired stamp sets from the above list to your shopping cart.

2. Insert the coupon code into the Promotional Code box.

3. Click the Update Cart button.  Your discount should now be applied.

4. Proceed to checkout to finalize and submit your order.

Now hop on over to Danielle Lounds for the next sample. Thanks so much for stopping by! Have a wonderful day.
Hugs and smiles

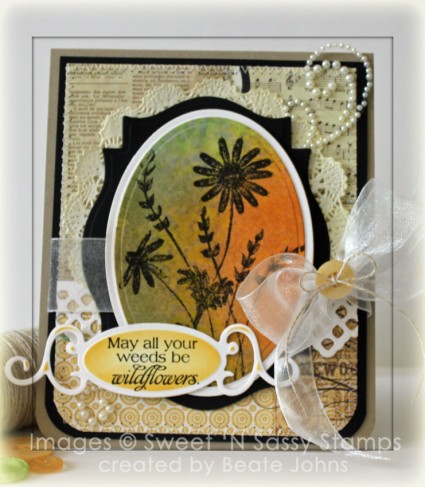
For this post I thought I share a card I created to update an older tutorial on Splitcoaststampers. The Foxy Oxi Technique. I created it back in 2004 when OxiClean was a pretty new product. I was wondering if it would act just like Bleach. Well, it does and it doesn’t. Depending on what ink and paper you use, the results vary.

For my sample I used a shipping tag and Distress inks. Distress inks don’t bleach out all the way, the get darker spots. When I created the tutorial, I used Stampin’ Up! Classic inks and Whisper White cardstock. That combination bleached out into white spots.

I sponged my shipping tag with Peeled Paint, Broken China and Wild Honey Distress inks before I sprinkled OxiClean over it and sprayed it with water. After the tag dried, I cut it with a Petite Oval Nestabilities die and stamped the main image from the Wildflowers set in Jet Black Archival ink over it.

The oval was first layered on a slightly bigger white oval, then on a piece of black cardstock that had been cut and embossed with a Label 18 Nestabilities die.

The pieces of My Mind’s Eye Lost & Found Sunshine paper were stitched to a 4″ x 5 1/4″ piece of black cardstock. The bottom corners were rounded. A 4″ strip of white cardstock was cut and embossed with a Lacy Doily Accent die. It was adhered over the horizontal patterned paper strip.

A doily was cut apart, sponged with Antique Linen and adhered under the Label 18 layer. White Organdy ribbon was run under the main image and tied around the layers. It was topped with a button that was tied on with Linen thread.

The sentiment is also from the Wildflowers set. It was stamped on a piece of white cardstock that had been cut and embossed with one of the Fancy Tag labels and sponged with Wild Honey Distress ink.

To finish the card off a Pearl swirl was cut apart. The bigger part was adhered to the top right, the smaller one to the lower left of the card front. The layers were adhered to a 4 1/4″ x 11″ piece of Kraft cardstock, folded in half.

Here is a video I created for this technique for the visual learner:

[youtube]https://www.youtube.com/watch?v=H4gFNafQ1hY [/youtube]

Thanks so much for stopping by! Have a wonderful day!
Hugs and smiles

© 2012 fresh & fun Suffusion theme by Sayontan Sinha