Search Results : crafty Secrets

sparrowsingingwidewcmd09b.jpg

Here is my entry for Crafty Secrets WCMD challenge. I love the image of the birds.

 The card base is black cardstock cut with the Clear Scallop Square Big Shot Die.  The Whisper White square is 3 7/8″ and was alyered with two pieces of OffBeat BasicGrey paper. I machine stitched the layers to the White square and added three Celery brads on the top right. Kiwi Kiss Satin Ribbon was tied around the layers.

sparrowsingingwcmd09b.jpg

I stamped the Birds  from Crafty Secret Stamp set Bird Notes in Tuxedo Black Ink on Gina K’s Pure Luxury White Cardstock and colored them in with Copic Markers (E 25, E27, E34, Y17, Y26, YG03, YG25). I cut the image out with Spellbinders Label Four Nestabilities, left the die on and airbrushed the image with Copic Marker BG27.

The sentiment is from the same set, was stamped in Tuxedo Black on Gina’s white cardstock, cut it out with Circle Nestabilities, airbrushed the center and layered it on a slightly bigger black scallop circle.

sparrowsingingwcmd09binside.jpg

Inside the card I added another 3 7/8″ Whisper White square and taped a 1 1/8″ x 3 7/8″ strip of Offbeat BasicGrey paper. The edges were stitched and distressed and Celery brads were added.

I am working on posts for next week and for submissions, so I have  no card or project to share with you today. Instead I thought I offer up a few Crafty Secrets Products that might work for Valentine’s projects.

This Blog Candy includes:

  • Classic Paper Pack
  • Vintage Postage Kit
  • Cherub Clear Art Stamp set

If you are interested in the blog candy please leave a comment under this post and I will draw a winner on Wednesday with help of random.org.

How about you tell me if you have a favorite kind of stamp or stamp company. I think for me it’s definitely outline stamps of flowers and people, so I can use my Copics. But then…I also love solid stamps, especially frames like JustRite Stampers or Waltzingmouse. They are perfect for fast cards.

Have a wonderful Sunday!
Hugs and smiles

I created this card as a sample for yesterday’s tutorial on SCS : Faux Barn Board. Sharon Field wrote the tutorial and at first told me she couldn’t shoot the video because she didn’t have the right equipment. I shot the video after asking her a few questions and when she replied she told me she could shoot the video with the help of a friend. Since mine was already done, I thought I can share it here. Make sure to check her video, too. She is way better at this technique then I am.

craftysecretspoppiesclosup.jpg

Since I thought Barn board sounded country, I worked my whole card around that idea. I stamped Poppies from Crafty Secrets new Poppy set in Tuxedo Black Memento Ink on X-Press It Blending card and colored them with Copic Markers (Poppies: R32, R35, R39, N5, N7 and a touch of E97 Leaves and stem: YG11, YG63, YG67 Glow: 1/5th YR31, 4/5 blending solution). The image was cut down to a 3 3/8″ x 4 1/4″, the edges were distressed and it was adhered to a 1/4″ bigger piece of Early Espresso Cardstock (SU), that had it’s edges distressed as well. The top right edge of each of the two layers was rolled, then the rest of the edge of the layer was paper pierced.

craftysecretspoppiesfauxbar.jpg

The card base is a 5 1/2″ x 11″ piece of Early Espresso cardstock folded in half. A 5 1/4″ Whisper White square had it’s edges colored with YR31 and distressed. Next I sanded the edges of a 5″ square of Cosmo Cricket Mitten Weather paper and sponged the edges with Antique Linen distress ink.  The paper layer was stitched to the white cardstock before both were adhered to the card base.

The Faux Barn Board sample measures 3 3/8″ in length. The edges were distressed and it was stitched to a 1/4″ bigger piece of Early Espresso, which edges were distressed as well. Two Antique Brads (Stampin’ Up!) were added to the upper edge. A bow tied out of May Arts Gingham ribbon was topped with a bigger antique brad and adhered to the lower edge to finish off the card.

Here is my video for this technique:

[youtube]https://www.youtube.com/watch?v=M4drdrMSgs8[/youtube]

Thanks so much for stopping by! Have a wonderful day!
Hugs and smiles

 P.S.: Did you notice that I didn’t use one Spellbinders die for this card? It almost never happens because I LOVE them!

Amy Westerman has Try Something New Tuesdays. She made an Acetate pocket card. Well….of course I didn’t read the whole thing and I used a luggage tag. The outcome still looks the same.

 crafty-secrets-carte-postal.jpg

My center image is an image from the Crafty Secret booklet Wacky & Wonderful. I layered it on whisper white cardstock and cut a border with my Fiskars Postage scissor to make it look like an old photograph. I layered that onto chocolate chip cardstock.

I cut the tag of the luggage tag off with scissors and cut a half circle into the top with my coluzzle. I stapled May Arts double sided pink satin ribbon, Stampin’ Up! white organdy ribbon and May Arts white ric rac on the top of the image.

For the card base, I used a 4 1/4″ x 11″ piece of chocolate chip cardstock folded in half. The 4″ x 5 1/4″ piece of decorated paper is from Radiant paper pack from Crafty secrets. The color was a little bit too intense so I sanded it down quite a bit with Stampin’ Up!’s sanding block.

I stamped the paper with images from the French Mail  set from Crafty Secrets in Brown Palette ink. The luggage tag was taped to the main card with glue dots. I finished the card of with double layered prima flowers that were attached with Vintage brads.

 You can find Crafty Secrets products in Anna Wight’s store Sassy and Sweet Crafts.

Whiff Of Joy, Technique Tuesday & More

Promotional post Comments Off on Whiff Of Joy, Technique Tuesday & More
Jan 252014
Whiff of Joy
  • Gnomes – Delivering my Heart to You  $4.25
  • Gnomes – I am sorry                                     $4.25
  • Gnomes – I serenade you                            $4.25
  • Gnomes – Good Luck Gnome                     $4.25
  • Spring Tree plus sentiment  (retired)    $2

Crafty Secrets

  • Fairies                                                             $5.50

Penny Black

  • Flower Garden                                              $4 Wood mounted stamp

I will only ship product with flat rate priority Mail. Otherwise all the mailing will get to complicated.

Have a great weekend! Hugs and smiles
Beate


Great Online Sources

A Muse Artstamps

CAS-ual Friday Stamps

Crafty Secrets

Creative Imaginations

Eclectic Paperie

Ellen Hutson

Flourishes

Freckled Fawn

Gina K. Designs

Kitchen Sink Stamps

La-Land Crafts

Love To Stamp

Inspiration Emporium

Just For Fun Stamps

JustRite Stampers

Lawn Fawn

My Favorite Things

Our Craft Lounge

Sassy and Sweet Crafts

Scor-Pal

Simon Says Stamp!

Spellbinders

Stamp Simply Ribbon Store

Starlitstudio

Sweet ‘n Sassy Stamps

The Cat’s Pajamas

The Greeting Farm

There She Goes Clear Stamps

Tiddly Inks

Unity Stamp Company

Verve Stamps

Want2Scrap

Waltzingmouse Stamps

Whimsy Stamps

Wild Orchid Crafts

Last Wednesday Splitcoaststampers posted a new product review. This time we reviewed the Perfect Layers tools. Before I stamped I was a quilter. I love exact measurements and math. I love my paper cutter and don’t have any problems figuring out the size of my next layer. But…if you are not like me, this is a pretty nifty tool.


One of my samples was this card. I used to the 1/16″ edge to layer the image from Creative Scraps Birds & Blossoms on a piece of Neenah Classic Cream Cardstock after the edges of the image had been sanded. I used the 3/8″ edge to cut a piece of Prima Natural Garden paper for my layer on the card base.

May Arts ribbon was tied around the image layers. A sentiment from Crafty Secrets Bird Notes was stamped in Rich Cocoa Memento Ink on a piece of Classic Cream cardstock, that had been cut and embossed one of the Home Sweet Home dies. The edges of the tag were sponged with Frayed Burlap Distress ink and a bird from Bird Notes was stamped over the sentiment in a second generation Frayed Burlap ink. The tag was tied around the bow along with a button with Linen Thread.

The layers were adhered to a piece of Kraft cardstock, cut and embossed with the smallest of the Grand Label 23 Nestabilities die.  The edges of the Prima paper were sanded and stitched before the piece was adhered to the card base. The image layers were adhered to the card base. Parts of a Finesse Pearl Swirl finish off the card.

Thanks so much for stopping by! Have a wonderful day!
Hugs and smiles

This weeks “From the Archives” Tutorial in the Weekly Inkling was the Tunnel Card. I used to love these cards and I haven’t made one of them in years.

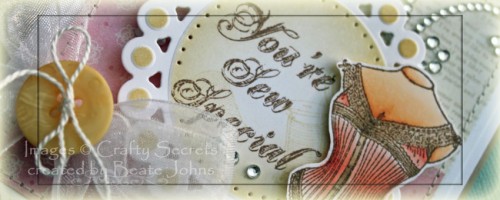
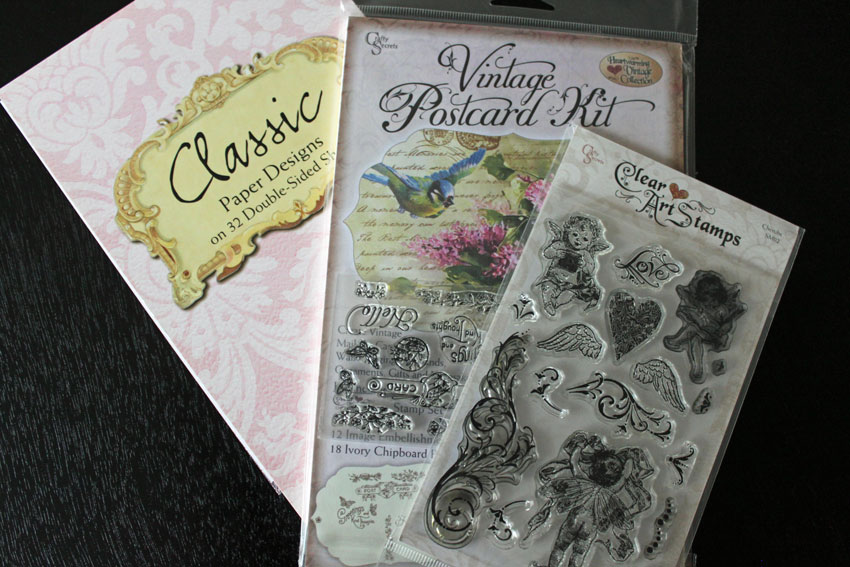
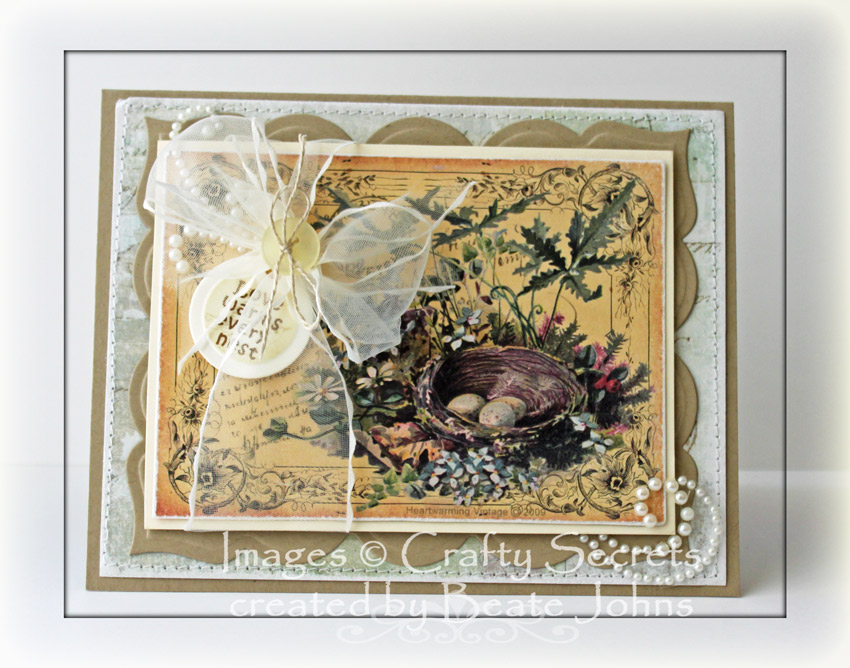
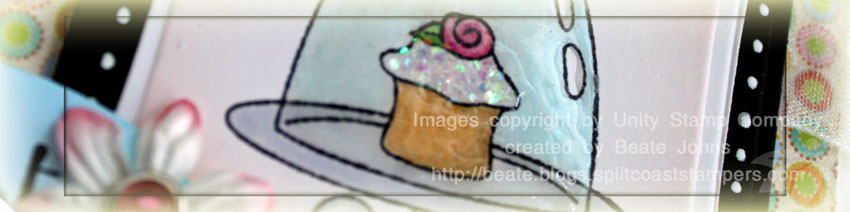
For my sample I started by creating the card front. The mannequin image of Crafty Secrets Sew Special was stamped in Rich Cocoa Memento Ink on Neenah Solar White cardstock. It was colored with Copic Markers (Corset: R00, R11, R12, R14 Body: E50, E51, E53 Stand: E21, E23, E25, E27) and cut out. Clear Spica Pen was added over the lacy part of the corset.

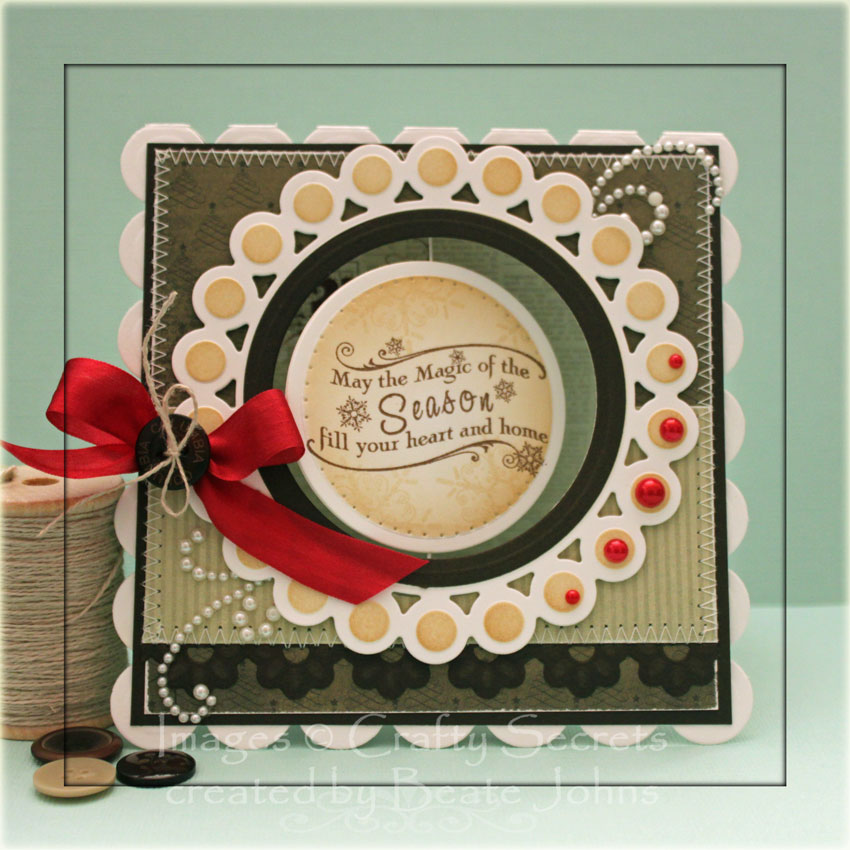
A piece of white cardstock was cut and embossed with a Beaded Circle Nestabilities die. A sentiment from Sew Special was stamped in it’s center with Rich Cocoa ink and the panel was sponged with Antique Linen Distress ink. Images from the same set were stamped in it’s center with Antique Linen to give it some texture. The inner edge of the circle was paper pierced.

A 3 1/2″ wide strip of white cardstock was cut and embossed with a Lace Doily Accent Die. It was adhered under a 2 1/4″ x 3 1/2″ piece of MME Lost & Found Madison Street Patterned Paper which was in turn adhered to a 3 1/2″ x 5″ piece of the same paper pack. The layers were stitched to a slightly bigger piece of white cardstock.

White organdy Ribbon was tied around the horizontal layer and a yellow button was tied on top of the bow with embroidery floss. The sentiment panel was adhered over the panels with dimensionals and the mannequin was adhered slightly over it that. Baby Bling Rhinestones and a Finess Swirl finish off the card front layers. They were adhered to the card front,  a 8 1/4″ x 5 1/2″ piece of Kraft cardstock folded in half.

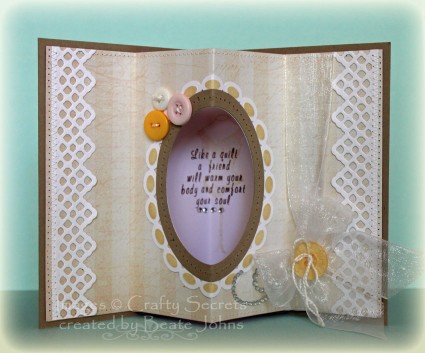
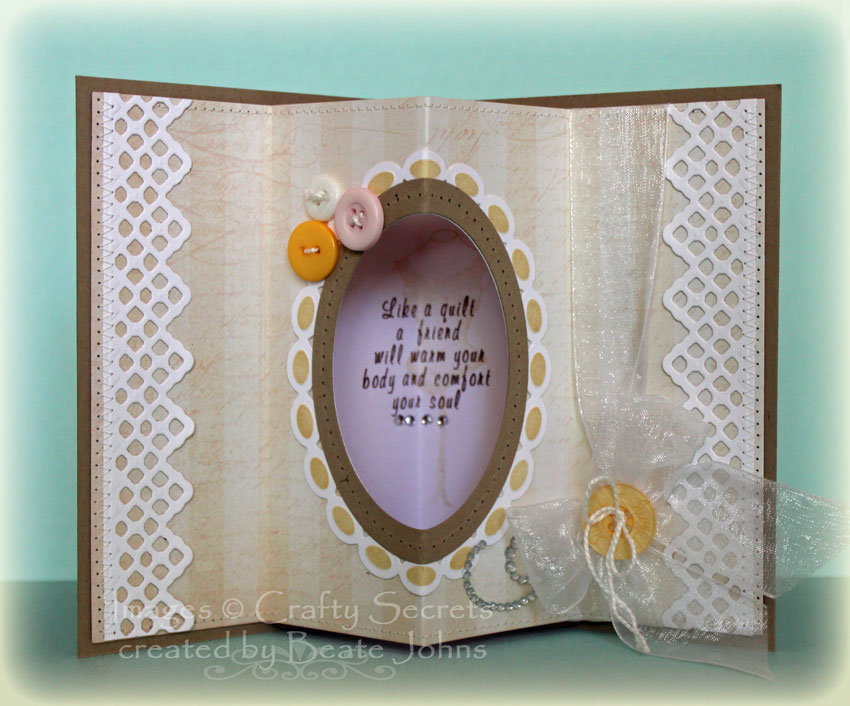
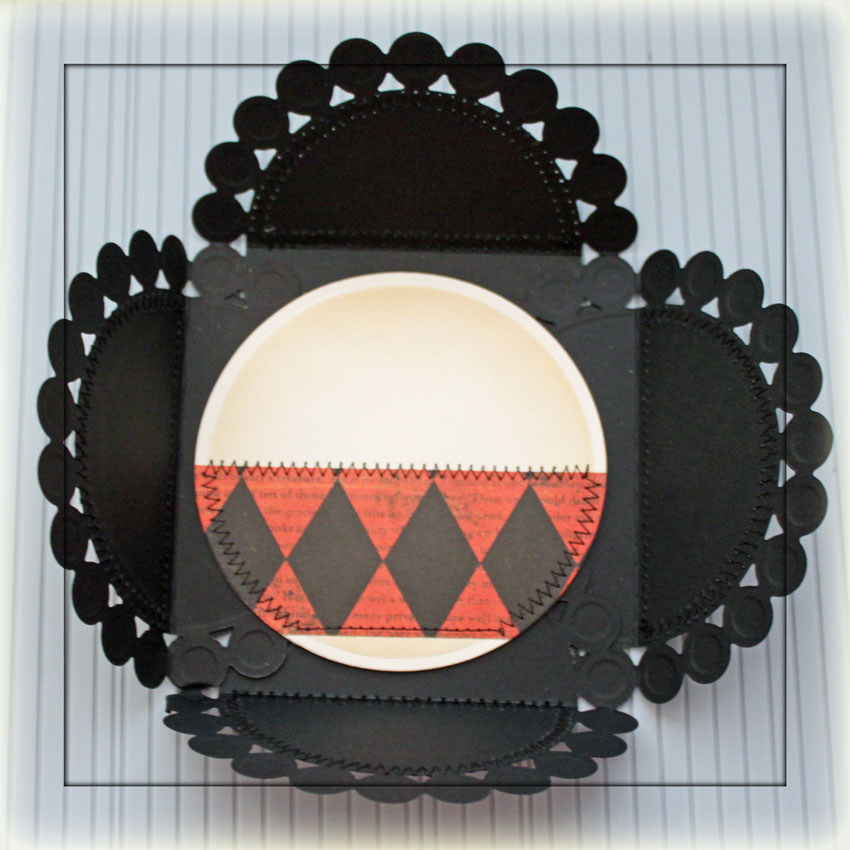
The inside of the card was created out of a 5 1/4″ x 8″ piece of MME Lost & Found Madison Street paper. It was scored at 2″, 4″, 6″ and 8″. A window was cut in it’s center with a Classic Oval Nestabilities die. A frame was cut with Beaded and Classic Oval Nestabilities dies out of Neenah Solar White cardstock and sponged with Antique Linen Distress ink. It was topped with a slim frame cut out Kraft cardstock. The Kraft frame was paper pierced before it was adhered around the window.

The top and bottom edge of the layer was stitched before two pieces of white cardstock, cut and embossed with the Lace Doily Accent die, were zig zag stitched to the side edges. Three buttons were stitched to the upper left of the frame. Before the inner layer was adhered, a sentiment was stamped in the center of a piece of  5″ x 7 3/4″ white cardstock in  Rich Cocoa Memento Ink. The mannequin image was stamped lightly over it in Antique linen. The white cardstock piece was adhered to the inside of the card, before the inner, scored layer was adhered just to the side edges of the card.

White organdy ribbon was tied on the left hand side and topped with a yellow button. I get a lot of questions on how to mail my cards. Usually I just send them in a slightly bigger envelope. This one is quite bulky because of the inside of the card. I will either mail this card unfolded in a 6″ x 9″ envelope with crimped cardstock pieces on top and bottom of the card, or in a small box along with a gift.

Here is a video for the visual learner:

[youtube]https://www.youtube.com/watch?v=V8w9waiPUKw[/youtube]

Thanks so much for stopping by! Have a wonderful day.
Hugs and smiles

I created this card as a sample for the video tutorial for the Suspension card as well as another HYCCT challenge. Wanda is the hostess of that challenge and she challenged us to have a hanging element on your project. I thought it was the perfect occasion to create a suspension card.

I cut and embossed two circles out of Neenah Solar White cardstock. On one I stamped an image from Crafty Secrets Winter Wishes in Rich Cocoa Memento Ink, on the other a sentiment from the same set. The image was colored with Copic Markers (Hat/Gloves: R05, R24, R29, R39 Coat: YG91, YG93, YG95 Skin: E0000, E00 Hair; Y23, E33) before it was masked and the circle was sponged with Antique Linen and Vintage Photo Distress ink. A snowflake image of that set was stamped over the circle with Antique Linen.

I created a frame for my window on the card front with a Beaded Circle Nestabilities die as well as a Classic Circle die out of Neenah Solar White cardstock. The frame was sponged lightly with Vintage Photo distress ink before a slim circle frame cut with Classic Circle dies out of Canyon Brown cardstock was added over the frame.

A strip of Canyon Brown cardstock was cut and embossed with a Floral Doily Accent die. It was adhered under a 1 7/8″ x 4  1/2″ piece of MME Lost & Found Christmas paper that was adhered to a 4 1/2″ square of the same paper pack. The layers were stitched to a 3/16″ bigger piece of Canyon Brown paper. A window was cut into the layers with a Classic Nestabilities die. It didn’t quite cut through the three layers and I used a Hobby Knife to finish the cut. A pearl swirl was cut in pieces. Part of it was adhered to the top right, part to the lower left of the window.

The card base was cut with one of the Grand Scallop Square Nestabilities dies out of white cardstock. Again a window was cut in the center with the same circle die used to cut the window in the other layers. The card front was adhered to the card base.

Here is a video for the visual learner:

[youtube]https://www.youtube.com/watch?v=i1geoRxwtEQ[/youtube]

Thanks so much for stopping by! Have a wonderful day.
Hugs and smiles

I got the idea for this weeks tutorial from Ellen Hutson. She posted a similar one several years ago. I thought it was a great card idea and wanted to share it with all of you and have it in the SCS resource section. You use 4 circle die cuts to create a Petal Card.

For my sample I cut and embossed the four circles out of black cardstock with the largest of the Beaded Circle Nestabilities dies. 2 circles were cut and embossed with a smaller Classic Circle Nestabilities die out of Glowing Authentique Patterned Paper. The patterned paper circles were cut in half and sanded before one half was stitched to each of the four Beaded circles. The circles were scored in half and adhered with glue dots.

A piece of Crochet Lace was stitched to a 2″ x 10″ strip of Authentique Paper before it was adhered around the card as a belly band. Gold Organdy Ribbon was tied around the band. A Muse Token was tied around the bow with Linen Thread and topped with a button.

An image from Crafty Secrets Halloween Creative Scraps was cut with a Classic Oval Nestabilities die. The edge of the image was sanded before it was first adhered to a slightly bigger black cardstock oval, then to a Scallop Oval layer cut and embossed out of Classic Cream Neenah cardstock. A sentiment ticket from the  same Creative Scraps was cut out and attached to the image layer with a Mini Paper Clips. A small button was stitched underneath the sentiment.

For the inside of the card I cut and embossed another piece of Classic Cream cardstock with a Classic Circle Nestabilities die. A strip of Authentique paper was stitched to the layer after the edges had been sponged with Antique Linen Distress ink.

Here is a video for the visual learner:

Thanks so much for stopping by! Have a wonderful day!
Hugs and smiles

© 2012 fresh & fun Suffusion theme by Sayontan Sinha