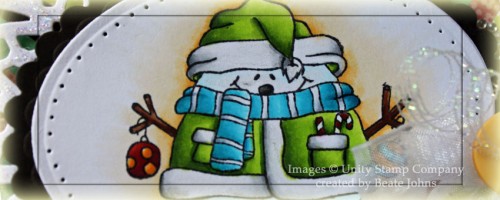
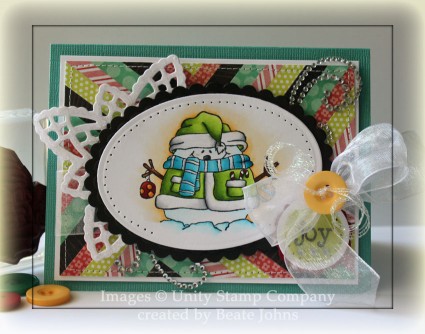
Today’s tutorial on Splitcoast is for the Herringbone technique. It’s a  great way to get rid of your small patterned paper strips. For my sample I used an the Itty Bitty Unity image called Roly Poly Winter Joy. I had it colored since the CHA Supershow. It had been stamped with Tuxedo Black Memento Ink on Neenah Solar White cardstock and colored with Copic Markers (not sure about the colors, sorry). The image was cut and embossed with a Petite Oval Nestabilities die. It was adhered to a piece of Canyon Brown cardstock, cut and embossed with a Scalloped Petite Oval Nestabilities die. The edges of the image oval were paper pierced.

The Herringbone background was created with MME Lime & Twist Life of the Party patterned paper. It measured 3 1/2″ x 4 3/4″. It was stitched to a 3/16″ bigger piece of Neenah Solar White cardstock. White Organdy Ribbon was tied around the layers. A Basic Grey button was tied over the bow with Iridescent Curling Ribbon.

A piece of white cardstock was cut and embossed with a Lace Doily Accent die. It was adhered behind the image layers were before those were adhered to the Herringbone layers with dimensionals. The Lace Doily die cut was covered with Stardust Stickles. A sentiment from the Roly Holy set was stamped in Tuxedo Black on a piece of white cardstock cut and embossed with a Classic Circle Nestabilities die. The inner part was airbrushed before the circle was adhered to a piece of Cherry Cobbler Cardstock cut and embossed with a Scallop Circle die. The edges of the sentiment circle were paper pierced before it was adhered under the bow.

The card base is a 5 1/2″ x 8 1/2″ piece of Core’dinations cardstock folded in half. The layers were adhered to the card base and parts of a Finesse Rhinestone swirl finish off the card front.

Here is a video for the visual learner:

[youtube]https://www.youtube.com/watch?v=AMbHmMdUTC8[/youtube]

Thanks so much for stopping by! Have a wonderful weekend!
Hugs and smiles

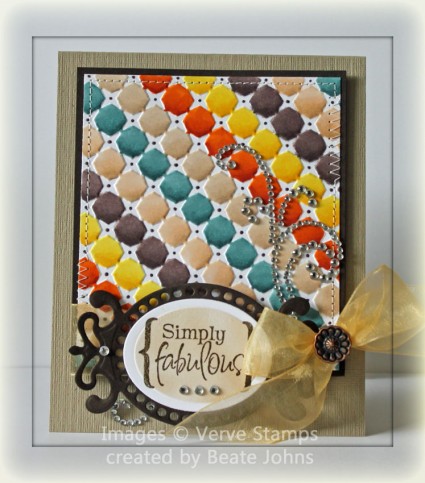
This weeks Moxie Fab World Tuesday Trigger looked tough. I was not about to enter that challenge. But then I saw the awesome Free For All Challenge Lydia hosted. That along with a new embossing folder I received that day gave me an idea for a card that would work for both challenges.

I started by embossing a 3 1/2″ x 4″ piece of Neenah Solar White cardstock. I colored each of the embossed cubes with Copic Markers (BG72, BG73, E30, E31, YR15, YR18, Y13 , Y15, E74, E77, E41, E42) and the tiny dots with E77. The layer was stitched to a 1/4″ bigger piece of Canyon Brown cardstock. Another piece of Canyon Brown cardstock was cut and embossed with a Fancy Tag 3 die.

A piece of white cardstock was cut and embossed with a Classic Oval Nestabilities die. A sentiment from Verve’s Beautiful Kindness was stamped in Walnut Stain Distress Ink was stamped on the oval. The inner part was airbrushed with Copic Marker E42 before it was adhered to the Fancy Tag die cut. Yellow Organdy Ribbon was threaded through the die cut frame and  tie around the layers.

The layers were adhered to the card base a 4 1/4″ x 10 1/2″ piece of Textured Kraft cardstock, folded in half. Part of a Finesse Rhinestone Swirl was adhered over the bow and a small one on the left under the tag. Small Baby Bling Rhinestones on the sentiment panel finish off the card.

Thanks so much for stopping by! Have a wonderful day!
Hugs and smiles

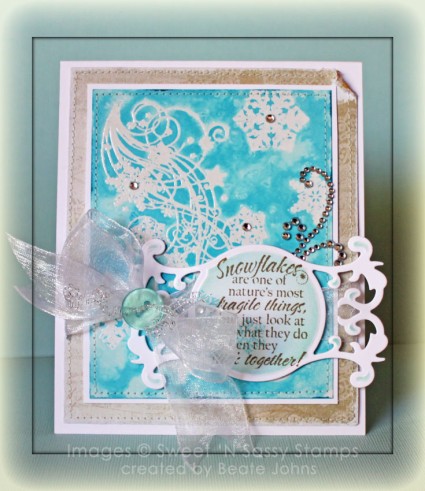
One of last weekend’s VSN challenges was to create a card with the Salted Background Technique. That was the perfect time for me to create a a video for that technique.

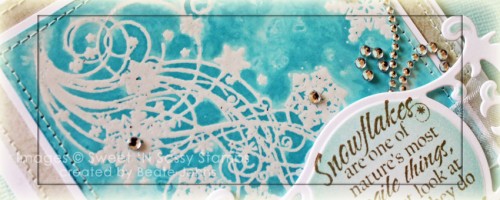
I had received the newest order from Sweet ‘n Sassy Stamps latest release. I knew I wanted to use the gorgeous Snowflake Swirl image for that technique. I embossed the Swirl and a few snowflakes on a 3 1/2″ x 4 1/2″ piece of Glossy Cardstock Tumbled Glass Distress Re-inker was brushed over the cardstock, rock salt was sprinkled over it and the cardstock was misted with water. After the background dried, it was adhered to a 1/4″ bigger piece of Neenah Solar White cardstock.

A 4 1/4″ x 5 1/4″ piece of MME Lost & Found 2 Sunshine paper was sanded and the edges were stitched. The salted background layers were adhered to the paper.

A sentiment from the Snowflake swirl was stamped in Frayed Burlap on a piece of Neenah Solar White cardstock that had been cut and embossed with a Fancy Tags 3 die. The embossed parts were sponged with Tumbled Glass ink.

White Organdy Ribbon was threaded through the tag and tied around the layers. The bow was topped with a button that was tied on with silver curling ribbon.  The layers were adhered to the card base, a 4 1/2″ x 11″ piece of white cardstock folded in half. Baby Bling and parts of a Finesse Rhinestone swirl finish off the card.


Here is a video for the visual learner:

[youtube]https://www.youtube.com/watch?v=ULQ1XTRI304[/youtube]

Thanks so much for stopping by! Have a wonderful day!

Hugs and smiles

© 2012 fresh & fun Suffusion theme by Sayontan Sinha