Today starts the third annual Holiday Tutorial Blitz on Splitcoaststampers. It starts off with a tutorial for a Treat Box card written by Melanie Schulenberg.

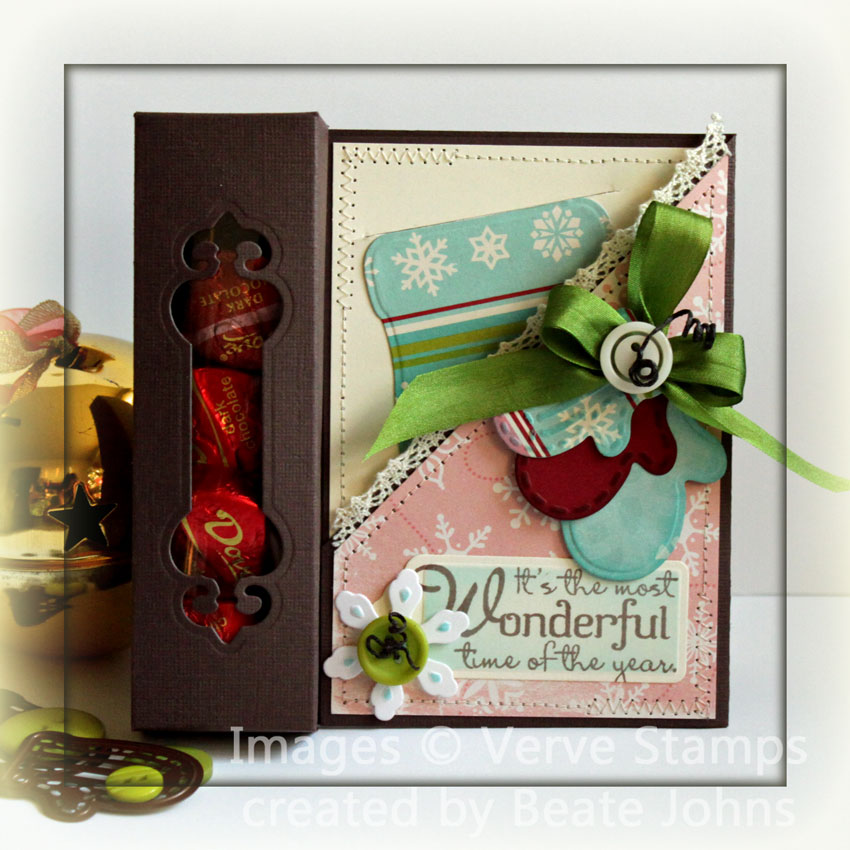
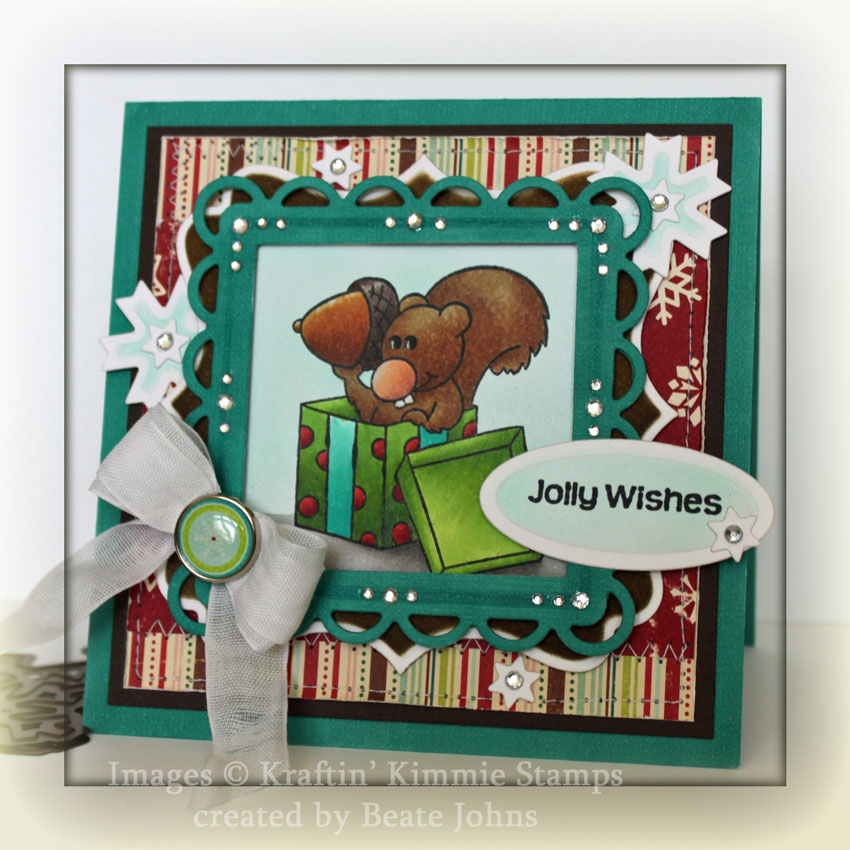
For my treat box card I used Chocolate Chip card stock. Mary Brown came over on Friday and we stamped together. We switched Melanie’s box up just a bit by adding an extra flap on the top of the box so you can open and close it. To do that, just add another 1/2″ to the width of your cardstock. Then cut everything away from that but at the 1 1/2″ for the box top. Add a score line there and corner round the ends. We figured after working for so long on a treat box, it would be nice if you didn’t have to rip open the box to get to the goodies.

Hint: Bette told me she had a hard time with the measurements on the template. Here is how I cut and scored. Start with a 7″ x 12″ piece of cardstock. Score the 7″ side at 1/2″, 1 1/4″ and 6 1/4″.  Flip and score the long side at 3 1/2″, 7″, 8 1/2″, 9 1/4″, 10 3/4″ and 11 1/2″.

Now flip your cardstock back to the 7″ side and cut on the 1/2″ score line all the way to the 9 1/4″ score line. Leave the 1 1/2″ flap and then cut the last 1 1/4″ off. This will be the lid for your box. On the 1 1/4″ score line cut all the way up to the 8 1/2″ score line and then the last 1/2″. That part you fold in. Repeat this cut on the 6 1/4″ line. Cut the lines on the flaps so you can fold the box in and you are ready. (I hope that makes sense without pictures. Just print out the template, draw the extra flap on it and mark the lines on there with the measurements I gave you. That’s what I did.)

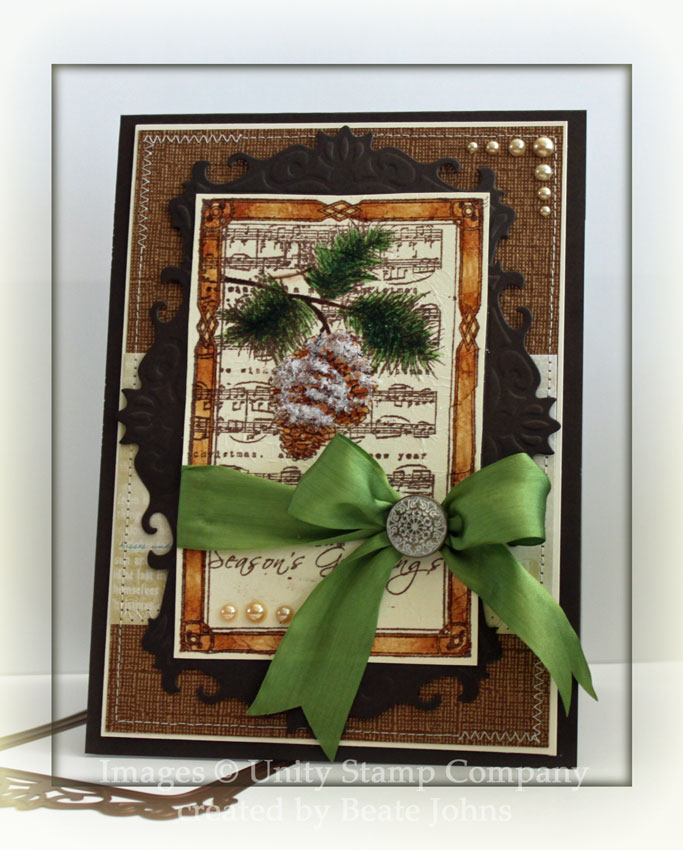
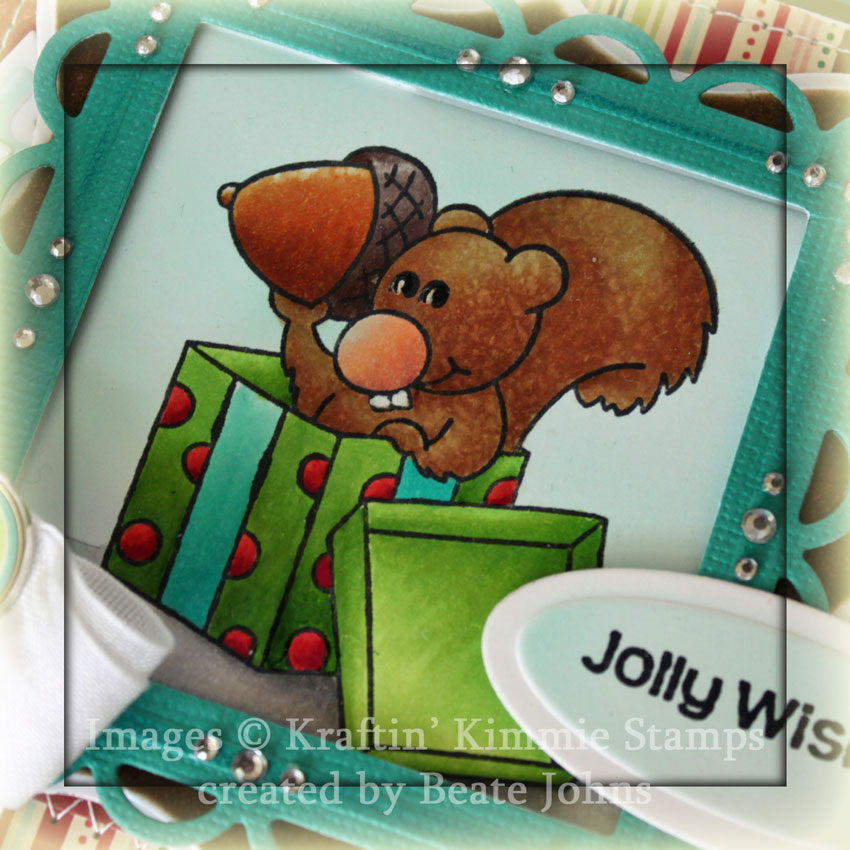
My window was cut and embossed with one of the Fancy Tag dies  from Spellbinders. On the back I added a piece of Acetate to make sure my chocolate would stay inside and not fall out.

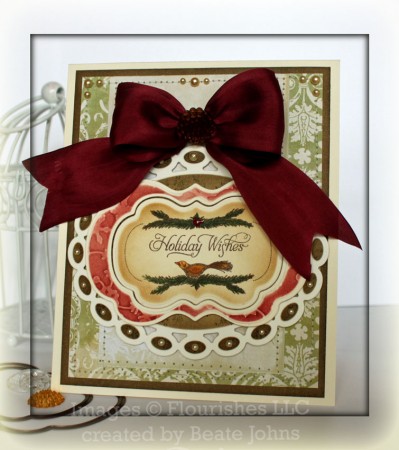
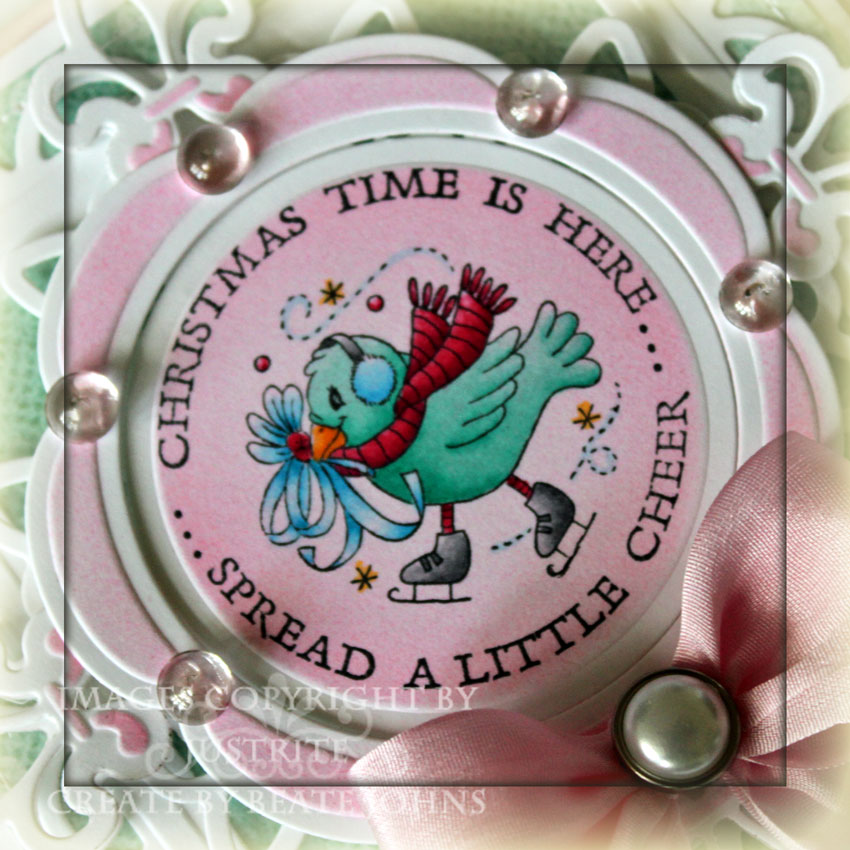
For the pocket card part I used Good Cheer and Very Merry October Afternoon Paper , May Arts crochet lace as well as the new Nested Mitten dies.  The sentiment is from Verve’s Christmas is in the air. It was stamped in Rich Cocoa Memento Ink on a tag cut with another Spellbinders die. The tag was then sponged with Tumbled Glass Distress ink.

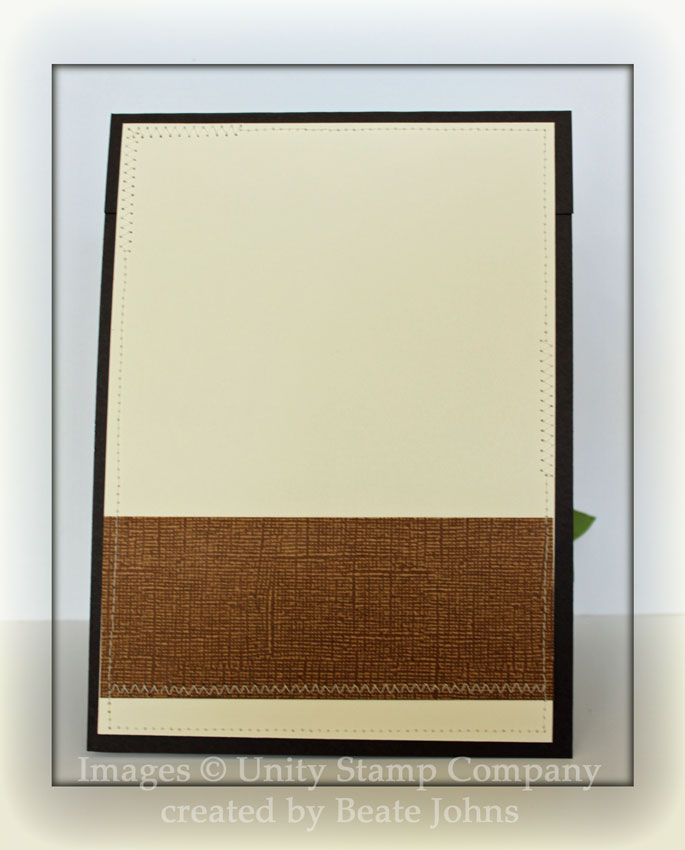
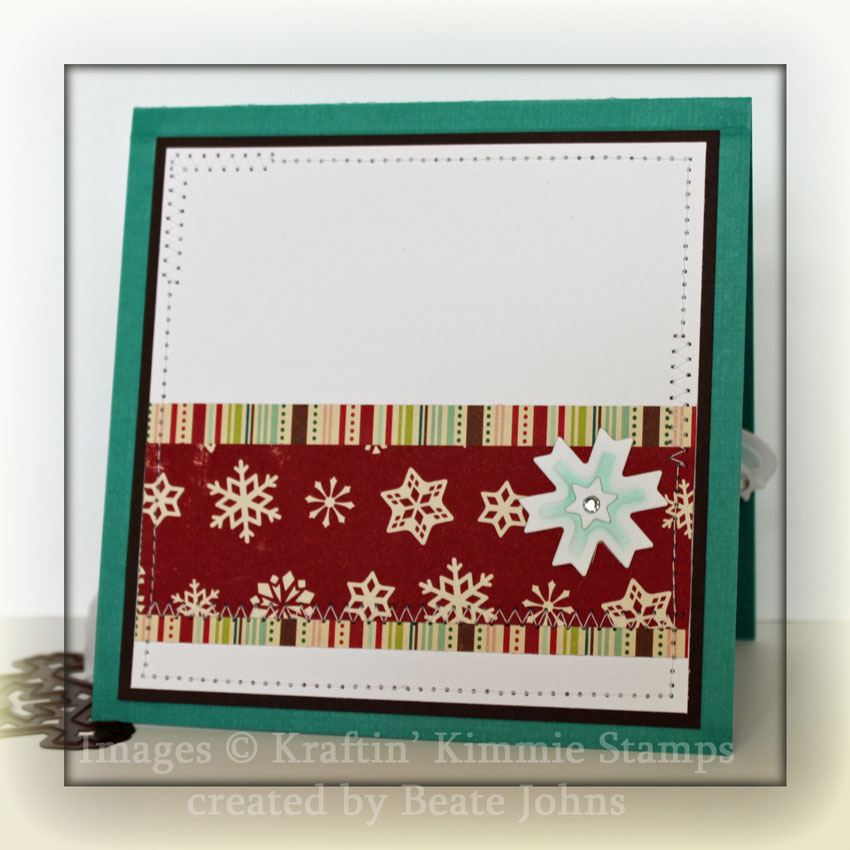
For the back of the pocket I cut and embossed Very Merry October Afternoon Paper. It was adhered to a 3 3/8″ x 4 7/8″ piece of Vanilla card stock. the edges were stitched and the top of the mitten was cut so I could slip a gift card into it.

I hope you have time to try out the new tutotrial! Check back tomorrow for a new project. Thanks so much for stopping by! Have a Happy Halloween! (My kids already went Trick or Treating on Friday. Very strange that we had to do that on Friday instead of today!)

Hugs and smiles

I took a few images to Chicago to color and the new My Favorite Thing Sending You a little Christmas image was one of them. I had stamped it on X-Press it Blending card with Tuxedo Black Memento Ink and colored it with Copic Markers ( Coat: B000, B02, B04  Scarf, hat: RV13, RV14, RV17  Leggings: YG21, YG03, YG25,  Boots and Mitten C1, C3, C5 Skirt: E50, E51, E53). It was cut and embossed with Classic Circle Nestabilities airbrushed with Copic Marker B01. It was then layered first on gray circle cut-out, then on a white Lacey Circle Nestabilities.

I added Polar White Flower Soft as snow on the bottom of the image and fine glitter on the hat and the top of the boots.

The patterned paper used for the bag is from Very Merry October Afternoon. The white cardstock strip was cut and embossed with the Snowflake Borderabilities and airbrushed with Copic Marker B01. I LOVE that border die. It’s big and the snowflakes that are cut out with it are beautiful. I used them (white ones) on the main image topped with Silver Kaisercraft Rhinestones. The gray snowflake was cut and embossed with a die from the Snowflake Pendant dies from Spellbinders.

For the bag holder, I cut two small pieces of gray cardstock in half that they had been cut and embossed with Lacey Nestabilities die.  The crinkled May Arts ribbon was originally white. It had been colored with Copic Marker RV17.

Here is a video for the visual learner:

[youtube]https://www.youtube.com/watch?v=gcTL0gShpLA[/youtube]

I made this card on Wednesday, right before going to the airport. In fact, my husband thought we might miss the plane because I wanted to finish the card before leaving. LOL Well….I made the flight, learned a bunch from Marianne during the intermediate Copic Certification and had a wonderful time hanging out with friends.

But…I didn’t get the card posted yesterday for the challenge. I got back yesterday afternoon and was too lazy to work on the blog post right away, so I am posting it now.

For my card I used darling Oliver. I stamped the image with Tuxedo Black Memento Ink on X-Press Blending Card and colored him with Copic Markers(I am sorry. In the rush to get the card done, I didn’t write the marker codes down.). The Blending card was cut down to 2 5/8″ x 4 5/8″ and stitched on a slightly bigger piece of Basic Black cardstock. Cherry Cobbler Cardstock was cut and embossed with Long Rectangle Nestabilities as the final layer of the main image.

A 4 1/2″ long strip of Neenah White cardstock was cut and embossed with the new Snowflake Borderabilities and airbrushed with a light blue Copic Marker. A 5″ square of Bo Bunny patterned paper was stitched to a 1/4″ bigger piece of Black cardstock. The horizontal strip was adhered to the lower right hand side. The main image was adhered over the horizontal strip with dimensionals.

Orange ribbon was tied into a bow and topped with a light blue Recollection Rhinestone brad and adhered to the end of the horizontal strip. The layers were adhered to a 5 1/2″ x 11″ piece of Neenah Solar White cardstock folded in half.

The small snowflakes were cut-outs from the white strip. They were attached to the card with dimensionals and topped with Silver Kaisercraft Rhinestones. More Silver Kaisercraft Rhinestones were added to the top right of the card to finish it off.

Have a wonderful weekend! Hugs and smiles

This week’s Timeless Tuesday challenge was to focus on a sentiment. I had ordered all the new sets from Flourishes. I just can’t help myself. I LOVE Flourishes stamps. I was itching to use one of the sets. I picked A Gift For You. I love that they are made to fit Spellbinders dies. Talk about combining two of my favorite things.

I cut a frame with two Label 14 Nestabilities out of Cream Neenah Cardstock. Next I embossed the piece with both dies as well as the Snowflake Impressabilities and sponged the frame with both label dies still on there with Fired Brick Distress inks.  I used the smaller cut-out to stamp the image in Rich Cocoa Memento Ink

The image was colored with Copic Markers (Bird: YR21, YR24, YR14, Beak: YR14, YR18 Branch: YG63, YG67). I placed the die back on the cut-out and sponged it first with Antique Linen and then with Vintage Photo.

I cut another piece of Cream Neenah cardstock with the largest Beaded Oval Nestabilities die. It was sponged with Walnut Stain distress ink. The red frame was adhered to the center of the beaded oval with dimensionals, then the image layer was adhered in it’s center. Latte Kaisercraft Pearls were adhered to the beaded ovals.

A 3″ x 4 3/4″ piece of Webster’s pages patterned paper was adhered to a 4″ x 5″ piece of a different pattern of Webster’s Pages paper. The layers were stitched to a 1/4″ bigger piece of Kraft cardstock that had been sponged with Walnut Stain Distress ink.  The card base is 4 1/4″ x 11″ piece of Neenah Cream cardstock folded in half.

Burgundy May Arts Silk Ribbon was tied into a double bow with the Bow Easy and topped with a Webster’s Pages Scalloped Sparkler. More Latte Kaisercraft Pearls finish off the card.

Thanks so much for stopping by! Have a great weekend.
Hugs and smiles

I needed a sample for the Faux Silk technique to shoot the video tutorial. I thought Unity’s Harmonious Sprig would be perfect for this.

I stamped the image in Rich Cocoa Memento Ink on cream Tissue paper and adhered it to a Neenah Natural White cardstock. I used Xyron to add adhesive to the entire piece of cardstock. After the tissue was adhered, it was colored with Copic Markers (Pine Cone: E31, E33, E35 Pine Needles: G24, G28). Tissue paper is very soft, so the color does run a bit. But it helps to have the cardstock underneath. Because of the complete adhesive cover, the ink couldn’t sink in to the cardstock underneath. It was almost like coloring on glossy cardstock.

Canyon Brown Neenah cardstock was cut with the Classic Frame Nestabilities die. I cut it twice, then cut the tops off and adhered them around my image.  Polar White Flower Soft as well as fine glitter was added over the pine cone and olive Silk Ribbon was tied around the center of the image.

A 3″ x 4 1/2″ piece of Webster’s Pages Holiday Paper was adhered to a 4 3/4″ x 6 3/4″ piece of Core’dination cardstock. That was stitched to a 1/8″ bigger piece of Natural White Neenah cardstock. The card base measures 5 1/2″ x 7 1/4″ and was pieced together out of Canyon Brown Neenah cardstock. Latte Kaisercraft Pearls on the bottom left of the image panel and top right corner of the Core’dination cardstock.

Again my inside of the card is super simple. It doesn’t take long, but I like it better then keeping it plain.

Here is a video for the visual learner:

[youtube]https://www.youtube.com/watch?v=KmOBaWi_y-U[/youtube]

Thanks so much for stopping by! Have a wonderful day! I know mine will be. I am in Chicago hanging out with Lori, Jenn and Sharon today. Lori is teaching a Copic Certification. Sharon and Jenn are helping.  Tomorrow is the Intermediate Copic Certification. Marianne is teaching and we are all taking the class. I can’t wait!

Hugs and smiles

Welcome to JustRite Stampers’ newest Wednesday feature, 12 Weeks of Christmas Blog Hops 7!   Every Wednesday up until Thanksgiving some of your favorite designers will be joining some of the JustRite design team for a series of Christmas blog hops, showcasing JustRite’s entire Christmas Collection of stamps!  You also might see some projects from the JustRite design team, using some of their newly released line of CLING stamps!  You can find our new collection of cling stamps HERE.  This week, the designers joining us are most of the Spellbinders and Caardvarks design teams!  So mark your calendars for Wednesdays at 9am Central for great Christmas gift, card & project ideas, starting at the JustRite Inspiration blog!

I had seen a cool layering of Spellbinder dies created by Aga on the Spellbinder blog the other day and had to try it out. Since  I didn’t want to case her completely I used pink as my color, added patterned paper and finished the card differently.

I stamped an image from JustRite Stampers  Whimsical Christmas  in Tuxedo Black Memento Ink on X-Press It Blending card and colored it with Copic Markers (Bird: BG11, BG32, BG13 Scarf: RV14, RV17, RV19 Ribbon: B000, B02, B04 Skates: N1, N3, N5). It was cut and embossed with Classic Circle Nestabilities and it was airbrushed with Copic Marker RV14.

Next I cut a frame with the same Circle Nestabilities die as well as a Blossom Nestabilities. Again it was airbrushed by Copic Marker RV14. Dew Drops from the Cotton Candy bottle I just picked up at my local Scrapbook store.

The layers were added to a piece of Neenah Solar White cardstock cut and embossed Fleur de Lis Pendant. Four small Fleur de Lis pieces were cut, airbrushed and adhered to the big Pendant.

The entire stack was adhered to a frame cut with Lacey Square and Classic Square Nestabilities. A dew drop was added to each corner.

The card base is a 4 7/8″ x 9 3/4″  piece of Pink Pirouette cardstock folded in half.  A 4 3/8″ Pretty Please My Mind’s Eye patterned paper was stitched to a 1/4″ bigger piece of white cardstock. The layers were adhered to the card base.

A bow out of silk ribbon, topped with a Recollection brad finished off the card.

Please visit these designers’ blogs to see what fabulous JustRite Christmas inspiration they have for you on the hop today!

JustRite Inspiration Blog
Spellbinders Blog
Debbie Olson
Kimberly Crawford
Sharon Harnist
Beth Pingry
Amy Crockett
Kellie Fortin
Latisha Yoast
Becca Feeken
Lucy Abrams
Sankari Wegman
AJ Otto
Beate Johns
Heidi Van Laar
Kazan Clark
Julie Overby
Peet Roeven
Michele Kovack
Judy Hayes
Kathy Racoosin
Stephanie Kraft
Terre Fry
Angela Barkhouse
Holly Simoni
Heidi Blankenship

Thanks so much for coming by! Have a fun time blog hopping.
Have a wonderful day! Hugs and smiles

Today Kraftin’ Kimmie Stamps is releasing their new Sweet Holiday October Stamps!  As you’ve seen over the last few days in our Krafty Peeks,  Annie Rodrigue has created some amazing festive characters this month!  There are six images in the complete set and they are Christmas Clara, Nick, Noelle, Merry, Willard and Virginia and each one comes with it’s own matching accessory stamp and a bonus coordinating sentiment!
And Steven Leary is back with Miles the Mouse and his pals, having some jolly winter fun!   You’ll get to check them all out in today’s October release day KRAFTY HOP!!  You’ll meet Miles and Maisie Claus, Squirrel’s Gift, Mistletoe Miles and Maisie, Stocking Miles and Frosty the Snowmouse!
If you want to start from the beginning, just head over to the Kraftin’ Kimmie Challenge Blog!  Or hop on over to the next blog, which is Tracy’s. As you hop from blog to blog, be sure to leave a comment at each and every stop because some lucky stampers will win packages of stamps from the new release!!  And when you’re done hoppin’, be sure to head over to the Kraftin’ Kimmie shop, because ALL the new images are NOW available! 
Also, you’ve been enjoying the ‘Gimme Kimmie’s Kits’ so much, that we’re doing it again!!  For those of you who just HAVE to have all the new images, we’ve got the perfect thing for you!  It’s called the ‘Gimme Kimmies Kit’!!!  Instead of clicking on each image that you’d like, you only have to click once to pick up a Gimme Kimmies Kit AND it’s at a discounted price!!  What could be better???

For my sample I used the stamp Squirrels gift. I just love that little fellow. I stamped the image in Tuxedo black Memento Ink on X-Press It Blending card and colored it with Copic Markers (Squirrel: E31, E33, E35 Nose: E01, E02, E04 Package: YG23, YG25, YG17 Dots: R24, R29, R39 Ribbon: BG34, BG13, BG15 Nut: E97, E99, E74, E77, E79) It was cut and embossed with Classic Square Nestabilities and airbrushed with Copic Marker BG10.

I used the same Classic square die along with Label 16 Nestabilities to create a frame out of Neenah Solar White cardstock. I left the dies on and sponged the frame with Walnut Stain Distress Ink. I cut another frame, this time with Lacey Square Nestabilities and Classic Square Nestabilities out of Core’dination cardstock. I added Tiny Twinkles to the frame.

The card base was cut out the same Core’dination cardstock as the frame. It measures 4 5/8″ x 9 1/4″, folded in half. A 2 3/4″ x 4″ strip of October Afternoon paper was stitched to a 4″ square of My Mind’s Eye paper. The paper was then stitched to a 4 1/4″ square of Canyon Brown Neenah cardstock. Small snowflakes that were cut and embossed with Create-a-Flake 2 dies and airbrushed with Copic Marker BG10. They were topped with another Tiny Twinkle.

The sentiment is from the set Holiday Sentiments. It was stamped in Tuxedo Black Memento Ink on Neenah Solar White cardstock, cut with Petite Oval  Nestabilities and airbrushed with Copic Marker BG10. Another small star (left over from a big snowflake) topped with a Tiny Twinkle was added as embellishment. A bow was tied out of white Linen ribbon , topped with a Mind’s Eye Brad and adhered to the lower right hand side of the frame.

The inside is really simple, just a bit of paper that was used on the outside and another snowflake.

Thanks so much for stopping by.  Have fun blog hopping! Have a great day!
Hugs and smiles

I had a quite a bit of computer problem. It completely crashed and Rick had to reboot it. Now it’s working again, but all my files were lost. I am so getting an automated backup system. I just spend the last hour creating watermarks and editing photos I had already edited. Arggh….computers!

I created this card for Bev’s Hope You can Cling to Challenge.  She asked us to use felt on our project.  First I stamped Miles and Maisie Claus in Tuxedo Black Memento Ink on X-Press It Blending Card. The image was cut and embossed with Classic Circle Nestabilities and colored with Copic Markers (Cheese: Y11, Y15, Y17 Maisies hat: G03, G05, G07 Maisies coat: R35, R37, R39 coat trim: E40, E41 Maisies fur: N1, N3, R20 Maisies nose: R81, R83 Apron trim: Y38, E97 Miles fur: E42, E43 Beard: W00, W1 Coat: R24, R27, R29, R39 Trim: B91, B0000 Gloves: C5, C7, C9 Nose: E04, E07) The image was airbrushed with Copic Marker B91 and Chunky Crystal Crafty Sparkles were adhered to the bottom with Glossy Accents.

I cut green Prisma cardstock with the largest Eyelet Circle and a Classic circle Nestabilities die to create the frame. With the Classic Circle die still on the paper, it was airbrushed with Copic Marker G07.  Next I cut and embossed a frame with the largest Eyelet square and a Classic square Nestabilities die and airbrushed that with Copic Marker B91. For the Eyelet Square, I adhered the circles that were cut out back in to decorate the frame. For the Eyelet Circle frame, I used Snow and Red Kaisercraft Pearls. Small green Kaisercraft pearls were added to the top right and left bottom edge of the square frame.

Red Silk May Arts ribbon was tied into a bow with Bow-Easy, topped with a Recollection Brad and adhered to the top left corner. The sentiment is from Holiday Sentiments. It was stamped in Tuxedo Black Memento Ink on Neenah Solar White cardstock, cut with Petite Oval Nestabilities and airbrushed with B91.

The card base is a 5″ x 12″ piece of blue Core’dinations cardstock folded in half. A 2 1/2″ x 4 1/2″ piece of patterned paper I received last year in one of Taylored Expressions project pantries kit was stitched to a white strip of felt that had been cut with the Scalloped Scallop Die-namics die. That was adhered to a 4 1/2″ x 5 1/2″ piece of the same paper pack. The layers were stitched to a 1/4″ bigger piece of white cardstock.

The inside of the card is kept very simple. Just something to tie it in with the front.

Thanks so much for stopping by! Have a wonderful week (and cross your fingers my computer will not crash again!).

Hugs and smiles

Today’s Kraftin’ Kimmie Challenge is to create a Christmas card with non-traditional colors. I used Clara from the upcoming release for my card.

I stamped Clara in Tuxedo Black Memento Ink on X-Press It Blending card and colored her with Copic Markers (hair: E13, E15, E19, E18 Dress: R81, R83, R85 Skin: E000, E01, Nutcracker: G24, G28, E41, E43, E44, E47, E49, C5, C7, C9, Y26, Y28 shoes: E44, E470.  The cardstock was cut down to 3 1/8″ x 4 3/8″ airbrushed with E51 with the Scallop Frame die from Spellbinders on top of it and layered on Canyon Brown Neenah cardstock, cut and embossed with the same die.

The card base is a 4 3/4″ x 12″ piece of textured Chocolate Chip cardstock, folded in half.  I colored the edges with Copic Marker E49 to make it darker and match the images.

A 3 1/2″ x 4 1/2″ piece of October Afternoon Very Merry paper was stitched to a 4 1/2″ x 5 3/4″ different pattern from the October Afternoon Good Cheer paperMelissa Frances white lace was adhered to the horizontal strip. Over it May Arts White Silk ribbon was tied and topped with a Basic Grey Button.

The sentiment is from Kimmie’s Sassy Sentiments. They just crack me up. The sentiment was stamped on Neenah Solar White cardstock  in Tuxedo Black Memento Ink. It was cut and embossed with Petite Oval Nestabilities and airbrushed with Copic Marker G24. Pink and Silver Kaisercraft Rhinestones finish off the card.

I hope you have time to play! It’s an easy and fun challenge. Have a great weekend!
Hugs and smiles

Wednesday’s tutorial on Splitcoast was written by Julie Warner. She showed us how to create Faux Brads. I made this sample for the video tutorial .

I started out with the darling Fairy Girl from My Favorite Things. It was stamped in Tuxedo Black Memento Ink on X-Press it Blending card. It was colored with Copic Markers (hair: E31, E25, E29 skin: E51, E53 mushroom: R24, R29, R39, E50, E51, E53 shoes: E55, E57, E59 Grass: YG95, YG97, Wings & Wand: B91, B000). It was cut with Classic Circle Nestabilities, airbrushed with Copic Marker B00 and layered on a piece of Canyon Brown Neenah cardstock cut and embossed with Blossom Nestabilities.

A 4″ square of All Fall Fancy Pants paper was stitched to a 1/4″ bigger piece of white cardstock. The card base is a 4 1/2″ x 9″ piece of Red cardstock from MFT folded in half. The two slightly smaller pieces were adhered to the card base and the main image was attached to the layers with dimensionals.

The sentiment is also from the Fairy Girl set. It was stamped in Tuxedo Black Memento ink on a strip of X-Press It Blending card. I was bend into a wavy banner and attached underneath the image with dimensionals.

The Faux Brad was created out of All Fall Paper and cardboard and measures 3/4″. The edges were inked with Walnut Stain Distress ink and the top was clear embossed.  Silver Kaisercraft Rhinestones were added to the top right and bottom left of the card. May Arts Gingham ribbon topped with a Stampin’ Up! Brad was adhered to the upper left side of the image to finish off the card.

Here is a video for the visual learner:

[youtube]https://www.youtube.com/watch?v=aPaVjyIbCWQ[/youtube]

P.S.:
If you have never taken the Copic Certification class and want to check it out, you can get more info on Marianne’s blog. They are still accepting applications for the Chicago class next Thursday, the 21st. Jenn Balcer and I will be there and Lori Craig is the teacher. I can’t wait. It will be so much fun!

Thanks so much for stopping by! Have a wonderful Saturday! Hugs and smiles

© 2012 fresh & fun Suffusion theme by Sayontan Sinha