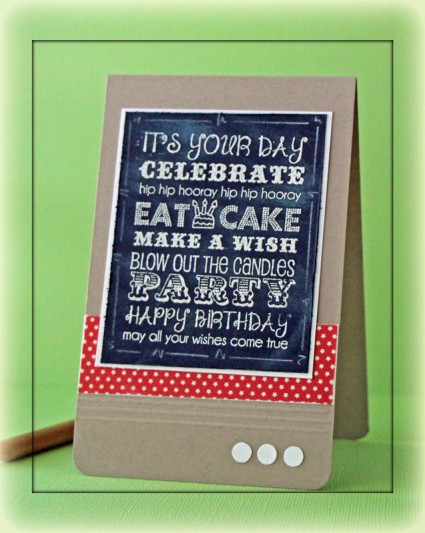
Today’s  Chalkboard tutorial on Splitcoaststampers was created by the wonderful Amy Rohl. I created the video for the technique and this is the sample I created for it.

The card measures 3 1/2″ x 5 1/2″ and was created out of Kraft cardstock. The bottom corners were rounded and some score lines were added with my Scor-Pal.

Taylored Expressions Graphic Birthday Greetings sentiment was stamped in Snow Cap Pigment ink on black cardstock. It was embossed with white embossing powder. The edges were distressed and the layer was adhered to white cardstock. A border was added with a white chalk pencil.

A piece of an old Pink Paislee paper pack was added above the score lines before the image was adhered to the card base. Three 1/4″ white circle punch outs on the bottom right corner finish off the card.

Here is a video for the visual learner:

[youtube]https://www.youtube.com/watch?v=zj1fVfmU5fs[/youtube]

I created this card also as a sample for my Hope You Can Cling to Challenge on Splitcoaststampers. It is the fourth year of our annual card drive to create cards for the MD Anderson Cancer center in Houston. Participate in challenges, send your cards to the hospital and you might win  great prizes from some of your favorite stamp companies. I hope you have time to join us.

Thanks so much for stopping by! Have a wonderful day.
Hugs and smiles

Yesterday we posted a new tutorial and a new Product Focus on Splitcoaststampers. The tutorial was a basic one on Inking with Markers. The product review goes hand in hand with the tutorial and is about the Distress Markers.

[youtube]https://www.youtube.com/watch?v=1mQc_9S5PQs[/youtube]

My son is coming home for Labor Day. I am so excited and can’t wait to cook all his favorite food!  🙂

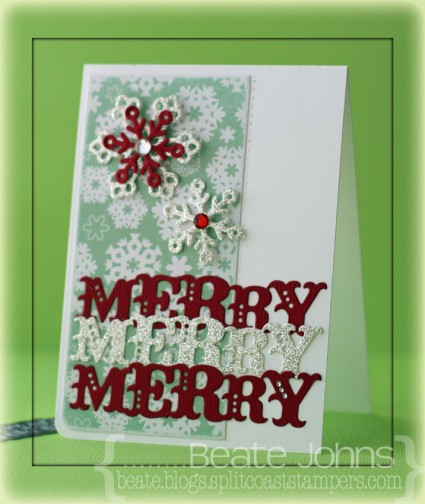
My card today is super easy. I started with a 4″ x 11″ piece of Neenah Solar White cardstock. It was folded in half and the bottom left corner was rounded. One corner of a 2 1/2″ x 5 1/4″ piece of Echo Park’s Holly Jolly Christmas paper was rounded before the edges were sanded. The layer was adhered to the left hand side of the card front.

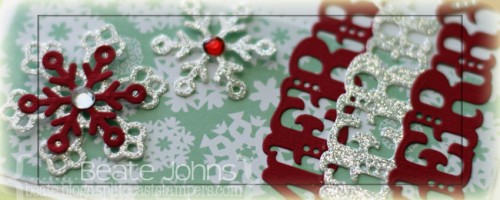
I have had the Taylored die Merry for a while and had to use it before Christmas is over. I like it a lot. I cut two Merry’s out of Red Devil Fourz Bazzill cardstock and one of silver glimmer paper. They were adhered to the lower part of the card base. Three tiny rhinestones were added on the Y of the bottom Merry.

Next I cut and embossed silver glimmer paper and Red Devil cardstock with the two small dies from the 2012 Snowflake Pendant Shapeabilities® die set. The snowflakes were adhered to the upper right hand side of the card front and topped with rhinestones. A paper piercing edge along the paper strip above the sentiments finish off the card.

I want to wish you a Merry Christmas. I hope you have a wonderful time with friends and family! Have a wonderful day!
Hugs and smiles

Today starts our 6th annual Holiday Blitz week on Splitcoaststampers! Every day for the next week a new tutorial will be published with cute Holiday ideas. Check here to find the project galleries (with links to the tutorials) from the previous Holiday Blitz weeks.

The first tutorial was created by the wonderful Deb Felts. Check out here Tiny Triangle Box tutorial.

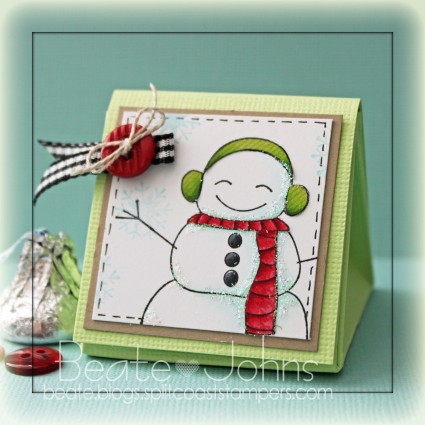
My box base was created out of Limeade Canvas Bazzill cardstock. An image from Taylored Expressions The Cool Crowd was stamped in Tuxedo Black Memento Ink on a 2 11/16″ square of Neenah Solar White cardstock. The image was stamped again on patterned paper from Carta Bella’s Merry & Bright Paper pack. Pieces were cut out and adhered to the image on the white cardstock square. The image was colored with Copic Markers (R32, R35, R39, YG01, YG03, YG17, C5, C7, C9, BG10, BG11) and a border was doodled with a Copic Multiliner. A few snowflake from The Cool Crowd were stamped on the layer with Sea Breeze VersaMagic ink.

The layer was first adhered to a 1 3/4″ square of Kraft cardstock before it was adhered to the box base. Some glitter was added to the snowman and gingham ribbon was tied to a button with Linen Thread and adhered to the upper left side of the image.

Thanks so much for stopping by! Have a wonderful day!
Hugs and smiles

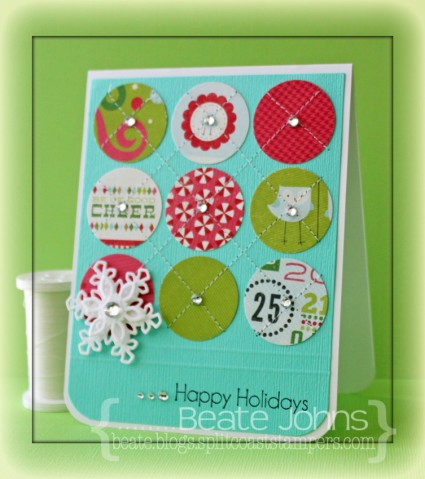
I created this card for last week’s Featured Stamper challenge. I loved this layout from Cheryl’s card and decided to use it and just change it a tiny bit. I changed the colors, the direction of the stitching and made it a Christmas card.

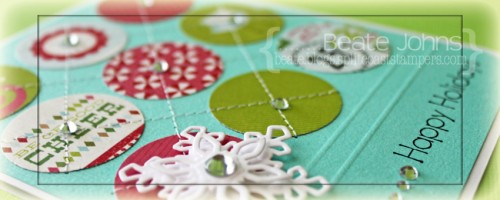
I was too lazy to cut and emboss 9 circles with my Circle Nestabilities, so I used my 1 1/4″ circle punch to cut circles out of Carta Bella’s Merry & Bright patterned paper. They were adhered to the top of a 4 1/8″ x 5 1/4″ piece of Patina Bazzill Cardstock.  Two lines were scored at the 4 1/8″ and 4 3/8″ with my Scor-Buddy. Lines were stitched diagonally through the circles and the bottom corners were rounded.


A sentiment from Taylored  Expressions Very Merry stamp set was stamped on the bottom right corner of the cardstock with Jet Black Archival ink. The layer was adhered to the card base, a 4 1/4″ x 11″ piece of Neenah Solar White cardstock, folded in half.  White cardstock was cut and embossed with two small Create a Flake 4 Spellbinders dies. They were adhered together with more foam adhesive square. A rhinestone was added to the center of the flake. It was adhered to the lower left circle. More rhinestones from a Sleek Strips Silver Rhinestones were adhered in the center of each circle and to the left of the sentiment to finish off the card.

Thanks so much for stopping by! Have a wonderful weekend!
Hugs and smiles

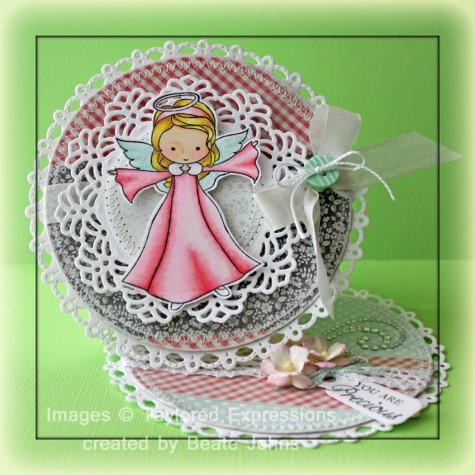
My card today is a multi-tasking card. It is a sample in this week’s tutorial for the Twisted Circular Easel card, a fun variation of the Easel card tutorial that was already in our resource section. It is also a sample for the new Spectrum Noir Marker review on SCS and a sample for Lydia’s HYCCT challenge, which was to create a card that showcases your style.

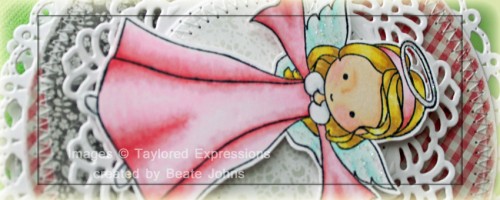
I started by stamping Taylored Expressions Moka Angel image Tuxedo Black Memento Ink on Neenah Solar White cardstock. It was colored with Spectrum Markers (Dress: PP1, PP3, PP5 Skin: FS2, FS3, FS 6 (cheeks), TN2 Wings: BT1, BG2) and cut out.  A piece of white cardstock was cut and embossed with a Vintage Lace Motif die. A piece of My Mind’s Eye Be Happy paper was cut and embossed with a Standard Circle Nestabilities die. The edges were sanded before the circle was stitched to the Vintage Lace circle.  The angel was adhered over the circles with foam adhesive squares. Stardust Stickles was added over the wings and the halo.

My Mind’s Eye Honey patterned paper was cut and embossed with the smallest Grand Circle Nestabilities die. The edges were sanded and stitched. Seam binding was tied around the layer. The bow was topped with a button, tied on with embroidery thread and the layers were adhered to a piece of white cardstock, cut and embossed with the smallest of the Grand Decorative Circle dies.  The image circles were adhered to the card front center with foam adhesive squares.

The inside of the card was also decorated with Honey patterned paper that had been cut and embossed with a Grand Circle Nestabilities die. White Crochet Ribbon was adhered around the horizontal strip before the layers were stitched.  White cardstock was cut and embossed with a tag die from the new Back to the Basic tag dies. A sentiment from Moka Angel was stitched on it with Jet Black Archival ink. Flowers and part of a Finesse Rhinestone Swirl finish off the card.

Here is a video for the visual learner:

[youtube]https://www.youtube.com/watch?v=1RoUVh0l8yM[/youtube]

Thanks so much for stopping by! Have a great day!
Hugs and smiles

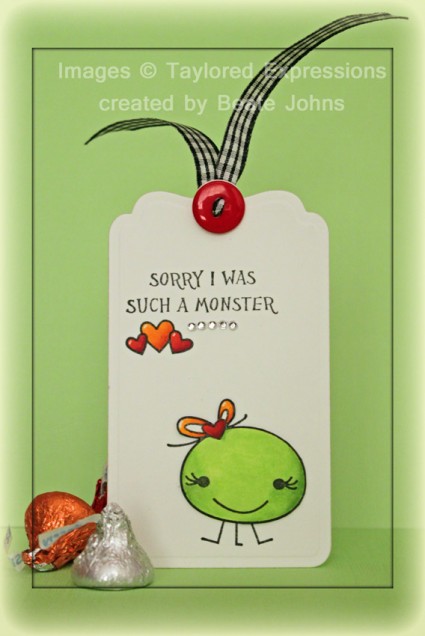
The next challenge during VSN was to create a project that has at least three R’s in it. For me I picked

Ribbon – Rhinestones – Red

I made a quick little tag with Taylored Expressions Love Monsters. A monster, a sentiment and a few hearts were stamped on a piece of Neenah Solar White cardstock in Tuxedo Black Memento Ink, that had been cut and embossed with one of Spellbinders Tags & Flags die. The images were colored with Copic Markers (YG01, YG03, R05, R27, R39, Y17, YR15, YR18).

The tag was finished up with a few Rhinestones from a Sleek Strips Silver Rhinestones pack, a button and May Arts Ribbon.

Thanks so much for stopping by!
Hugs and smiles

On Wednesday a new Product Focus was published on Splitcoaststampers. This time we got to review the Perfect Squares Tool. So when I was creating a card for last Sunday’s Featured Stamper Challenge, I used that tool to cut and score my layers.

The Featured Stamper was Angela R. I hope you have time to check out her gallery on SCS. She creates beautiful cards. For my case I chose this cad of hers. I kept the layout, but changed the topper and the ribbon. I also added a little bling. Just a little. 🙂

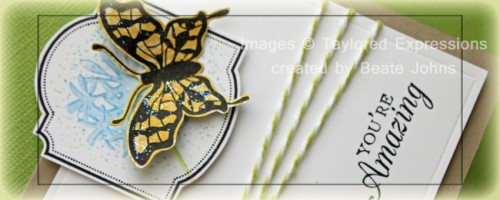
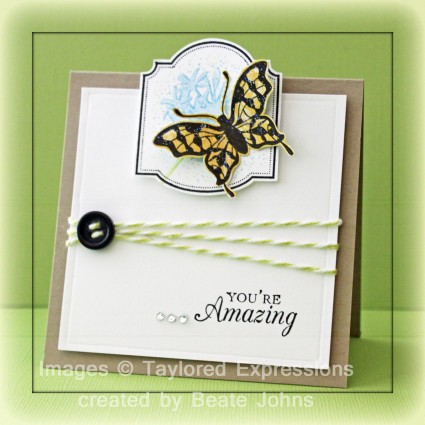
I started by stamping the Butterfly from Taylored Expressions Make it Amazing in Jet Black Archival Ink and cut it out. The frame from the same set was stamped with Jet Black Ink on Neenah Solar White cardstock. The frame was hand cut before a flower image was inked with Sky Blue and New Sprout Memento Markers and stamped in it’s center. A few dots in each color were added before the butterfly was adhered over the flower with Scor-Tape (under the body), and double stacked foam adhesive (under the wings).

A 3 1/4″ white cardstock square was cut and a border was embossed 1/8″ in. A sentiment from Make it Amazing was stamped to the lower right side with Jet Black ink. Honeydew Twine was threaded through a black button and tied around the layer before it was adhered to the card base with dimensional. The card base is a 3 3/4″ x 7 1/2″ piece of Kraft cardstock, folded in half.

The image layers were adhered to the card with foam adhesive squares. Three rhinestones from a Sleek Strips Silver Rhinestone and Frost Smooch Glitz over the butterfly finish off the card.

Thanks so much for stopping by! Have a wonderful day!
Hugs and smiles

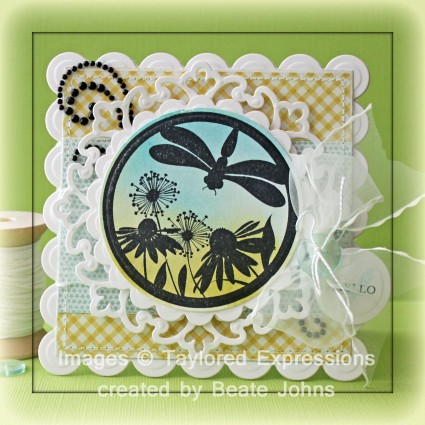
In today’s Weekly Inkling we had the Smackin’ Acetate technique as the technique from the Archive. It was a tutorial I wrote a long time ago and needed an update BAD.

For my sample I used my new Distress Markers (Wild Honey, Shabby Shutter and Tumbled Glass) on Whisper White cardstock. I tried it with Neenah and Glossy cardstock, but Neenah was too soft and Glossy to slick. Whisper White seems to work best.

Once the background was dry, an image from Taylored Expressions Embrace Beauty was stamped over it withJet Black Archival ink. The image was cut out with a  Standard Circle Nestabilities die. The image was layered  first on a piece of Neenah Solar White cardstock cut and embossed with a Scalloped Circle Nestabilities die, then on more Solar White cardstock, cut and embossed with one of the Parisian Motifs die.

A strip of  My Mind’s Eye Follow your Heart Be Amazing patterned paper was adhered to a bigger square of the same paper pack. The paper was cut and embossed with one of the  Grand Square Nestabilities die. The edges were sanded and stitched.May Arts ribbon was threaded through the bigger layer before the layers were adhered to the patterned paper with dimensionals. The layers were then adhered to the card base, Solar White cardstock, cut and embossed with a Grand Scallop Square Nestabilities die.

A sentiment from Make it Amazing was stamped in Jet Black Archival Ink on a piece of Solar White cardsttock cut and embossed with a Home Sweet Home die pack. It was tied to the bow with embroidery thread and a button. Parts of a black Finesse Rhinestone swirl finish off the card.

Here is a video for the visual learner:

[youtube]https://www.youtube.com/watch?v=7CoGjuqa1nw[/youtube]

Thanks so much for stopping by! Have a wonderful day.
Hugs and smiles
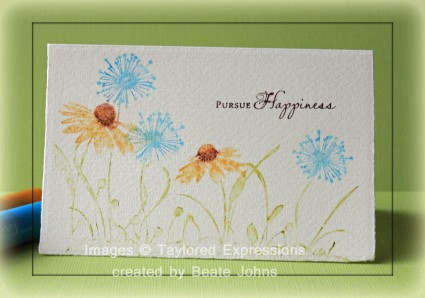
For the Product Review last week, Rose Ann wrote a tutorial on how to stamp with Gelatos. That is so much fun and an easy way to create a water colored look.

For my sample I used Taylored Expressions Discover your Wings stamp set. I used yellow, brown, pistachio green and blue metallic gelatos and stamped it on a Fabriano Notecard. I added detail to the flower center with  Nougat and Sepia Big Brush pen. I immediately went over it with a watercolor brush to soften the dots I added to a subtle shadow. The sentiment was inked with the Sepia Big Brush pen and stamped to the upper right.

Here is a video for the visual learner:

[youtube]https://www.youtube.com/watch?v=Qf_QKqJLN6o[/youtube]

Thanks so much for stopping by! Have a wonderful day!
Hugs and smiles

© 2012 fresh & fun Suffusion theme by Sayontan Sinha