I have another card to show you with the new Ali Edwards Be Mine stamp set.  I started by stamping five hearts from the set in Tuxedo Black Memento Ink in the center of the card base,  a 5 1/2″ x 7″ piece of Neenah Solar White cardstock , folded in half. The bottom right corner was rounded.

Hearts were stamped on Handmade Lilybeedesigns paper. The hearts were cut out and adhered over the ones on the heart base. Lines were scored above and underneath heart row.  Parts of two sentiment were inked up and stamped underneath the lower score lines.

A small strip of Arrow Washi tape was added on the top left of the card. A button as well as Want2Scrap rhinestones finish off the card. Thanks so much for stopping by today!
Hugs and smiles


It’s time for me to share with you another card made with the new Ali Edwards Be Mine stamp set. I started with a 3″ x 5″ piece of  Neenah Solar White cardstock. I cut the circle border die at an angle across the width of the layer. Above and underneath the border cut I scored two lines with my Scor-Pal.

A piece of Echo Park So Happy Together was adhered behind the circle border. The words of one of the sentiments were inked up separately with Tuxedo Black Memento Ink and stamped above and underneath the border.  The top right and bottom left corner were rounded. Silver cord was wrapped above the top of the border and topped with a button.

The layer was adhered to a slightly bigger piece of black cardstock, before it was adhered to the card base, a 3 1/2″ x 11″ piece of Kraft cardstock, folded in half. A heart from Be Mine was stamped with Tuxedo Black ink on So Happy Together patterned paper, cut out and adhered to the lower right of the card. Rhinestones next to the heart and happy finish off the card.

I hope you have time to check out everyone else’s work with this set. Comment on each blog and you might win a $25 gift certificate for the Technique Tuesday store!!!


Thanks so much for stopping by! Have a wonderful day!
Hugs and smiles

I created this card for the wonderful Bev Rousch’s Hope You Can Cling to Challenge “Shine It Out!” back in October. I was cyber stamping with Tami Mayberry a little while ago and we created cards fro the same challenges. I thought it was only right to use one of her stamp sets for my sample.

Just before that, I had found a new challenge blog with a wonderful sketch and I wanted to use that for my card. My card base is very basic, a 4 1/4″ x 11″ piece of Neenah Solar White cardstock, folded in half. The bottom corners were rounded.

I started by inking the heart from Hopeful Hearts first with Versamark ink, then with Memento’s Rosebud ink. It was then embossed with iridescent Ice Embossing powder to add sparkle. Next I stamped the solid circle from GKD Inspiration Mosaic in Pear Tart Memento Ink 3 1/2 times on the left and once on the right of the heart. A sentiment from Hopeful Hearts was stamped over the circles on the left in Jet Black Archival ink.

I scored one line under the shapes and two lines above. Beautiful Bling Border – Beautiful Bloom was added above the top score line. 5 Rhinestones from a Sleek Strips Silver Rhinestones were adhered to the bottom right and one above an i in the sentiment to finish off the card.

Thanks so much for stopping by!
Hugs and smiles


Today’s Holiday Blitz tutorial is written by Susan Culotti. She shows us how to create a flip top box (like it’s used for cigarettes or crayons). I shot the video and created this box as a sample.

My box base is a piece of Kraft cardstock. The patterned paper used to decorate the box is from Carta Bella’s Winter Fun patterned paper. Holiday Apothecary Labels stamps and dies were used to dress up the box.  Rhinestones from Sleek Strips Silver Rhinestones finish off the box.

Here is a video for the visual learner:
[youtube]https://www.youtube.com/watch?v=5M9mODY5weM[/youtube]

Thanks so much for stopping by! Have a wonderful day!
Hugs and smiles

I created this card for a Featured Stamper challenge last month. Cheryl has such a wonderful gallery, I wanted to case another card of hers. This time I chose this CAS washi tape card.  I created my Washi Tape strips out of Tissue Stock from Canvas Corp. I cut strips in different sizes.

The biggest strip was stamped with the the smallest diamond images from Distressed Diamonds stamp set in Pear Tart Memento Ink. The thin strip was stamped with the snowflake background from Christmas Ornaments in Bahama Blue Memento Ink.  The last strip was sponged with Pear Memento Ink and stamped with a background stamp from By the Numbers in Jet Black Archival ink.

The card base is a 3 1/2″ x 11″ piece of textured Whisper White Stampin’ Up! cardstock folded in half. The bottom corners were rounded. A line was scored at 3/4″ on the bottom. Then the Faux Washi tape strips were adhered with a Xyron glue stick. Another line was scored right above the tissue strips, as well a partial strip 1/8″ under the lower score line.

A sentiment from Merry Kissmas was stamped on the right hand side partially on, partially off the highest tissue paper strip.  Neenah Solar White cardstock was cut with the two largest Let it Snowflake die-namic dies. They were stacked with foam adhesive squares and topped with a button.

Thanks so much for stopping by today! Have a wonderful day!
Hugs and smiles


P.S.: Today’s Holiday Blitz Tutorial on Splitcoaststampers was written by the wonderful Clare Buswell. She is showing how to create a pierced Luminaria.  I hope you have time to check it out!

Today starts our 6th annual Holiday Blitz week on Splitcoaststampers! Every day for the next week a new tutorial will be published with cute Holiday ideas. Check here to find the project galleries (with links to the tutorials) from the previous Holiday Blitz weeks.

The first tutorial was created by the wonderful Deb Felts. Check out here Tiny Triangle Box tutorial.

My box base was created out of Limeade Canvas Bazzill cardstock. An image from Taylored Expressions The Cool Crowd was stamped in Tuxedo Black Memento Ink on a 2 11/16″ square of Neenah Solar White cardstock. The image was stamped again on patterned paper from Carta Bella’s Merry & Bright Paper pack. Pieces were cut out and adhered to the image on the white cardstock square. The image was colored with Copic Markers (R32, R35, R39, YG01, YG03, YG17, C5, C7, C9, BG10, BG11) and a border was doodled with a Copic Multiliner. A few snowflake from The Cool Crowd were stamped on the layer with Sea Breeze VersaMagic ink.

The layer was first adhered to a 1 3/4″ square of Kraft cardstock before it was adhered to the box base. Some glitter was added to the snowman and gingham ribbon was tied to a button with Linen Thread and adhered to the upper left side of the image.

Thanks so much for stopping by! Have a wonderful day!
Hugs and smiles

Today’s tutorial on Splitcoast is written by the wonderful Stacy Morgan. She is showing us how to create little treat holder that look like Hershey’s Kisses. I shot the video and create a Halloween treat holder…What else but a Halloween project can I showcase today, right?

I started by cutting two hearts out of Kraft cardstock with the largest of the Classic Heart Nestabilities dies. They were first stamped with the smallest Distressed Diamonds background in Cloud White VersaMagic Ink. Once that dried, I stamped the star banner from Primitive Pumpkins over it in Jet Black Archival ink.

A pumpkin was cut out of Neenah Solar White cardstock with one of the Primitive Pumpkin Die-namic dies, and one of the pumpkins was stamped over it in Tea Leaves and Pumpkin Spice VersaMagic Ink. Lizard Bazzill Textured Cardstock was cut with the Flourish Die-namics die. The flourish and the pumpkin were adhered to the treat holder front and a button was tied to the pumpkin with silver cord.

A sentiment of the Primitive Pumpkins set was stamped in Jet Black Archival Ink on a white strip of cardstock and tied on to the Hershey’s Kiss with more silver cord.


Here is a video for the visual learner:

[youtube]https://www.youtube.com/watch?v=gpXJFFNNEfo[/youtube]

Thanks so much for stopping by! Have a wonderful Halloween!
Hugs and smiles

Welcome to the Whimsy Stamps October 2012 rubber stamp and die RELEASE (Holiday Collection Part 2)!

Today, Whimsy Stamps is releasing 23 fantastic new rubber stamps & stamp sets, 5 wonderful new Shapeology dies, 2 fabulous new Shape EZ templates and 2 beautiful 6×6 paper packs. These new goodies are available to buy right now from the Whimsy Stamps store along with all your Whimsy favorites.

From today until 30 October the Whimsy DT and Special Guests will be showcasing these new products with a daily mini blog hop. Each mini blog hop has a new release prize hidden somewhere along the way and you have 24hrs to enter each prize draw by leaving a comment on every blog listed for that day.

At the end of release week (Wednesday 31 October) we will post a Release Round-Up on the Whimsy blog. This will include a selection of DT work from the new release week together with a complete list of winners from the daily mini blog hops.

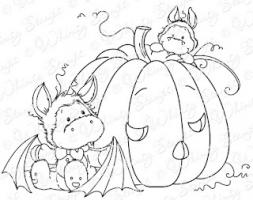
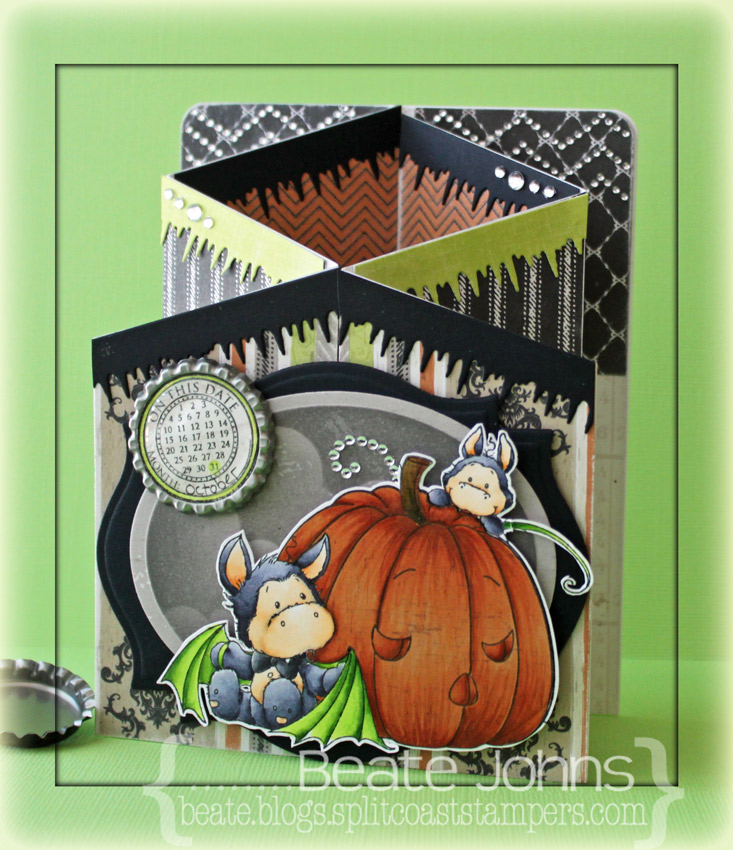
For my first sample I chose the adorable Wee Boo image. It’s so cute, I can’t stand it. I stamped it in Tuxedo Black Memento Ink on Neenah Solar White cardstock . It was colored with  Copic Markers (Little Dragons: BV20, BV23, BV25, BV29, E50, E51, E53, R20   Pumpkin: E95, E97, E99   Wings: YG01, YG03, YG17   Bow: C5, C7, C9) and cut out.  The image was stamped again on Echo Park’s Chillingworth Manor patterned paper, colored , cut out and adhered to the main image.

Another piece of Chillingsworth Manor was cut and embossed with the largest of the Classic Oval LG dies. Cloud dies (cut with Spellbinders Whimsy dies) were adhered over it and the layer was sponged with Gray Flannel Memento ink. It was then layered on a piece of black cardstock, cut and embossed with the largest Label Eighteen die. The image was adhered over the spooky background with  foam adhesive squares.

Last week’s tutorial on Splitcoast was so much fun, I had to make another Concertina card. The card base was created with Neenah Solar White cardstock and lined with more Chillingworth patterned paper. Black and green paper were cut with Icicle Border  die and adhered to the top. I think it could be used for “goo” as well as icicles.

The date circle is from Everyday Circle Postmarks and was stamped in Tuxedo Black on more Chillingworth paper. It was cut out and the 31st as well as a circle border were colored with Copic Marker YG01. I ran a bottle cap through my Grand Calibur (cutting plate and Raspberry adapter plate) to flatten it, adhered the sentiment in the center and topped it with a Epoxy Dot. It was adhered with foam adhesives to the upper left hand side of the image.

Part of a Finesse Rhinestone swirl,  a few rhinestones from a Sleek Strips Silver Rhinestones and a few rows of a Beautiful Border Bling – Chevrons finish off the card. In case you missed it last week, here is a video for this fold for the visual learner:

[youtube]https://www.youtube.com/watch?v=Whpy-eDRcac[/youtube]

Thanks so much for stopping by! Have a wonderful day!
Hugs and smiles

To be entered into today’s mini blog hop prize draw, be sure to leave a comment on ALL of the DT posts listed below by 12:00PM EST tomorrow:

Finally, here is a full reveal of the wonderful October release. Don’t forget to visit today’s DT and leave a comment on their blog posts to be entered into the draw to win a new release stamp!

[Please note that the following pictures are not to scale]
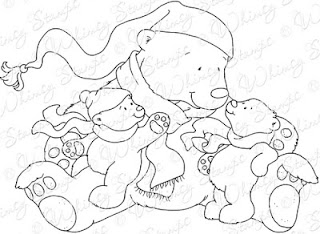
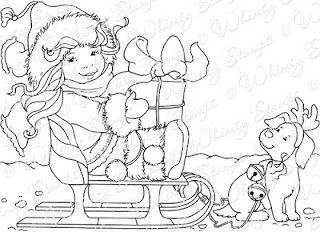
4 Crissy Armstrong rubber stamps
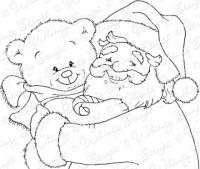
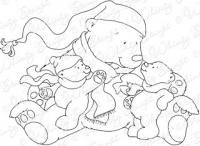
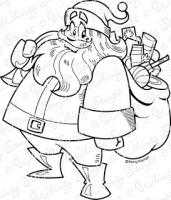
Crissy Armstrong ~ Santa & Teddy ~ Sheltering Love ~ The Littlest Reindeer 

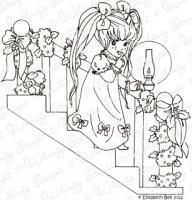
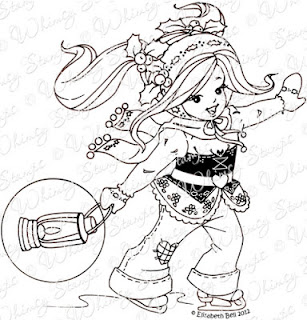
4 Elisabeth Bell rubber stamps
Apple Blossom’s Skates ~ Chloe’s Little Light ~ Little Jack Drumming ~ Sunkissed’s Christmas Tree


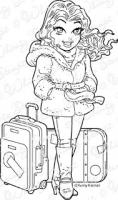
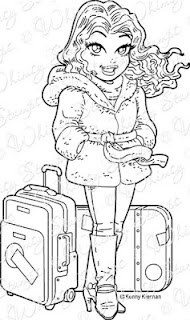
4 Kenny K rubber stamps
Fashionista ~ Jet Setter ~ Santa ~ Xmas Shopping

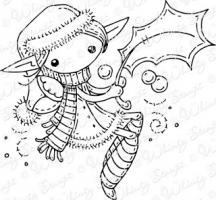
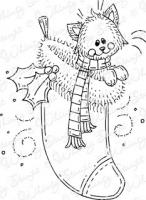
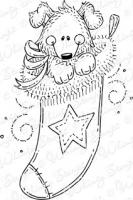
3 Meljen’s Designs rubber stamps
Holly Christmas Fairy ~ Stocking Kitten ~ Stocking Puppy

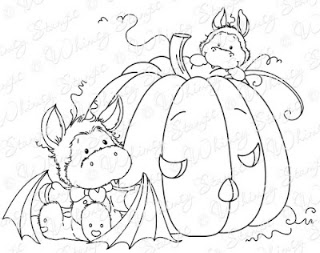
3 Sylvia Zet rubber stamps
Batty Boo ~ Birthday Baby Girl ~ Ruby Whimsy

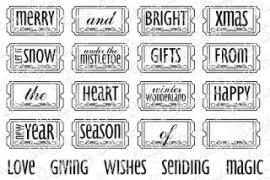
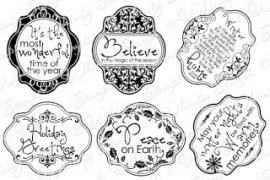
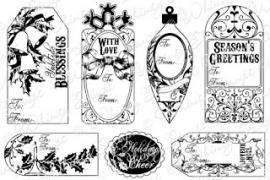
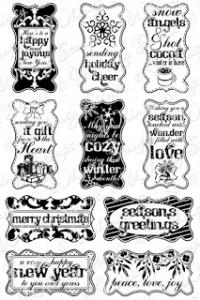
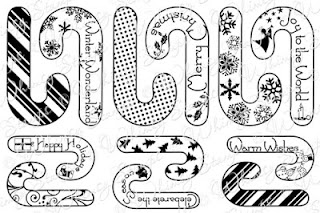
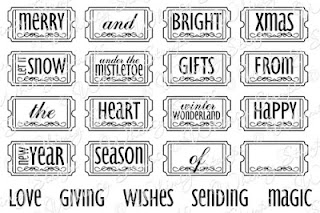
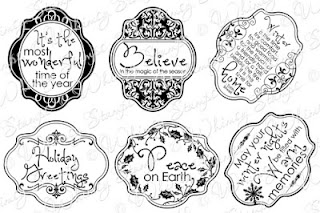
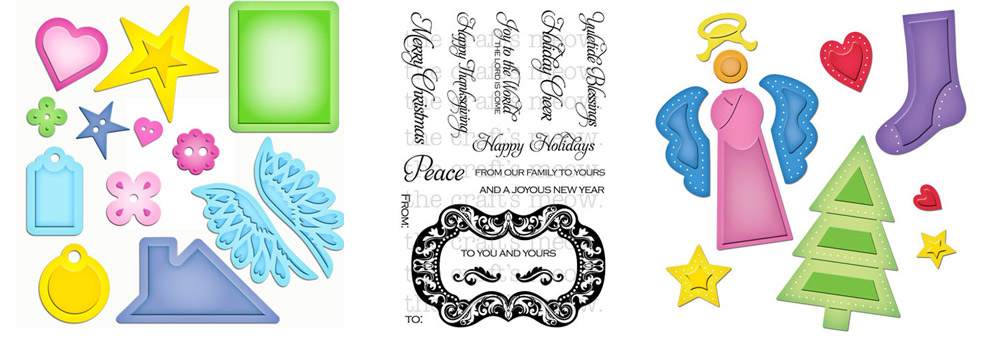
5 Raindrop Echo Designs rubber stamp sets
Candy Canes ~ Holiday Mini Tickets ~ Tis The Season Notables 5 ~ Vintage Holiday Gift Tags ~ Holiday Notables 3
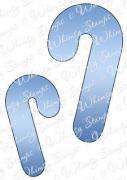
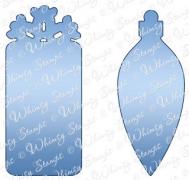
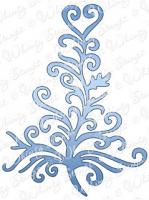
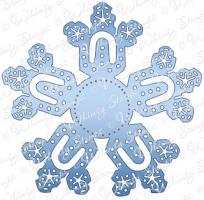
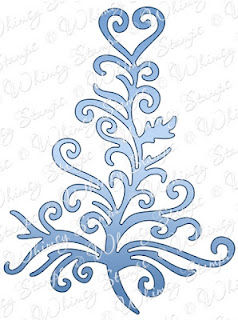
5 Shapeology dies
Candy Canes set ~ Holiday Gift Tags set ~ Christmas Tree ~ Holiday Sentimentables set ~ Snowflake Doily
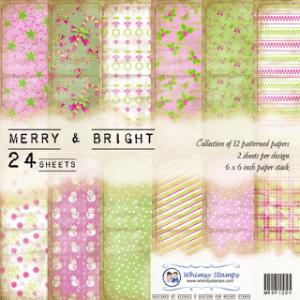
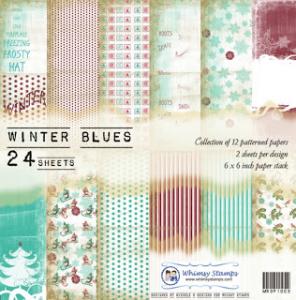
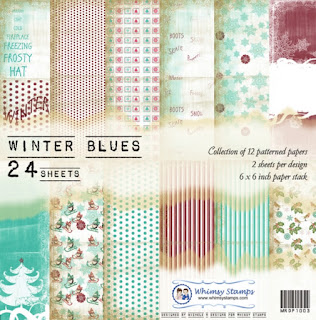
2 6×6 Paper Stacks
Merry and Bright ~ Winter Blues

24 sheets per pack – 12 designs, 2 of each printed on heavy weight slightly textured papers.
Acid and Lignin free.

2 Shape EZ by TLC templates
Snowflake Card ~ Snowy Ball

Thanks so much for stopping by and I hope you enjoy our new release!
Have a great day! Hugs and smiles

P. S.: How about a little giveaway? Would you like to win last month released Hazel and the Whimsy Halloween Grunge Paper? If so, just add your name to the inlinkz underneath. Open only for people with US address. Sorry.

I will pick a winner with the help of random.org on Sunday!


I created this card for last week’s Featured Stamper challenge. I loved this layout from Cheryl’s card and decided to use it and just change it a tiny bit. I changed the colors, the direction of the stitching and made it a Christmas card.

I was too lazy to cut and emboss 9 circles with my Circle Nestabilities, so I used my 1 1/4″ circle punch to cut circles out of Carta Bella’s Merry & Bright patterned paper. They were adhered to the top of a 4 1/8″ x 5 1/4″ piece of Patina Bazzill Cardstock.  Two lines were scored at the 4 1/8″ and 4 3/8″ with my Scor-Buddy. Lines were stitched diagonally through the circles and the bottom corners were rounded.


A sentiment from Taylored  Expressions Very Merry stamp set was stamped on the bottom right corner of the cardstock with Jet Black Archival ink. The layer was adhered to the card base, a 4 1/4″ x 11″ piece of Neenah Solar White cardstock, folded in half.  White cardstock was cut and embossed with two small Create a Flake 4 Spellbinders dies. They were adhered together with more foam adhesive square. A rhinestone was added to the center of the flake. It was adhered to the lower left circle. More rhinestones from a Sleek Strips Silver Rhinestones were adhered in the center of each circle and to the left of the sentiment to finish off the card.

Thanks so much for stopping by! Have a wonderful weekend!
Hugs and smiles

Hello, friends! After a much needed summer break, the NinaB Designs team is back to showcase some of Nina‘s designs for our monthly hop. Make sure you check out the new Summer CHA Releases by Spellbinders, Want2Scrap and Penny Black, and her monthly release by The Craft’s Meow.
For this month’s hop, Nina challenged us to create something with gift-giving in mind. For my project I decided to create a tag and a matching small box. You can find the tutorial for the box HERE.

I started by creating a tag. The tag base was cut and embossed out of Kraft cardstock with a die from Tags & Flags. My Mind’s Eye Winter Wonderland paper was cut and embossed with the same die, sanded and cut down on the embossed edge. 3/8″ wide strip of paper from the same paper pack was added before the edges were stitched and seam binding was tied around the paper. It was then adhered to the tag base.
More Winter Wonderland paper was cut and embossed with the tree die from Sweet Folk Art. A small piece of Kraft cardstock was cut and embossed with the same die to create the tree stem. Buttons were stitched to the tree. Handmade Lilybeedesigns paper was cut and embossed with the small star from Sweet Folk Art, sanded and adhered to the top of the tree.
Neenah Solar White cardstock was cut and embossed with the rectangle tag die from Home Sweet Home. A sentiment from The Craft’s Meows Season’s Greetings in Jet Black Archival Ink. It was tied to the seam binding bow along with a button with Linen Thread.  Part of a Finesse Rhinestone Swirl above the bow and three small rhinestones from a Sleek Strips Silver Rhinestones on the bottom left were added to finish the tag.
The box base was created out of Kraft cardstock and was decorated with more Winter Wonderland paper and seam binding. The top corners were cut with Crop-a-Dile Cloud Chomper. Another sentiment from Season’s Greetings was stamped on Solar White cardstock, cut and embossed with a  Nested Lacey Pennant die. Again part of a Finesse Rhinestone Swirl and rhinestones from a Sleek Strip Silver Rhinestones on the bottom left were added to finish the box.
Hershey Nuggets were covered with 1″ wide strips of the Winter Wonderland paper. If I had some Candy Canes, I think I would have added those to my box, but it’s a bit too early to find those in the stores.


Here are these NinaB. Designs products I used for my project:
To welcome you back to our hop, we are giving away these TWO PRIZE PACKAGES:
Prize #2 includes The Craft’s Meow’s Vintage Rides and Retired Layers of Colors Dotted Dahlias and Dotted Peonies Stamp sets:
Winners will be picked randomly from 2 of the designers’ blogs:
Nina
Brackett
* Beate Johns
(you are here!) * Beatriz
Jennings
* Clare Buswell * Heather Jensen * Jennie
Harper
* Julie Overby * Lea Lawson * Linda LucasViola
Mahr

Everybody is welcome to comment and eligible to win. Nina will announce the winners on  September 22 on her blog.
Finally, please consider liking the following Facebook pages that are represented on today’s hop, so you don’t miss the latest news and happenings: 


I hope we’ll inspire you all today! Happy hopping! Thanks so much for stopping by! Have a wonderful day!
Hugs and smiles 

© 2012 fresh & fun Suffusion theme by Sayontan Sinha