It’s my turn to share on the Spellbinders blog. Today I have a video tutorial for a tri-fold gift card holder created with the new A2 Bracket Border dies. I hope you have time to check it out and let me know what you think.

Have a wonderful weekend!
Hugs and smiles

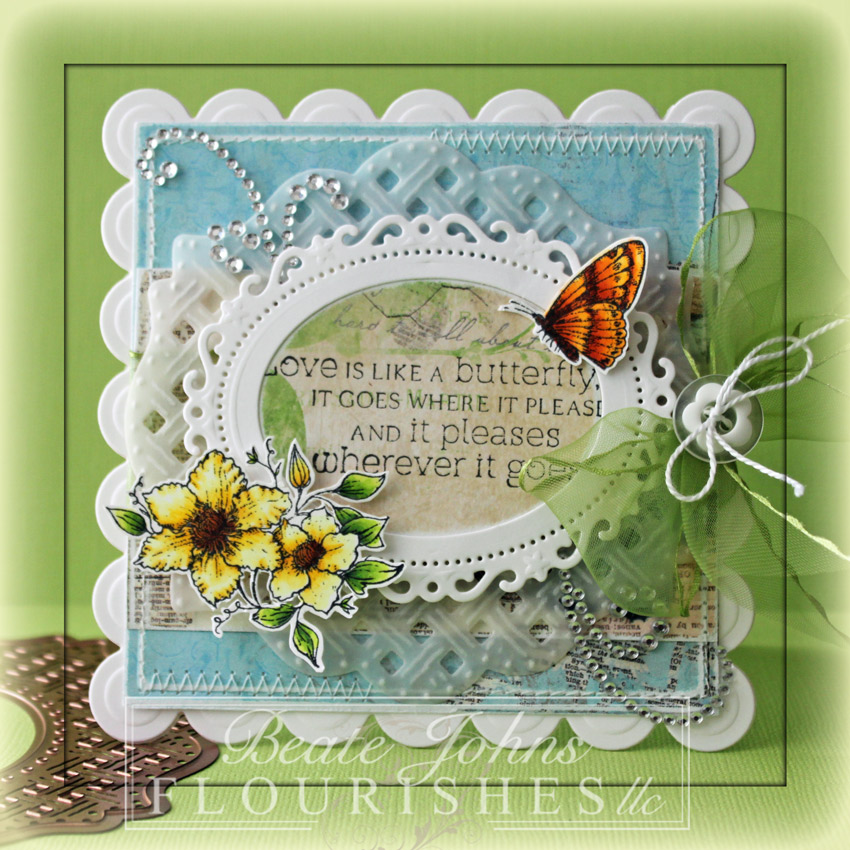
I am excited to be participating in the Spellbinders™ Spring Blog Hop today. My assignment was to create a card with two or more of the gorgeous Classic Insert 4 dies. I love the look the inserts create along with the Classic Edge dies. But I had never used them without a cutting edge. I used all three insert dies without a cutting edge and I really like how it turned out.

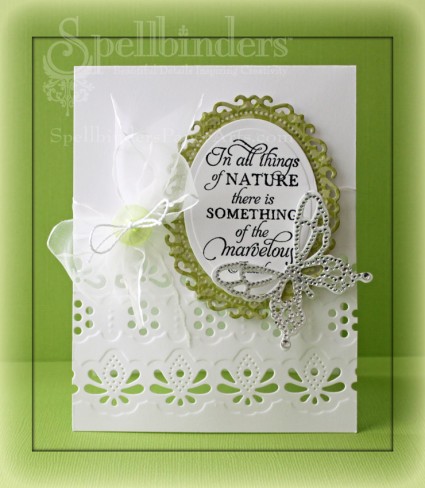
Spellbinders Paper Arts Supply List:

Cross Promotional Partner:

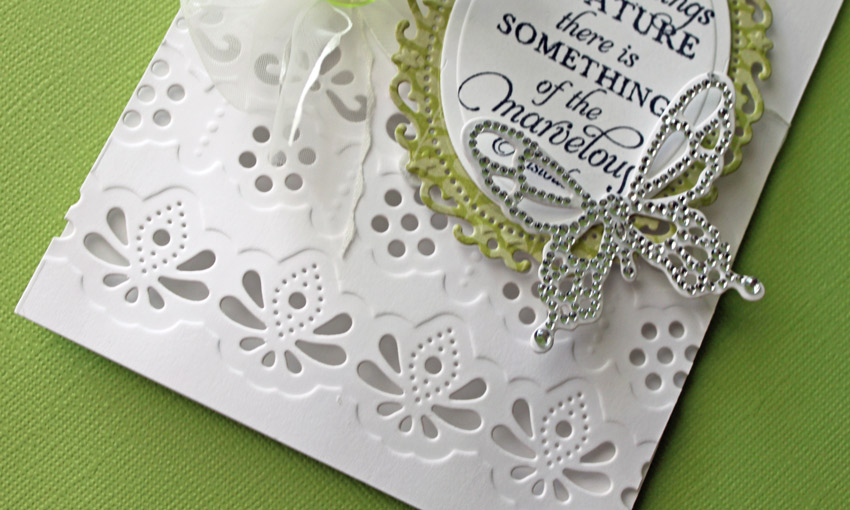
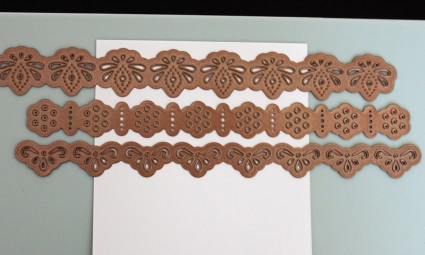
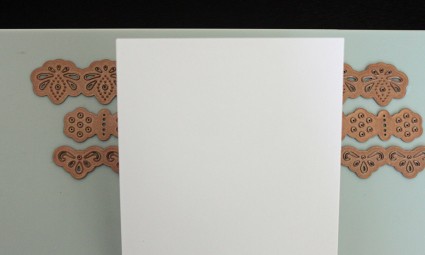
I started by laying down the card base on my base plate. I arranged the Classic Decorative Inserts Four dies over the bottom of the back of the card base. (I placed the the back of the card underneath the dies, because the inserts are 8″ long. The way I arranged the dies I had to place them the long way on the base plate. Since the card base is 11″ long, it wouldn’t fit any other way).

I folded the card front over the dies and cut and embossed the card front.

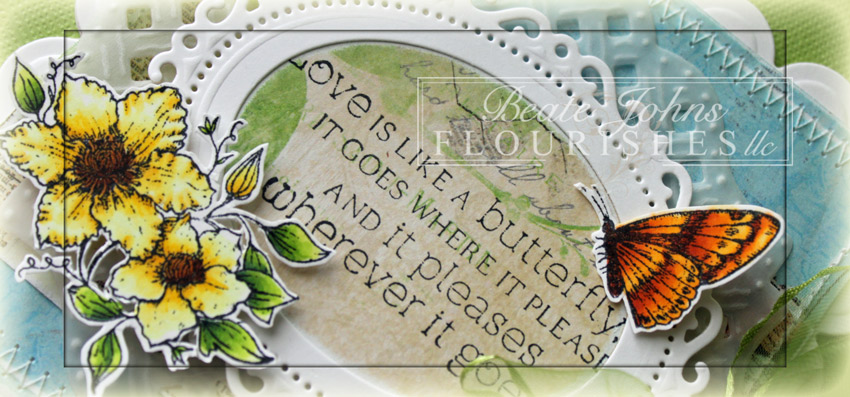
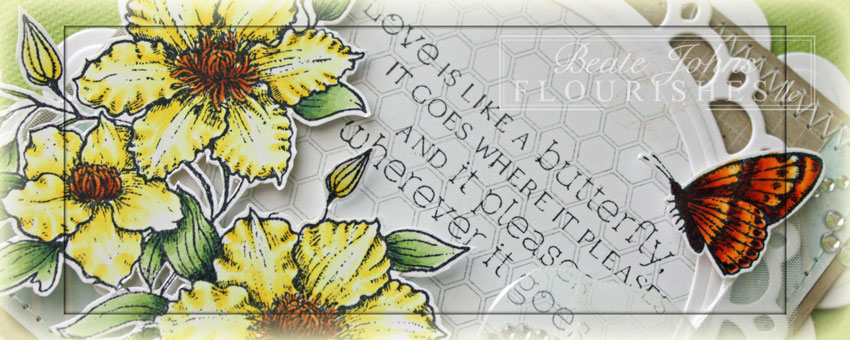
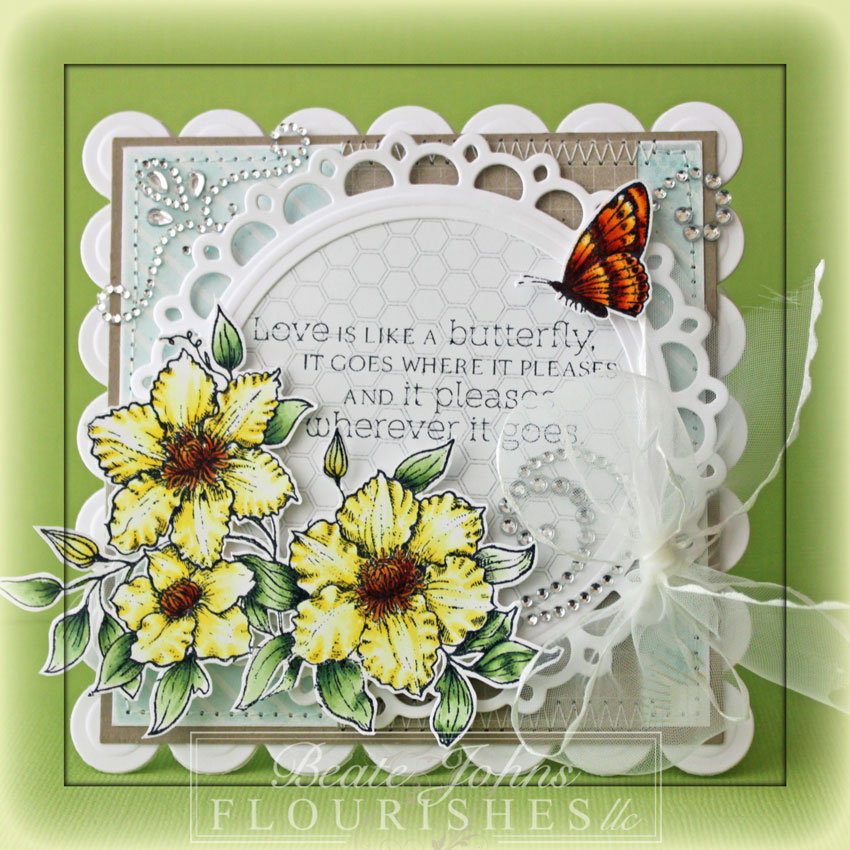
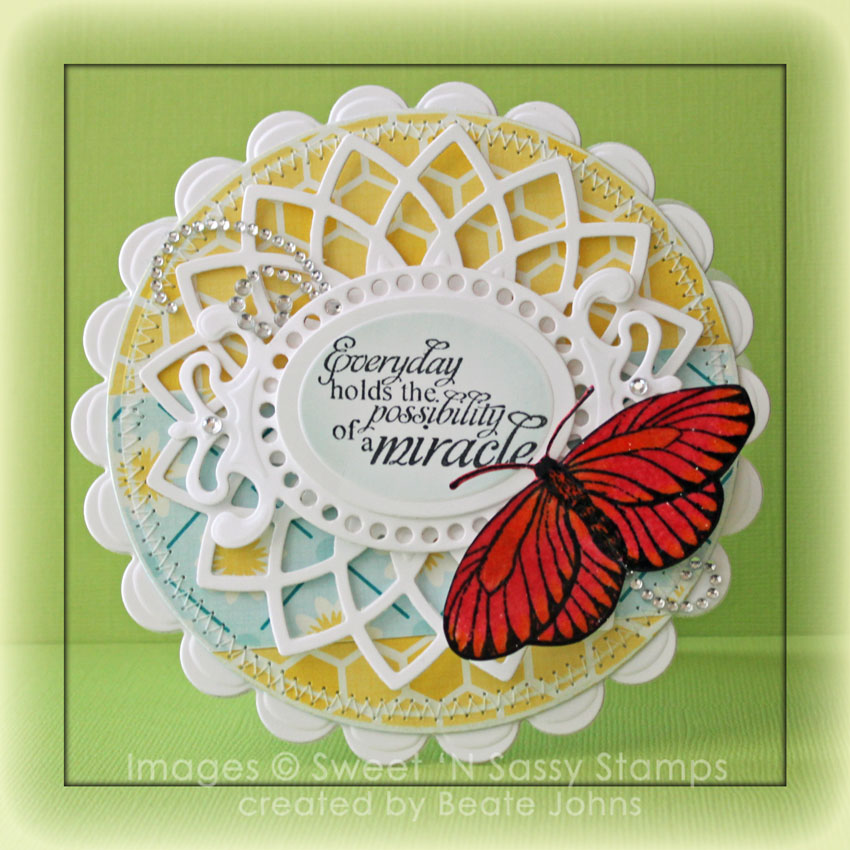
A piece of My Mind’s Eye™ On The Bright Side Two was cut and embossed with the second largest Floral Oval die. A piece of white cardstock was cut and embossed with the second largest Classic Oval Small die. The white oval was stamped with a sentiment from Flourishes Life Lines and adhered over the patterned paper oval.

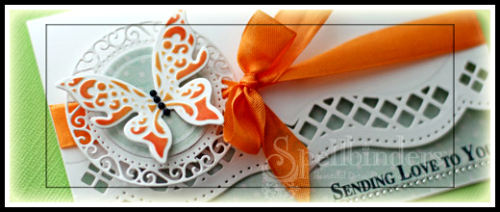
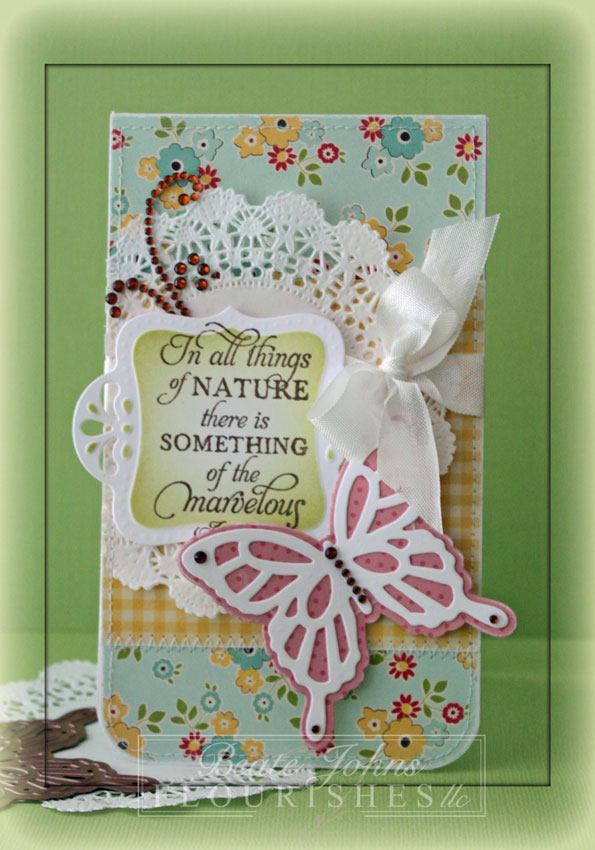
Ribbon was tied around the card front above the embossed part. A button was tied on over the bow with embroidery thread before the sentiment layers were adhered to the card front with SCRAPBOOK ADHESIVES BY 3L™ 3D Foam Squares.

A piece of white cardstock was cut with a die from the Wonderful Wings pack. Want2Scrap Wonderful Wings Bling was adhered over the cardstock butterfly before it was adhered to the lower edge of the oval panels.

The Spellbinders™ Spring Blog Hop will begin April 30th, and will end on May 5th, 2012. It consists of 16 individual and one grand prize drawings.  Enter the Spellbinders™ Spring Blog Hop by visiting the participating blogs each day.

From each Blog Hop post, click on the Blog Hop “Enter HERE” at the end of each blog to open the entry form. You may only enter once from each blog each day.

Spellbinders™ will randomly draw one winner from each participating blog to receive all of that day’s products. The Grand Prize Winner will be randomly drawn from the pool of entrants that sent entry forms from each and every participating blog during the 48 hours each blog was open. For the full list of official rules please click RULES.

**Enter the contest by clicking HERE**

Thanks so much for stopping by! I hope you have time to check out what the other blog hop participants have created for you.

Christine Emberson

Windy Robinson


Questions?  [email protected]

No entries will be accepted at this email address.


Today’s Timeless Tuesday Challenge hostess is Cindy Haffner. Her challenge to us is to create something with a butterfly. It can be a die cut, patterned paper with butterflies, embellishment or stamped image. I pulled out Butterflies & Blossoms, one of my favorite Flourishes set along with some of my favorite Spellbinders die to create my sample.

I started by cutting a frame with the second largest Floral Oval Nestabilities and a Classic Oval die out of white cardstock. A piece of Bo Bunny Country Garden paper was cut and embossed with a slightly larger  Classic Oval die. The edges were sanded and a sentiment from Butterflies & Blossoms was stamped in it’s center with Tuxedo Black Memento Ink. The oval was adhered behind the frame.

The smaller floral and butterfly image were stamped in Tuxedo Black Ink on white paper, colored with Copic Markers (Flowers: Y00, Y11, Y13, Y15, YR23, YR27, E37   Leaves: YG00, YG01, YG03, G46   Butterfly: Y17, YR15, YR18), cut out and adhered on the lower left and upper right of the frame.

Another piece of Country Garden paper was cut and embossed with a Grand Square Nestabilities die. The edges were sanded and stitched. A piece of Vellum cardstock was cut and embossed with a Lattice Motif die. Green May Arts Ribbon was threaded through the Vellum layer before it was adhered to the patterned paper square. The ribbon was tied into a bow and topped with a button before the sentiment layers were adhered over the Vellum Lattice die cut.

The layers were adhered to the card base, white cardstock cut and embossed with a Grand Scallop Square Nestabilities die. Parts of a rhinestone swirl on the top left and lower right finish off the card.

Take a peek at what the other Timeless Tuesday designer have created for today…

I hope you have time to play. Thanks so much for stopping by! Have a wonderful day!
Hugs and smiles


It’s time for another Timeless Tuesday Challenge. Heather is our hostess this week and she gave us a gorgeous inspiration photo to pick three colors from.

I picked the light yellow, green and orange as my colors.  I stamped the big image from Butterflies & Blossoms in Tuxedo Black Memento Ink on  Neenah Solar White cardstock. It was colored with  Copic Markers (Flowers: Y00, Y11, Y13, YR23, YR27, E37   Leaves: G40, G43, G46) and cut out. The small butterfly was stamped and colored (Y17, YR15, YR18) as well.

A frame was cut and embossed with a Picot Edge Circle and Standard Circle Nestabilities die. A piece of My Mind’s Eye Be Amazing patterned paper was cut with a slightly larger circle die and adhered behind the white frame. The cut out images were adhered over the frame with dimensionals. A 2″ x 3 7/8″ strip of Be Amazing Paper was adhered to a 3 7/8″ square of the same paper pack. The layers were stitched to a 1/4″ bigger Kraft cardstock square. May Arts Ribbon was tied around the square horizontally before the frame was adhered over the squares.

The layers were adhered to the card base, white cardstock cut and embossed with a Grand Scallop Square Nestabilities die. Part of the new Fancy That Want2Scrap Border bling and parts of a Finesse Rhinestone Swirl finish off the card.

Check out my fellow Timeless Tuesday Challenge Members for more inspiration:

Cindy Haffner
Heather Jensen
Maki Jones
Mona Pendleton
Silke Ledlow
Tammy Hershberger
and March Guest Designer Meredith MacRitchie

Thanks so much for stopping by! Have a wonderful day!
Hugs and smiles


It’s time for another Timeless Tuesday challenge. Our hostess is Tammy and she asked us to be inspired by country living. I read country, pulled out the darling flower print from October Afternoon Sidewalks Paper and worked from there.

A 3 1/4″ x 3 1/2″ piece of gingham paper from the Sidewalks paper was adhered over a 3 1/2″ x 6″ piece from the same paper pack. The bottom corners were rounded and all the edges were sanded. A paper doily was adhered to the left hand side and the edges of the paper were stitched.

A sentiment from Life Lines was stamped in  Rich Cocoa Memento Ink on a piece of Neenah Solar White cardstock, cut and embossed with an Ornate Artisan Tags & Accent die.  The center of the panel was sponged with Shabby Shutters Distress ink. Seam binding was tied around the paper before the sentiment panel was adhered over the ribbon and paper doily with dimensionals.

A solid butterfly was cut and embossed with a Wonderful Wings die and topped with an outline butterfly cut and embossed out of Solar White cardstock. The butterfly was topped with rhinestones from a Brown Finesse Rhinestone swirl and adhered slightly to the right of the sentiment panel. Part of that brown Finesse swirl was adhered to the upper left side of the sentiment. The layers were adhered to the card base, a 3 1/2″ x 12″ piece of white cardstock, folded in half.

Check out my fellow Timeless Tuesday Challenge Members for more inspiration:

Cindy Haffner
Heather Jensen
Maki Jones
Mona Pendleton
Silke Ledlow
Tammy Hershberger
and February Guest Designer Tera Fujan

Thanks so much for stopping by! Have a wonderful day!
Hugs and smiles

Today’s tutorial on Splitcoaststampers was written by Joan Boardee. She shows us how to use both Copic Markers and Distress Inks to color an image.

For my sample I used Sweet n’ Sassy Everyday Miracles. I stamped the butterfly in Black India Ink on Neenah Classic White cardstock. Part of the image was colored with Copic Markers Y15 and Y17. Next Worn Lipstick Distress Ink was applied directly with the ink pad. The image was misted with water. After the paper dried, the image was cut out and embossed with clear embossing powder.

Three pieces of Solar White cardstock were cut and embossed with a Lotus Pendant die, a Fancy Tag 3 die and a Classic Oval Nestabilities die. A sentiment from the Everyday Miracles was stamped in the center of the the Classic Oval die cut and the edges were sponged with Tumbled Glass Distress Ink. The oval was adhered over the Fancy Tag die cut and that was adhered to the Lotus die cut.

Pieces of Echo Park Country Drive Patterned Paper were cut and embossed with the smallest Grand Circle Nestabilities die. The edges were sanded and stitched before the layers were adhered to a scallop circle card base, cut and embossed with Grand Scalloped Circle Nestabilities die. A couple of Baby Bling Rhinestones and parts of a Finesse Rhinestone Swirl finished off the card.

Here is a video for the visual learner:

[youtube]https://www.youtube.com/watch?v=f_1dAy-D5dU[/youtube]

Thanks so much for stopping by! Have a wonderful day.
Hugs and smiles

© 2012 fresh & fun Suffusion theme by Sayontan Sinha