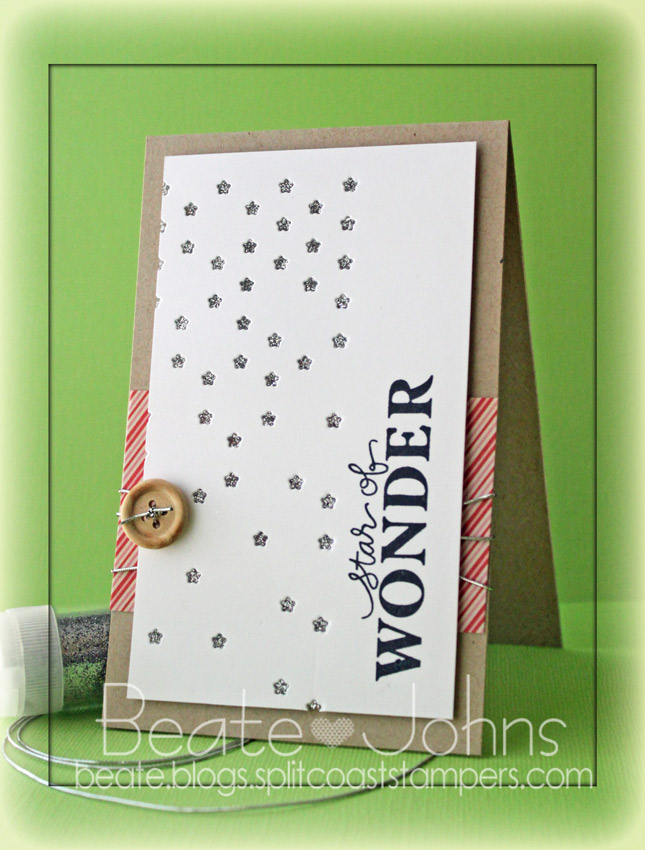
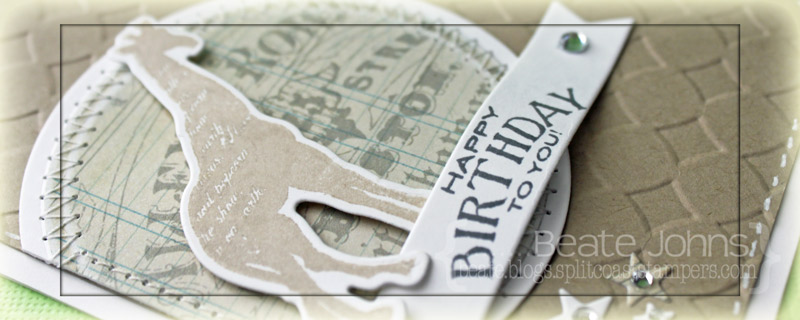
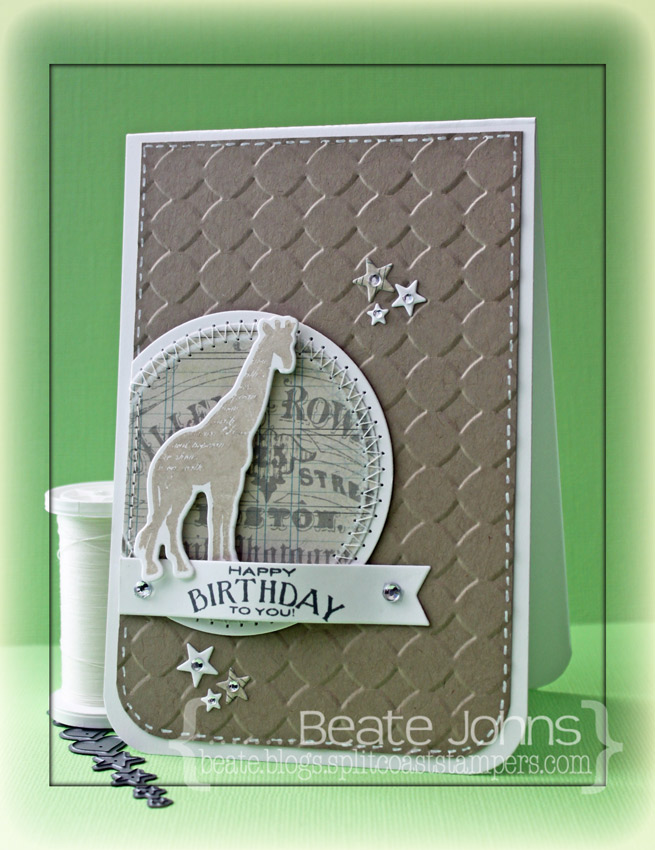
I have another Clean and Simple card to share with you that is mostly made with supplies from the new Simon Says Stamp December card kit. I created the card for the current CAS(E) this sketch challenge. I will also enter it into the current Simon Says Stamp Challenge, because the current one is anything goes! One lucky entry will win a $50 shopping spree!!!

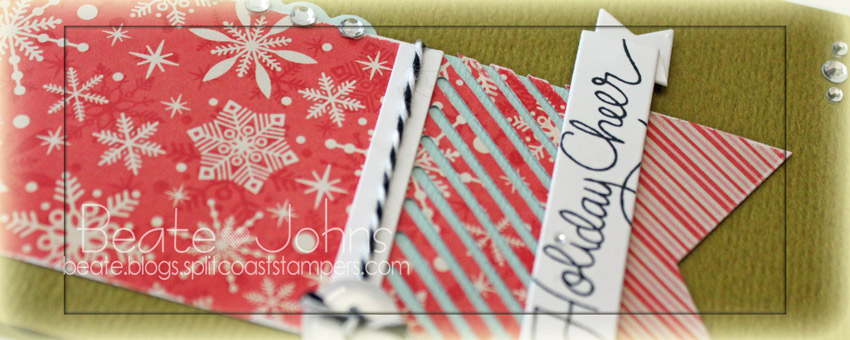
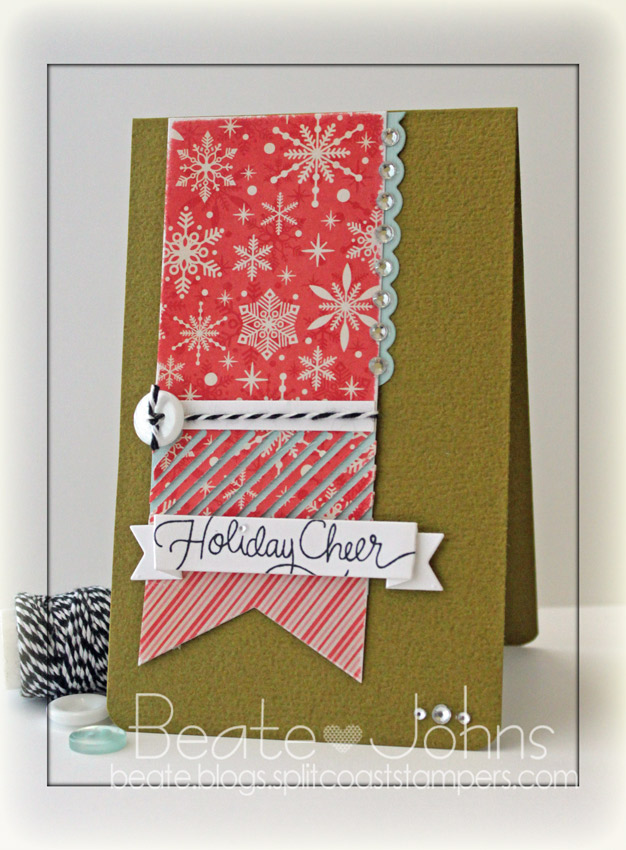
I started by cutting two red papers of Pink Paislee Sidewalks patterned paper (included in kit) in 2″ wide strips. The bottom was cut with one of MFT’s Fishtail Flags Die-namics die and the center was cut with Simon Says Stamp Air Vent die. Sea Salt Bazzill cardstock (included in kit) was adhered behind the vent and a 1/4″ strip of white cardstock was adhered above. A white button was tied on to the side of that paper strip with Beetle Black twine.


A 2 1/2″ long strip of Sea Salt cardstock was cut with MFT’s small scalloped border die and adhered to the top right of the strip. Rhinestones from a Sleek Strip Silver Rhinestones pack were adhered next to each scallop. The banner strip was adhered to the card base, 3 1/2″ x 11″ piece of green Bazzill cardstock (included in kit), folded in half. The bottom corners were rounded.

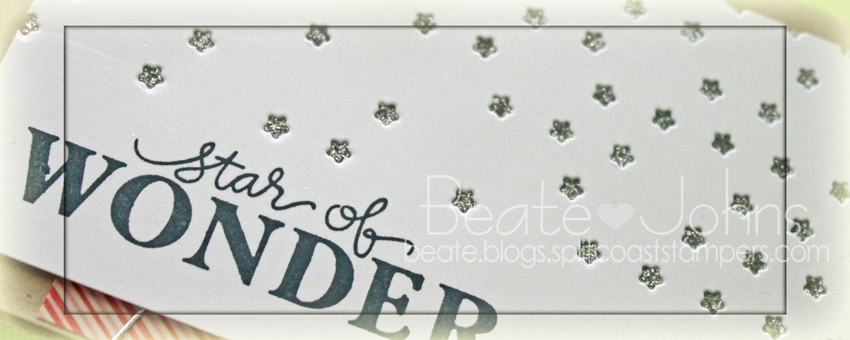
A sentiment from Merry Everything (included in kit) was stamped in Tuxedo Black Memento Ink on a piece of Neenah Solar White cardstock that had been cut with a small folded  Banner die.  It was adhered slightly off center underneath the vent die cut. A tiny rhinestone was adhered as the dot over the i and three rhinestones from the Sleek strip pack were adhered on the bottom right corner to finish off the card.

Thanks so much for stopping by! Have a wonderful day!
Hugs and smiles

I recently got the new Simon Says Stamp December card kit in the mail and couldn’t wait to play with it. I had missed the deadline of the latest CAS(E) this sketch, but I wanted to create a card with it anyway. It definitely works for the current Simon Says Stamp Challenge, because the current one is anything goes! You could win a $50 shopping spree if you enter!!! And with me being broke because I ordered a new camera, 2 lenses, wireless memory card and kids presents on Black Friday, that would be wonderful!

I started by cutting the right side of a 3″ x 5″ piece of white cardstock (from kit) with the Simon Says Falling Stars die. Packing tape was adhered behind the stars and Sterling Glitter was rubbed over it.  A sentiment from Merry Everything stamp set (included in kit) was stamped in Tuxedo Black Memento Ink on the right side of the cardstock piece.

The card base is a 3 1/2″ x 11″ piece of Neenah Desert Storm cardstock (included in kit) folded in half. A 2″ x 3 1/2″ piece of Pink Paislee Sidewalk patterned paper (included in kit) was taped to the lower half of the card base and silver cord was tied around the card base. A wooden button (included in the kit) was adhered to the left hand side of the white layer to finish off the card.

Thanks so much for stopping by! Have a wonderful day! I know mine will be! My new camera is scheduled to arrive today!!!
Hugs and smiles

I created this card for last week’s Inspiration challenge.  For my sample I chose this darling stuffed giraffe.  The color scheme for this card came from last week’s  Ribbon Reel Challenge.  The sketch is from the current CASE study challenge.

I started by cutting a piece of Neenah Solar White cardstock with the giraffe die from MFT’s Spectacular Circus stamp and die set. The matching giraffe stamp was stamped over it in Wheat VersaMagic ink. A piece of Pink Paislee Portfolio patterned paper was cut and embossed with a Standard Circle Nestabilities die. The edges were sanded before the circle was stitched to a slightly bigger white cardstock circle.

A 3 1/2″ x 5 1/4″ piece of Kraft cardstock was embossed with the Simplicity M-Bossabilities folder. The bottom corners were rounded and a the edges were faux stitched with a Signo white gel pen. The layer was adhered to the card base, a 3 3/4″ x 11″ piece of white cardstock folded in half before the partial circle was adhered to the left hand side. The giraffe was adhered to the circle with foam adhesive squares.

One of the sentiment from Circus Spectacular was stamped in Gray Flannel Memento ink on a piece of white cardstock, cut with one of MFT’s Sentiment Strips die-namics die. One of the sides was cut straight and the sentiment was adhered underneath the circle with Scor-Tape on the edges and two foam adhesive squares on top of each other in the center.

Stars were cut out Solar White cardstock as well as the same paper that was used for the circle with SimonSaysStamp exclusive Holiday Shapes die. The stars were adhered to the card and topped with rhinestones. A rhinestone on each end of the sentiment strip finishes off the card.

Thanks so much for stopping by! Have a wonderful day!
Hugs and smiles

I created this card about a year ago for a submission. I am kind of glad that it didn’t get picked so I have something to share with you today. Sorry I have been so quiet lately. With the long labor day weekend followed by another bout of migraines (we had a rain front moving through), I didn’t get much stamping done lately!

For this card I printed out Tiddly Inks Toasting Properly on Neenah Classic White cardstock. The image was cut and embossed with a Grand Rectangle die and colored with  Copic Markers (Skin: E000, E00, E01, E11, BV00   Hair: Y26, E35, E37, E47   Dress: V04, V05, V06, V17, V09   Crown: Y13, Y15, Y17, W3   Bottle: YR21, YR23, YR23, W3, YG01, YG03, W3    Ground: W3, W5, W7, W10    Background: BV0000, BV000, BV00, BV01    Background spots: BV000, BV00, BV01, YR21, YG03)  . The image was adhered to a piece of black cardstock, cut and embossed with a Grand Scallop Rectangle Nestabilities die and the edges were paper pierced. Some dots were added with Stardust Stickles around the girl to make the background sparkle.

A 3″ x 4 1/2″ piece of Phantom Pink Paislee patterned paper was adhered to a 4 1/2″ x 5 1/4″ piece of the same paper pack. The bottom corners were rounded and a border was stitched around the edge. White organdy Ribbon was colored with Copic Marker V06, tied around the horizontal strip  and topped with a black button, tied on with Silver Curling Ribbon.

A sentiment from Whimsy’s Friendship ticket sentiments was stamped in Tuxedo Black Memento Ink on a piece of white cardstock, cut and embossed with Spellbinders retired Five in one Tag die. The embossed part was colored with the markers I used for the image background. The sentiment was tied to the bow with the same curling ribbon that was used for tying on the button.

The layers were adhered to the card base, a 4 3/4″ x 11″ piece of white cardstock folded in half. Parts of a Finesse Rhinestone Swirl were adhered above and underneath the the bow and three Baby Bling Rhinestones on the lower left corner finish off the card.

Thanks so much for stopping by! Have a wonderful day!
Hugs and smiles

Hello and welcome to Day 5 of our August Rubber & Die Release Showcase!

On Wednesday (22 August) Whimsy Stamps released this month’s new rubber designs, new Shapeology dies, new digital papers and new Shape EZ by TLC. From then until 28 August the Whimsy Stamps DT and Special Guests are showcasing these fabulous new goodies with a daily mini blog hop and I am part of today’s hop!

Each mini blog hop has a new release prize hidden somewhere along the way and you have 24hrs to enter each prize draw.

To be entered into today’s mini blog hop prize draw, be sure to leave a comment on ALL of the DT’s posts listed below by 12.00PM EST tomorrow. All winners will be announced on the Whimsy blog on 29 August.

For my sample I stamped the darling new Wee Image Summer Fairy in Tuxedo Black Memento Ink once on Neenah Solar White cardstock. It was colored with  Copic Markers (Hair: Y23, E97, E99 Skin: E0000, E00, E01 Wings: YG0000, YG11, BG10, BG11, BG13 Dress: YG01, YG03, YG17 Shoes: C00, C1, C3 Ground: YG01, YG03, YG17, E33, W3) and cut and embossed with the smallest Grand Decorative Oval Nestabilities die. The image was masked, the die placed back over the cardstock and the open space was  sponged first with Tumbled Glass, then with  Broken China Distress Ink.

I kept the rest of the card pretty simple. It’s such a cute image, it didn’t need much. Two pieces of Pink Paislee Spring Jubilee Patterned Paper were cut to a 4″ x 5 1/4″ layer. The two bottom corners were rounded, the edges sanded and stitched. May Arts ribbon was tied around the layers before the image layer was adhered over it with dimensional adhesive. The layers were adhered to a card base, a 4 1/4″ x 11″ piece of Solar White cardstock, folded in half with the bottom corners rounded.

Letters from the new Spell It Out set were stamped on white cardstock, cut out and adhered to the left side of the image oval for a sentiment. Part of a silver Finesse Rhinestone Swirl and a piece of Fancy That! Border Bling on the top right finish off the card.

To take a peek at today’s fabulous new release creations, please click on the links below…

Remember that the entire new release is available to buy right now from the Whimsy Stamps store along with all your Whimsy favourites.

Thanks for stopping by and don’t forget to pop back to the Whimsy blog tomorrow for more new release creations! Have a wonderful Sunday!
Hugs and smiles

It’s time for Kraftin’ Kimmie August Release Blog hop. For my card I used another Candy Girl. This image is called Fabby Flossy. She was stamped on Tuxedo Black Memento Ink on Neenah Solar White cardstock. It was cut and embossed with the second largest of the Resplendent Rectangles die. It was colored with Copic Markers (Cotton Candy: BG10, BG11, BG13   Skin: E000, E00, E01 ,E11   Hair: Y32, E33, E37, E39   Dress/Roses: RV10, R81, R83, R85   Ground: W0, W1, W3, W5, W7, W9) and  sponged with Antique Linen Distress Ink.

A piece of Pink Paislee Spring Jubilee patterned paper was cut and embossed with the largest Resplendent Rectangle die. The embossed edges were sanded and then cut along the embossed line. It was adhered to the card front, white cardstock with the same die.

A sentiment from the set was stamped in Tuxedo Black on white cardstock that had been cut and embossed with an insert die from the Fancy Framed Tag One. It was sponged with Antique Linen before it was adhered to the upper right hand side of the image. Rhinestones from a Sleek Strip Silver Rhinestones pack finish off the card.

Check out the creations from the other design team members. Just click on the froggy image to find the links.


Thanks so much for stopping by! Have a wonderful day!
Hugs and smiles

Can you believe we are getting close to Halloween already? Crazy how fast time flies. Me….I am looking forward to next Friday when school starts again. Don’t tell my kids I said that. LOL. I am more creative when I have the house to myself. Today the Kraftin’ Kimmie gang is introducing the Halloween Lulu stamp set. You can find links to the blogs of the participants by clicking on the inlinkz link on the bottom.

For my sneak peek sample I stamped Frankenstein Lulu inTuxedo Black Memento Ink on Neenah Solar White cardstock cut and embossed with the second largest Decorative Label Eight Nestabilities die die. The image was colored with Copic Markers (Skin: YG01, YG03, YG17   Hair, Skirt, Sneakers: C3, C5, C7, C9, C10   Jacket, Socks: V04, V06, V09   Ground: W3, W4, W5, W7, W9). It was then masked. The die was placed back over it and cloud masks were added that had been cut with Spellbinders Whimsy die dies. The background was then sponged first with Black Soot, then with Dusty Concord Distress Ink.

Two pieces of Pink Paislee’s Phantom paper (it is still one of my favorite paper packs) were cut and embossed with the second largest Card Creator Matte A die. The edges were sanded before the layer was stitched to black cardstock that had been cut and embossed with the largest Card Creator Matte B die.

May Arts ribbon was colored with Copic V09 Marker and tied around the patterned paper layers before everything was adhered to the card base, cut and embossed with the second smallest Grand Scallop Rectangle die out of Basic Gray cardstock. The bow was topped with a rhinestones brad.

The sentiment is also from the new Halloween Lulu set. It was stamped on white cardstock, cut and embossed with an insert die from the Fancy Framed Tags Two dies. The sentiment layer was sponged just like the image layer background and adhered to the lower left of the image. Part of a Finesse Rhinestone swirl under the bow and  Fancy That! Border Bling on the top left corner finish off the card.

Check out the blog posts of all the Kraftin’ Kimmie Design team members by clicking on the inlinkz button:

Thanks so much for stopping by! Have a wonderful day!
Hugs and smiles

Hello and welcome to Day 6 of our June Rubber & Die Release Showcase!

On Wednesday (20 June) Whimsy Stamps released this month’s new rubber designs, new Shapeology dies and new Shape EZ by TLC. From then until 26 June the Whimsy Stamps DT and Special Guests are showcasing these fabulous new goodies with a daily mini blog hop and I am part of today’s hop!

Each mini blog hop has a new release prize hidden somewhere along the way and you have 24hrs to enter each prize draw.

To be entered into today’s mini blog hop prize draw, be sure to leave a comment on ALL of the DT’s posts listed below by 12.00PM EST tomorrow. All winners will be announced on the Whimsy blog on 27 June.

My sample today was created with another new image from Elisabeth Bell. I stamped Lemon Pepper’s Laundry Day Tuxedo Black Memento Ink on Neenah Solar White cardstock,. It was cut and embossed with the largest  Classic Square Nestabilities die. The image was colored with Copic Markers (Shirt/birds: Y00, Y02, Y04, Y08   Jeans/blanket: B91, B93, B95, B97, B99   Skin: E000, E00, E01, E11   Hair: Y32, E33, E37, E29   Apron/Laundry: YG01, YG03, YG17   Apron/Sheet/Cat: N0, N1, N3    Flowers/Blanket: Y35, Y38, YR07    Ground: YG61, YG63, YG67, E31    Background: BG0000, BG000). The image was adhered to a piece of Kraft cardstock, cut and embossed with the largest swatches die.

A piece of Pink Paislee Spring Jubilee Patterned Paper was cut and embossed with a  Grand Square Nestabilities die. The edges were sanded and stitched. Another piece of Spring Jubilee paper was sanded and stitched and adhered slightly askew over the bigger layer. Aqua Sheer ribbon was tied around the layers before they were adhered to the card base, white cardstock cut and embossed with a Grand Scallop Square Nestabilities die.

The image was adhered over the card base with dimensionals. A sentiment from the new Definition Notables 4 sentiments was stamped twice in Tuxedo Black on Neenah White cardstock. The bold words were cut out and adhered to the left of the image.

I left the card without further embellishments, not wanting to distract from the very detailed image.

To take a peek at today’s fabulous new release creations, please click on the links below…

Michele RoosSpecial Guest

Remember that the entire new release is available to buy right now from the Whimsy Stamps store along with all your Whimsy favourites.

Thanks for stopping by and don’t forget to pop back to the Whimsy blog tomorrow for more new release creations!
Hugs and smiles

Today’s challenge hostess is Mona! She asks us to create a thank you card or tag.  I knew right away I wanted to use the new Hydrangea stamp set again. This time I chose to use the larger of the two flower clusters instead of the big bouquet. The image was stamped three times in Tuxedo Black Memento Ink on white cardstock, colored with Copic Markers (YR30, YR31, R000, R00, R01, Ro2).  I know those are not colors that Hydrangeas come in, but they worked best for the patterned paper I chose.

A frame was cut out of white cardstock, a  Standard Circle Nestabilities die as well the largest  Tear Drop Circle die. The same Standard circle was used to cut a piece of patterned paper from the  Pink Paislee Butterfly Garden collection. The circle was sanded and stitched and a sentiment from the Hydrangea set was stamped in it’s center. The flowers were adhered to the lower  left of the of the frame.

Another piece of Butterfly Garden paper was cut and embossed with the smallest of the Grand Square Nestabilities die. The edges were sanded and stitched. May Arts Ribbon was threaded through a hole in the Tear Drop circle frame and the layers were adhered to the patterned paper square. The ribbon was tied into a bow and topped with a button. The layers were adhered to the card base, white cardstock cut and embossed with a Grand Scallop Square Nestabilities die. Rhinestones on the top left finish off the card.

Take a peek at what the other Timeless Tuesday designer have created for today…

I hope you have time to play. Thanks so much for stopping by! Have a wonderful day!
Hugs and smiles

Hello and welcome to Day two of our May Rubber & Die Release Showcase!

On Wednesday (23 May) Whimsy Stamps released this month’s new rubber designs and new Shapeology dies. From then until 29 May the Whimsy Stamps DT and Special Guests are showcasing these fabulous new goodies with a daily mini blog hop and I am part of today’s hop!

Each mini blog hop has a new release prize hidden somewhere along the way and you have 24hrs to enter each prize draw.

To be entered into today’s mini blog hop prize draw, be sure to leave a comment on ALL of the DT’s posts listed below by 12.00PM EST tomorrow. All winners will be announced on the Whimsy blog on 30 May.

For my sample today I chose the new Wee image Love Trip. It was stamped in Tuxedo Black Memento Ink on Neenah Solar White cardstock. The image was cut and embossed with a Petite Oval Nestabilities die and colored with Copic Markers (Bugs: N0, N1, N3, N5, R24, R29, R39   Balloon: Y32, Y17, YR15, YR18, BG000, BG01, BG05   Leaves: YG01, YG03, YG17   Flowers: Y13, Y15, Y17   Basket: E30, E31, E33, E37).  The edges of the image were sponged with Tumbled Glass Distress Ink. The image was then adhered to a piece of white cardstock cut and embossed with the largest Floral Oval Nestabilities die.

A 2 1/4″ x 4″ strip of Pink Paislee She Art patterned paper was adhered to a 4″ x 5 1/4″ piece of the same paper pack. The bottom corners were rounded, the edges sanded and stitched. May Arts ribbon was threaded through a hole in the Floral Oval die cut before it was adhered in the center of the patterned paper with dimensionals. The layers were adhered to a card base, a 4 1/4″ x 11″ piece of Solar White cardstock, folded in half with the bottom corners rounded.

A sentiment from Ticket Notes was stamped in Tuxedo Black Ink on white cardstock. It was cut out, colored with Copic Marker B000 and tied to the ribbon bow with embroidery thread and a button. Parts of a black Finesse Rhinestone swirl finish off my card.

To take a peek at today’s fabulous new release creations, please click on the links below…

Debbie Eastman
Heidy Blom
Lori Pachkowsky
Michele Roos

Remember that the entire new release is available to buy right now from the Whimsy Stamps store along with all your Whimsy favourites.

Thanks for stopping by and don’t forget to pop back to the Whimsy blog tomorrow for more new release creations!
Hugs and smiles

© 2012 fresh & fun Suffusion theme by Sayontan Sinha