Wednesday Splitcoaststampers ran a Product Focus on Kreate-a-lope Templates. They make it really easy and fast to create envelopes. You can read all our reviews here. Here are some of the envelopes I have created with the templates:

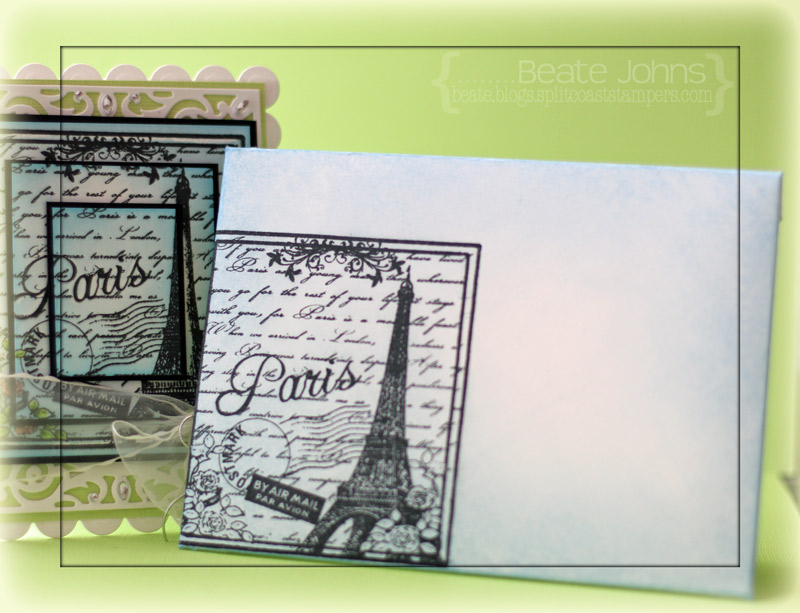
I made this one to match the card I created for last weeks Triple Stamping tutorial.  I needed a bigger envelope, so I used Stampin’ Up! Whisper White 12″ x 12″ cardstock and the A6 envelope template.

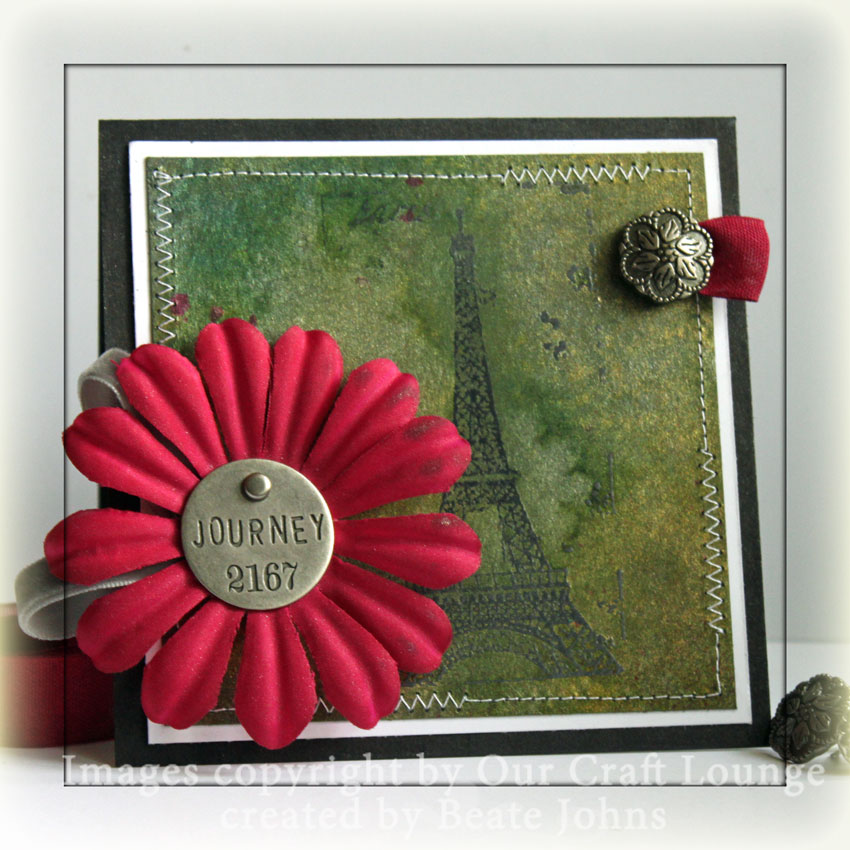
I stamped the same image from Sweet ‘n Sassy Stamp To Paris with Love in Tuxedo Black Memento Ink on the lower right of the envelope.  I sponged the entire envelope with Summer Sky Memento Ink.

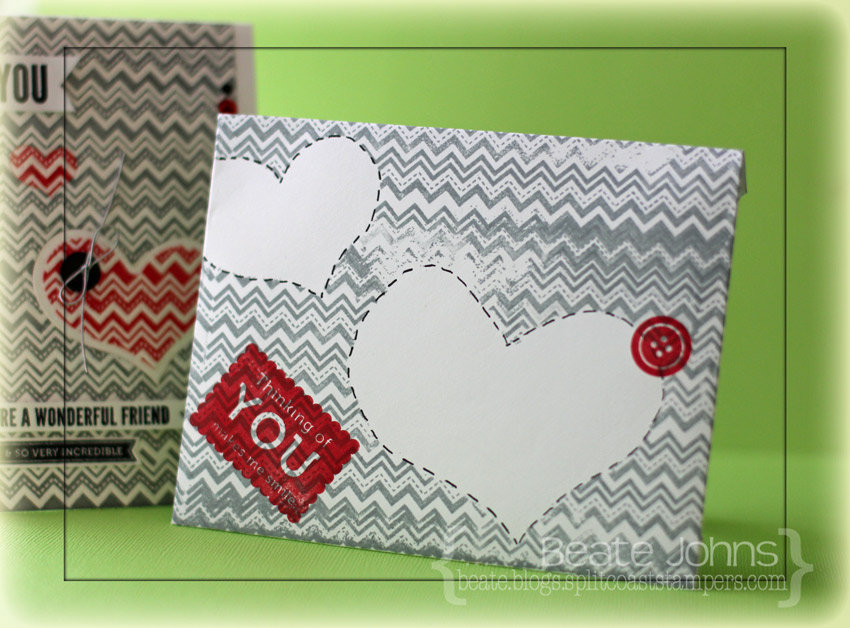
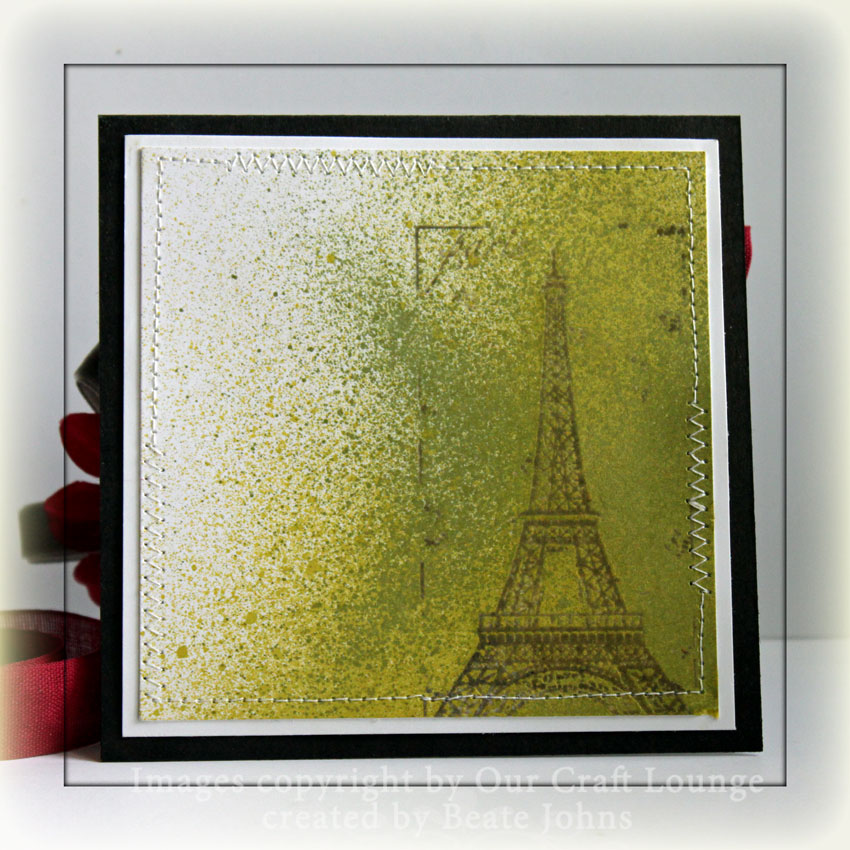
I used copy paper and the A6 template to make a matching envelope for the Puzzle Resist card I made a couple of weeks ago. I used masks cut out of copy paper with the new Hearts One die and stamped the chevron strip from Very Special in London Fog Memento Ink all over.  I added a faux stitched border with a black gel pen and stamped  a sentiment and button stamp (also from Very Special) with Red Magic VersaMagic Ink.

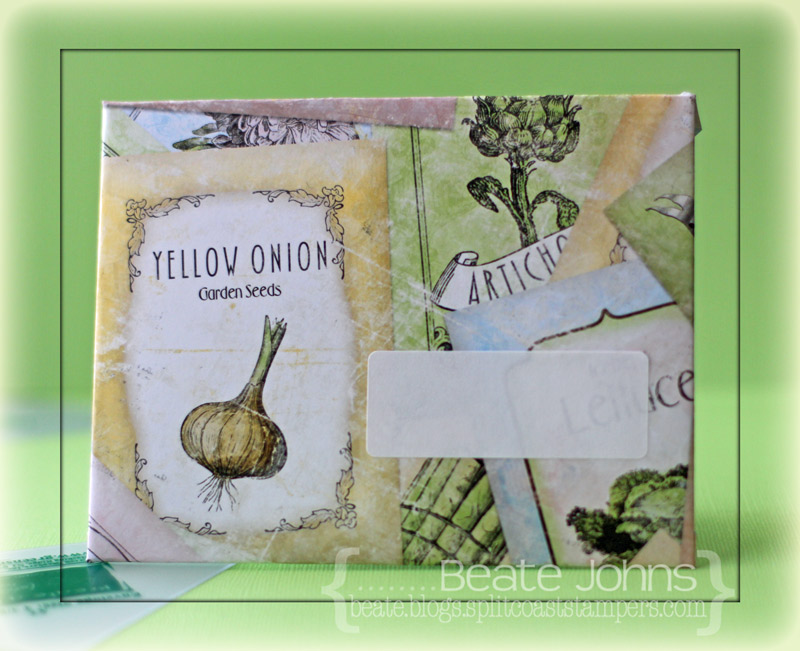
I created this envelope out of older 12″ x 12″ Bo Bunny Country Garden patterned paper that I had for a while. The templates are a great way to use up older paper and create envelopes with them.I just added an address label.

Thanks so much for stopping by! Have a wonderful weekend!
Hugs and smiles

Last Wednesday Splitcoaststampers posted a new product review. This time we reviewed the Perfect Layers tools. Before I stamped I was a quilter. I love exact measurements and math. I love my paper cutter and don’t have any problems figuring out the size of my next layer. But…if you are not like me, this is a pretty nifty tool.


One of my samples was this card. I used to the 1/16″ edge to layer the image from Creative Scraps Birds & Blossoms on a piece of Neenah Classic Cream Cardstock after the edges of the image had been sanded. I used the 3/8″ edge to cut a piece of Prima Natural Garden paper for my layer on the card base.

May Arts ribbon was tied around the image layers. A sentiment from Crafty Secrets Bird Notes was stamped in Rich Cocoa Memento Ink on a piece of Classic Cream cardstock, that had been cut and embossed one of the Home Sweet Home dies. The edges of the tag were sponged with Frayed Burlap Distress ink and a bird from Bird Notes was stamped over the sentiment in a second generation Frayed Burlap ink. The tag was tied around the bow along with a button with Linen Thread.

The layers were adhered to a piece of Kraft cardstock, cut and embossed with the smallest of the Grand Label 23 Nestabilities die.  The edges of the Prima paper were sanded and stitched before the piece was adhered to the card base. The image layers were adhered to the card base. Parts of a Finesse Pearl Swirl finish off the card.

Thanks so much for stopping by! Have a wonderful day!
Hugs and smiles

Last week we posted a new Product review on Splitcoaststampers. The team was lucky enough to receive 6 of the 8 available colors of Smooch Glitz. It is glitter mixed with clear Smooch ink that comes in darling little nail polish bottles. The applicator is a brush inside the lid. I wasn’t sure if I would like it, but let me tell you, I do.

You have seen several samples I made with the product last week already. For this sample I cut down an image from Creative Scraps Little Blessings with one of the Classic Square Nestabilities. The edges were sanded and Starlight Smooch Glitz was added around the edges. The square was adhered to a piece of Neenah Solar White cardstock, cut and embossed with a Fleur De Lis Square Nestabilities die.

A piece of MME Lost and Found Market Street Patterned paper was cut and embossed with a Classic Square Nestabilities die. The edges were sanded, seam binding was tied around it and topped with a Recollections (Michaels) glitter brad.  The image layers were adhered over the layer with dimensionals.

I card base was cut and embossed out of the largest Fleur De  Lis Square die. A single piece of white cardstock was cut with the same die and adhered over the card base and the layers were adhered on top of that.

Here is a video about the Product:

[youtube]https://www.youtube.com/watch?v=sg6U4AyYuU0[/youtube]

Thanks so much for stopping by! Have a wonderful day!
Hugs and smiles

Yesterday Splitcoaststampers published a new Product Review. This time we got to play with Want2Scrap Products. If you have read my blog the last month you have seen me use it. I have to say I love it! It’s very affordable, gorgeous bling. I love that the Nestaboard and Nestabling are created to match Spellbinders dies. To see the entire review, click here.

In the Accordion Card Video tutorial I show the Nestaboard and Nestabling matching the Label 1 dies from Spellbinders. You can see how easy it is to use.

[youtube]https://www.youtube.com/watch?v=Cwi–V-SdVc[/youtube]

Lori Craig and Sharon Harnist are coming to town today for tomorrows Copic Certicification. Tomorrow morning Jenn Balcer arrives. I can’t wait. We will have a great weekend!

Thanks so much for stopping by! Hugs and smiles

Yesterday Splitcoaststampers published a new Product Review, this time it was a review of Daily Window Products. Each review team member received one product of their choice as well as one of their Design Cubes.

For my product I picked the Systematic Success Binder. As soon as I saw it, I knew it would be a wonderful product for a Copic Sample Book. I printed the title on Neenah Solar White cardstock, then stamped the Cherry Blossom image from Flourishes Cherry Blossoms stamp set over it with Tuxedo Black Memento Ink.

A little flourish was stamped underneath the title. The image is from Waltzingmouse Holiday Label 14 stamp set. The image was cut and embossed with Grand Oval Nestabilities and colored with Copic Markers (R30, R32, R35, E23, E25, E29, YG93, YG95, YG97, B0000, B000, B01). The image was stitched to a piece of black cardstock, cut and embossed with the Grand Scallop Oval Nestabilities.

A strip of Ducks in a Row October Afternoon paper was stitched to a piece of Fly A Kite paper. May Arts ribbon was adhered over the vertical strip and a black Rhinestone swirl was cut apart and adhered to the right hand side. The image was adhered to the center with dimensionals and inserted to the binder.

Thanks so much for stopping by! Have a wonderful day.
Hugs and smiles

P.S.: While it was a great plan to use this wonderful binder as my Copic sample book, I will have to purchase another to do so. My sweet girl wanted it as her portable art station (it’s now filled with a clip board, blank paper, ruler, pens and page protector for her finished artwork). How can I say no to that?

For today’s product review on SCS we got to play with Xyron’s 1.5″ Create-a-Sticker. I really like using this nifty tool for adhering smaller die cut shapes.

For this sample I used the Xyron Create-a-Sticker to add adhesive to two 1/2″ circles as well as a strip of cardstock cut with My Favorite Things Jumbo Ric Rac die. I ran both the ric rac and the circles through the Xyron, took off the liner and covered them in Primrose Glass Glitter.

The image is from My Favorite Things Merry Kissmas. It was stamped in Tuxedo Black Memento Ink on Xpress it Blending card and colored with Copic Markers (hat: C1, C3, C5, RV13, RV15, RV17 Scarf: BG11, BG32, BG13 Skirt: E41, E42, E43, E44 Stockings: E40 Skin: E0000, E00, R20 Branch: E27, E29). The image was cut and embossed with Square Nestabilities and airbrushed with Copic Marker  BG000. It was layered first on a piece of Bermuda Bay cardstock cut and embossed with the next size square Nestabilities, then on a piece of black cardstock, cut and embossed with the Fair Isle Pendant die.

The card base is a 5″ x 10″ piece of Core’dination cardstock folded in half. A 4 1/4″ square of Mitten Weather paper was stitched to a 3 1/6″ bigger piece of Basic Black cardstock before that was adhered to a 1/4″ bigger piece of White cardstock.

The sentiment was stamped on Neenah Solar White cardstock in Tuxedo Black Memento Ink, cut with Petite Oval Nestabilitiesand airbrushed with Copic Marker BG11. A White Linen Ribbon bow topped with a Recollections glitter brad and a few silver Kaisercraft Rhinestones on the top left  corner finish off the card front.

Here is a video for the visual learner:

[youtube]https://www.youtube.com/watch?v=wUWa_VdBifI[/youtube]

Today’s Product Review on Splitcoast is on the new decorative Nestabilities dies from Spellbinders. Oh…that was a sweet product to review!!! You all know how much I LOVE Nestabilities. Now these new decorative dies are a wonderful new addition. They really dress up the Classic Nestabilities or to create some gorgeous card bases.

fllckidsatplaylaceycircles.jpg

For my first sample I folded a 4 1/2″ x 9″ piece of Neenah Solar White cardstock in half and cut and embossed it with the biggest Lacey Circle Nestabilities die. You might have to cut your cardstock twice to get the paper all cut, especially if you are using thick cardstock like the Neenah one I used.

The image is from the new Flourishes set Kids at Play. It was stamped in Jet Black Archival Ink along with a sentiment from the same set. I placed the die back on the card base and airbrushed the top with YR31, the bottom with YG95 Copic Markers.

Because when you cut card bases with dies, you can’t cut the top completely. one of the lace tops was missing. I covered it up with a bow tied with black and white gingham ribbon that was topped with a Recollections brad (Michaels).

I know, I know…I DO have a sweet job! Thanks so much for stopping by! Have a wonderful day. Hugs and smiles

On Wednesday last week SCS posted a Product Review for Smooch™ Spritz. It’s always fun to try out product new to me. It helps me get out of my comfort zone. Pearlized Spray is a bit messy, so I had stayed away from it until now. I did have a great time playing with it and trying out different ways to use it.

Because I was at the CHA and had too much fun hanging out with old friends and making new ones, I am posting my sample along with the video I shot for the product now.

oclvintagetravelersmooched.jpg

For this sample I used the spray two different ways. First I used Cosmic Pink Smooch Spritz to dye my white flower (Stampin’ Up! Pretties Kit) and my white cotton ribbon. While those were drying I stamped the Eiffel Tower image from OCL’s Vintage Traveler (new set, should be available really soon) Embossing Ink on Basic Grey cardstock and embossed it with clear embossing powder. I sprayed Citrus Tickle and Green Olive Smooch Spritz over that, let it dry and buffed the surface a bit with a damp rag to make my Eiffel tower show up more.

The layer was stitched to a 3 15/16″ square of white cardstock. My pink flower as adhered to the lower left corner with dimensionals after a Philosophy tag was added in the center with a small brad. The ribbon was attached with an Antique Brad (Stampin’ Up!) on the upper right hand corner.

oclvintagetravelersmoochins.jpg

For the inside of the card I stamped the Eiffel Tower in Pumice Stone Distress ink on the lower right hand side  of a 3 3/4″ square of Neenah Solar White cardstock and embossed it with clear embossing powder. Citrus Tickle and Green Olive were sprayed over it. I left most of the left hand side white for a personal message.

The square was stitched on a 3 15/16″ square of White cardstock before it was adhered to the inside of the card.

Here is a video for the visual learner:
[youtube]https://www.youtube.com/watch?v=8NWFZ-x9WAk[/youtube]

Thanks so much for stopping by! Have a wonderful day!
Hugs and smiles

inkadinkadotreewatercolorwi.jpg

Splitcoast is featuring a new Product review today. We had the opportunity to play with Inkadinkado’s new ink pads and watercolor markers. My favorite thing were the Watercolor Marker. They are soooo cool! They have a dabber point on one side, and a fine point on the other. The dabber is specifically made for us stamper in mind. Just add it directly to your stamp by painting or dabbing it on, mist and stamp!

The cool thing is if you brush the ink on first, then go over and dab on several places, it will give you different shades of the same color.

For my card the Dogwood stamp from Inkadinkado was inked up with Terra Cotta and Olive Green Marker and stamped on Watercolor paper. I added sky with the sky blue marker and my aqua painter. I just scribbled marker on an acrylic block and picked the ink up from there with my aqua painter. The same was done with the ground with Terra Cotta Marker.

inkadinkadotreewatercolorbe.jpg

The sentiment is from Verve’s Accent Notes was inked with the Terra Cotta marker and stamped on the lower right hand corner.

The card base is a 4 1/4″ x 8 1/2″ piece of Sno Cone cardstock folded in half. The 3 5/8″ square of watercolor paper was stitched to a 3 7/8″ square of Old Olive cardstock. To add a little something something….I stitched a tiny bit of twill to a button and adhered that to the top left of the card.

Here is a video about the new Markers:

[youtube]https://www.youtube.com/watch?v=L5GVsJnzg0Q[/youtube]

Make sure to also check out today’s tutorial by Sharon Tidwell. She shows you how to use Watercolor Crayons on Canvas. Have a wonderful day! Hugs and smiles

unitydonnafoiledwide.jpg

Today’s tutorial was written by Ashley Newell and it shows you how to add transfer foil to your images. The tutorial goes hand in hand with today’s Product review. It is all about Stix2 adhesives. We were given Stix2 adhesive as well as some of their transfer foil, beads and glitter to try out their products. Fun, fun, fun!

unitydonnafoiledbeate.jpg

For my sample I inked the Donna Downey stamp first in Peeled Paint, then with a bit of Forest Moss, misted it with water and stamped it on Neenah Solar White. It was cut out with Label 1 Nestabilities and sponged with Wild Honey distress ink while the die was still on the paper. The grid is from Unity’s Capture Life stamp set. It was stamped over the image with Vintage Photo.

The card base is a 4 1/4″ x 8 1/2″ piece of Neenah Solar White cardstock folded in half. it was topped with Cosmo Cricket Early Bird paper that was cut in 3 15/16″ width. Where the two pieces overlap I stapled a strip of lace (Walmart) over it. To dress up the card I added a metal corner on the bottom right and a Recollection brad (Michaels) with a tiny piece of white taffeta ribbon on the top left. The butterfly was punched out with a Martha Stewart punch, Stix2 glitter was added and it was adhered to the card with dimensionals.

The sentiment is from Unity’s set Nothing but Blue Skies. It was stamped in the lower left hand corner in Jet Black Archival ink.

Here is a video for the visual learner:

[youtube]https://www.youtube.com/watch?v=El188p_I4a0[/youtube]

Thanks so much for stopping by! Have a great day! Hugs and smiles

© 2012 fresh & fun Suffusion theme by Sayontan Sinha