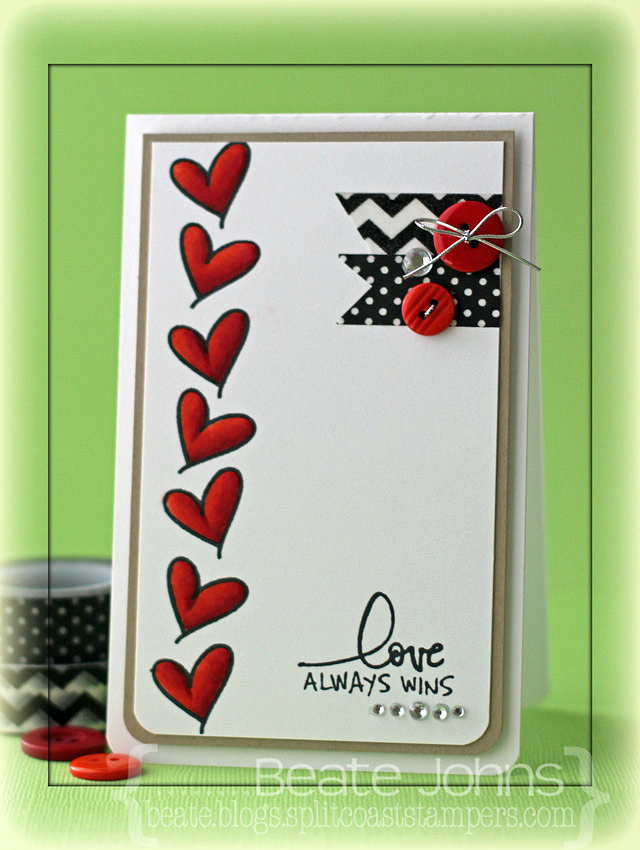
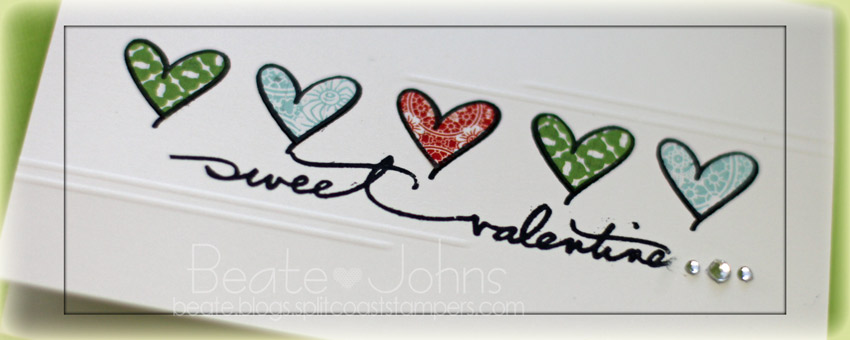
I have another card to show you with the new Ali Edwards Be Mine stamp set.  I started by stamping five hearts from the set in Tuxedo Black Memento Ink in the center of the card base,  a 5 1/2″ x 7″ piece of Neenah Solar White cardstock , folded in half. The bottom right corner was rounded.

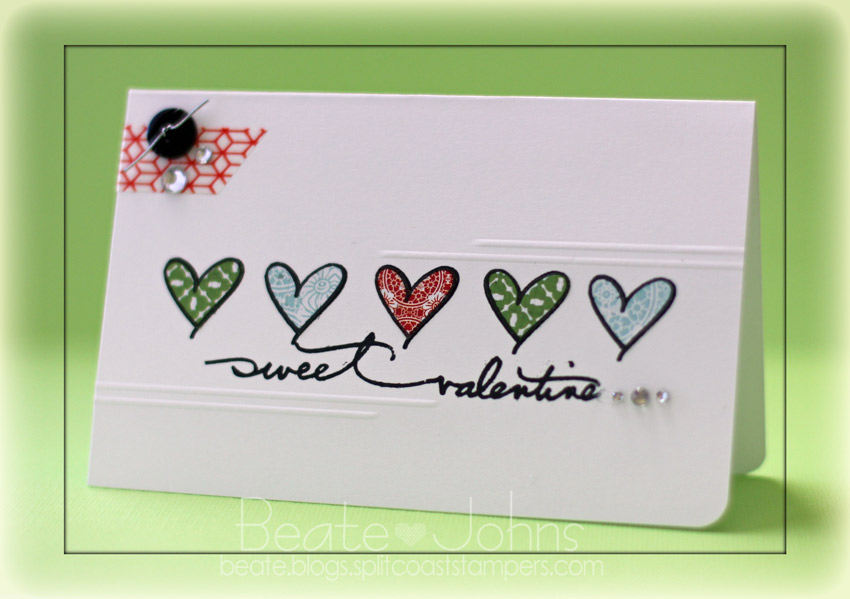
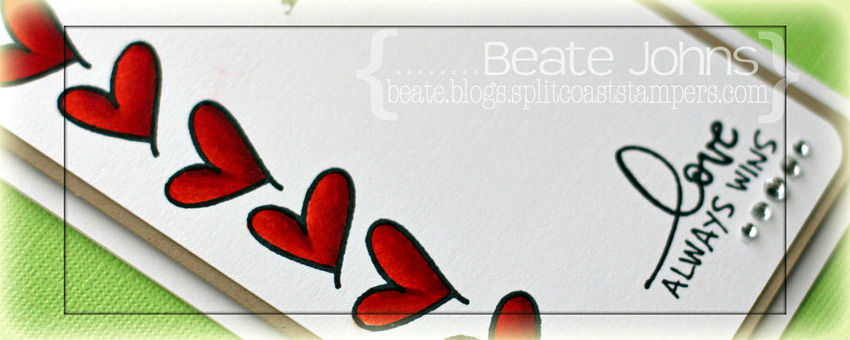
Hearts were stamped on Handmade Lilybeedesigns paper. The hearts were cut out and adhered over the ones on the heart base. Lines were scored above and underneath heart row.  Parts of two sentiment were inked up and stamped underneath the lower score lines.

A small strip of Arrow Washi tape was added on the top left of the card. A button as well as Want2Scrap rhinestones finish off the card. Thanks so much for stopping by today!
Hugs and smiles


It’s time for me to share with you another card made with the new Ali Edwards Be Mine stamp set. I started with a 3″ x 5″ piece of  Neenah Solar White cardstock. I cut the circle border die at an angle across the width of the layer. Above and underneath the border cut I scored two lines with my Scor-Pal.

A piece of Echo Park So Happy Together was adhered behind the circle border. The words of one of the sentiments were inked up separately with Tuxedo Black Memento Ink and stamped above and underneath the border.  The top right and bottom left corner were rounded. Silver cord was wrapped above the top of the border and topped with a button.

The layer was adhered to a slightly bigger piece of black cardstock, before it was adhered to the card base, a 3 1/2″ x 11″ piece of Kraft cardstock, folded in half. A heart from Be Mine was stamped with Tuxedo Black ink on So Happy Together patterned paper, cut out and adhered to the lower right of the card. Rhinestones next to the heart and happy finish off the card.

I hope you have time to check out everyone else’s work with this set. Comment on each blog and you might win a $25 gift certificate for the Technique Tuesday store!!!


Thanks so much for stopping by! Have a wonderful day!
Hugs and smiles

Happy New Year! I hope you had a wonderful and save New Years Eve!

I am excited to be guest designing for Technique Tuesday this month with Ali Edwards newest set called Be Mine. For my card  I started with a 3″ x 5″ piece of Neenah Solar White cardstock. The heart from the set was stamped in Tuxedo Black Memento Ink on the left hand side and colored with Copic Markers (YR09, R24, R29, R39). A sentiment was stamped on the lower right hand side.

Two pieces of Washi Tape were adhered to the upper left side and the bottom corners were rounded. The layer was adhered to a slightly bigger piece of Kraft cardstock. Two buttons were tied to over the washi tapes with silver cord.  The layers were adhered to the card base, a 3 1/2″ x 11″ piece of white cardstock, folded in half, with foam adhesive squares. Rhinestones finish off the card.

Thanks so much for stopping by! Have a wonderful day!
Hugs and smiles

I created this card on Wednesday for the Sketch Challenge on SCS. It’s another CAS card. I seem to be on a CAS kick since the last VSN.  For my card I started by stamping a sentiment from Technique Tuesday’s Thanks for Everything in Jet Black Archival ink on Kraft cardstock and cut it out by hand. The flower from the same set was stamped in Tuxedo Black Memento ink on Neenah Solar White cardstock and colored with Spectrum Markers (BT2, BT4, BT5, BT7, CT2, CT4, GB5, OR1). It was cut out as well and adhered to the left hand side of the sentiment panel.

The card base is a 4 1/4″ x 11″ piece of Kraft cardstock folded in half. The bottom corners were rounded. The edges of a 1 3/4″ x 5 1/2″ strip of Echo Park’s Everyday Eclectic Paper were sanded and top and bottom edge stitched. Another piece of paper from the same Echo Park paper was cut and embossed with the second largest Romantic Rectangle die die and the edges were sanded.

The rectangle was adhered first to the center of the card. Next the stitched strip was adhered partly over the rectangle to the right. White Crochet Ribbon was adhered over the left edge of the strip. The image and flower layers were adhered to the lower right with foam adhesive squares. Part of a Finesse Rhinestone swirl over the flower finishes off the card.


Thanks so much for stopping by! Have a wonderful Sunday.
Hugs and smiles

Last week I updated the old Shaving Cream Tutorial. For my sample I used Frayed Burlap and Spiced Marmalade Distress Re-inker on Neenah Solar White cardstock. The background was cut and embossed with a Classic Circle Nestabilities die.

The image is from TCP’s Fright Night stamp set. It was stamped in Versamagic Midnight Black in the center of the Shaving Cream circle. It was stitched on a slightly larger white cardstock circle, then on a piece of black cardstock, cut and embossed with the largest Beaded Circle Nestabilities die.

The sentiment is also from Fright Night and was stamped in Midnight Black on a piece of white cardstock cut and embossed with a small classic circle Nestabilities die. It was adhered to the left hand side of the image. Rhinestones were adhered to each of the beaded circles.

A 3 1/2″ x 4 1/2″ piece of Authentic Glowing Paper was stitched to a 4 1/2″ square of MME Lost & Found paper. White Crochet Lace and ribbon was died around the layers before they were a  4 3/4″ square of More Mustard paper. The card base is a 5″ x 10″ piece of black cardstock folded in half. A Finesse swirl was cut up and adhered to the lower left and upper right of the image.

Here is a video for the visual learner:

[youtube]https://www.youtube.com/watch?v=RCbpnGs2OJA[/youtube]

Thanks so much for stopping by! Have a wonderful day!
Hugs and smiles

I created this card for a VSN challenge back in February. It was a sketch challenge. When I saw the sketch, I knew I wanted to use a bold flower and only stamp it partially in four squares.

Four squares were cut and embossed out of Neenah Solar White cardstock with Classic Square Nestabilities. The Flower from Technique Tuesday’s Thanks for Everything was stamped on to the squares with Tuxedo Black Memento Ink. Each flower was colored with different Copic Markers (Blue Flower: B21, B23, B26,    Yellow Flower: Y13, Y15, Y17,    Red Flower: R20, R21, R22,     Green Flower: YG01, YG03, YG17,   Flower Center: E41, E42, E43, E44).The edges of the squares were paper pierced.

The two bottom corners of a 4″ x 5″ piece of Echo Park Springtime Paper was stitched to a 3/16″ bigger piece of black cardstock. The layers were adhered to a 4 1/2″ x 11″ piece of Kraft cardstock, folded in half.  The squares were adhered to the card base with dimensionals. The sentiment is from the same set and was stamped on the paper with Tuxedo Black Memento ink. Silver Recollection Pearls finish off the card.

Thanks so much for stopping by! Have a wonderful day!
Hugs and smiles

Yesterday’s new Tuesday Trigger challenge was a great picture. Lime Green Polka dot cupcake paper in front of yellow and orange paper….how fun is that?

I went through my paper stash and pulled out some fun Polka dot paper from Pebbles Happy Go Lucky paper line and orange and yellow paper from Echo Parks Springtime line. Next I looked through the Go To Sketch Magazine, picked a sketch and and went to work.

The card base is a 3 5/8″ x 11″ piece of Kraft cardstock folded in half. Each corner was rounded. A piece of white crepe paper was cut with the Scallop Frame die and adhered underneath a 1 1/2″ x 3 5/8″ piece of Pebbles paper. The strips were adhered to the upper part of the cardbase.

The orange and yellow paper were punched with a 1 3/4″ circle punch. I punched three circles from each paper and adhered them to the card base. A dotted border was added around the card base and circles with a brown pen.

The sentiment is from Technique Tuesdays Little Sentiments. It was stamped in Tuxedo Black Memento Ink on a strip of Neenah Solar White cardstock.  A green button threaded with Lemondrop Twine was adhered to the left of the panel.

More Lemondrop Twine was wrapped around the horizontal layers and topped with a white button.

Thanks so much for stopping by! Have a great day.
Hugs and smiles

I know, I know….I never post more then once in a day. But I saw today’s Tuesday Trigger on Moxie Fab World and had to play and post right away. Today, it’s cold but the sun is shining and the inspiration image just made me smile.

I knew right away that I wanted to use Spellbinders Lattice Borderabilities for this  and keep it simple. Not an easy task for me.

My card base is a 4 1/4″ x 11″ piece of Kraft cardstock folded in half. The bottom corners were rounded.  White cardstock was cut and embossed with the Lattice Borderabilities and stitched to the bottom of a 2 1/4″ x 4 1/4″ piece of October Afternoon Thrift Store paper.

The scroll was cut with Sizzix Scribbles Swirls out of Sour Apple cardstock and airbrushed with Copic Marker YG95 for a little bit more depth. The swirl as well as two Recollection flowers were adhered under a Prima flower.

Before the Flower embellishment was adhered to the strip, I stamped a sentiment from Technique Tuesdays  stamp set : Simply You in Tuxedo Black Memento Ink on the lower left hand side of the strip.

I hope you are having a wonderful day. Here the sun is shining, the music is going and I am stamping. It IS a good day!
Hugs and smiles

For this week’s Tutorial from the Archives I picked the Wax paper Resist technique. The tutorial needed a major overhaul. It was one of the earlier ones I had created forSplitcoast. For my new sample I used Technique Tuesday’s Wingin’ It stamp set.

The background was sponged with Broken China Distress ink and cut and embossed  with Label 14 Nestabilities die. It was adhered to a bigger piece of black cardstock and hand cut. The wax paper layer edge was paper pierced. The sentiment was stamped on t the lower left of the label with Black Stazon.

For the butterfly I sponged the waxed background with Wild Honey Distress ink. The butterfly was stamped with black Stazon. After it was dry it was cut out and the edges were sponged with Barn Door Distress ink. The image was adhered to the upper right hand corner. A bow out of orange ribbon was topped with a black Recollection brad and adhered to the lower left of the label.

The card base is a 4 1/2″ x 9″ piece of Pumpkin pie cardstock folded in half. A 3 3/4″ square of Neenah Solar White cardstock was embossed with Provocraft’s Polka dot Embossing folder and stitched to a 3/16″ bigger piece of Black cardstock. Three Black Kaisercraft Rhinestones were adhered to the upper right hand corner.

Here is a video for the visual learner:

[youtube]https://www.youtube.com/watch?v=mT5lph6QXzk[/youtube]

Thanks so much for stopping by! Have a wonderful day.
Hugs and smiles

Last week’s tutorial on Splitcoast was written by Jenna Barber. She showed us how to make quilted cards. For my sample I thought I should make a heart quilt blog. You can find a lot of quilt block pattern online for free.

For my quilted heart I used paper from Cosmo Crickets Circa 1934 and Togetherness. Each of my quilt squares were 3/4″. I ran a 3″ piece of cardstock through my Xyron and adhered the squares and triangles to that. Next the quilted square was stitched  to a 3 3/8″ square of Canyon Brown cardstock. Both layers were embossed with a Brocade Embossing Folder before they were adhered to a piece of Cherry Cobbler cardstock, that had been cut and embossed with a Classic Square Nestabilities die and sponged with Aged Mahogany Distress ink.

I created the flower out of tissue paper with large scallop circle Nestabilities. It’s held together by an Antique Brad (Stampin’ Up!), sprayed with a mix of water and Vintage Distress Re-inker and dried while the edges were fluffed.

The sentiment is from the new Technique Tuesday’s Smooch set. It was stamped on a 1/2″ wide piece of Classic Cream Neenah cardstock with Rich Cocoa Memento Ink. The edges were sponged with Vintage Photo Distress ink, the left end cut with my photo corner punch (SU) and shaped into banner form. So it would keep this form I added three dimensionals stacked on top of each other under the “wave”. The sentiment was adhered under the flower and both were attached to the left side of the heart. Two buttons from my Mom’s stash were stitched underneath the flower with brown embroidery floss.

The card base is a 4 5/8″ x 9 3/4″ piece of Classic Cream cardstock folded in half. The card front was embossed with the same embossing folder used on the quilted square and the edges were sponged with Vintage Photo Distress ink. The edges of a  4 1/8″ square piece of Cosmo Cricket Earth Love Paper were sanded before it was stitched to a 1/8″ bigger piece of Canyon Brown cardstock. Those layers were embossed as well before they were adhered to the card base.

I hope you have a wonderful Valentine’s Day filled with family, friends and love (and maybe chocolate and flowers?)
Hugs and smiles

© 2012 fresh & fun Suffusion theme by Sayontan Sinha