Today’s tutorial on Splitcoaststampers is written by Judy Maddigan and super fun. My little Santa cracked me up wobbling back and forth. I hope you try it out.

I made two samples. One really simple one with pieces cut out of Carta Bella Merry & Bright paper cut with Simon Says Stamp exclusive Christmas Trees dies. The tree was decorated with Silver Stickles and Red Baby Bling Rhinestones.  A tiny star was cut out of Desert Marigold Fourz Bazzill paper with another die from the Holiday Trees set.

The santa (from Simon Says Stamp Gnome Sweet Gnome ) was a bit more tricky, since the stamp comes only with his face, not the back.  I stamped it twice in Tuxedo Black Memento Ink on Neenah Solar White cardstockand cut them out. I flipped one over and traced the lines from the front to the back, leaving off his face and his thumbs.
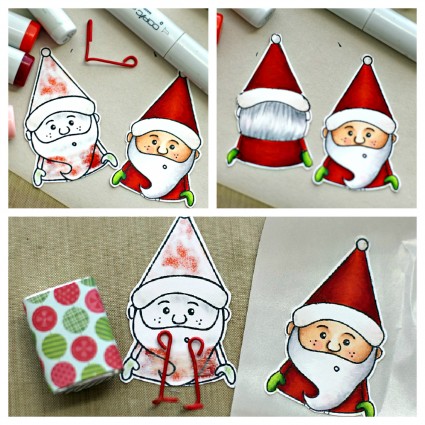
The images were then colored with Copic Markers (Red: YR09, R24, R29, R39    Mittens: YG01, YG03, YG17    Beard/Hair: N0, N1, N3   Hat trim: W00, W1   Skin: E50, E21, E34, R20). Red paperclips that had been unbend and reshaped were adhered to the inside of the back with Scor-Tape. The front was run through my Xyron and adhered over the back, hiding the paper clip ends. The Santa as well as the tree were adhered to a covered Hershey’s Nugget with Glossy Accents.

Here is a video what these little rockers do: They crack me up, especially that little Santa Gnome.

[youtube]https://www.youtube.com/watch?v=-dLGB22EbVY[/youtube]

And here is a video on how to create the rocker for the visual learner:

[youtube]https://www.youtube.com/watch?v=7CR8qa_D_c8[/youtube]

Thanks so much for stopping by! Have a wonderful day!
Hugs and smiles

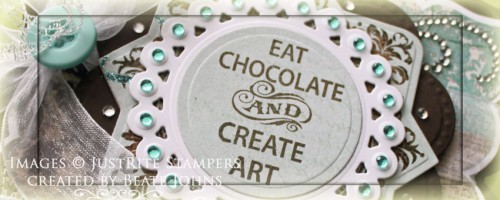
I have a quick video tutorial on the Spellbinders blog, showing how to create this little treat box. I hope you have time to check it out.  The sentiment is from a JustRite Stampers set that will be released in the middle of September. It’s called Grand Sentiments and it’s gorgeous!

Have a great weekend!
Hugs and smiles

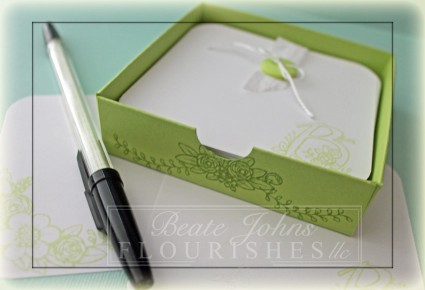
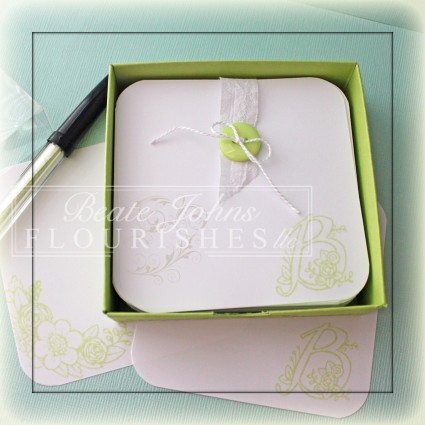
Today’s Timeless Tuesday Challenge is Cindy. She is challenges us to create anything that could be found on your desk. I thought I would create a little note pad box with the new Summer Blossoms and Letters in Blossom sets from this month release.

First I cut around 70 3 1/2″ squares out of printer paper. The edges of each square were rounded. Some squares were stamped with New Sprout Memento Ink and a corner blossom from Summer Blossoms, some where stamped with the B from Letters in Blossom.

For the box I started with a 7 5/8″ square of green cardstock. Each side was scored at 1″ and 2″. Before the box was adhered together,  images from the Summer Blossoms set were used to stamp the outer walls with Bamboo Leaves Memento Ink. One one side I used a 3/4″ circle punch to create a slot to make it easier to get the single papers out of the box. Before the papers were added, I taped a piece of white wrinkled ribbon on the bottom of the box as another help to lift the papers out of the box.

The outer ribbon end was topped with a button, sewn one with embroidery thread. A 3/4″ x 4 1/2″ piece of copy paper was stamped densely, rolled and slipped into an RSVP pen. To finish off my box I created a box top out of clear cardstock. A 5 3/4″ square was scored at 1″ on each side to create the top.

Take a peek at what the other Timeless Tuesday designer have created for today…

I hope you have time to play. Thanks so much for stopping by! Have a wonderful day!
Hugs and smiles

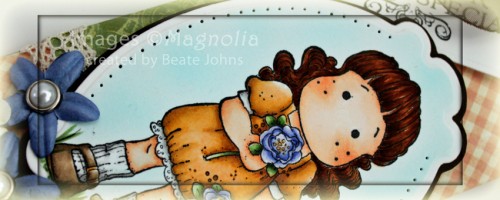
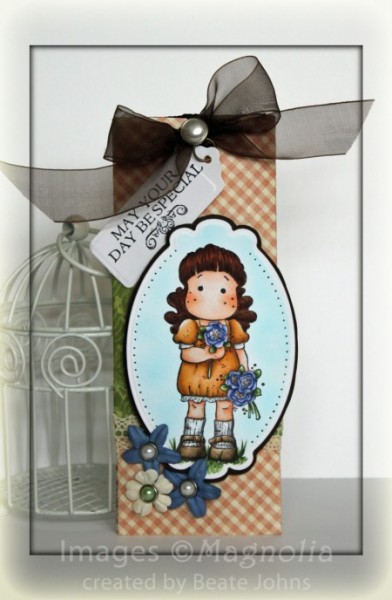
I created this little Pull-Treat over a year ago for a submission. It wasn’t accepted and I completely forgot to share it with you until now. For my sample I stamped Tilda in the Garden in Tuxedo Black Ink on Neenah Solar White cardstock. The image was cut and embossed with Label 10 die and colored with Copic Markers (Skin: E000, E00, Eo2, Hair: E99, E39, E18, dress: YR20, YR21, YR23, E33, Leaves and grass: G40, G82, G85, Dress Trim and socks: T0, T3, Shoes: E42, E43, E44, Flowers: B60, B63, B66).

The image was airbrushed with Copic Marker B00, layered on Neenah Canyon Brown cardstock and a slightly bigger layer was free hand cut. The edges of the image layer were paper pierced.

The treat holder was created out of Graphic 45 Once Upon a Springtime patterned paper. The sleeve was created out of a 2 1/2″ wide strip from the same paper pack. May Arts Crochet lace was adhered to the bottom of that paper strip before the image was adhered with dimensionals.

The hole for the ribbon was punched with Stampin’ Up!’s ribbon slot punch. The ribbon is Brown Organdy ribbon by May Arts. The ribbon was topped with a Recollection Pearl Brad. The sentiment was stamped on a piece of white cardstock cut and embossed with Spellbinders retired 5 Tag die and attached to the bow with a jump ring.

Three Prima flowers were topped with more Recollection pearl brads and adhered to the lower left hand side of the image.

Thanks so much for stopping by! Have a wonderful day! Hugs and smiles


Here is my last guest designer sneak peek for JustRite Stampers.  This one is a box like the one I created back in December. I used of the new JustRite Stampers set Just Keep CalmMy Mind’s Eye Lost &Found 2 Breeze paper and various Spellbinders dies.

I hope you go and check out the entire box over at the JustRite Stampers Blog.

Have a wonderful day!
Hugs and smiles
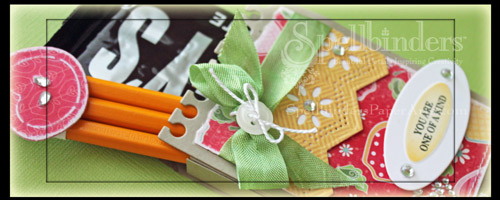
This week I picked the Paper Clip Bookmark for the Tutorials from the Archives for the Newsletter.

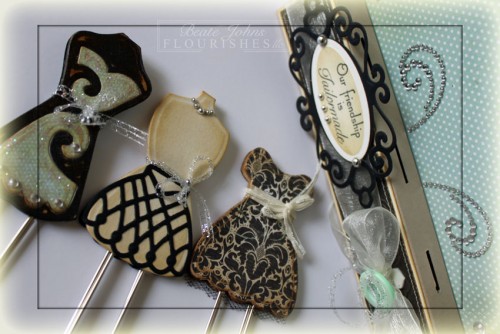
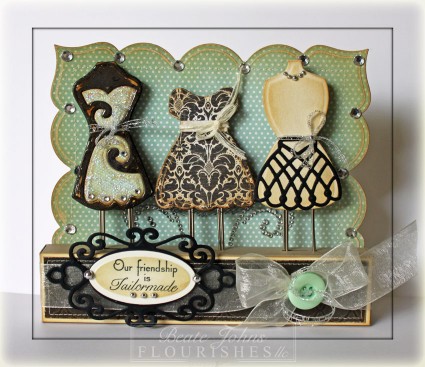
I started with cutting thin coasters with Spellbinders gorgeous new Dress Form dies. (You can purchase them at now at Crafters Home stores or starting in February everywhere.) I LOVE these new dies and had to use them as soon as I got them.

Two of the dress forms were layered with MME Lost & Found  2 Sunshine Paper, one with part of the fourth dress form die, cut and embossed from black cardstock. The patterned paper layers were first sanded, then sponged with Vintage Photo Distress ink.

Jumbo Paperclips were adhered on the back of one of the dress form with Glossy Accents, before a second one cut and layered the same was adhered over it with dimensionals. I had purchased the Paper clips a couple of years ago at Walmart.

The pieces had been dressed up with Silver half Pearls (Recollections, Michaels), May Arts Silver Curling ribbon and thin beige ribbon, Stardust Stickles as well as Baby Bling Rhinestones.


I decided to create a box with a backdrop to show off the bookmarks. I started with a 5″ x 8 1/2″ piece of Kraft cardstock piece. The 5″ side was scored at 3/4″, 2 1/4″, 3″ and 4 1/2″. The 8 1/2″ side was scored at 3/4″ and 7 3/4″.  Before the box was put together, I cut three 3/4″ slids about 1/16″ wide in the top of the box.

A 1 1/2″ x 7″ piece of Natural White cardstock was sponged with Vintage Photo Distress ink. The edges of a 1 3/8″ x 6 7/8″ piece of Sunshine paper were sanded, then sponged with Vintage Photo ink. The patterned paper was stitched to the sponged white cardstock before those were adhered to the box front.

May Arts Ivory Organdy Ribbon was tied around the box. The bow was topped with a button tied on with more silver curling ribbon. A sentiment from Flourishes Feminine Charms was stamped in Tuxedo Black Memento Ink on a piece of Natural White cardstock, cut and embossed with a Petite Oval Nestabilities die. The oval was sponged with Vintage Photo before it was adhered in the center of a piece of black cardstock that had been cut and embossed with a Fancy Tag 2 die.

For the backdrop I cut a piece of Sunshine paper with a Grand Label 23 Nestabilities die. It was stitched to a piece of Natural white cardstock, cut with the same die for more stability.  The edges were first sanded, then lightly sponged with Vintage Photo. The Label was adhered behind the box and decorated with Rhinestones and Finesse Rhinestone swirls.

Here is a video for the bookmarks for the visual learner:

[youtube]https://www.youtube.com/watch?v=cnzBBDIVvIU[/youtube]

Thank you so much for stopping by! Have a wonderful weekend!
Hugs and smiles

filefolderfriendswide.jpg

Today’s Holiday Blitz tutorial is written by AJ Otto. She created the tutorial based on Taylor Van Bruggen‘s idea from a few years back. This project is fun, but definitely not a fast one. At least it wasn’t for me.

It took me a while to decide on what paper to use. I finally settled on My Mind’s Eye Just Dreamy paper, thinking it would great to make a Friend folder for Rebecca. With us moving every two to three years, she now has friends in three States and is always asking me for their addresses. After I finished the folder I showed it to her and she said I could keep it (OUCH!). She wouldn’t know what to write in it. Oh well…I have a new address folder! LOL

The title was stamped with JustRite stampers Times New Roman Upper and Lower Case letters. I don’t have a rectangle wood stamper, but the letters fit perfectly in my oval one. I love how everything mixes and matches with Just Rite. And now that you don’t have to condition the stamps before using them….I love them even more. 🙂

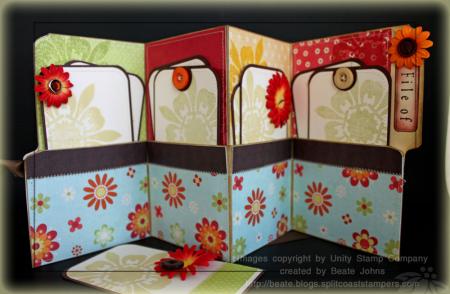
filefolderfriendsbeateinsid.jpg

After folding my File Folder, I sponged the edges with Frayed Burlap Distress ink, then added the paper. Next I machine stitched around the paper and zigzagged a line between my chocolate strip and paper on the lower part of the file folder.

The Chocolate Chip base for the pages measures 3 3/8″ x 5 3/4″. I rounded the edges with a large corner rounder (retired Stampin’ Up!) and layered a 1/8″ smaller piece of Vanilla cardstock over it. That piece had been stamped with Unity’s gorgeous Solid Posy stamp with either second generation Shabby Shutter or Scattered Straw Distress ink. I alternated those inks. The green file folder slots got yellow flower pages, the red and yellow slots got green flowers on their  pages.

 A 1 1/4″ x 3 1/4″ strip of patterned paper was adhered to the lower part of the page. Then I stitched all the pages as well. To hide the stitches I added a backing to each page. The backing was cut as the front Vanilla layer and stamped with the Floral Edge stamp from Unity.

The first page in each folder slot was embellished either with Daisy Doodles Prima Flowers or Basic Grey buttons. I created two pages for each folder slot.

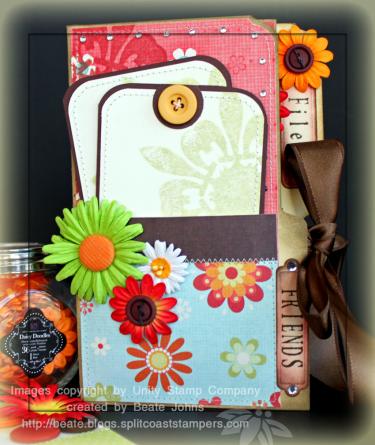
filefolderfriendsbeatefront.jpg

I cut another piece of Manila file folder matching my front. I decorated it similar to the inside pages. Before taping that front on with Scor-Tape, I tied 1″ wide May Arts Chocolate Satin Ribbon around the folder as my closure.

I hope you have a wonderful day! My oldest is turning 15 today. He will be able to get his learner’s permit in 1/2 year. YIKES!

Hugs and smiles

© 2012 fresh & fun Suffusion theme by Sayontan Sinha