Today’s Tutorials on SCS is on how to make a triangle box. It’s simple, it’s quick and easy changeable to different sizes. For my tutorial sample I started with a 5″ x 10″ piece of textured Baja Breeze Designer Paper.

justriteclassicovalchristma.jpg

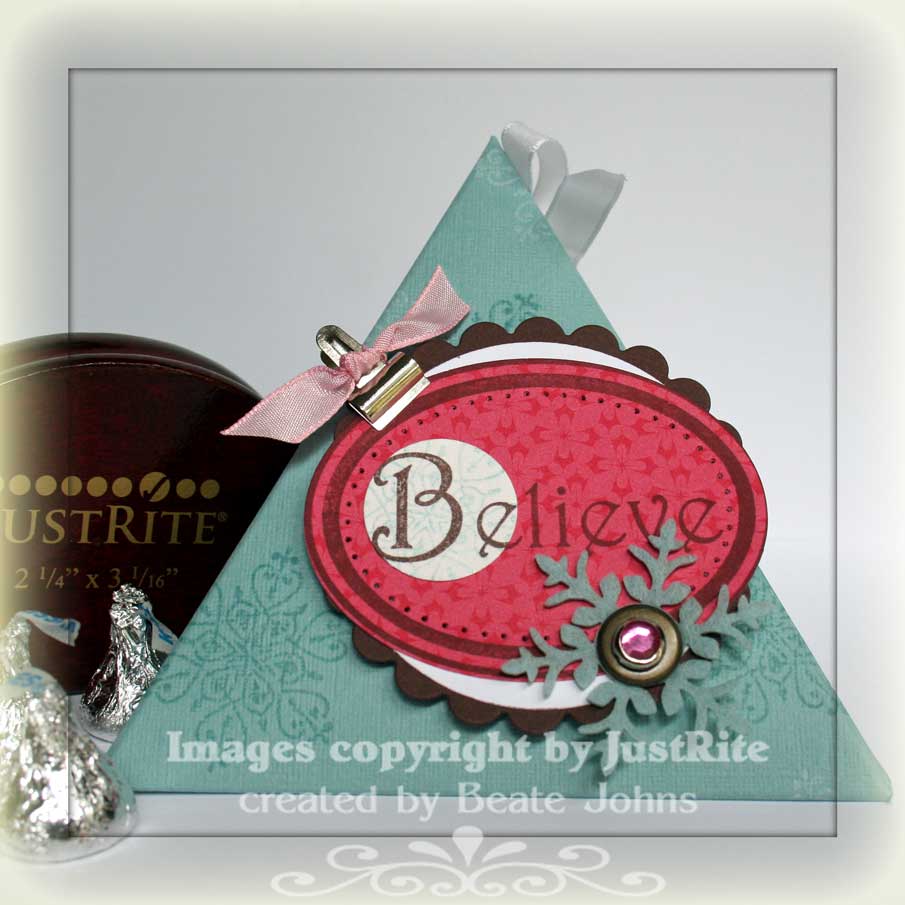
I stamped the cardstock with the snowflake from the Stampin’ Up! Winter Post stamp set. I stamped the snowflake first in Baja Breeze classic ink, then in Whisper White Craft ink all over the cardstock.

Since we are also running a new product focus page about the new JustRite Harmony stamp ensembles, I decided to use one of the the stamp sets I received for the tutorial as well. The sentiment and the oval frame are both from the Classic Harmony Oval II stamp ensemble. After conditioning the stamps (check out Sharon’s awesome tutorial also published today on SCS) I stamped them in Chocolate Chip ink on Ski Slope Designer Paper. I cut them out with my Oval Nestabilities. The stamps fit great in those die templates.

I layered it on a Whisper White circle and Chocolate Scallop circle, both were cut with Circle Nestabilities. The inside of he oval frame was paper pierced. I added a silver paper clip from the Paper clip assortment from Stampin’ Up! to the top left of the sentiment and tied Pink Taffeta Ribbon around it. On the bottom right I added a Snowflake from the Little Felt Flurries, added a Jumbo Eyelet in it’s center topped with an Fire Circle Rhinestone brad.

I created smaller sample with a 2 1/2″ x 5″ piece of cardstock. I will share that with you tomorrow.

Have a great day! Hugs and smiles

I had no desire to stamp yesterday after getting done with my chores. I made this card early this morning. I have to walk Rebecca to school. I will be right back to the details. Still no mojo here, so I went back to my fall back layout! Thank goodness the BIC was easy. It was screaming for me to use the Urban Garden Paper and Pocket Silhouette stamps.

pocketsilhouettesbic20black.jpg

This time I started with my image and worked my card around it. I stamped the leaf stamp from Pocket Silhouette in Black Stazon on Whisper White, punched it out with the 1 3/4″ circle punch and added a blue shadow with my Blender Pen and Baja Breeze ink pad.

I layered it first on a slightly bigger Old Olive circle that I had cut with circle Nestabilities, then on a black scallop circle cut with the Bigz XL Pennant Die from Stampin’ Up!. I added 9 paper piercing holes on the lower left and the top right. I punched a small flower from Baja Breeze cardstock with Trio Flower Punch, sponged it’s edges with a sponge dauber, added a 1/8″ black circle, adhered it to the image with dimensionals and topped it off with a small Ice Circle Rhinestone Brad.

The card base is a 4 1/4″ x 8 1/2″ piece of Kiwi Kiss cardstock folded in half. A white gel pen dotted border was added 1/8″ in all the way around.  The next layer is a 3 3/4″ square of Basic Black cardstock. Each corner was punched with the ticket corner punch. The 3 1/2″ Whisper White square that is the next layer was first scored every 3/8″ vertically to create the look of the wall of the inspiration piece. I used my Scor-It to create those scores. It creates deep score lines and you can add those score lines anywhere you want. (Click on the image to see the image bigger and the score lines better.)The bottom part was layered with a 1 3/4″ x 3 1/2″ piece of Urban Garden Designer paper piece. Each corner was punched with the ticket corner punch and the edges were paper pierced. I tied ribbon from the retired Jersey Ribbon Originals Pack around the layers. I didn’t even realize until now that it’s the same ribbon that now comes in all six In Colors. I wish we still had a little bit wider black ribbon like that (sigh).

The sentiment was stamped in Black Stazon on white cardstock and punched out with the small oval punch. I cut the right edge off and lined it up with the edge of my designer paper, paper pierced a line underneath the sentiment and paper pierced a line under the sentiment. I punched a flower out of Kiwi Kiss paper with the Trio Flower Punch, sponged the edges and added a 1/8″ black circle before adhering it under the sentiment with a dimensional. Again the flower was topped off with a small Ice Circle Rhinestone Brad.

© 2012 fresh & fun Suffusion theme by Sayontan Sinha