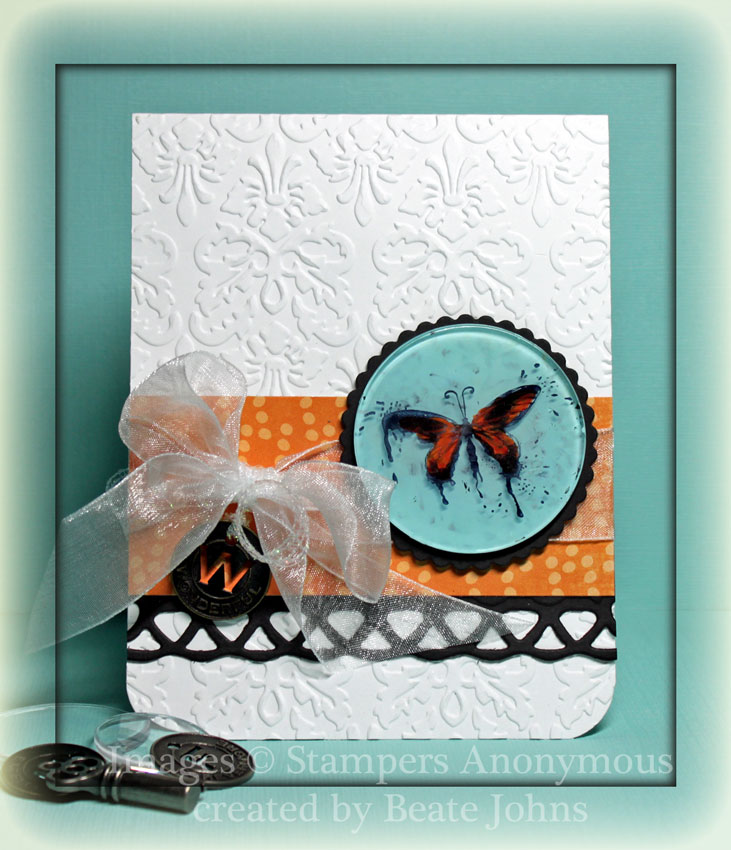
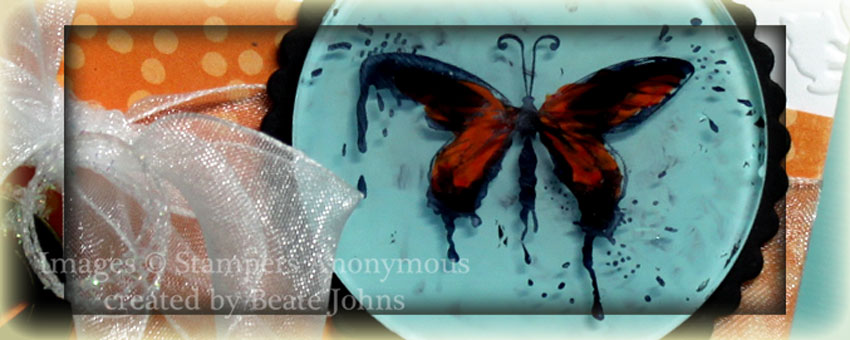
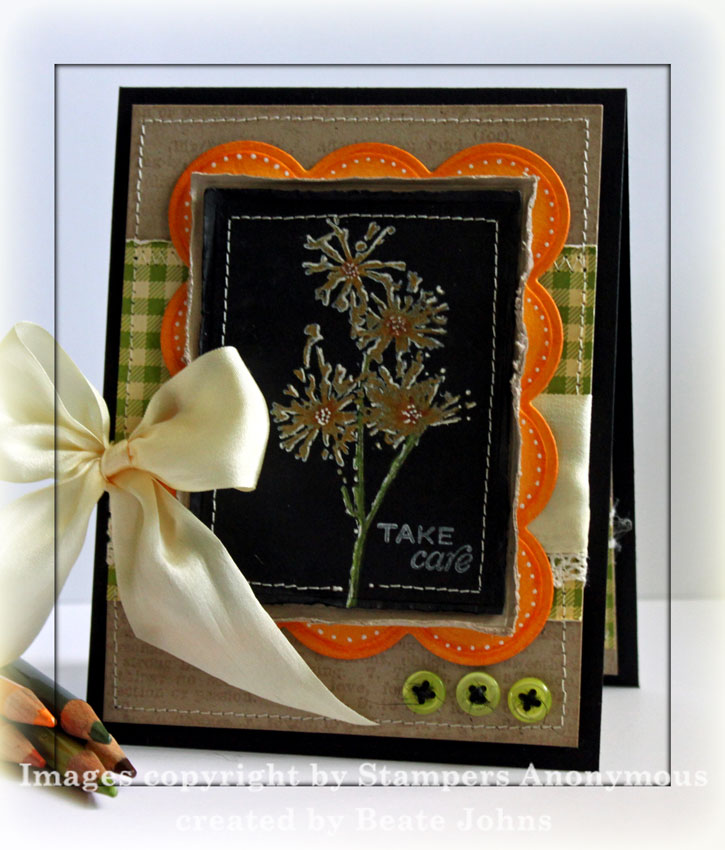
One of the Challenges of the February VSN at Splitcoast was to create a card with Soot Stamping. For my sample I used the gorgeous bird stamp from Tim Holtz Urban Tapestry stamp set.

Before I added the soot to my glossy cardstock, I cut  and embossed it first with a Label 13 Nestabilities die. It was adhered to a piece of Classic White cardstock, that was hand cut into a slightly bigger layer. The edges of the soot layer were paper pierced.

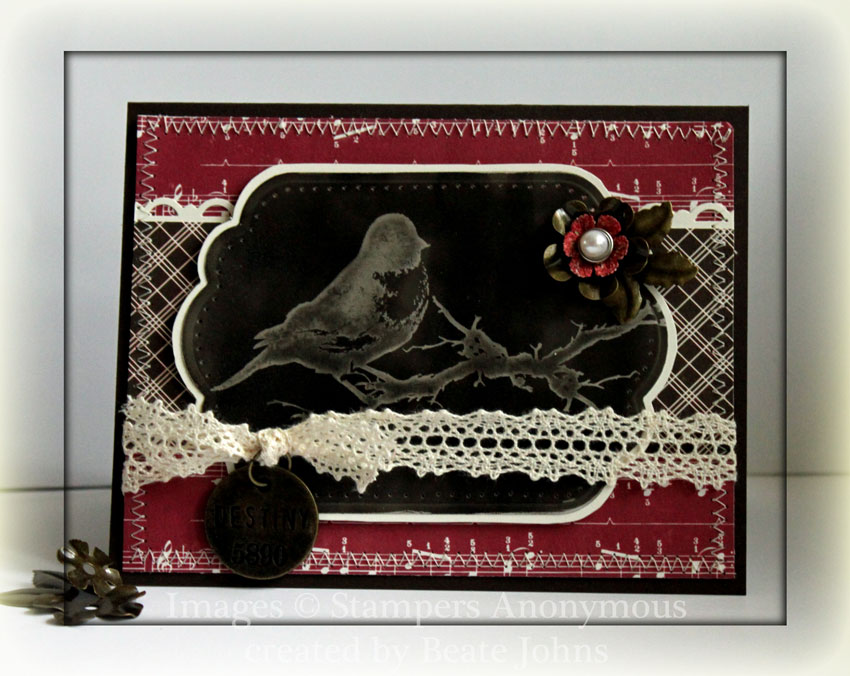
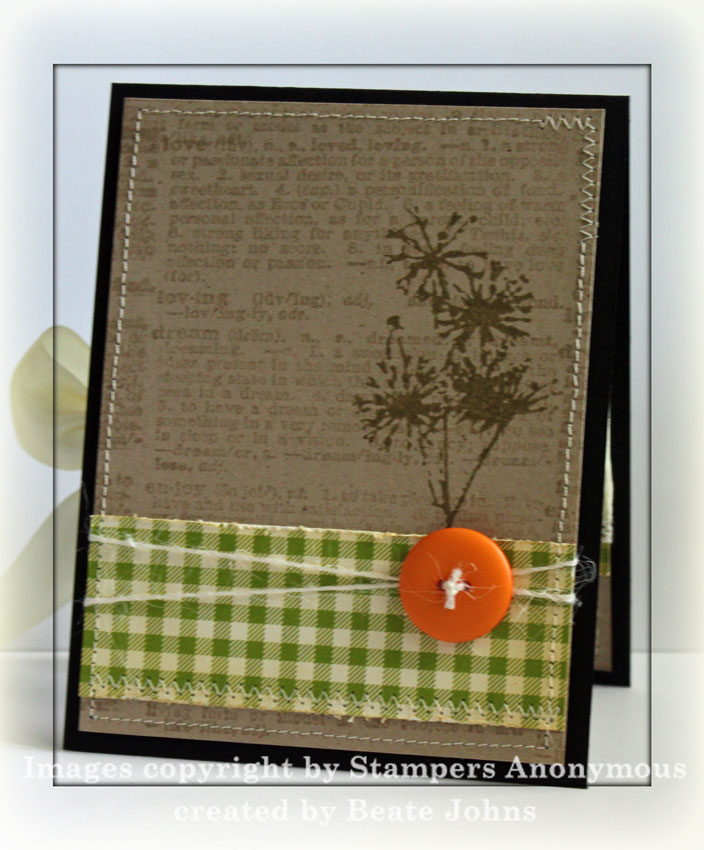
A 2″ x 5 1/4″ strip of Echo Park Merry Christmas paper was stitched to a 4″ x 5 1/4″ piece of the same paper pack. May Arts Crochet Ribbon was tied around the bottom of the horizontal layer before everything was adhered to the card base, a 5 1/2″ x 8 1/2″ piece of Canyon Brown cardstock, folded in half.

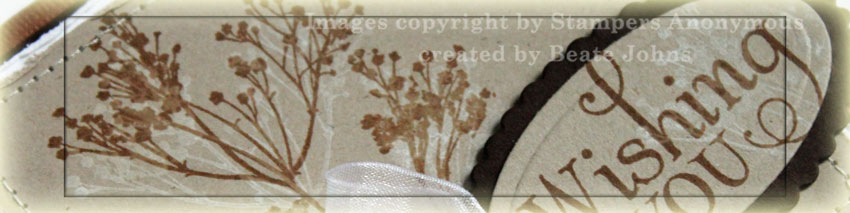
The bird layers were adhered to the card base with dimensionals. It was adhered underneath the lace. A Philosophy Tag was attached to the lace with a jump ring. Tim Foilage topped with a Recollection Pearl brad finish off the card.

Thanks so much for stopping by! Have a wonderful day!
Hugs and smiles

This is one of the cards I made for the new Inspiration Emporium Challenge, which is to use fragments on your project.

For this sample I used a round fragment (which are unfortunately retired), stamped an image from Tim’s Urban Chic stamp set in Jet Black Archival ink and let it dry. Next I turned it over and added paint from Adirondack Acrylic Paint Aqua, Red Pepper and Sunset Orange. Once that was dry I used it as focal point of my card.


The card base is a 4 1/4″ x 11″ piece of Solar White cardstock folded in half. The corners were rounded and the card front was embossed with Cuttlebug’s Brocade Embossing folder.

A 2″ x 4 1/4″ piece of Playground Echo Park paper as adhered over a piece of black cardstock, that had been cut and embossed with the new Rectangle Lattice Nestabilities. It was adhered to the lower half of the card base. White organdy Ribbon was tied around the strip and a Muse Token was attached to the ribbon with iridescent curling ribbon.

I hope you have time to play. You could win a $50 shopping spree at Inspiration Emporium.

Thanks so much for stopping by!
Have a wonderful day! Hugs and smiles

One of my favorite stores is starting to hold a monthly challenge. And guess what? The winner will receive a $50 shopping spree in the store? How awesome is that? This first challenge will run all April and is a Way to use it challenge.

We are challenged to use Tim Holtz Fragments. Okay…who is guilty of having bought that product and having left it sit in a drawer, shelf, closet? I did…I think I used them just a couple of times. This challenge was perfect for me. So far I made two projects that I will share later, but give you a peek of now.

My first card is a CAS card that came together in literally 20 minutes. That never happens when I make card.

For this sample I used a round fragment, stamped an image from Tim’s Urban Chic stamp set in Jet Black Archival ink and let it dry. Next I turned it over and added paint from Adirondack Acrylic Paint Aqua, Red Pepper and Sunset Orange. Once that was dry I used it as focal point of my card.

This card gave me the confidence to use the fragments in another card. The fragments are really not scary and fun to use. I knew I wanted to create a faux tile look for my next sample.


I chose another image from Flourishes Spring is Sprung set. I just LOVE that set. I stamped the bird nest in Tuxedo Black Memento Ink on Neenah Solar White cardstock and colored it with Copic Markers (Nest: E41, E42, E43, E44   Eggs: BG000, BG01, BG02   Leaves: YG01, YG03, YG17   Branch: E23, E25, E27, E29   Sky: B12, B000, B0000).

I cut the image to the size of my square and rectangle fragments and adhered the pieces to the fragments with Glossy Accents. One the adhesive dried, I adhered the fragment pieces to a piece of black cardstock, cut and embossed with a Lacey Square Nestabilities die.

I hope that gave you  a little bit of inspiration on how to use the fragments. You can also adhere printed images underneath as I did on my Vintage Mitten project or just a sentiment like I did in for card.

Have fun with it! I hope you play. $50 shopping spree is a pretty SWEET prize. Have a wonderful day!
Hugs and smiles

savervesapphirecarvsnwide.jpg

I created this card for theVSN challenge Dreaming of May. You had to change color, image or texture from left to right. At first I was stumped, but then I decided to stamp the same image multiple times without re-inking and sponge the left side darker then the right.

Tim Holtz Truck from Mini Muse was stamped on a 2 3/8″ x 4 1/4″ piece of Vanilla cardstock with Chipped Sapphire Distress ink. The background is from Wendy Vecchis stamp set Love to Make Art. It was stamped in Antique Linen. The edges were distressed, then the layer was stitched to a 1/4″ bigger piece of Chocolate chip cardstock that had been sponged with Walnut Stain Distress Ink.

Two Copper brads were added to the upper left hand side, Chocolate Taffeta ribbon was tied to the right edge.

savervesapphirecarvsnbeate.jpg

A 3 3/4″ x 5″ piece of A Proper Gentleman from Graphic 45 paper was sanded, sponged with Antique Linen and the edges were distressed. It was then stitched to a 3 3/4″ x 5 1/4″ piece of Vanilla cardstock that had also been sponged with Antique Linen. The card base is a 5 1/2″ x 8 1/2″ piece of Chocolate Chip cardstock folded in half. The edges of the card had been sponged with Walnut Stain Distress ink.

The sentiment is from Verve’s Just for You. It was stamped in Walnut Stain Distress ink. It was cut with Circle Nestabilities and sponged with Antique Linen. To finish it off I added a paper pierced row under the sentiment.

Thanks for stopping by! Have a great day! Hugs and smiles

sastamphodgepodgewide.jpg

I usually try to use only stamps from one company on a card, but this one has three! The main image is from Tim Holtz Nature’s Discovery, then I needed a background stamp for the Kraft cardstock and used Unity’s Giving it All meaning. I only had a small spot for the sentiment and this one from Flourishes Taglines fit perfectly. The card was created for a Technique Challenge over on SCS. The challenge was to create a card with the Black Magic technique. I usually don’t like the look of this technique…but after playing with it for a bit, really liked how this card turned out. It looks better IRL.
sastamphodgepodgetlc274beat.jpg

I stamped the image from Nature’s Moments  in Snow cap pigment ink on black cardstock and colored it with Prismacolor Pencils (Dark Brown, Marine Green, Limepeel,  Yellow and Pumpkin Orange). It was cut out with Classic Rectangle Nestabilities. It was layered on the next size rectangle in Kraft cardstock. The layers were stitched together to give it an extra border and the edges of the cardstock was distressed.

I cut a a large scallop rectangle out of Apricot Appeal cardstock with Nestabilities, sponged it with Wild Honey Distress ink and added a dotted border with the Inkessential white pen. The image layer was attached to the scallop layer with dimensionals.

The card base is a 4 1/4″ x 11″ piece of Basic Black cardstock folded in half. Next is a 3 15/16″ x 5 3/16″ piece of Kraft cardstock. The layer was stamped with Unity’s Giving it all Meaning background in Watermark Resist Ink. A 3″ x 3 15/16″ piece of Fly A Kite October Afternoon Paper was distressed and stitched to the Kraft layer. May Arts Ribbon was tied around the layer and three green buttons ($1 bin at Michaels) were attached with black Burlap String. The layer was attached to the card front with dimensionals.

sastamphodgepodgeinside.jpg

The card inside is pretty simple, but I really like how it looks. A 3 15/16″ x 5 3/16″ piece of Kraft cardstock. It was stamped with Giving it All Meaning in Watermark Resist ink. The image from Nature’s Moment was stamped on the right hand side with Frayed Burlap Distress Ink. A 1 3/8″ x 3 15/16″ strip of Flying a Kite Paper was distressed and stitched to the Kraft layer. I tied a Basic Grey Button to the layer with tiny twine from MFT’s Bakery Blend Ribbon.

Thanks so much for looking! Hugs and smiles

saframedtreetlc273wide.jpg

Monday’s Technique Lover Challenge was to create a frame and use it on your project. It was a great challenge to use one more of my Encaustic Backgrounds. Did I mention that I had fun playing with that technique?

For this background I used light blue, darker blue and white wax for the sky and two greens and a yellow for the green hills. I stamped the tree from Mini Ornates in Jet Black Archival ink over the background. The frame was cut with Rectangle Nestabilities out of Whisper White Textured cardstock.

saframedtreetlc273.jpg

My card base is a 4 1/4″ x 10 1/2″ piece of Kraft cardstock folded in half. A 3 3/4″ x 4 3/4″ piece of My Mind’s Eye Just Dreamy 2 Paper was sanded and stitched to a 3 7/8″ x 4 7/8″ piece of black cardstock. Both layers were adhered to the card base.

The sentiment is a a little Verve stamp I received as a thank you for my order. Yep, Julee is great like that. It was stamped with Jet Black Archival ink on Whisper White cardstock, cut with Petite Oval Nestabilities, sponged with Shabby Shutter Distress ink and layered on a scallop Kraft oval.

I thought it needed a splash of blue so I added a bow created with the Bow-Easy out of 1/2″ wide blue satin ribbon on the left next to the sentiment. Three black Kaisercraft Rhinestones finish off the card front.

saframedtreetlc273inside.jpg

The inside of the card is very simple. I just added a 1 3/8″ wide strip of Just Dreamy 2 Paper to a white cardstock layer that was then stitched to a black layer.

Thanks for stopping by! Have a wonderful day. Hugs and smiles

savervefernwisheswide.jpg

Jenn was supposed to come over this weekend. We had planned on attending Wendy Vecchi classes in Indianapolis. But Texas is having bad weather and her flight was cancelled. I didn’t feel like driving to Indi without Jenn, so I stayed home and stamped. I made this card for yesterday’s Inspiration Challenge at SCS

ic232fernbamboolaminedishes.jpg

I picked these dishes as my inspiration pieces. I really liked the neutral color combo of the dishes and thought that it would translate into a great card.

savervefernwishesic232front.jpg

I stamped the weed image from Nature’s Moments first in Snow Cap Adirondack ink, then in Sepia Archival ink on the right side of a 3 1/2″ square of Kraft cardstock. The edges of the square distressed, then the square was stitched to a distressed 3 11/16″ square of White cardstock.

An oval was cut out of Kraft cardstock with Petite Oval Nestabilities. On the right hand side I stamped the weed image in Snow Cap Adirondack ink. The sentiment is from Verve’s Wishing you stamp set. It was stamped on Sepia Archival ink. The oval was layered on a slightly large scallop oval. It was cut out of Chocolate chip cardstock. The edges of that layer were sponged with Walnut stain distress ink. I punched a small circle on the left hand side of the oval layer with the Crop-a-Dile. Organdy Ribbon was tied through the hole around the layers.

The card base was cut out of Core’dinations Chocolate Box cardstock with the Scalloped Square Big Shot Die. The next layer was a 3 15/16″ square of Chocolate Chip cardstock that had been sponged with Walnut Stain Distress ink.

savervefernwishesic232insid.jpg

For the inside of the card I used the same cardstock squares as on the front. I stamped the image again on the Kraft layer with Sepia ink on the right hand side. I stamped the second part of the sentiment on a white scallop oval that had been cut with Nestabilities.

Thanks for stopping by! Have a wonderful day! Hugs and smiles

sadimensionalflowerwide.jpg

If you read my blog, you have already seen my grunge flower tutorial, that I learned at Ranger U from Tim Holtz. Today’s tutorial on SCS is the same flower. I called it dimensional flowers since they also work with patterned paper and with a bit more effort (in rolling the edges) with cardstock.

sadimensionalflowersmallbj.jpg

For my flower I adhered dictionary pages to grunge paper before I cut the flowers with Tattered Floral Alteration Die. The die cuts were sponged with Wild Honey and Fired Brick Distress inks.

The sentiment is from the stamp set Good Thought. It was stamped in Jet Black Archival Ink on Neenah White cardstock. It was cut out with Nestabilities Label 2 dies. I left the die on and stamped the swirl from Mini Ornates in Shabby Shutter on the top left and bottom right. Then I sponged over the cardstock in the same color.

The layout for this card is from last week’s sketch challenge on SCS. My small squares measure 1 15/16″ and are from Tim Holtz Retro Grunge Paper Pack. They were adhered to a black scallop square cut with Stampin’ Up!’s scallop square die. Each edge was stamped in Jet Black Archival ink with the sewing stamp from Spring Sprung.

Here is a video for the visual learner:

[youtube]https://www.youtube.com/watch?v=hIe-bYvlw58[/youtube]

sabsignwide.jpg

Sorry I have been so quiet. I am going through another stamping “slump” phase. First I watched all the Bones episodes, then I started reading a book series and this week I have been fighting with nasty migraine attacks.

I won’t show you the entire card because I wasn’t quite happy with the way it turned out. The card is too busy!!!  I am telling you…major slump over here.

Here is a video I shot for last weeks newsletter for the Faux Cloisonne tutorial:

[youtube]https://www.youtube.com/watch?v=LVjIZpsMJFU[/youtube]

sa3dnaturesmomentswide.jpg

Sorry I have been so quiet this week. There hasn’t been a lot of stamping for me. The kids are home on spring break. Plus I started watching Bones on Netflix. Now I am hooked. I really like the characters on the show. Thank you for everyone wishing me a Happy Birthday yesterday.  I had a great day!

This week’s Tutorials you might have missed in the weekly inkling was 3D stamping. Lynn Mercurio wrote a great tutorial for SCS last year. Here is the card I created for the video tutorial.

sa3dnaturesmomentbeate.jpg

My card base is a 4 1/4″ x 11″ piece of Neenah Solar White cardstock folded in half. Pink Paislee’s Bayberry Cottage paper was sanded and taped together to a 3 3/4″ x 5″ layer. Chocolate Satin Ribbon was tied around the area where the paper overlapped. The layer was stitched to a 3 15/16″ x 5 3/16″ piece of Chocolate chip cardstock that had been sponged with Walnut Stain Distress Ink.

For the main image I cute an oval out of Baja Breeze cardstock with Petite Oval Nestabilities. I sponged the edges with Stormy Sky distress ink and stamped with the script from Mini Ornates. The flower/weed from Nature’s Moments was first stamped in Stormy Sky, then in Snow Cap Adirondack ink. The oval was layered first on a Chocolate Chip oval (sponged with Walnut Stain), then on a white callop oval.

All brads used were from Recollections. The sentiment is also from Nature’s Moments. I inked it partly with Walnut Stain, stamped it on white cardstock and punched it out with the large oval punch from Stampin’ Up!. It was sponged with Shabby Shutter Distress ink and part of the weed was stamped on the right hand side of the oval with Stormy Sky. The oval was layered on a Styled Silver hardware piece from Stampin’ Up!

Here is a video for the visual learner:

[youtube]https://www.youtube.com/watch?v=3M0phAg6Mts[/youtube]

© 2012 fresh & fun Suffusion theme by Sayontan Sinha