The second challenge during VSN last week was to create something with an image with wheels. I searched through my stamps and found a scooter from one of Unity’s Kit of the Month.

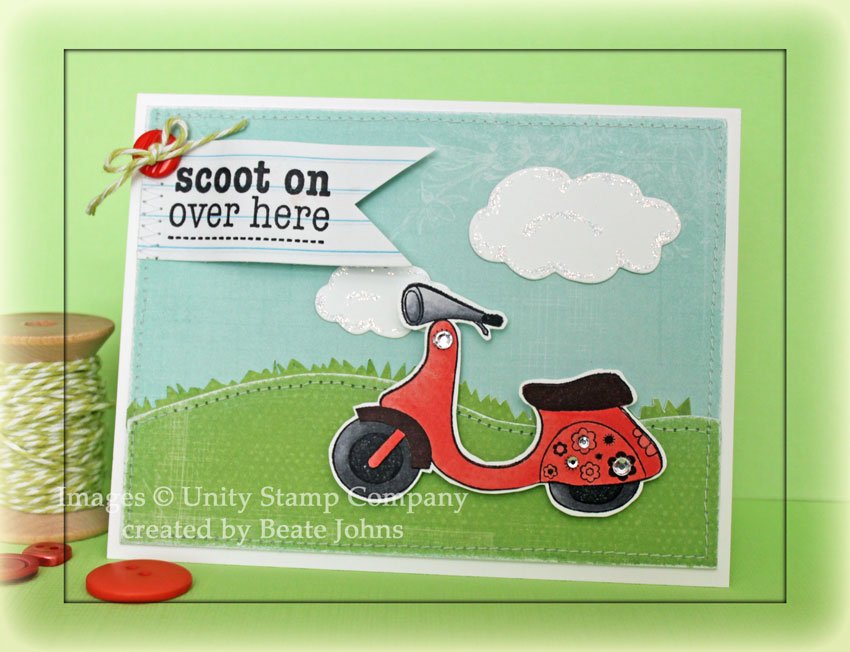
I stamped it twice in Jet Black Archival Ink, once on Neenah Solar White cardstock, once on Pink Paislee Spring Jubilee Patterned Paper. They were both cut out and the patterned paper was adhered over the white cardstock image. The image was colored with Copic Markers and a few rhinestones from a Sleek Strips Silver Rhinestones .

A green piece of patterned paper was cut in a slope and adhered to a blue paper piece from Spring Jubilee paper. The edges were stitched before the layers were adhered to the card base, white cardstock, folded in half.  White cardstock was cut with MFT Cloud Die-namics die.  Two clouds were added to the scene and highlighted with Stardust Stickles.

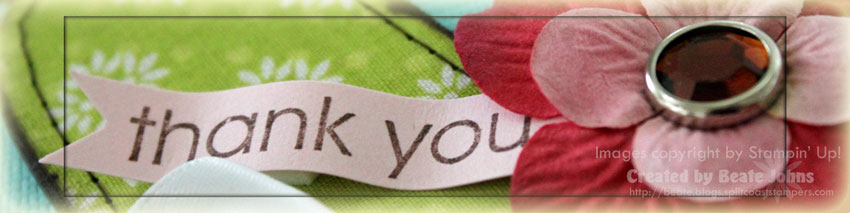
A piece from the notebook paper I still had from the last challenge was cut into banner shape by hand . A sentiment from the same KOM from Unity was stamped on the banner and it was adhered to the upper left hand side. A button was threaded with Honeydew Twine and adhered on the top edge of the banner.

VSN only gives you 45 minutes per card. That’s not a lot of time for me, so this card as well as the ones the next few days will be CAS cards. Very much out of my comfort zone.

Thanks so much for stopping by!
Hugs and smiles

sanaturesmomentsbflywide.jpg

I actually shot two videos for the Glitter Puzzle Tutorial. One where you cut your puzzle with a hobby knife, and this one where I use Tim’s new Fanciful Flight Alteration Die.

The card base was cut out of Chocolate chip cardstock with Stampin’ Up!’s Big shot scallop square die. I cut another piece for my card front and sponged the edges with Walnut Stain distress ink.  I inked up the big flower image from a Nature’s Moment with Peeled Paint and Chipped Sapphire. It was stamped on  4″ square of Just Dreamy 2 My Mind’s Eye paper.

 sanaturesmomentsbutterflybe.jpg

The edges were sponged with Broken China Distress ink and stamped with the stitch stamp from Spring Sprung. (If you were following my blog 2 years ago…I was obsessed with using a stamp from All in a Row to fake stitching. This Tim stamp is sooo cool! I might get obsessed with using that.)

The sentiment is from Going Somewhere. It was stamped in Walnut ink and embossed with Clear Embossing Powder. Stardust Stickles was added over the flower ends.

I ran a sheet of cardstock through my Xyron to add double sided adhesive. Then I cut the butterfly twice, once with the adhesive side up, once with the cardstock side up.  If you cut the butterfly the same way twice, you will have two left glittery wings. 🙂

I attached the solid wing pieces to the card base with dimensionals, peeled off the adhesive backing and adhered the detailed wing part over it. Then I rubbed Red, Orange and Yellow Martha Stewart Glitter over the wing. After I tapped off the excess, I peeled the adhesive backing off the detailed stamp and added Brown Glitter.

Here is a video for the visual learner:

[youtube]https://www.youtube.com/watch?v=CLqwl2n-Q3s[/youtube]

I am enjoy playing with all my new Tim Holtz stamps, dies, inks and accessories so much. Have a wonderful Easter weekend! Hugs and smiles

Remember this card?

kindredspiritsbookmarkcard1.jpg

The card has a decorated inside with a detachable bookmark. I couldn’t show it back then because we hadn’t run the product review on the Xyron Creatopia yet. So here is the inside of the card.

kindredspiritsbookmarkcard2.jpg

And here is the bookmark part:

kindredspiritsbookmarkcard3.jpg

You can find a step by step tutorial written by Mary Brown for this card style on Splitcoast. Here is a video for the visual learner:

[youtube]https://www.youtube.com/watch?v=ghxZBObw-vE[/youtube]

Today’s tutorial is part of the Product Review for the Xyron Creatopia. Make sure to check it out. It is one cool tool. The favorite feature for most reviewers was the Fabric Adhesive Cartridge. Ashley Newell wrote the tutorial about Adhering Fabric to chipboard and created the cutest sample.

kom0909ragannfabric2.jpg

For my fabric sample I stamped this cute girl from Unity’s September Kit of the Month kit in Black Memento ink on thicker natural looking muslin. I ran it through the Creatopia, cut it out with Oval Nestabilities and sponged the edges with Vintage Photo Distress Ink. The fabric was taped on a slightly bigger oval in Basic Black ink and the edges were stitched. The little girl was colored in with Copic Markers (G82, G85, E 41, E 43, R27, R29, YR04, YR07, YR09).

kom0909ragannfabric1.jpg

The card base was cut out of Basic Black cardstock with the Clear Scallop Die from Big Shot. The next layer is a 3 3/4″ Kraft cardstock square that had been sponged with Vintage Distress ink. The polka dotted layer is fabric. It was adhered to a piece of cardstock, cut down to 3 1/2″, sponged and then stitched to the Kraft cardstock layer. Pumpkin striped grosgrain ribbon was tied around the fabric/kraft layer and buttons were sewn on with Linen Thread.

kom0909ragannfabric3.jpg

The measurements of the inside layers mirror the ones on the card front. The fabric strip measures 7/8″ x 3 1/2″. It was sponged and stitched to the main layer. The sentiment is also from Unity’s September Kit of the month stamp set. A Pumpkin Corduroy button as sewn onto a Prima Flower with Linen Thread.

Here is a video for the visual learner:

[youtube]https://www.youtube.com/watch?v=ACSO17fXUpQ[/youtube]

abundantblessingssmile.jpg

My Bermuda Bay card base measures 4 1/4″ x 8 1/2″ . It was dry embossed and cut with the Xyron Creatopia.  A piece of Thoroughly Modern designer paper was taped to the top and sanded. White May Arts Satin Ribbon was tied around it.

The image is from Verve’s stamp set Abundant Blessings. It was stamped with Melon Mambo ink, cut out with Circle Nestabilities and first layered on a slightly bigger Chocolate chip circle, then on a Whisper White Scallop Circle. Another piece of Thoroughly Modern Designer Paper was taped to the inside of the card front.

To see the Creatopia cutting and dry embossing, check this video:

[youtube]https://www.youtube.com/watch?v=wwfMTNNaKOY[/youtube]
I shot this video before receiving a second wheel guide from Xyron. The second wheel guide  helps cutting paper straighter.

Here is another tutorial published this Wednesday. This one is about altering spiral notepads. I wrote it to show off Creatopia‘s permanent adhesive and laminating cartridge, but you can alter bought spiral notepads without the machine as well.

unitykom020309notes.jpg

It’s pretty self explanatory, so I will just add the supply list:

Stamps: Unity February 09 Kit of the Month stamp set

Ink: Tuxedo Black Memento Ink

Paper: Paper Salon Patterned Paper, Black cardstock

Acc.: Button Late, retired SU’s Sage ribbon

unitykom020309inside.jpg

On the inside I stamped each notepad page in second generation Soft Suede ink with another stamp from Unity’s February KOM set.

Here is a video for the visual learner:

[youtube]https://www.youtube.com/watch?v=n4NcCg9iCY0[/youtube]

enjoyeverymomenwcmd09.jpg 

Are you stamping ? Are you knee deep in creating cards for the challenge posted on Splitcoast yet? You better drink something with lots of caffeine and head on over. SCS member companies are hosting challenge every hour. It started at 10:00 a.m. EST and it will end at 11 p.m. EST. As long as you upload your card by Sunday at midnight, you are eligible to win PRIZES!

Stamping and a chance of free stuff? I don’t think it can’t get any better. But wait…it does. Because…you can send the cards you have made to Operation Write Home  and donate them to this wonderful cause. Okay….so get your stamps out and get started! 🙂

This hour the SCS gang hosts a challenge. Our requirements are to make a card that

  • includes chocolate
  • follows the theme thankfulness
  • and uses the WSC100 sketch!

untitled-1.jpg

Here is my sample. And yes…that’s four days in a row that I posted a card with this sketch. I took my liberties and my circle turned into a BIG heart. But heck…if you read my blog you know I always just use sketches as starting points.

enjoyeverymomentwcmd09bj.jpg

My card base is a 4 1/2″ x 9″ piece of Pink Pirouette cardstock, folded in half. The front was embossed with Cuttlebug’s Swiss Dot Embossing Folder.  The Chocolate Chip square measures 3 5/8″ . It was layered with a 1/4″ smaller piece of Aruba Core’dinations cardstock. The edges of that layer had been sanded and then zigzag stitched. Stampin’ Up!’s white Satin Ribbon was tied around the lower half of these two layers.

I adhered Fabric (bought as a fat quarter at JoAnn’s) over my chipboard heart, cut off the excess and inked the edges with Chocolate Chip Craft ink. Next I straight stitched around the edge (I was surprised my machine did that! Yeah for me and my Pfaff!).  The flowers are from Prima Quick Picks Flowers Hydrengea Strawberries pack. They were attached to the heart with a big rhinestone brad I got from sweet Charmaine a while back.

 The thank you from Stampin’ Up!’s Enjoy Every Moment was stamped on Pink Pirouette ink in Chocolate Chip. The cardstock was cut down to a strip and the left edge was punched with the photo corner punch. Next I rolled it up and down over a pen and adhered it with dimensionals.

Have fun participating in the challenge!

© 2012 fresh & fun Suffusion theme by Sayontan Sinha