Today’s tutorial on Splitcoaststampers is written by the amazing Eva Doblias. She shows us how easy it is to use Twinkling H2O’s. She couldn’t create a video, so I shot one showing how to use the paints to create a watercolor wash background.

I started by stamping snowflakes from Verve’s Glad Tidings in VersaMark ink on a 3″ x 5″ piece of white cardstock.  They were embossed with white embossing powder before I used blue and purple Twinkling H2O’s for the waterwash. Once the paper dried, I stitched the edges of that layer.

A piece of white cardstock was cut with the Vintage Oval Frame die and the stamp with the same name was stamped over it with Starlite Black Brilliance Ink. A sentiment from Glad Tidings was stamped in the center.

Silver glimmer paper was cut and embossed with the two smallest dies from Spellbinders Create-A-Flake Four, layered on top of each other and connected with a Recollections brad (Michaels). The snowflake was adhered to the right hand side of the sentiment layer. Rhinestones from a Sleek Strips Silver Rhinestone package were added underneath the sentiment. The sentiment layer was adhered to the lower left of the background layer before the background was adhered to the card base. Part of a Finesse Rhinestone Swirl finishes off the card.

Here is a video for the visual learner:

[youtube]https://www.youtube.com/watch?v=oSWBfnl_wSo[/youtube]

Thanks so much for stopping by! Have a wonderful day!
Hugs and smiles

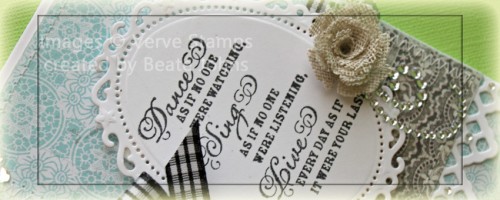
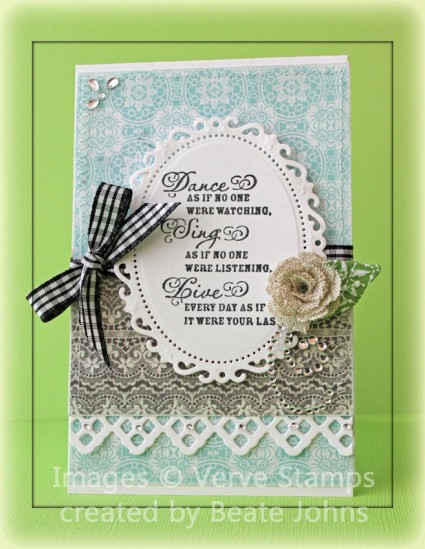
Another VSN challenge last weekend was to create a card that shows off something physical on your card. I decided to use a sentiment that talks about Dance . I used die cuts that were in my little box of die cuts I cut and then didn’t use, so the card came together pretty quickly.

The sentiment is from Verve’s Beautiful You. It was stamped in Jet Black Archival Ink on white cardstock, cut and embossed with the second largest Floral Oval Nestabilities die.

White cardstock cut and embossed with a Lace Doily Accents die was adhered underneath a 2″ x 3 1/2″ piece of Head over Heels paper . The strip was adhered to  3 1/2″ x 5 1/4″ piece of Handmade Lilybeedesigns paper . The edges were sanded and stitched before gingham ribbon was tied around the top edge of the horizontal strip. the paper was then adhered to the card base, a 3 1/2″ x 11″ piece of Neenah Solar White cardstoc, folded in half.

The sentiment oval was adhered to the center of the card with dimensional foam adhesive. Rhinestones and a Linen fabric flower, created with Bitty Blossoms dies, finish off the card. And yes, that flower was made already as well. I am sure you know how that goes…lol

Thanks so much for stopping by! Have a wonderful day. TGIF
Hugs and smiles

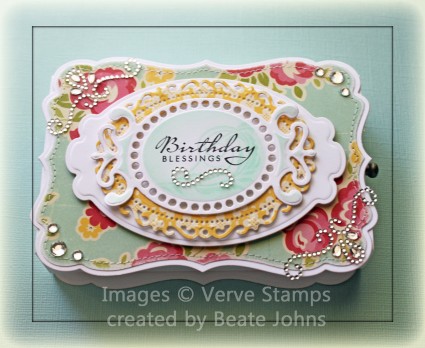
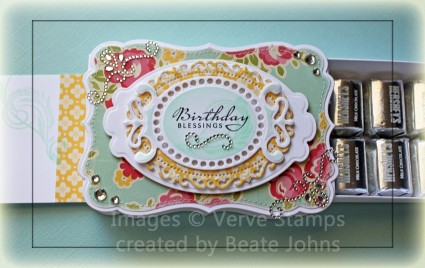
Today’s tutorial on Splitcoaststampers is for a Slider Box. When you open the drawer a slider message will appear.

A piece of Neenah Solar White cardstock was cut and embossed with a a Fancy Tag Three. The embossed part was sponged with Aqua VersaMagic ink and a sentiment from Verve’s Blessings stamp set was stamped in the center. Part of a Fancy That! Border Bling was adhered underneath.

The tag was adhered to a piece of October Afternoon Sidewalks Paper paper cut and embossed with the second largest Floral Oval Nestabilities die.  That was then adhered to another piece of white cardstock, cut and embossed with a Label 10 Nestabilities die. The layers directly over the box were cut with  the largest Label 17 Nestabilities die. The Label for the box top was covered with more October Afternoon Sidewalks paper. More Fancy That Border Bling! as well as Rhinestones from the 72 count Rhinestone bling finish off the card.

Here is a video for the visual learner:

[youtube]https://www.youtube.com/watch?v=fTyvpZLaxCQ[/youtube]

Thanks so much for stopping by! Have a wonderful day!
Hugs and smiles
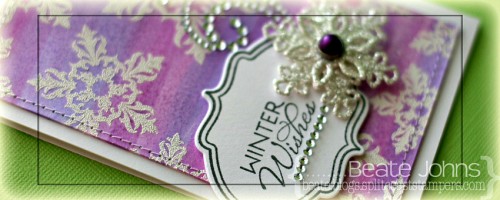
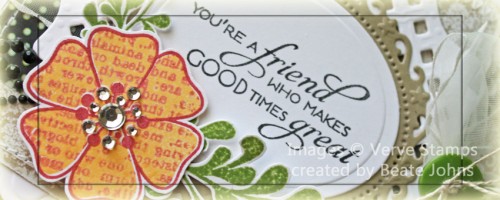
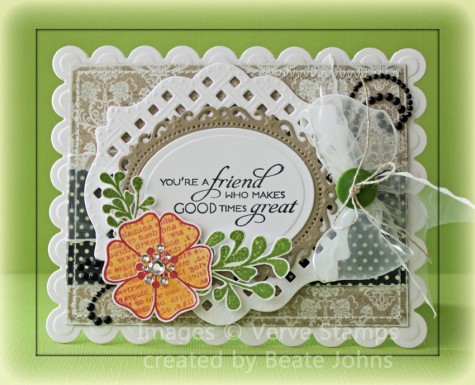
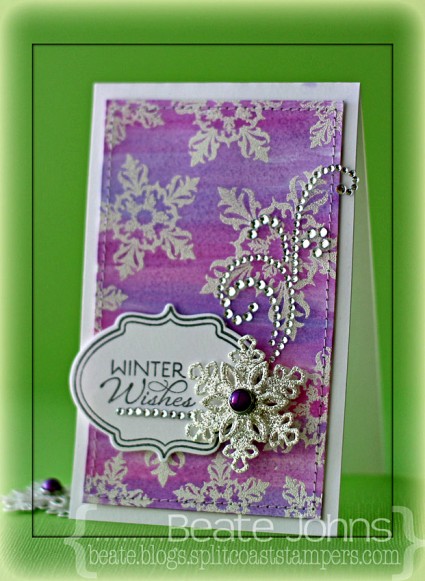
I created this card as a sample for the video tutorial for the Kissing technique. I started by inking the solid stamp from Verve’s Great Friend set in Cantaloupe Memento ink and Unity’s Giving it All Meaning Background stamp in Rhubarb Stalk Memento Ink. Next the solid stamp was pressed to the background stamp and then stamped on Neenah Solar White cardstock. Stems were stamped in Bamboo Leaves Memento Ink. Both the flowers and branches were cut out.

A sentiment from Great Friend was stamped in Tuxedo Black Memento Ink on a piece of Solar White cardstock, that had been cut and embossed with a Classic Oval Nestabilities die. The oval was first layered on Kraft cardstock, cut and embossed with the second largest Floral Oval Nestabilities die, then on a piece of white cardstock that had been cut and embossed with a Lattice Motif die.

Two pieces of My Mind’s Eye Lost & Found Two Rosy Patterned paper were cut and embossed with a Grand Rectangle Nestabilities die. The edges were sanded and stitched before May Arts ribbon was tied around the layers. The sentiment panel and flower were adhered over it with dimensional adhesive. The layers were taped to the card base, white cardstock cut and embossed with a Grand Scallop Rectangle die. Parts of a black Finesse Rhinestone and Sleek Strips Silver Rhinestones and Silver Baby Bling Rhinestones finish off the card.

Here is a video for visual learner:

[youtube]https://www.youtube.com/watch?v=2Zzw9YIdFiI[/youtube]

Thanks so much for stopping by! Have a wonderful day.
Hugs and smiles

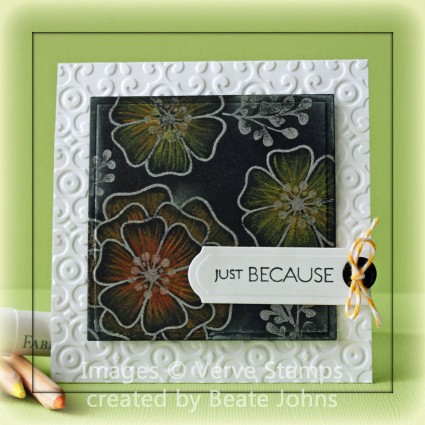
There is a new product review on SCS today. We got to play with Design Memory Crafts Mixed Media Sampler (Faber-Castell products). After checking their blog and finding this cool card, I wrote a tutorial for the technique for SCS. My sample is a lot more subdued then Jill Foster‘s, but I still like it. Those Pastel Pencils are a lot of fun.

I started by cutting a piece of black cardstock with a Classic Square Nestabilities die. Flowers from Verve’s Great Friend were stamped in Embossing Ink and embossed with silver embossing powder. The flowers were colored with PITT Pastel Pencils and the edges were smudged with a white gelato stick.

The card base was embossed with the Elegance M-Bossibilities folder and the image panel was adhered over it with dimensionals. A piece of Solar White cardstock was cut and embossed with a Tailor-Made Classic Keyhole die. A sentiment was stamped over it in Tuxedo Black Memento Ink and the right edge was cut straight. It was adhered to the lower right hand side of the image. It was topped with a black button, tied with Lemondrop twine.

Here is a video for the visual learner:

[youtube]https://www.youtube.com/watch?v=4hBX8RSC9EQ[/youtube]

Thanks so much for stopping by! Have a wonderful day!
Hugs and smiles
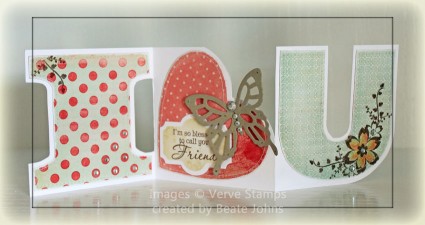
Yesterday’s tutorial on Splitcoaststampers was written by Dina Kowal. She showed us how to create a word card. It’s a very fun and easy project, perfect for showing off your patterned paper.

My card base was created out of a 3 1/2″ x 10 1/2″ piece of Neenah Solar White cardstock. It was scored at 3 1/2″ and 7″. My letters were cut out of MME Lost and Found Market Street Patterned paper. The paper edges were sanded and stitched. On top of the I and the bottom of the U an image from Verve’s Because of you was stamped in Rich Cocoa Memento Ink.

I recently got the red and yellow Mixed Media Sampler from Faber-Castell and was itching to try the aquarelle and pastel pencils from those sets. I used the red aquarelle and yellow pastel pencil to color the flower on the U and blended it with an embossing pen (I really need to get a new blending pen. Mine was dry).

A sentiment from the Because of you was stamped in Rich Cocoa Ink on a piece of Solar White cardstock, cut and embossed with the second smallest of the Label 21 Nestabilities die. The inner part was sponged with Antique Linen Distress ink and part of the flower image was stamped over it in the same ink. The sentiment was adhered to the lower part of the heart and topped with a butterfly, cut and embossed out of Kraft cardstock with one of dies from the Wonderful Wing Shapabilities set. Rhinestones on the flower, butterfly and lower part on the I finish off the card.

Here is a video for the visual learner:

[youtube]https://www.youtube.com/watch?v=qvhXs-xjzpQ[/youtube]

Thanks so much for stopping by! Have wonderful day!
Hugs and smiles

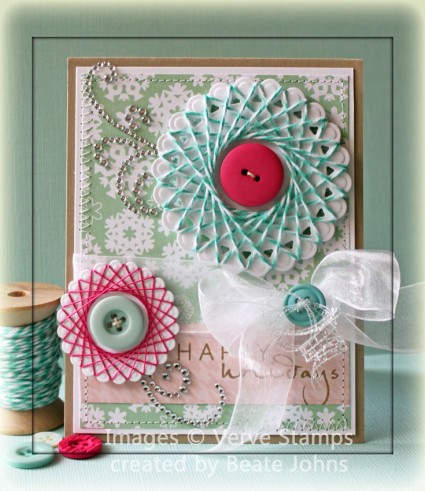
Today’s tutorial on Splitcoaststampers is written by Susie Nelson. She shows us how to create Spirelli – String Art. For my sample I used two different strings: Caribbean Twine from the Twinery and 20 count pink thread from Lizbeth (Hobby Lobby). I cut and embossed Neenah Solar White cardstock with the second and third smallest die from the Beaded Circle Nestabilities dies and wrapped my string around the scallops.

I first thought to use the Spirelli circles as flowers, but I can’t help myself. I am in LOVE with Echo Parks Holly Jolly Christmas paper and thought I could use them as funky snowflakes. I added a button in each snowflake center with Linen Thread.

A sentiment from Verve’s Frosty Flakes was stamped in Frayed Burlap Distress ink on a 1 1/4″ x 3 3/4″ strip of Holly Jolly Paper. It was adhered to a 3 3/4″ x 5″ paper from the same paper pack. Both pieces were stitched to a 4″ x 5 1/4″ piece of Solar White cardstock. White Organdy Ribbon was tied above the horizontal strip. A button was tied over the bow with Silver Iridescent Ribbon and the layers were adhered to the card base, a 4 1/4″ x 11″ piece of Kraft cardstock, folded in half. Parts of a Rhinestone Finesse Swirl next to the Spirelli circle finish off the card front.

Here is a video for the visual learner:

[youtube]https://www.youtube.com/watch?v=r2ZJUBdCfHg[/youtube]

Thank you so much for stopping by! Have a wonderful day!
Hugs and smiles
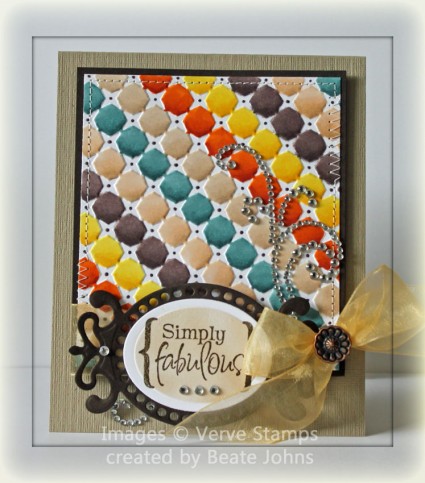
This weeks Moxie Fab World Tuesday Trigger looked tough. I was not about to enter that challenge. But then I saw the awesome Free For All Challenge Lydia hosted. That along with a new embossing folder I received that day gave me an idea for a card that would work for both challenges.

I started by embossing a 3 1/2″ x 4″ piece of Neenah Solar White cardstock. I colored each of the embossed cubes with Copic Markers (BG72, BG73, E30, E31, YR15, YR18, Y13 , Y15, E74, E77, E41, E42) and the tiny dots with E77. The layer was stitched to a 1/4″ bigger piece of Canyon Brown cardstock. Another piece of Canyon Brown cardstock was cut and embossed with a Fancy Tag 3 die.

A piece of white cardstock was cut and embossed with a Classic Oval Nestabilities die. A sentiment from Verve’s Beautiful Kindness was stamped in Walnut Stain Distress Ink was stamped on the oval. The inner part was airbrushed with Copic Marker E42 before it was adhered to the Fancy Tag die cut. Yellow Organdy Ribbon was threaded through the die cut frame and  tie around the layers.

The layers were adhered to the card base a 4 1/4″ x 10 1/2″ piece of Textured Kraft cardstock, folded in half. Part of a Finesse Rhinestone Swirl was adhered over the bow and a small one on the left under the tag. Small Baby Bling Rhinestones on the sentiment panel finish off the card.

Thanks so much for stopping by! Have a wonderful day!
Hugs and smiles
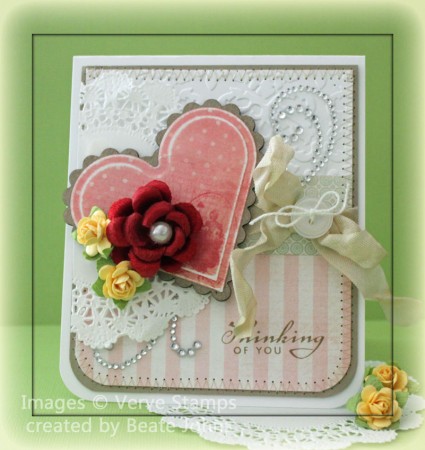
I created this card for another Hope you Can Cling to Challenge. Teresa Kline was the hostess and challenged us to use at least one heart on our card.  At first I wasn’t sure if I wanted to use a stamp image with a heart on it. After looking through my images I just couldn’t decide what to use so I went another route.


For my heart I used a a Nestaboard Scallop Heart as a base. I used a slightly smaller regular heart Nestabilities die to cut and emboss a piece of MME Lost & Found Market Street. The heart was sanded and adhered to the Nestaboard.

A 3 3/4″ x 4 1/2″ piece of Neenah Solar White cardstock was embossed with the Cuttlebug Brocade Embossing folder. Two different pieces of Market Street paper were adhered over it and the two bottom corners were rounded. The layers were stitched to a 3/16″ bigger piece of Kraft cardstock.  Parts of a Finesse Silver Rhinestones were  adhered to the upper right hand side and lower left of the layers.

A piece of seam binding that I had stained a while ago (not sure when or with what color, it was in my ribbon box) was tied around the horizontal layer and topped off with a button. The heart was adhered to the left of it after part of a doily was adhered underneath it. The red flower is a Prima flower, the smaller yellow ones are Recollection flowers (Michaels brand).

A sentiment from Verve’s Blessing stamp set was stamped to the lower right side of the layers with Frayed Burlap Distress ink. Everything was adhered to a 4 1/4″ x 10″ piece of white cardstock, folded in half.

Thanks so much for stopping by! Have a wonderful day!
Hugs and smiles
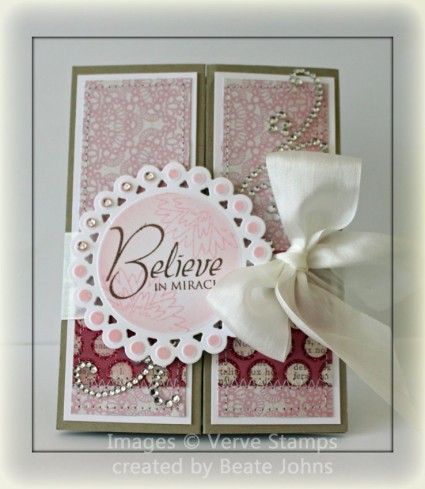
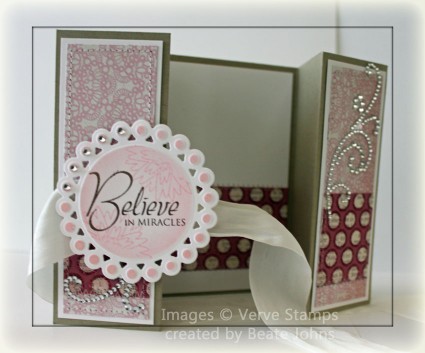
Today’s tutorial on Splitcoast is for the Double Z-Fold card. It looks like a Gatefold card closed, but has another fold to it when you open it up. I think it’s a great fold for invitations.

My card base is a 5 1/4″ x 12″ piece of Textured Kraft cardstock scored at 2″, 4″, 8″ and 10″. 1 1/2″ x 4 3/4″ pieces of My Mind’s Eye Lost & Found Two Blush paper were stitched to a 1/4″ bigger piece of Neenah Solar White cardstock before they were adhered to the card base panels.A Rhinestone swirl was cut apart. Part was adhered to the upper right, the rest to the lower left of the card base.

A piece of white cardstock was cut and embossed with one of the Beaded Circle Nestabilities dies. It was sponged with Spun Sugar Distress ink before a sentiment from Verve Believe Stamp set was stamped in its center with Rich Cocoa Memento ink. A medium sized flower was stamped over the panel twice with Spun Sugar for a more textured look.

White Silk Ribbon was tied around the card before the sentiment panel was adhered with dimensionals. Baby Bling Rhinestones on the upper left hand side of the sentiment panel finish off the card front.

The inside is very simple. A 2″ x 3 3/4″ strip of Blush Paper was stitched to a 3 3/4″ x 5″ piece of white cardstock.

Here is a video for the visual learner:

[youtube]https://www.youtube.com/watch?v=f616k3NoKGU[/youtube]

Thanks so much for stopping by! Have a wonderful day!
Hugs and smiles
© 2012 fresh & fun Suffusion theme by Sayontan Sinha