Love is in the air and Simon Says Stamp has made it even more fun to create projects to show someone that you love them with their 2013 Valentine’s Day Release.   I was asked to create a project using something from this release to share in today’s Valentine’s Day Blog Hop.

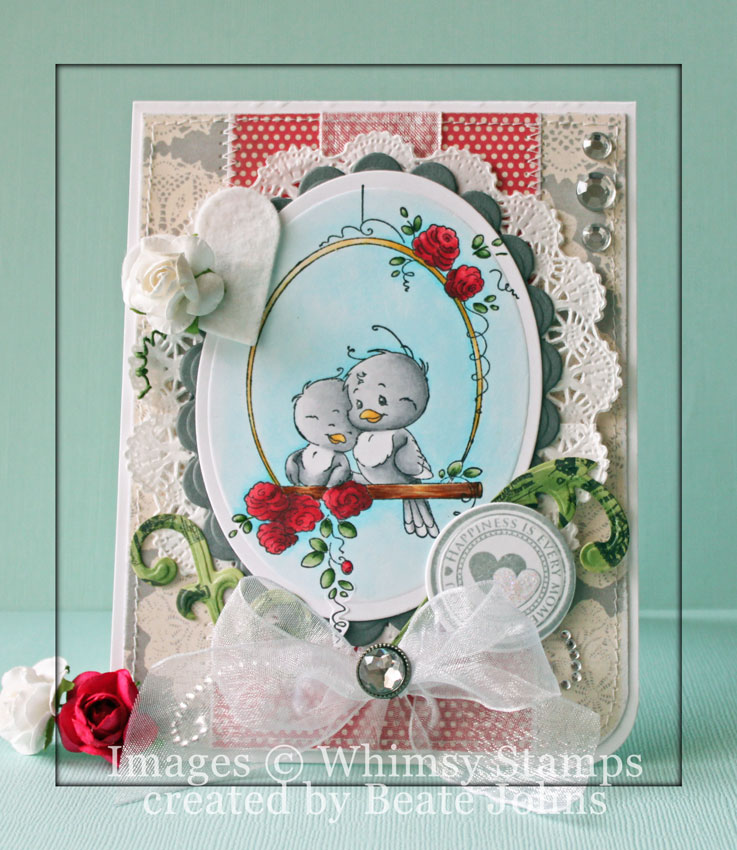
For my card I combined several of the new Simon Says Exclusive stamp set and dies.  I started  by stamping an image from Talk Bubbles 2 all over a  3″  x 4 5/8″ piece of Neenah Solar White cardstock in Sea Breeze VersaMagic ink. Small hearts from the new Lots of Hearts set were added in Key Lime VersaMagic ink in between the clouds. A sentiment from Just a Love Note was stamped in each bubble with the same ink.  Faux stitching was added to the edges with a black gel pen.

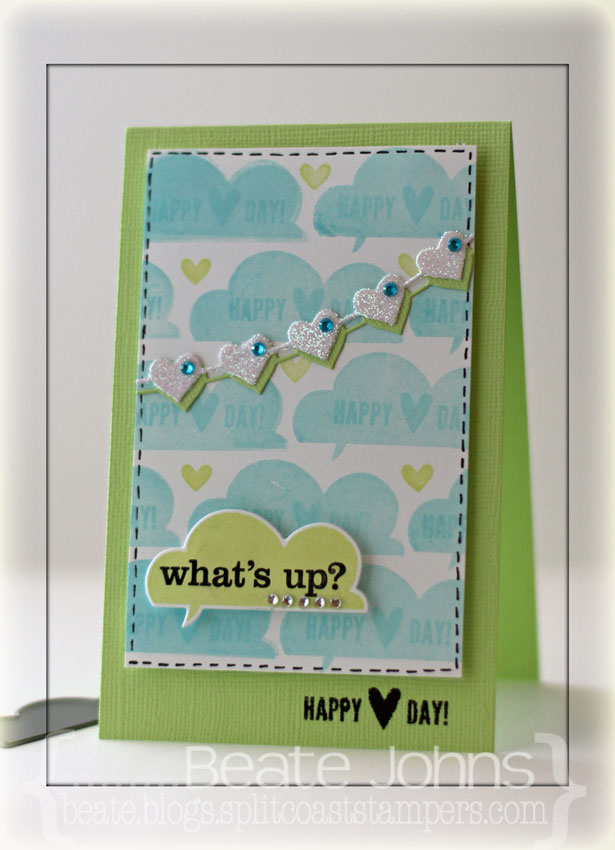
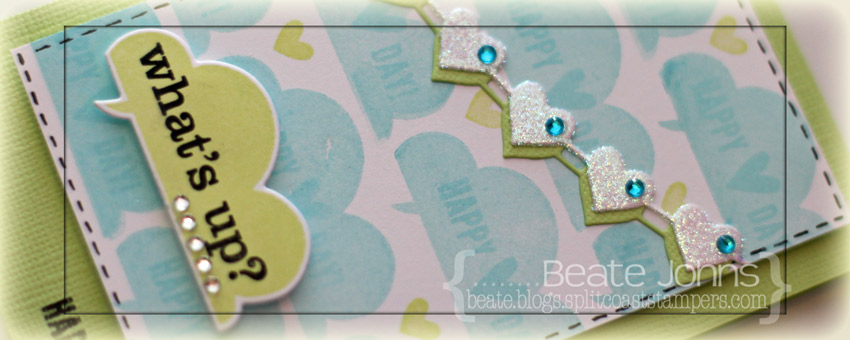
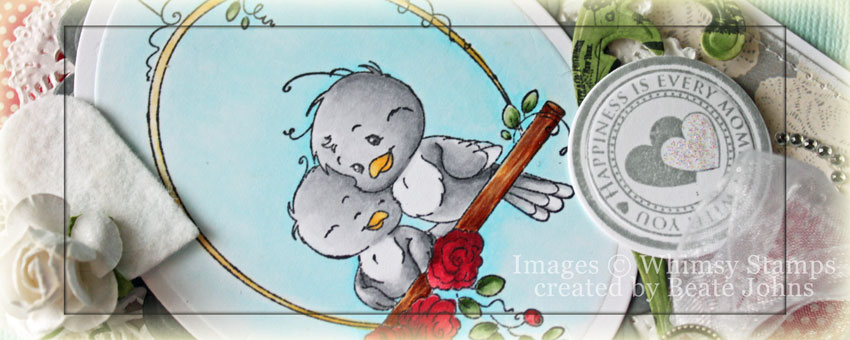
A cloud was cut with one of the Talk Bubbles 2 dies out of Solar White ink and stamped with the matching stamp in Key Lime ink. A sentiment from Talk Bubbles 2 was stamped into the cloud, rhinestones were added underneath and the cloud was adhered to the lower left of the layer with foam adhesive squares.

The card base is a 3 1/2″ x 11″ piece of Bazzill Limeade cardstock folded in half. The sentiment that I used inside the clouds was stamped in black in on the bottom right corner before the cloud panel was adhered over it with foam adhesive squares.  White and Limeade cardstock was cut with the new String of Hearts Craft die. I ran the white cardstock heart strip through my Xyron and covered it in glitter. It was adhered on top of the green hearts and both strings were adhered over the cloud background.

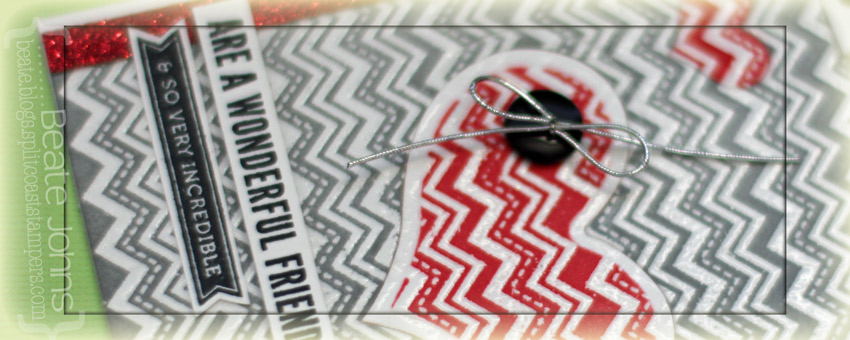
Last week I created another card with new Simon Says clear stamps. Just in case you missed it, you can find it here.

And now to the giveaway part! Leave a comment on this blog post and one lucky winner will receive a Simon Goodie Bag (if you know Heidi, it will be a good one!).  We will draw the winner on Thursday morning 1/31/13 at 9:00 AM EST. so be sure to leave your comment by then.

Thanks for visiting! The next stop in the Simon Says Stamp Valentine’s Day Blog Hop is the amazing Stephanie Klauck . If while hopping, you encounter a broken link, you can go back to the beginning for links to everyone who is participating in the hop.

Have a wonderful day! Hugs and smiles


Welcome to the Whimsy Stamps December 2012 rubber stamp and die release!

Today, Whimsy Stamps is releasing 20 fantastic new Rubber Stamps & Stamp Sets, 5 wonderful new Whimsy Shapeology Dies, a fabulous new Shape EZ by TLC template and 2 beautiful Whimsy Designer Paper 6×6 packs. These new goodies are available to buy right now from the Whimsy Stamps store along with all your Whimsy favourites.

We are also welcoming two new DT members to the Whimsy family today! We hope you will join us in giving a warm Whimsy welcome to Melissa Andrew and Janette Garcia. We are very excited that these extremely talented gals have joined us here at Whimsy as members of our magazine staff! Welcome Melissa and Janette!

From today until 23 December, the Whimsy DT and Special Guests will be showcasing these new products with a daily mini blog hop. Each mini blog hop has a new release prize hidden somewhere along the way and you have 24hrs to enter each prize draw by leaving a comment on every blog listed for that day.

At the end of release week (Monday 24 December) a ‘Release Round-Up’ will be posted on the Whimsy blog with a complete list of winners from the daily mini blog hops.


For my card today I used an image from the darling new Playful Kittens stamp set. Again this card works wonderful for the current Simon Says Stamp challenge. Some of my favorites on this card include Washi Tape, Patterned paper, Wee images, Rhinestones and Copic Markers.

The image was stamped with Tuxedo Black Memento Ink on a 3 1/4″ x 5″ piece of Neenah Solar White cardstock. The bottom corner were rounded and the image was colored with Copic Markers (Kitten: C00, N0, N1, N2, R000, R20     Scarf: Y11, Y13, Y15, Y17, YR09, R24, R29, R39      Ground: YG01, YG03, YG17    Butterfly: YG01, BG10, BG11, BG13).

Two 3 1/4″ wide strips of Echo Park So Happy Together paper were sanded and adhered to the top of the image layer. The edges were stitched and two pieces of Washi Tape were adhered to the left hand side of the patterned paper strips. A green button was tied on with silver cord.

A sentiment from the Playful Kittens set was stamped on a scrap piece of paper. It was cut into banner shape and adhered under the paper strips. Stardust Glitter was added over the butterfly wings and rhinestones above the button and to the right hand side of the card.

To be entered into today’s mini blog hop prize draw, be sure to leave a comment on ALL of the DT posts listed below by 12.00pm EST tomorrow:

If you would like to join us as our Guest Designer for our February 2013 release please go to our Guest Designer Contest page to read all about how to enter. Entries close at 12.00pm (EST) on Monday 24 December 2012.

For a full reveal of this month’s fabulous release, please visit the Whimsy blogThanks so much for stopping by. Have a wonderful day!

Hugs and smiles

Today Whimsy Stamps is combining forces with One Crazy Stamper to bring you a Crazy Whimsical blog hop filled with lots of inspiration and some PRIZES!!

Whimsy Stamps is a family owned rubber stamp company located in the United States. We carry a large variety of exclusive rubber and digital stamps, custom rubber and digital designs, our Shapeology metal crafting dies, and many different crafting embellishments. We have new releases each month for both rubber stamps and dies as well as new digital images. Hop by the shop and see what’s new!

One Crazy Stamper is a fantastic Canadian crafting store with an online site as well as a brick and mortar store located in Bolton, Ontario! One Crazy Stamper has the latest products you are looking for! Be sure to check out the One Crazy Stamper shop as well as the OCS blog for your daily inspiration.

Please join our hop featuring projects from the Whimsy and One Crazy Stamper Design Teams. Be sure to hop around from blog to blog and leave a comment at each stop, because some lucky random commenter are going to win some crafty goodies!!!


Well….when I started stamping, I remembered new images, I remembered what paper to use, but I forgot about the sketch we are using today.  I had most of the card done before I remembered. So my card doesn’t match the sketch 100%, but I think it still kind of works.

I stamped the new Bird Swing image in Tuxedo Black Ink on Neenah Solar White cardstock. It was cut and embossed with the largest Classic Oval Nestabilities die and the Out of the Box technique and colored with Copic Markers (Birds: N0, N1, N2, N3, Y21, Y23   Swing: E31, E33, E35, E37, Y21, Y23, Y26   Roses: R43, R46, R59    Leaves: YG61, YG63, YG67   Sky: B0000, B000, B00). The image was first adhered to a piece of gray cardstock, cut and embossed with the largest Scallop Oval Nestabilities die, then on a paper doily.

The edges of a 2 1/2″ x 5 1/4″ piece of Echo Park Yours Truly Patterned Paper were sanded before the strip was adhered to a 4″ x 5 1/4″ piece of the same paper pack. The bottom corners were rounded and the edges were first sanded, then stitched. Organdy Ribbon was tied around the vertical strip before the image was adhered with dimensionals. The layers were adhered to a card base , a 4 1/4″ x 11″ piece of Neenah Solar White cardstock, folded in half.

Two pieces of Yours Truly paper were cut and embossed with a die from the Twisted Metal Accents & Die collection and colored with Copic Markers (YG61, YG63). They were adhered next to the bow (and would have to count for the horizontal strip on the sketch). Parts of a Finesse swirl were adhered slightly under the paper swirls and the ribbon bow was topped with a Rhinestone brad.

A sentiment from the Everyday Circle Sentiments was stamped in London Fog Memento Ink on a piece of Neenah Solar White cardstock, cut and embossed with a Standard Circle die. It was adhered to the lower right of the image layer. A heart was cut out of felt with a Classic Heart Nestabilities die. A Flower was stuck through the left side and the flower end was twisted. The heart was adhered to the upper left of the image. Three Rhinestones on the top right edge finish off the card.

Check out the creations of my fellow blog hop participants:

One Crazy Stamper Blog

Jacilynn

Debbie Eastman

Michelle

Alberto Gava

Sue

Heidy Blom

Joni

Simonne Clay

Madge

Iris Wiechmann

Sharon

me

Lisa

Tammy Louise Cunliffe

Lora

Thanks so much for stopping by! Have a wonderful day!
Hugs and smiles

I thought it would be nice to have a video for the Acetate Box Tutorial. It’s a great project to dress up Valentine’s treats.

The finished box measures 2″ wide, 2″ deep and 3 1/2″ wide. Because it’s so little, there isn’t much room to decorate. The patterned paper strip are from  Echo Park Little Girl Patterned Paper. One edge was cut with the Stampin’ Up! Scallloped Edge Punch.

A tiny tag was cut with MFT’s Notched Tag die out of Neenah Solar White cardstock. Two small hearts were cut with dies from the same stamp set/die combo out of Little Girl paper as well as red cardstock. The hearts were adhered to the tag and a sentiment was stamped on it with Tuxedo Black Memento ink. Silver curling ribbon was tied into a double bow and adhered on top of the tag.

Here is a video for the visual learner:
[youtube]https://www.youtube.com/watch?v=HCfWNFyfkRU[/youtube]

Thanks so much for stopping by! Have a wonderful day.
Hugs and smiles

Remember this box from last week?

I wrote a tutorial for Splitcoast for that box and it came out today. Check here for step by step instructions on how the box was created.

Here is a video for the visual learner:

[youtube]https://www.youtube.com/watch?v=ShIz7gS_-jk[/youtube]

Thanks so much for stopping by! Have a wonderful day
Hugs and smiles

Today’s challenge hostess is Cindy Haffner. She challenged us to create a Center Step card. I haven’t made one of those in a while. I wanted mine to match the heart box I created last week, so I started with a card base out of  Neenah Classic White cardstock. Each portion of the card was stitched with a 3/8″ smaller piece of  Melissa Frances 5th Avenue Patterned paper.

I cut and embossed a piece of 5th Avenue paper with the second largest of Classic Heart Nestabilities dies. The paper was sanded and stitched to piece of white cardstock, cut and embossed with the second largest of the Classic Scalloped Heart die. The big flower image from Sweet Nature was stamped in Tuxedo Black Memento Ink on  Neenah Solar White cardstock, colored with Copic Markers (YG41, YG45, R81, R83, R85), cut out and adhered on top of the heart layers.

White Organdy ribbon was tied around the middle section of the card and the heart layers were adhered over it with dimensionals.  White Crochet Lace was adhered on the top of the bottom score line.

The banner from the new “From the Heart” set was stamped in Tuxedo Black Ink on Solar White cardstock. A sentiment from the same set was stamped in the center of the banner. The banner was cut out and colored (E40, E41) and adhered under the flower images. Parts of a Finesse Rhinestone Swirl were added to each of the side layers. Rhinestones from the 72 Count Rhinestone pack on the top left of the main panel and under the sentiment finish off the card.

Check out my fellow Timeless Tuesday Challenge Members for more inspiration:

Cindy Haffner
Heather Jensen
Maki Jones
Mona Pendleton
Silke Ledlow
Tammy Hershberger
and
January Guest Designer Cheryl Lea

Check back with the Flourishes Designer tomorrow for more sneak peeks of this set. Thanks so much for stopping by! Have a wonderful day!
Hugs and smiles

Hello and welcome to Day 1 of our January Rubber Die Release Showcase!

On Wednesday (18 January) Whimsy Stamps released this month’s rubber designs and new shapeology dies. From then until 25 January the Whimsy Stamps DT and Special Guests are showcasing these fabulous new stamps and dies with a daily mini blog hop.

Each mini blog hop has a new release prize hidden somewhere along the way and you have 24hrs to enter each prize draw.

To be entered into today’s mini blog hop prize draw, be sure to leave a comment on ALL of the DT’s posts listed below by 12.00PM EST tomorrow. All winners will be announced on the Whimsy Inspirations blog after 12.00PM EST on 25 January.

For my sample I chose to use the darling Wee Bunny first. The image was stamped in Tuxedo Black Memento Ink on Neenah Solar White cardstock, cut and embossed with a Standard Circle Nestabilities die and colored with Copic Markers (Bunny: E31, E41, E42, E43, E44, E47, R20, R21   Tie: B000, B21, B23, C0, C3   Leaves: YG21, YG23, YG17   Rose: R20, R21, R22, R24, YR31, W2   Ground: YG11 YG13, YG17, E30, E31, E33, W3, W5   Background: B0000, B000, B00). The image was layered to a piece of Solar White cardstock cut and embossed with the largest  Tear Drop Circle die and half a paper doily was adhered to the lower half.

Two pieces of October Afternoon Thrift Shop Paper to create a 4 3/4″ x 5 1/4″ layer. The corners were rounded and the edges were stitched. A hole was punched to the lower right of the image layers and White Organdy ribbon was threaded through.  A 4″ square of the same paper pack was taped over the stitched layers.

The image was adhered to the patterned paper square with dimensionals and the ribbon was tied around the main layers. Everything was adhered to the card base a 5″ x 11″ piece of cardstock, folded in half. A sentiment from the new Whimsy set called Thank You Tabs was stamped in Jet Black Archival ink. The solid part of the sentiment was cut out and adhered to the lower right of the card base and a layered flower was added above.  Stardust Stickles was applied over the flower as well as the flower in the image. Parts of a Finesse Pearl Swirl and addition to more pearls finish off the card.

To take a peek at today’s fabulous new release creations, please click on the links below…

Alberto Gava

Ann Vento

Deb Routledge

Debbie Eastman

Dena Concienne

Erin Bailey

Remember that the entire new release is available to buy right now from the Whimsy Stamps store along with all your Whimsy favourites.

Thanks for stopping by and don’t forget to check the Whimsy Inspirations blog tomorrow for more new release creations!
Have a great day!
Hugs and smiles

Today’s Whiff of Joy Challenge is “Love is in the Air. I hadn’t used my “Nora blowing Kisses” image yet and thought it would be perfect for this challenge. The image was stamped in Tuxedo Black Memento Ink on  a 4″ square of Neenah Solar White cardstock. The image was colored with Copic Markers (Skin: E000, E00, E01, E11, BV00    Hair: Y23, Y26, E35, E97    shoes/dress: Booo, B12, B14, B16   hearts/socks: YR07, R08, R27, R39   Ground: W4, W5, W7  background: W00, W0, W1). Stardust Stickles was added over the hearts.

The edges of the image square were distressed and Picket Fence Crackle Paint was added to the edges.  Once it was dry the edges were  sponged with Pumice Stone Distress ink and a border was stitched around the edges. The image was adhered to  a piece of Kraft cardstock, cut and embossed with the largest of the  Beaded Square Nestabilities dies.

A 2″ x 4 3/4″ piece of October Afternoon Farmhouse paper was stitched to a 4 3/4″ square of the same paper pack. A hole was punched to the lower right corner of the image layers and White Organdy ribbon was threaded through it. The image layer was adhered to the paper with dimensionals and the ribbon was tied into a bow.

The layers were adhered to the card base a 5″ x 11″ piece of Solar White cardstock folded in half. The bottom edge of the card base was cut and embossed with Classic Scallop Edgeabilities dies. A sentiment from the General Sayings sentiment set was stamped on a strip of Solar White cardstock. The edges of the strip were punched with a square punch, the strip was shaped into a banner and adhered under the ribbon bow. Rhinestones on the sentiment panel and the upper right hand corner of the image  and parts of a Finesse Rhinestone Swirl finish off the card.

Thank you so much for stopping by! I hope you have time to participate in the challenge.  Have a wonderful day!
Hugs and smiles


Today’s challenge hostess is Heather. Her challenge is to create something other then a card. I thought about it for a while and decided to try to create a heart shaped box. Since it was going to be a Valentine project, I thought Melissa Frances 5th Avenue Patterned paper.

I started by cutting two thin coasters with the largest  Classic Scalloped Heart die. I cut Neenah Classic White cardstock with the same die and one piece of Melissa Frances paper with the largest  Classic Heart Nestabilities The paper was sanded and stitched to one of the scalloped cardstock heart. The layers were adhered to one of the coaster hearts.

One of the sentiments from the new Heartlines stamp set was stamped in London Fog Memento Ink on a piece of Solar White cardstock that had been cut and embossed with a Fancy Tag 3 die. The heart row from the same set was stamped underneath and Baby Pink Rhinestones were adhered in between each heart. Three Zva Creative Flowers were covered with Stardust Stickles were added  to the upper left side of the sentiment panel. The sentiment was adhered to the lower right of the heart with dimensionals and parts of a Finesse Rhinestone Swirl were added to the upper left and right side of the tag.

Two 1 3/4″  wide strips of the Melissa Frances paper were adhered together. A 3/8″ line was scored on the long side of the strip and it was cut in about 5/8″ increments up to the score line. A smaller heart was cut out of a coaster and adhered to the bigger scalloped heart coaster, that had been covered with white cardstock. The paper strip was adhered around the smaller heart to form the walls for the box.  White Crochet Lace was adhered around the top of the strip.

I cut another heart the same size as the one that helped create the walls out of a coaster as well as out of more paper. The paper piece was sanded and adhered to the coaster heart. Two pieces of Crochet Lace were adhered to the bottom of the box top and the smaller heart was adhered over the lace ends. The other ends were adhered to the outside of the box so that the lid would stay on.

Check out my fellow Timeless Tuesday Challenge Members for more inspiration:

Cindy Haffner
Heather Jensen
Maki Jones
Mona Pendleton
Silke Ledlow
Tammy Hershberger
and
January Guest Designer Cheryl Lea

Check back with the Flourishes Designer tomorrow for more sneak peeks of this set. Thanks so much for stopping by! Have a wonderful day!
Hugs and smiles

This morning I checked the Tiddly Inks Challenge blog and I saw that they had a blog hop going on that everyone can join. I was looking for something to stamp and was itching to ink up the new Wryn – Grow A Little Love image.  I printed out the image on Neenah Classic White cardstock, cut and embossed with the largest Label 18 Nestabilities die and colored it with  Copic Markers ( Skin: E000, E00, E01, BV00   Hair: Y26, E35, E37, E47   Dress: Y11, Y13, Y15, Y18, Y38   Shirt: YG21, YG23, YG17   Stockings: C0, C1, C3    Pot: BG000, BG01, BG02, C3    Hair: YR07, R08, R39   Background: R0000, R000, R00, R01   Ground: W3, W5, W7, W9). I added dots to the dress with Copic Marker 0 and added Stardust Stickles over the dots.


A 4″ wide strip of white cardstock was cut with a Lacey Eyelet Border dies and adhered under a 3″ x 4″ piece of Echo Parks Summer Days. The strips were stitched to a 4″ x 5 1/4″ piece of paper from the same paper pack. Yellow Striped May Arts Ribbon was tied around the horizontal paper strip, a paper doily was adhered to the upper right corner and the image was adhered to the layers with dimensionals.

Parts of a Finesse Rhinestone Swirl were adhered to the upper left and lower right corner of the layers and everything was adhered to the card base, a 4 1/4″ x 11″ piece of Solar White cardstock, folded in half.

A sentiment from Whimsy’s Friendship ticket sentiments was stamped in Tuxedo Black Memento Ink on a piece of white cardstock, cut and embossed with a Classic Heart Nestabilities die. The embossed part was airbrushed  with the Copic markers YR07 and R29 and the sentiment was adhered under the bow.

Thanks so much for stopping by! Have a wonderful day!
Hugs and smiles

© 2012 fresh & fun Suffusion theme by Sayontan Sinha